
Do you want to add a spot for your customers to enter a promo code or coupon code on your online forms?
Giving users a place where they can enter a code to get a discount on your product or services is helpful if you’re using discount codes for yoru online marketing — which can really help boost your sales and traffic.
So in this article, we’ve written a step-by-step guide on how to add a coupon code field to your WordPress forms.
Click Here to Start Making Your Coupon Code Field Now
Why Add a Coupon Code Field to Your Forms?
There are a lot of reasons why you might want to add a place on your payment forms for visitors to enter a discount code. Here are a few:
- Apply discounts to your order forms
- Boost sales using different marketing tactics
- Drop the total price of visitors’ shopping carts
- If you issue refunds or credits using coupon codes
- Reward loyal customers if you give special codes to VIP members
- Perhaps you give discount or coupon codes in a specific email marketing campaign for lead generation (Birthday emails, Black Friday, etc.)
- And more
So now that you know why to add a coupon code field to your WordPress forms, let’s look at how to do it.
How to Add a Coupon Code Field to Your Forms
If you’re ready to to add a promo code or coupon code field to your WordPress forms, just follow these steps.
Step 1: Install the WPForms Plugin
The first thing you’ll need to do is install and activate the WPForms plugin. For detailed instructions, see our step-by-step guide on how to install a WordPress plugin. Among its many powerful features, WPForms works great to add a coupon code field to your forms.
Step 2: Set Up Your Form
Now that your WPForms plugin is installed, the next thing you’ll want to do is set up a payment form. That way, you’ll have a form to add your coupon code field to.
From your WordPress dashboard, head to WPForms » Add New in the left-hand panel to create a new form and name it whatever you’d like in the Form Name field, then select the Billing / Order Form template.
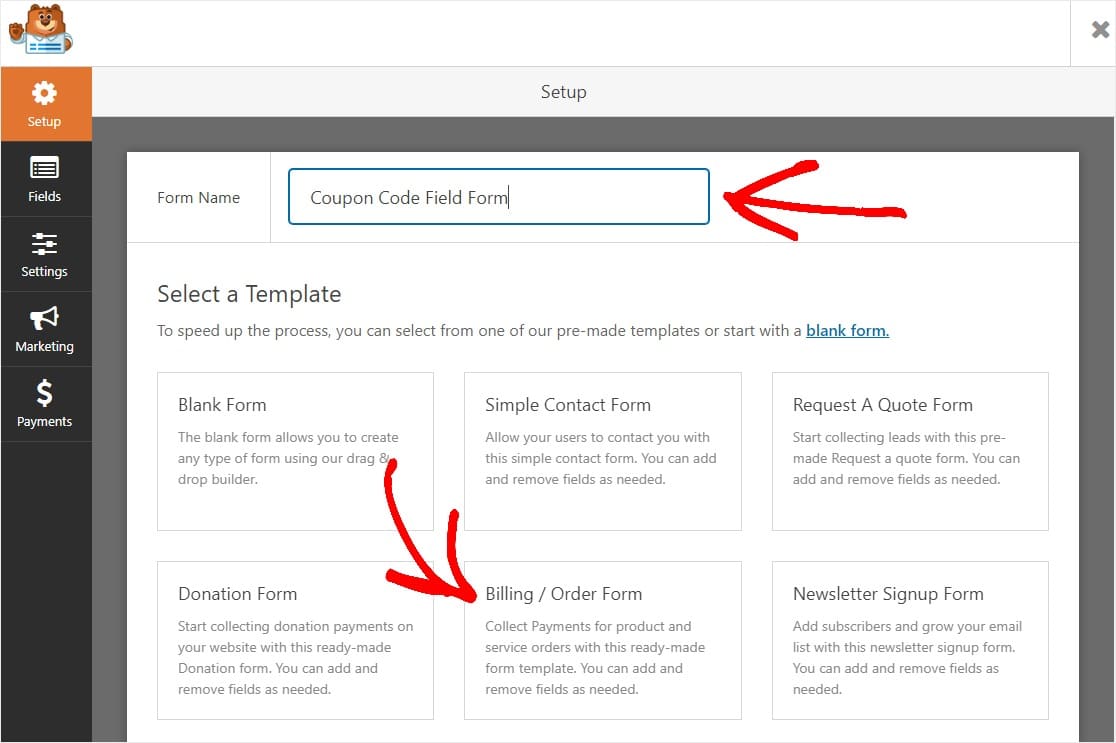
In this tutorial, we set up Stripe as our form of payment, so you’ll see we added a credit card field. For a more in-depth walk-through on setting up your order form, including notifications and configuring your payments provider (like Stripe or Paypal), we’ve created a post on building your online order form with payments.
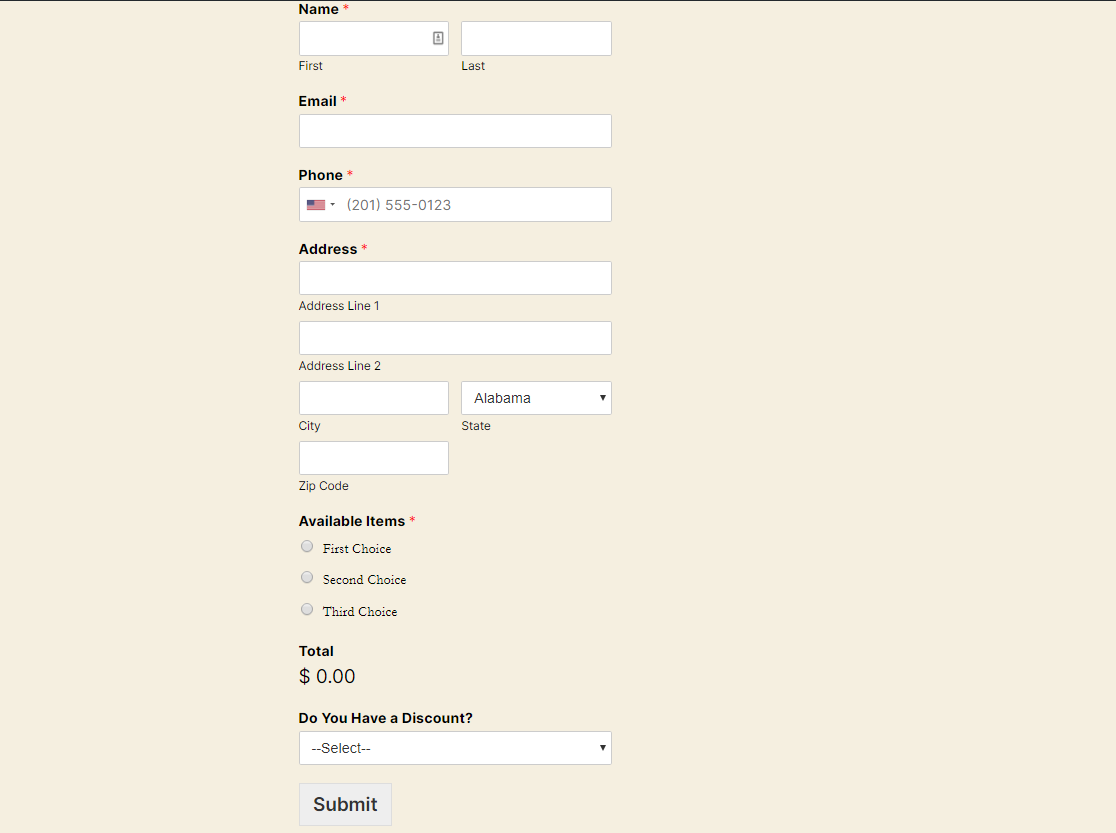
So, your order form will populate with nearly all the fields you need to take payments including:
- Name (First and Last)
- Phone
- Address
- Multiple Choice (Available Items)
- Total
- Comment or Message
You can drag fields up and down to rearrange their order, and delete things if you feel you don’t need them. Feel free to drag fields from the left-hand panel onto your form if you’d like to add something. In fact, this is how we’ll add a coupon code field.
For the sake of keeping things simple in this tutorial, we removed the Comment or Message box.
Now that you’ve created your form, let’s get ready to add that coupon code field.
Step 3: Add a Yes/No Question
Next up, we’re going to add a dropdown box. This box will ask a user if they have a discount or not.
We want to do this because it’s best practice not to show your discount field unless you know someone has a code. We’ll do this with Smart Conditional Logic.
To do this, simply drag the Dropdown Box field from the left-hand panel to your form underneath the Total box, or wherever you’d like to place it on your form.
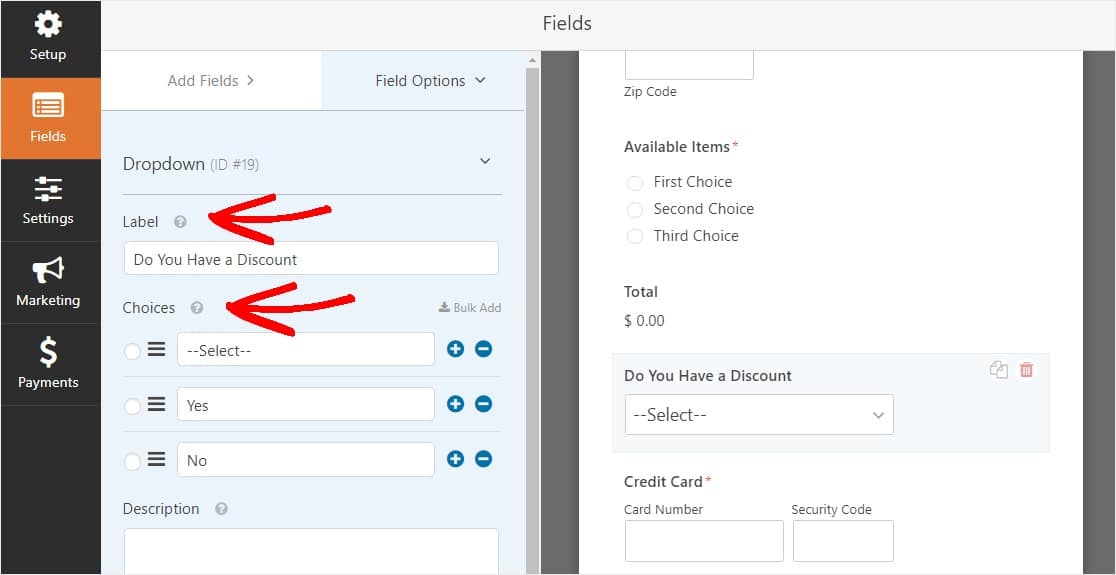
Next, you’ll want to customize your Dropdown box. Change the Label to “Do You Have a Discount?” and change the Choices to:
- –Select–
- Yes
- No
Feel free to have fun with the text in these spots, it’s your website. Try to keep it clear that the options are ‘Yes’ or ‘No’, but if it matches your brand, you can edit these to something more fun like ‘Sure!’ and ‘Nope!’. That’s totally up to you.
Step 4: Create Conditional Logic
Now that your Dropdown Box is created, the next step is to add a spot for someone to enter their discount code if they select ‘Yes’ in the Dropdown Box.
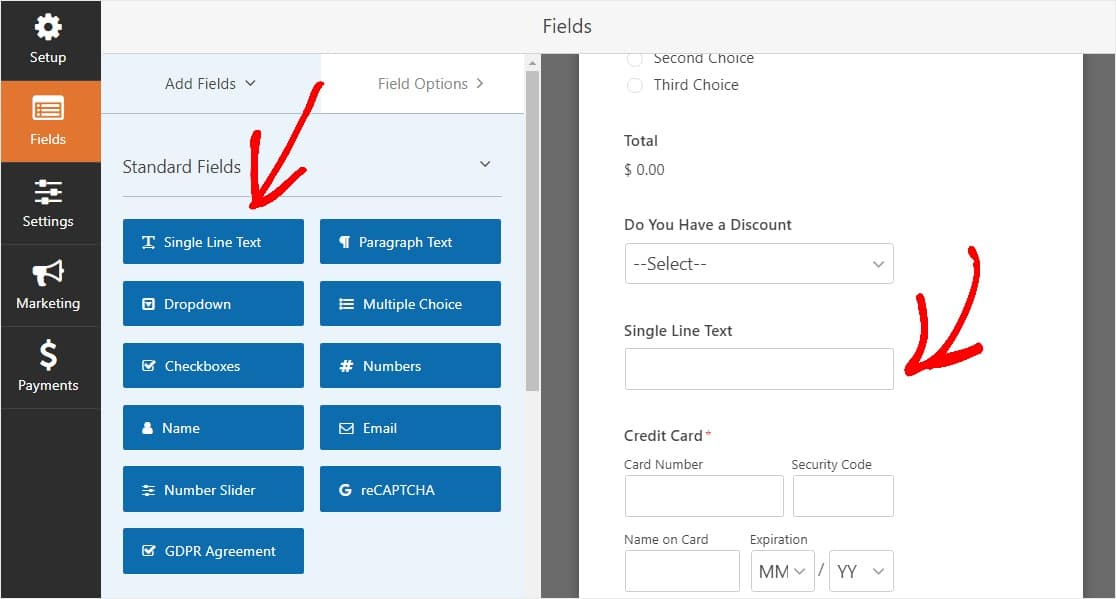
To do this, drag the Single Line Text field from the left-hand panel onto your form, right below the Do You Have a Discount field.
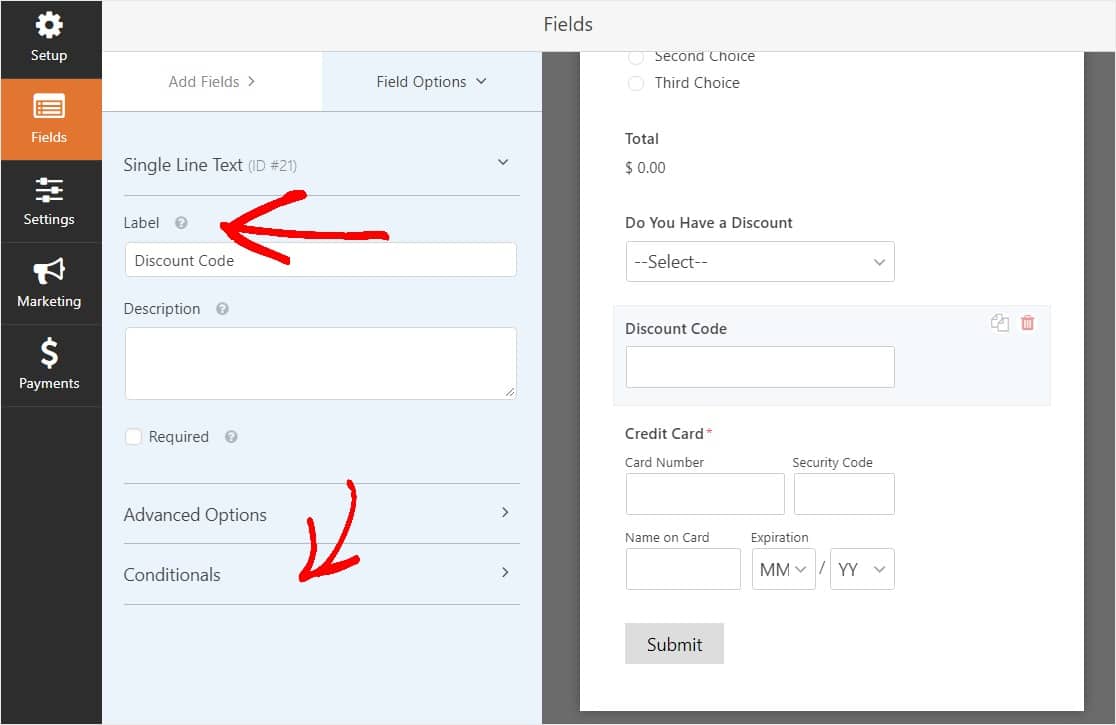
Now, rename the Single Line Text field’s label to “Discount Code” and then scroll down and click on Conditionals.
Next, click on the checkbox next to Enable conditional logic and in the area that expands, enter the following:
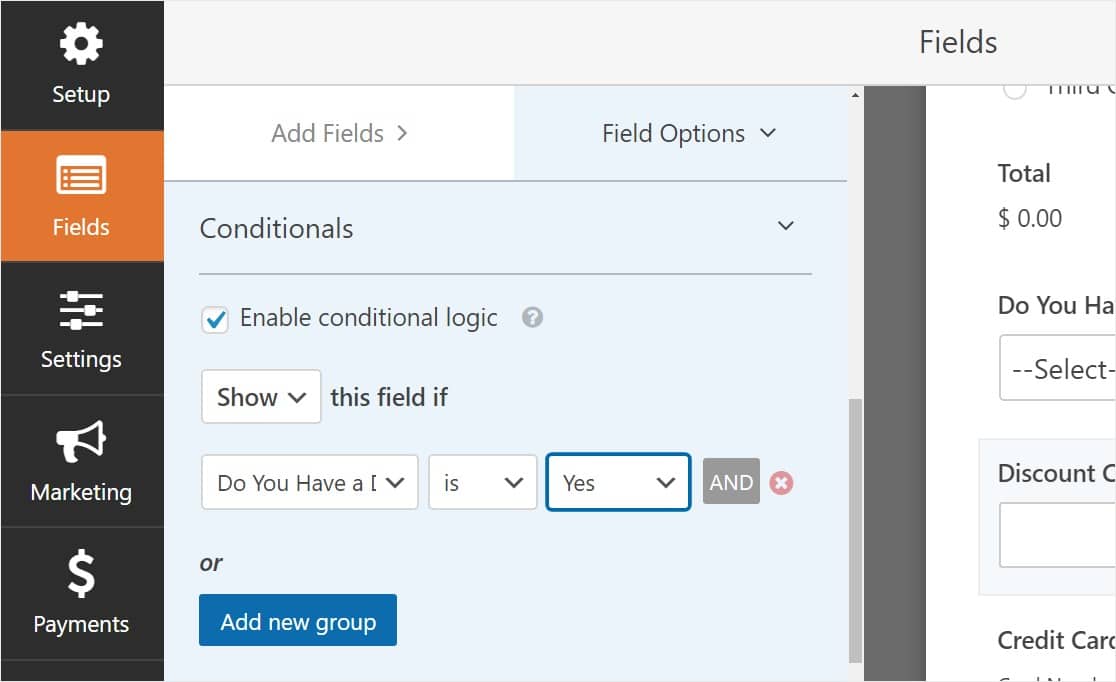
Your conditional logic should state Show this field if Do You Have a Discount Code is Yes.
Now, only people who select ‘Yes’ will see the discount code field. Keeping your form less cluttered and super organized.

You’re doing great so far, let’s move on to the next step.
Step 5: Create Your 1st Validation
The next thing you’ll do to create a coupon code field in your WordPress form is to add 2 validation responses. Simply put, we’ll create a response to show people if the discount code is valid, and another one to show if it isn’t.
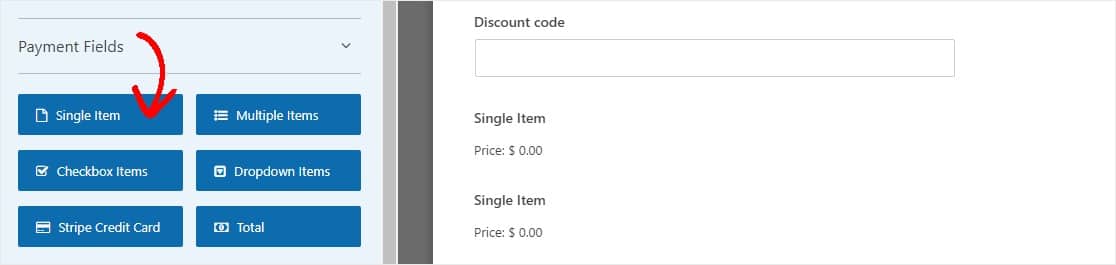
To start, drag 2 Single Item fields from the left-hand panel under Payment Fields onto your form below the discount code field.
Now, click on each of the Single Item fields on your form to display the settings so you can adjust them.
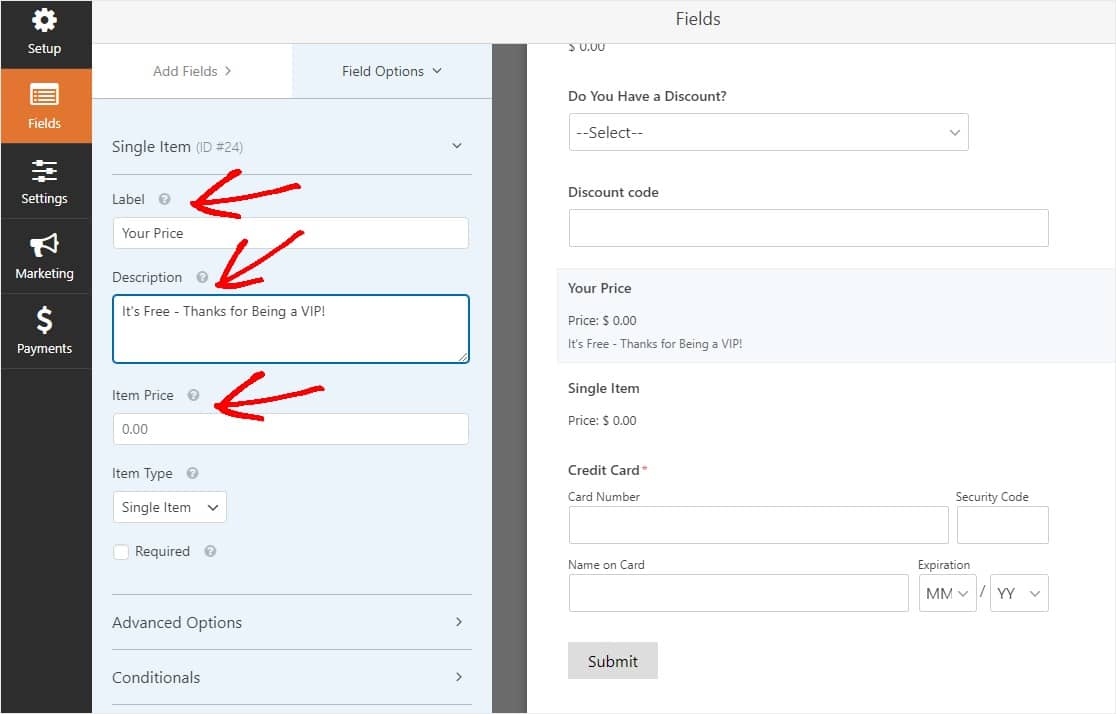
First, you’ll want to make some changes to the first Single Item field:
- Update the label to ‘Your Price’
- Write a description explaining the discount given
- Enter to total Item Price after the discount
Next, scroll down to the Conditionals tab and click on it so you can set up when people will see this particular Single Item field. Click the checkbox next to Enable conditional logic and decide what you want your discount code to be. For this example, we’ll use FREEVIP.
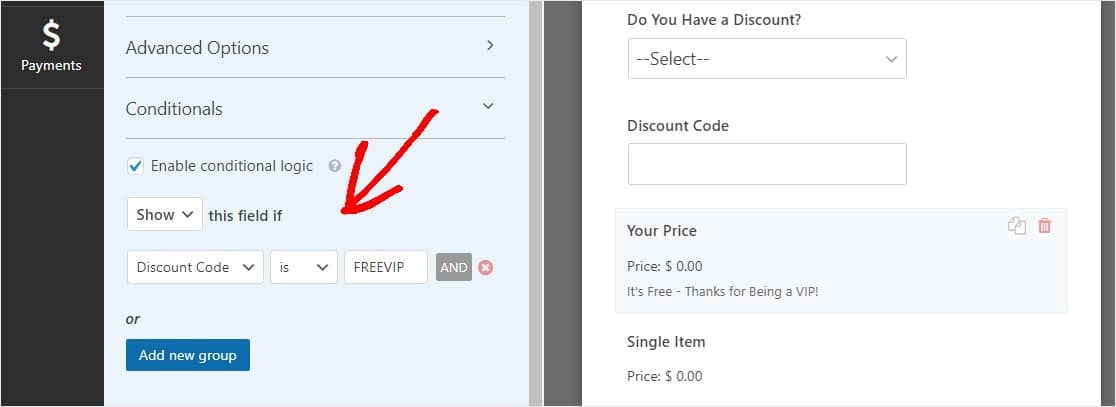
Your conditional logic should state Show this field if Discount Code is FREEVIP (or whatever your discount code is). Have more than one discount code you’d like to use? Simply click the And New Group button to repeat this process.
Step 6: Create Your 2nd Validation
Next, we’ll do the same thing but for the 2nd Single Item field. We’ll want this field to display if the discount code doesn’t match FREEVIP.
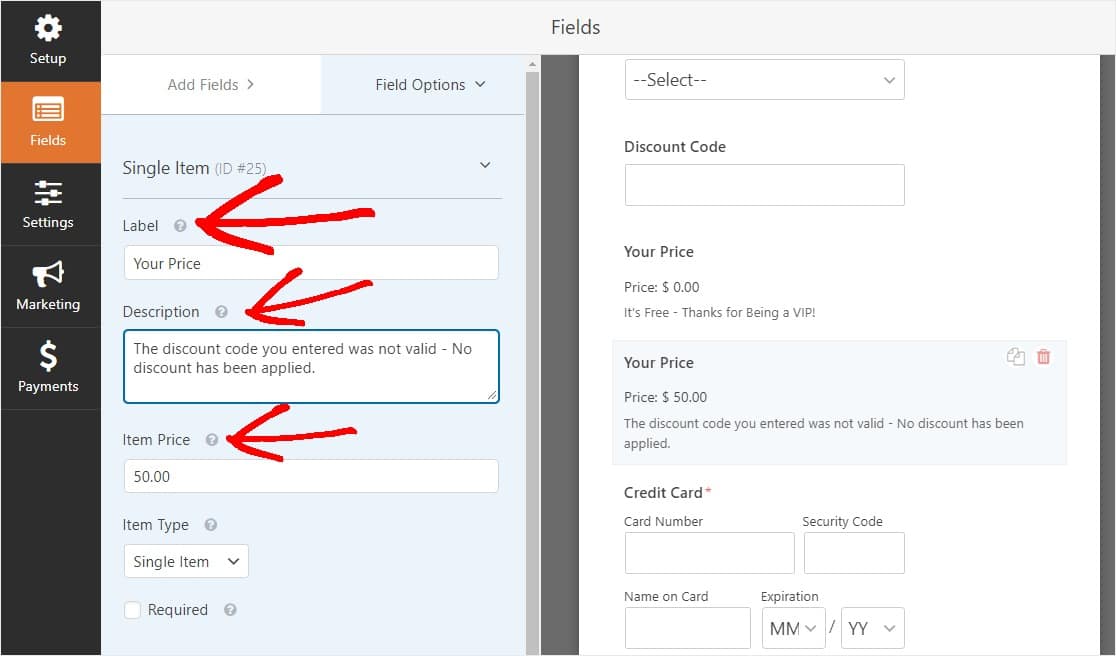
Click on the Single Item field to bring up its settings in the left-hand panel, and then:
- Update the label to ‘Your Price’
- Write a description explaining the discount code didn’t work
- Enter the total Item Price, which shouldn’t change from the original price
Next, scroll down to the Conditionals tab and click on it so you can set up when people will see this particular Single Item field. Click the checkbox next to Enable conditional logic and enter the following:
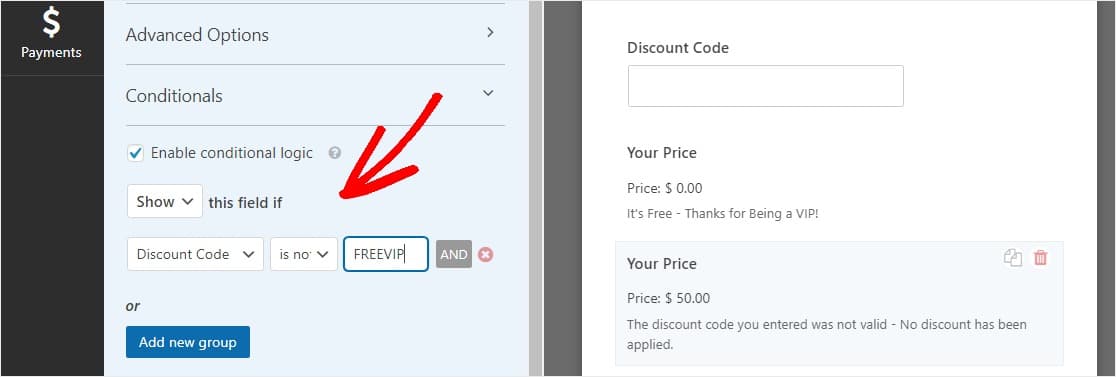
Your conditional logic should say Show this field if Discount Code is not FREEVIP (or whatever your coupon code is).
Finally, don’t forget to hit Save in the top right corner of the page.

Congrats! Now, your coupon code field form is almost ready. However, you’ll need to place it on a page for others to use now.
Step 7: Add Coupon Code Form to Your Website
In order for people to use your coupon code field, you’ll need it to be displayed on one of your web pages like your checkout pages.
And it’s super easy to do with WPForms. WPForms allows you to add your forms to many locations on your website, including your blog posts, pages, and even sidebar widgets.
Let’s take a look at the most common placement option: page/post embedding.
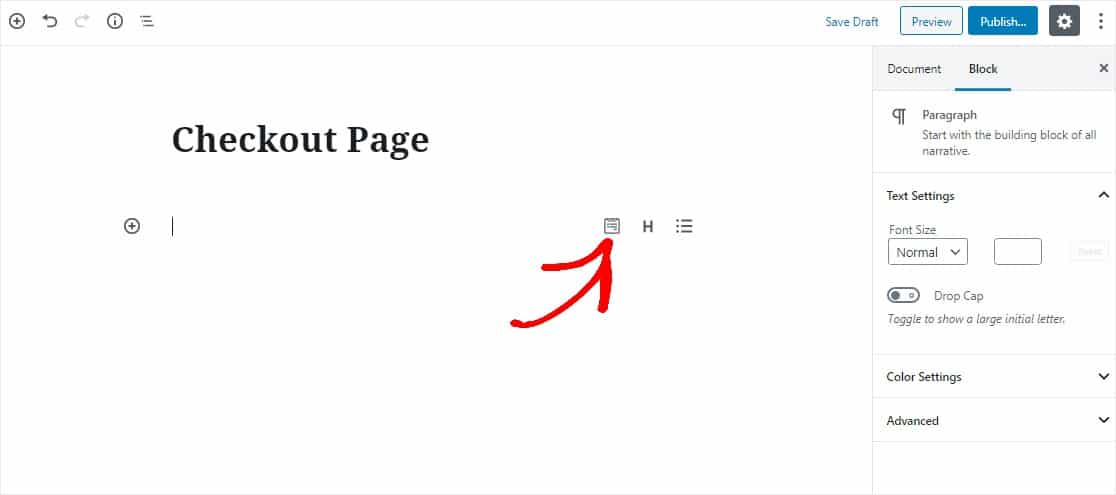
To begin, create a new page or post in WordPress, or go to the update settings on an existing one.
After that, click inside the first block (the blank area below your page title) and click on the Add WPForms icon.
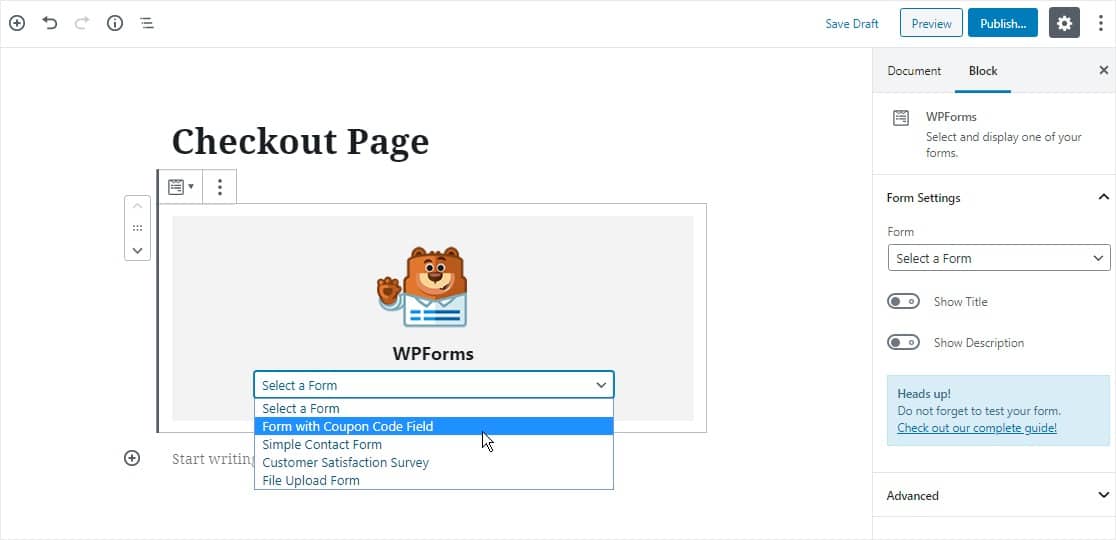
The handy WPForms widget will appear inside of your block. Click on the WPForms dropdown and pick which one of the forms you’ve already created that you want to insert into your page. Select the form you created that has the coupon code field.
Now, publish or update your post or page so your form will appear on your website.
To view form entries after they’ve been submitted, check out this complete guide to form entries. For example, you can view, search for, filter, print, and delete any form entries, making the work order process that much easier.
Click Here to Start Making Your Coupon Code Field Now
Final Thoughts
And there you have it! You now know exactly how to add a coupon code field to your WordPress payment forms.
Don’t forget to check out our article on how to create a WordPress lightbox popup, a great place to insert a discount code on your site!
So what are you waiting for? Get started with the most powerful WordPress forms plugin today. WPForms Pro includes a free online payment form template and offers a 14-day money-back guarantee.
And if you enjoyed this guide, make sure to follow us on Facebook and Twitter for more free WordPress tutorials.
The post How to Add a Coupon Code Field to Your WordPress Forms appeared first on WPForms.
source https://wpforms.com/coupon-code-field/

