Do you want to easily create a change request form in WordPress? A change request form allows project managers to control the process of change, so it doesn’t create problems in their team’s workflow.
In this tutorial, we’ll show you how to create a change request form in WordPress.
Click Here to Start Creating a Change Request Form Now
Dealing With Change as Part of the Management Process
As a project manager, you understand that change is a reality in your business. It’s impossible to know at the beginning of a project what’s needed to achieve the end goal. So, it’s inevitable you’ll have to deal with unplanned changes along the way.
Although some changes are beneficial, others are unnecessary. The best way to handle any kind of change is to manage it.
Two Categories of Change
When we’re discussing change, we know that they fall into two basic categories: Those that fall within the scope of a project and those considered being outside its scope.
- Inside Scope: Involve small revisions or corrections with minimal impact on the cost or schedule.
- Outside Scope: Requires significant changes that can create a major impact on cost, schedule, and other aspects of the project.
A change request form is a tool that allows project managers to see what changes they’re dealing with, the impact it’ll have on a project, and the demands it places on the project team. It’s then that a manager must decide whether to take action on the request.
Why Use a Change Request Form
So why not use a change request form on your WordPress website? Using a change request form can smooth out your management process and make it a lot easier for many reasons, including:
- Better Communication: Keep the client and your project team informed during the entire change process so you can control the outcome.
- Faster Decisions: Collect information about the change request, how it will affect your project, and whether it is to be done.
- More Organized: Keep change requests and documents in one place to provide records about requested changes.
- Thorough Control Process: Ensures that your standards, methods, quality, and key performance indicators are maintained and that it accurately follows corrective actions.
So now that you know why to create a change order request form on your WordPress site, let’s get into how it’s done.
How to Create a Change Request Form in WordPress
Asking yourself how do I set up a change request form in WordPress? Here’s a step-by-step tutorial that shows you how.
Step 1: Create a Change Request Form
WPForms is the easiest way to create a change request form in WordPress. WPForms Pro has a wide range of ready-made templates for every business, industry, and niche.
To begin, you’ll want to install and activate the WPForms plugin. For more details on how to do this, check out this step-by-step guide on how to install a plugin in WordPress.
Next, you must install and activate the Form Templates Pack addon.
It’s easy, just go to WPForms » Addon and find the one labeled “Form Templates Pack” addon.
Click on Install Addon.
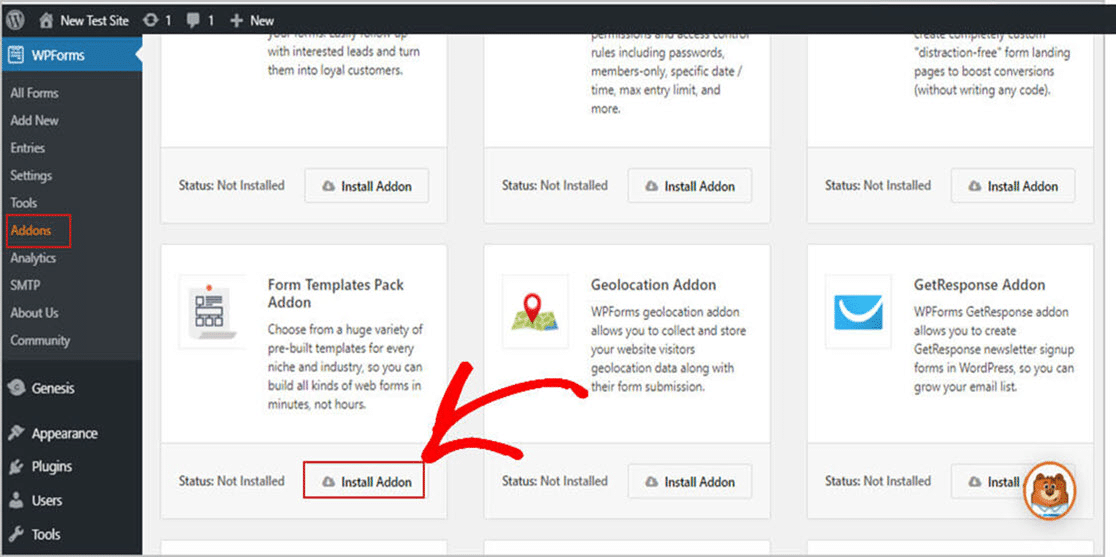
Now that you’ve activated the plugin, you can begin creating a new form.
First, go to WPForms » Add New and create a name for your form. You’ll be able to edit this name, so you can use anything you like. We’ll show you how to change it in a moment.
Next, scroll down to the section labeled Additional Templates and type “Change Request Form” in the search bar. Then, choose the Change Request Form.
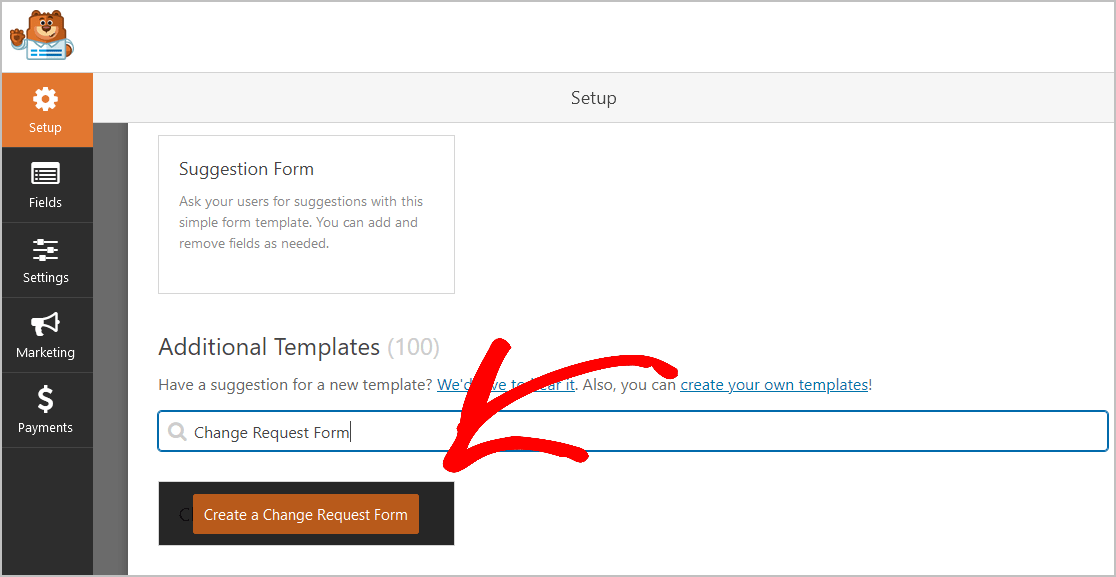
And once the pre-made form template loads, you’ll see that it’s already populated with fields that make creating your request template easy. You’ll find the following fields are already in the form:
- Requester Name
- Phone
- Company Name
- Client ID Number
- Project name
- Type of Change Request
- Reason for change
- Description of change
Your change request form has places for all the information you’ll need. You’ll have everything from the name of the project to the impact it’ll have.
After they submit the change request, as the project manager, you’ll have enough information to share with others in the decision-making process to determine the right action to take, or if no action is to be taken at all.
Also, you can take a look at our change request form demo to get an idea of what your form will look like.
You can customize your form by adding additional fields to by dragging them from the left-hand panel to the right-hand panel.
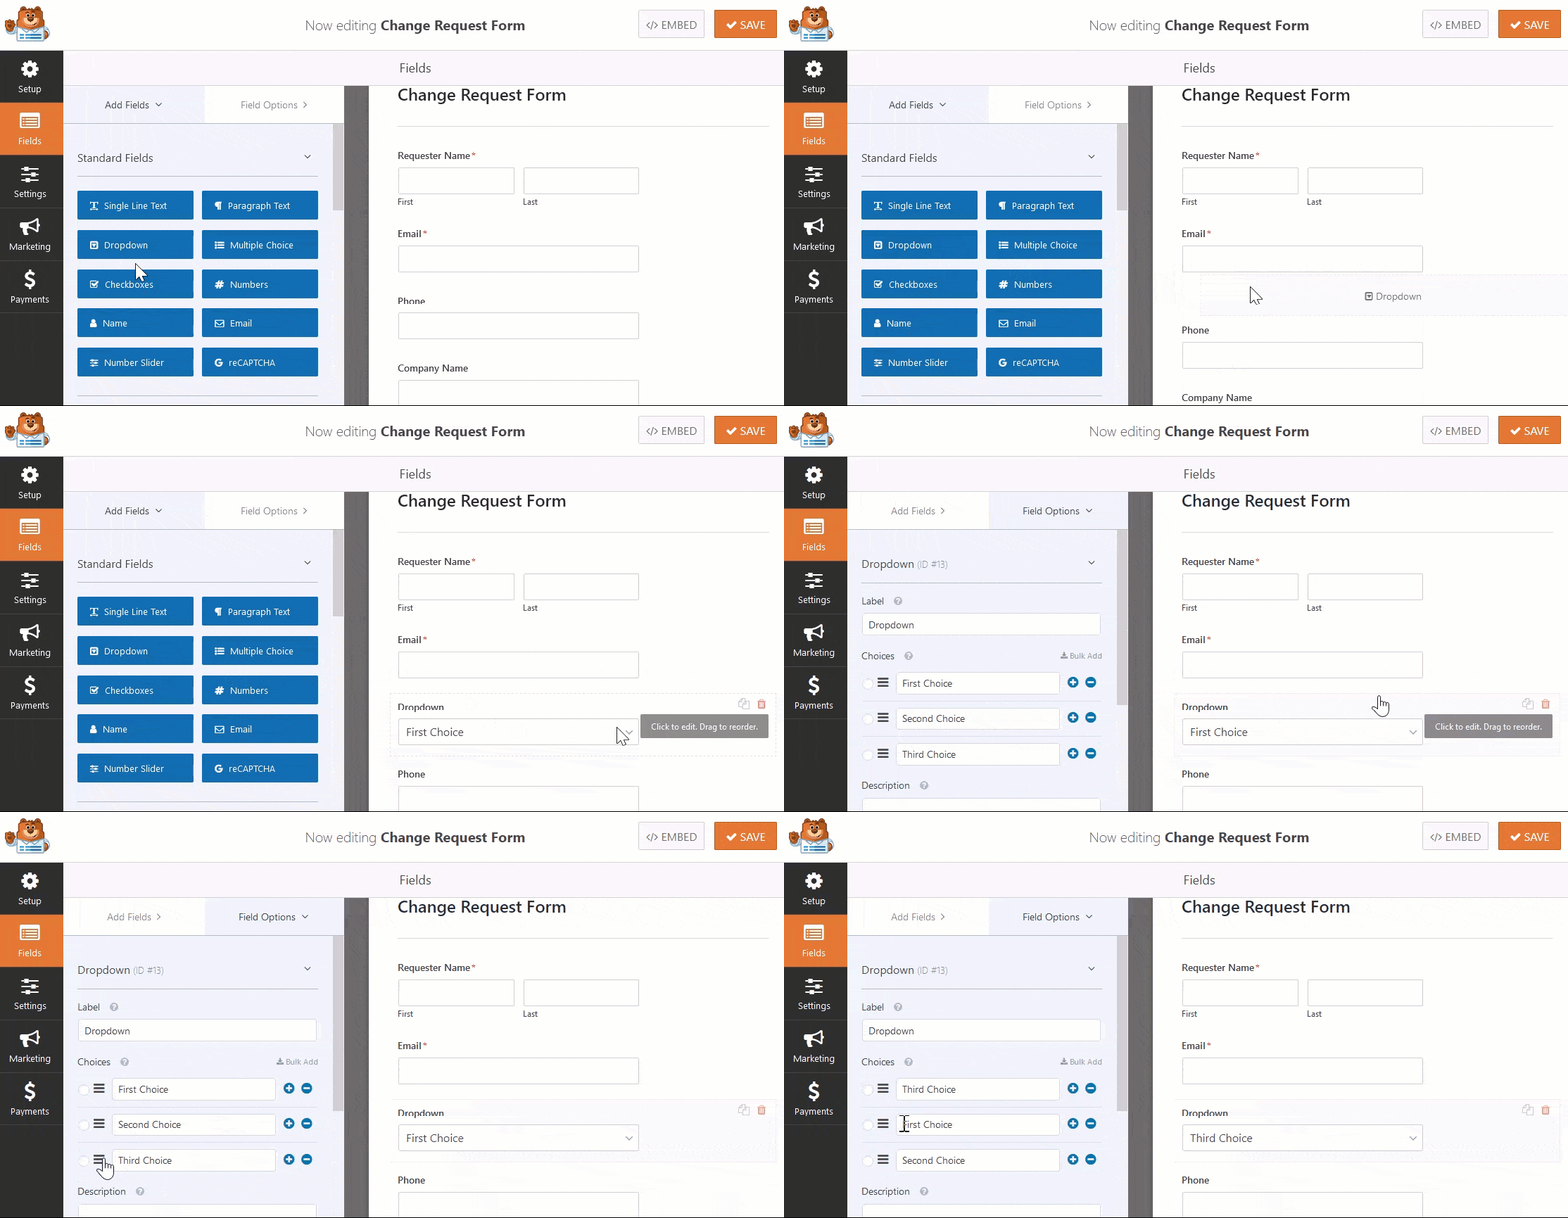
Next, click on the field to make other changes. You can also drag a form field to rearrange the order on your request template form.
For example, you can add a “File Upload” form field to your change request form template. So customers can upload images or documents that will help explain their change requests. You can also add a “Date / Time” form field so clients can decide when they want your team to make the changes.
Adding Additional Fields to Your Change Request Form
If the change requires a fee or a payment to be made, you can easily add a PayPal or Stripe payment gateway to your form so your customers can immediately pay additional charges. This encourages clients to think before making changes to projects you’re actively working on and guarantees you’ll get paid in full before you begin making changes.
Finally, you can add an “Address” field to your change request form template if you’re working on-site for a customer or add a “Website URL” form field if you’re working on a client’s website.
You can also add a “Signature” form field and ask the client to sign-off on changes that may prevent disputes in the future.
And when your request form looks the way you want it to, click Save.
Step 2: Configure Your Form Settings
Now, let’s configure your form settings. To start, go to Settings » General.
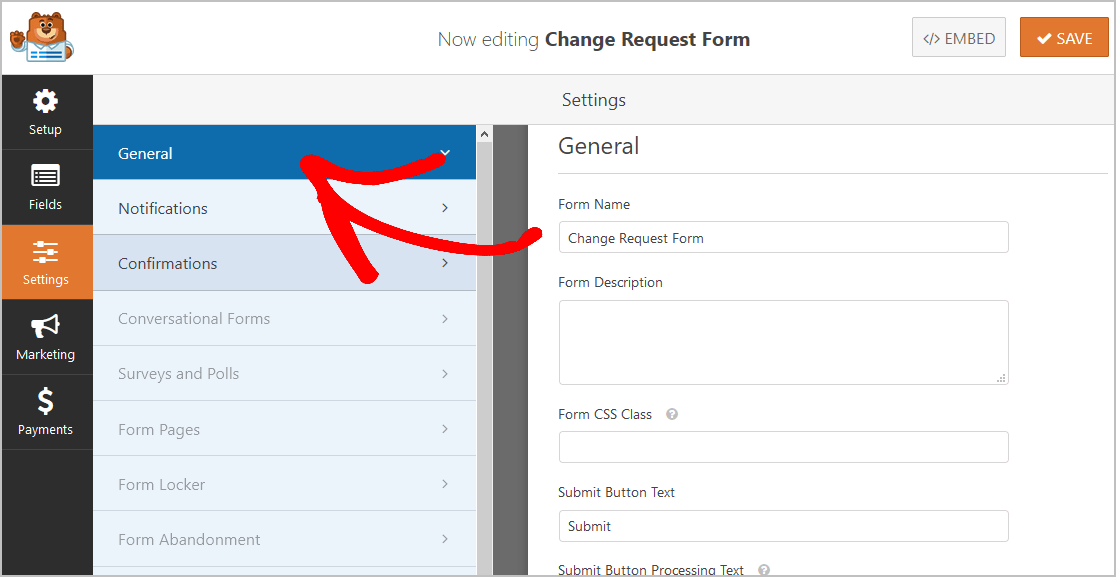
Here you can set your:
- Form Name: This is where you can change the name on your form.
- Form Description: Use this area to add notes describing your form.
- Submit Button Text: This option allows you to customize the text in your submit button. In our example, we’ll change our submit button to say “Submit Request.”
- Spam Prevention — Stop contact form spam with the honeypot feature or Google reCAPTCHA. The honeypot feature is automatically enabled on all WordPress forms so if you decide to use another form of spam prevention, unclick this option.
- AJAX Forms — Enable AJAX settings with no page reload.
- GDPR Enhancements — You can disable the storing of entry information and user details, such as IP addresses and user agents, in an effort to comply with GDPR requirements. In addition, check out our step-by-step instructions on how to add a GDPR agreement field to your simple contact form.
So once you’re done, click Save.
Step 3: Configure Your Form Notifications
Notifications let you receive an email whenever someone has submitted a change request form on your WordPress website.
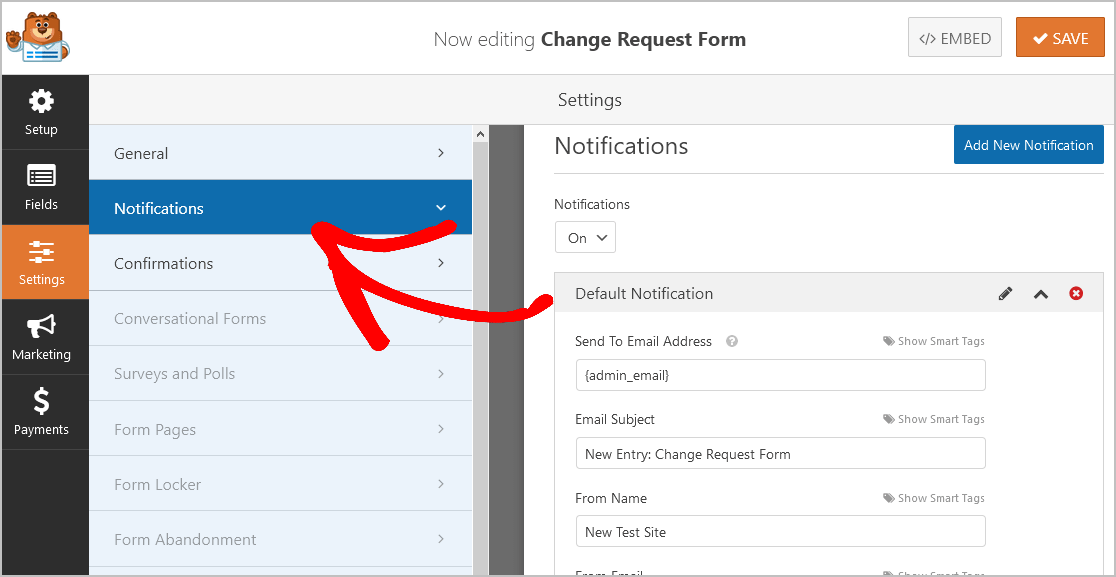
Once a request is submitted on your website, it’s important to notify your team right away.
If you use Smart Tags, you can also send a notification to the user when they fill this out, letting them know you received their entry. Also, a notification assures people their request has gone through.
To help with this step, check out our documentation on how to set up form notifications in WordPress.
WPForms also lets you notify more than one person when a request form is submitted. For instance, you can send notifications to:
- Yourself
- PMO Analyst
- Project Support Officer
- Team leads
- and Others
For help doing this, check out our step by step tutorial on how to send multiple form notifications in WordPress.
And lastly, if you want to keep branding across your emails consistent, you can check out this guide on adding a custom header to your email template.
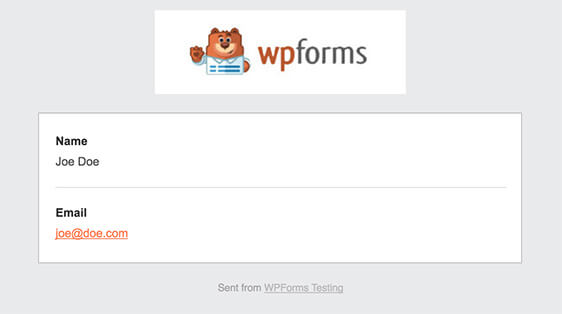
Notifications are a splendid way to quickly contact your team about new submissions so they can jump on things fast!
Step 4: Configure Your Form Confirmations
Form confirmations are messages that display to users once they submit a change form on your site. Confirmations let people know that you’ve processed the form and allows you to instruct them about what they should do next.
WPForms has 3 confirmation types to choose from:
- Message: This is the default confirmation type in WPForms. When someone submits a form, a message will appear letting them know their request is being processed. You can check out some great success messages to get ideas on how to write your own.
- Show Page: This confirmation type will take users to a specific web page on your site where you can give them more information. For help on how to do this, check out our tutorial on redirecting customers to a “Thank You” page. Also, be sure to check out our article on creating effective Thank You pages.
- Go to URL (Redirect): You can use this option when you want to send site visitors to a specific page on a different website.
So let’s take a quick look at how easy it is to set up a simple form confirmation in WPForms.
To start, click on the Confirmations tab in the Form Editor under Settings.
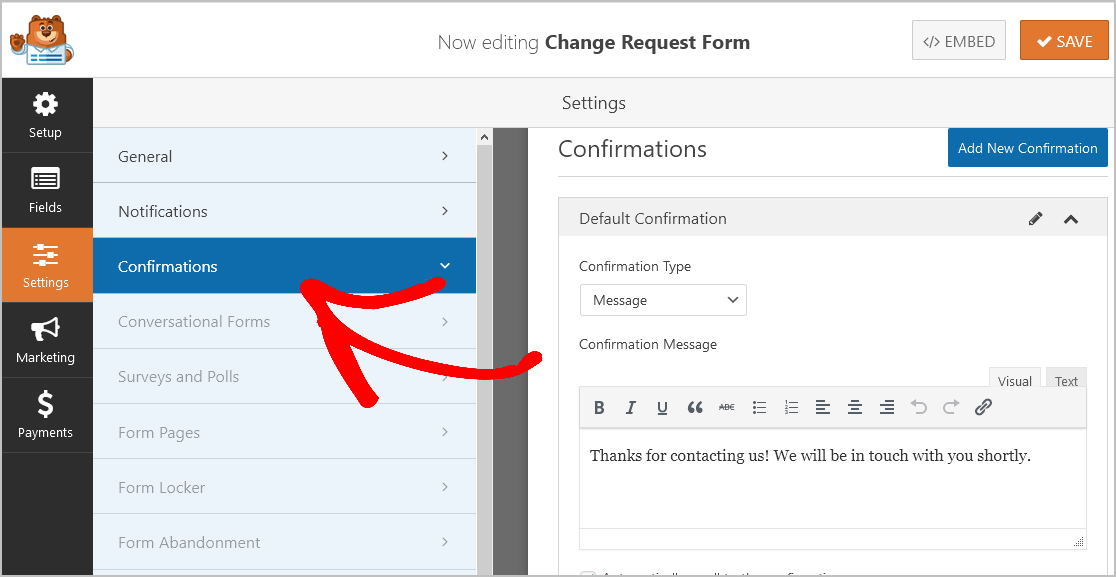
Then, customize the confirmation message to your liking and click Save.
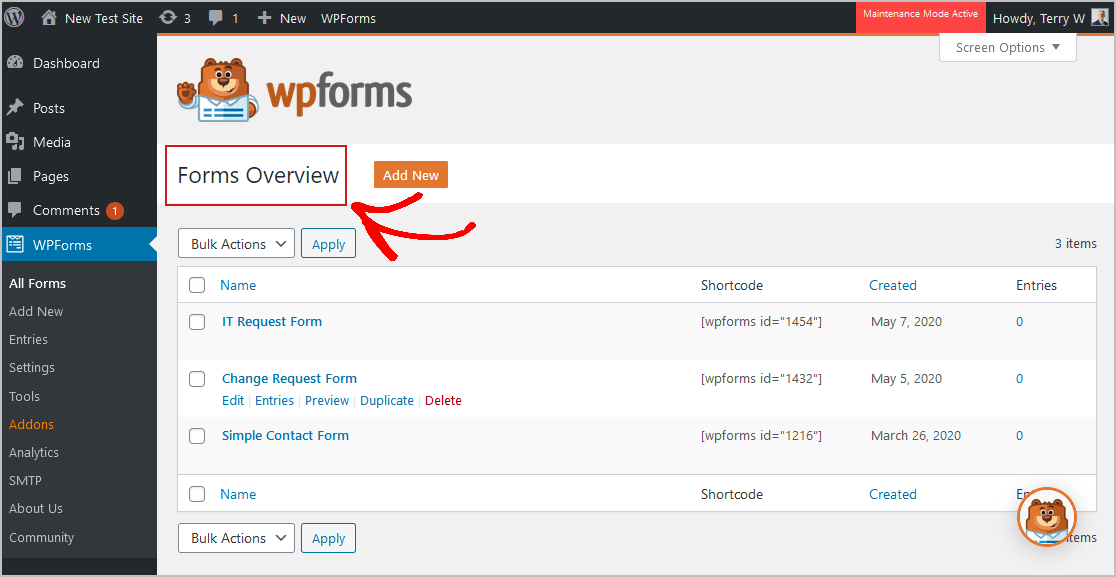
And now, click the X in the upper right corner of the form builder. You’ll be taken back to the Forms Overview page.
And if you need a little help with other confirmation types, see our documentation on setting up form confirmations.
Now, you’re ready to add your change request form to your WordPress website.
Step 5: Add Your Change Request Form to Your Site
So now that you’ve built your change request form, it’s time to add it to your WordPress website. WPForms allows you to add forms in many places on your site, including your blog posts, pages, and even sidebar widgets.
To begin, just create a new page or post in WordPress, or update an existing page if you prefer.
Next, click inside the first block (the blank area below your page title) and begin typing WPForms in the box and click on the Add WPForms icon.
![]()
The WPForms widget will appear inside your block. Now, click on the WPForms drop-down and select the form you’ve just created.
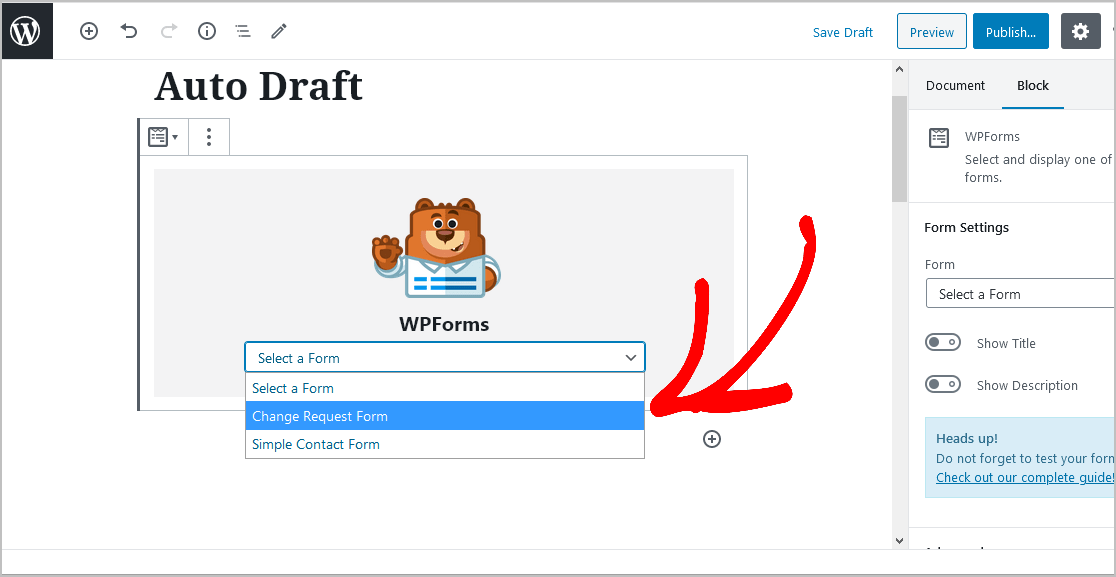
Now, hit the Publish button on your post or page, so your change request form appears on your website.
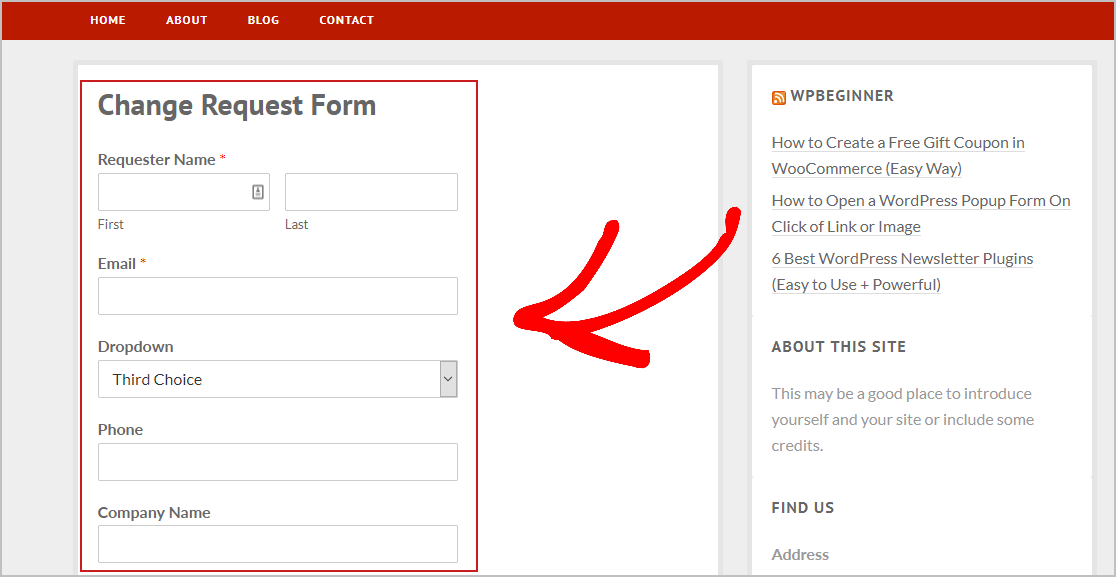
And to view the change request form entries once they’re submitted, you can check out this complete guide to form entries. This feature allows you to view, search for, filter, print, and delete any change request form entries, making the management process that much easier.
Click Here to Start Creating a Change Request Form Now
Final Thoughts
And there it is! You now know precisely how to create a change request form for your WordPress website. Make sure you check out our step-by-step guide on how to create a file upload form in WordPress.
So what are you waiting for? Start using the most powerful WordPress form plugin today. WPForms Pro includes a free change request form and offers a 14-day money-back guarantee.
And if you enjoy this post, follow us on Facebook and Twitter for more free WordPress tutorials.
The post How to Create a Change Request Form in WordPress appeared first on WPForms.
source https://wpforms.com/how-to-create-a-change-request-form/

