Do you want to create high-converting ActiveCampaign forms on your WordPress website?
Because WPForms has a built-in integration, you can connect your WordPress forms to ActiveCampaign in seconds and automatically send data from your forms to your ActiveCampaign account and email lists.
So in this post, we’ll show you exactly how to connect ActiveCampaign to your WordPress forms.
Why Create an ActiveCampaign Form in WordPress?
ActiveCampaign is a leading email marketing service that lets you build a relationship with your leads and customers. WPForms lets you to connect ActiveCampaign with WordPress so you can start creating and putting your forms on your site easily.
A few benefits to integrating ActiveCampaign with WPForms are:
- Easy to Use: Easily create an amazing form in just a few clicks right from your WordPress dashboard with a drag and drop builder.
- No need to log into ActiveCampaign: Integrate once and you can create unlimited signup forms from WordPress.
- Add a subscription checkbox: Want to allow users to automatically subscribe to your list when they submit a contact form? All you need to do is add a subscription checkbox to your contact form with our smart conditional logic.
- Form abandonment: Capture partial form entries by enabling form abandonment. This feature allows you follow up with interested leads and turn them into customers.
- And a lot more…
So now that you know why you might want to use ActiveCampaign with WPForms, let’s take a look at exactly how to create an ActiveCampaign form in WordPress.
How to Create ActiveCampaign Forms in WordPress
Follow this step-by-step guide to get your ActiveCampaign form up and running on your WordPress site.
Step 1: Activate the ActivateCampaign Addon
Before you can turn on the ActivateCampaign addon, the first thing you need to do is to install and activate the WPForms plugin. Here’s a tutorial on how to install a WordPress plugin.
Next, you’ll need to activate the ActiveCampaign addon. Head to WPForms » Addons and locate the ActiveCampaign addon. Click on Install Addon.
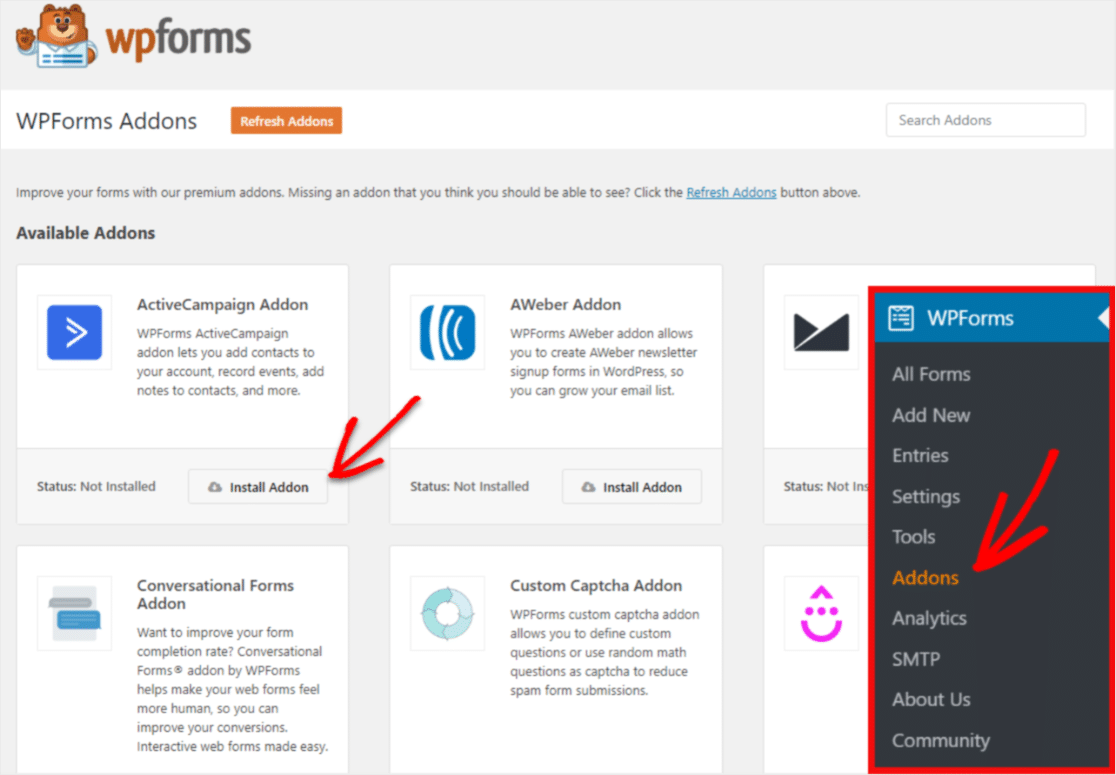
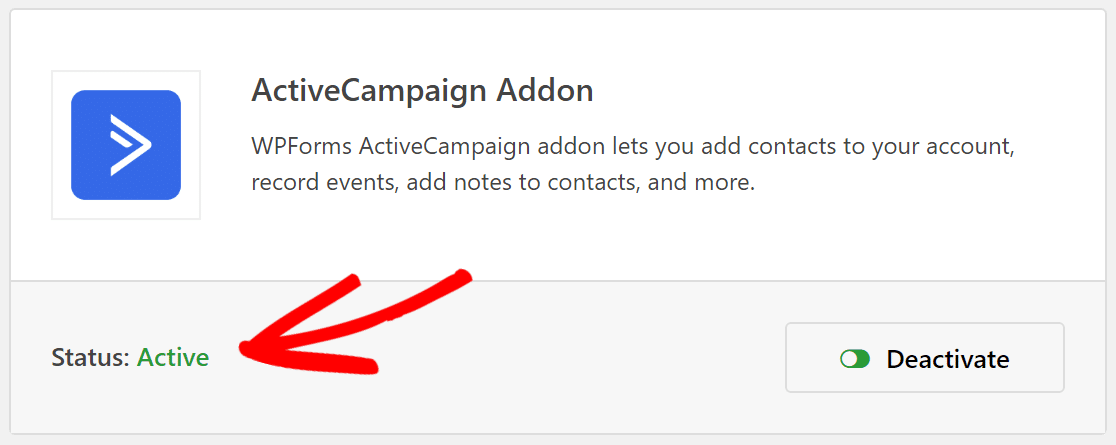
You’ll see the status of the addon change to Active once complete.
Step 2: Build Your Form
After the installation, you’ll want to create a form by going to WPForms » Add New.
On the setup screen, name your form and select the Newsletter Signup Form template.
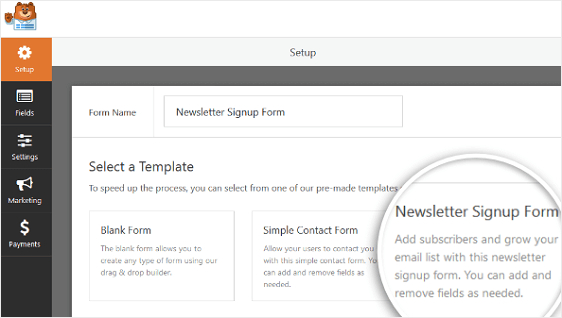
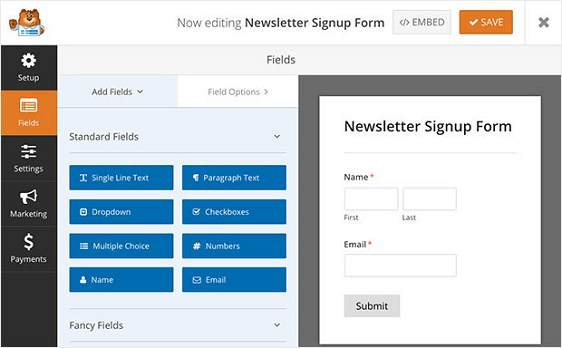
WPForms will create a simple newsletter signup form.
Here, you can add additional fields by dragging them from the left-hand panel to the right-hand panel. Then, click on the field to make any changes.
You can also click on a form field and drag it up or down to rearrange the order on your ActiveCampaign subscribe form.
One important form field to consider adding to your ActiveCampaign signup form is the GDPR Agreement field.
This form field helps you create GDPR compliant forms by giving your site visitors a way to agree to you storing their personal information and sending them marketing emails.
Want to learn more about keeping your website and visitors safe? Check out our post on WordPress security tips for your online forms.
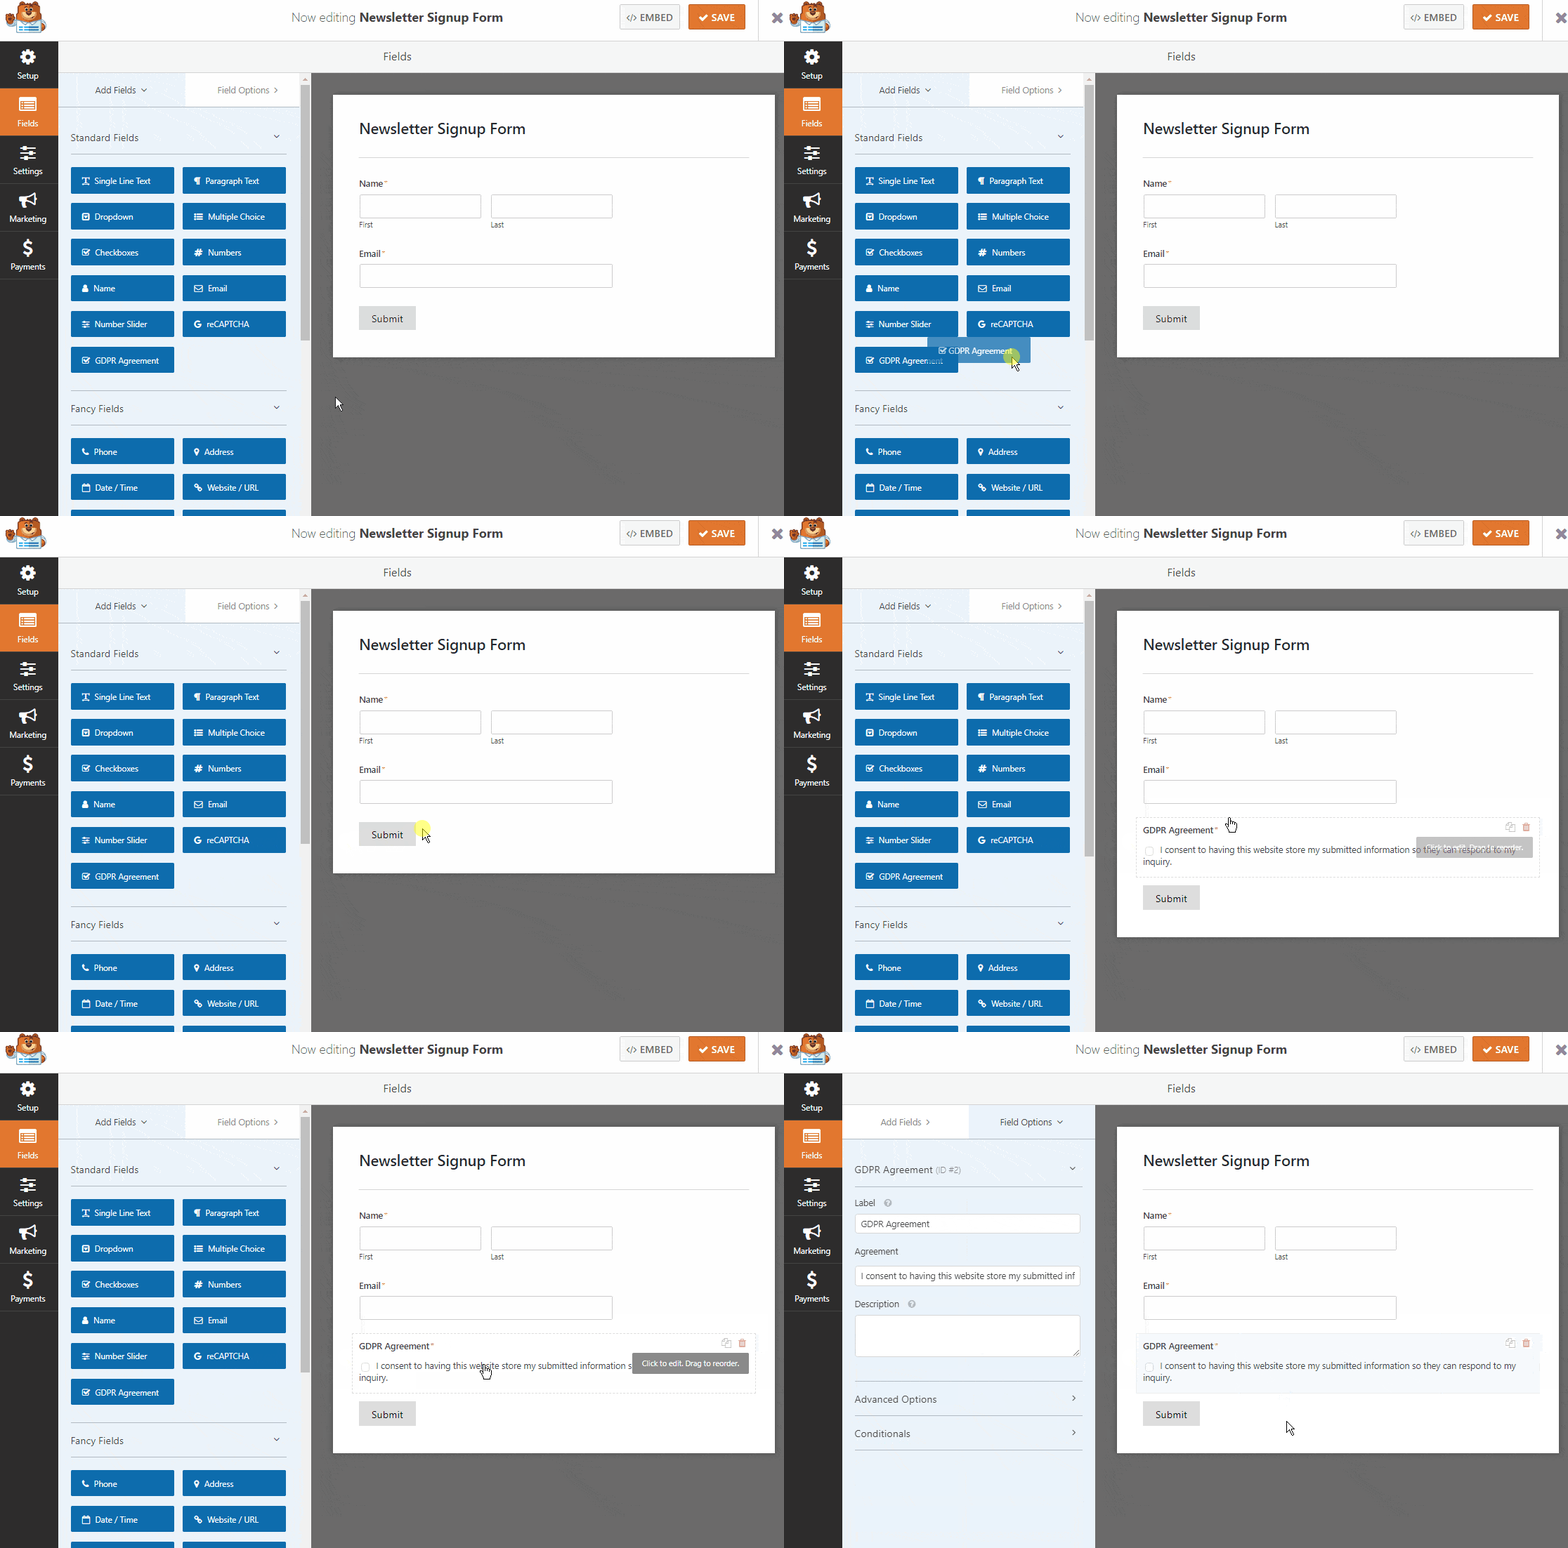
To change the default language of the agreement field, all you have to do is click on the field to make changes.
If you decide to add the GDPR Agreement field to your subscribe form, you’ll need to go to WPForms » Settings and click on the GDPR Enhancements checkbox.
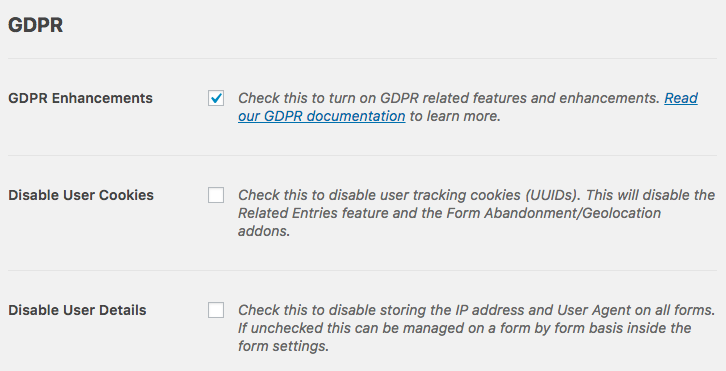
This will enable the GDPR enhancement features WPForms has available for you to make complying with GDPR that much easier.
In fact, you’ll be able to:
- Disable user cookies
- Disable user details, which includes IP addresses and User Agent data
- Access the GDPR form field for your WordPress forms
Once you’re done customizing your form, click Save.
Now, we’ll take a look at how to connect your ActiveCampaign form in WordPress to your email marketing provider.
Step 3: Connect Your Form to ActiveCampaign
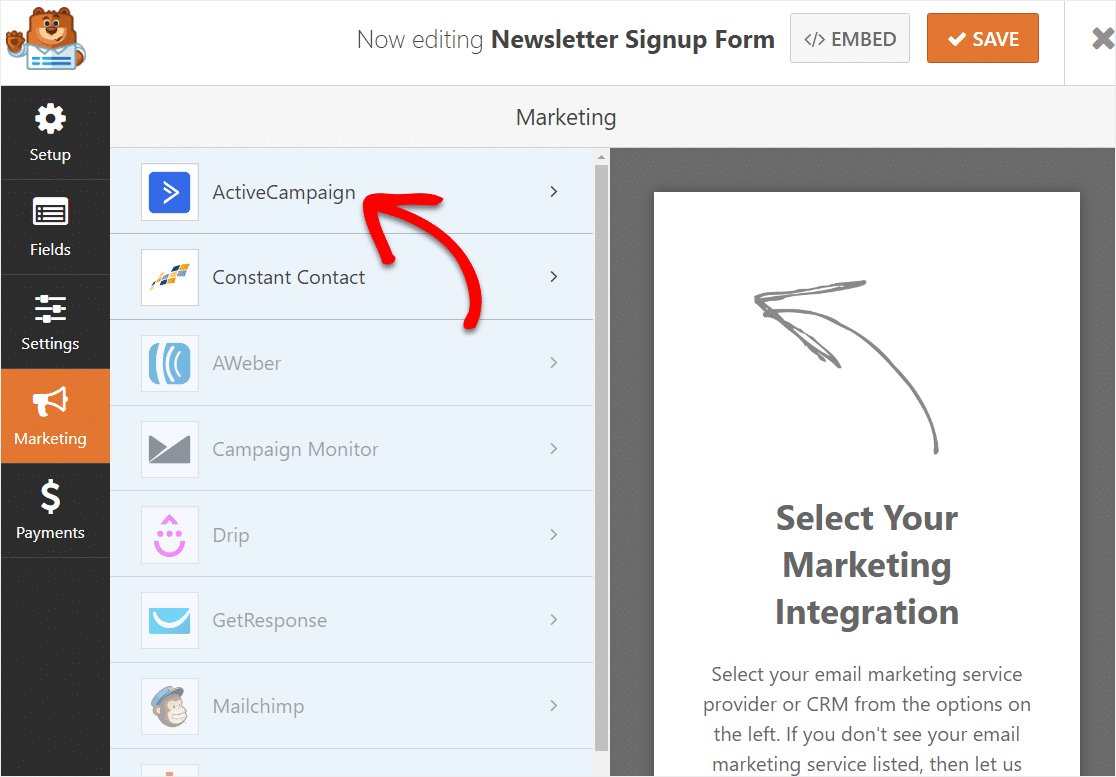
To connect your form to ActiveCampaign, click on the Marketing tab on the left side and then click on ActiveCampaign.
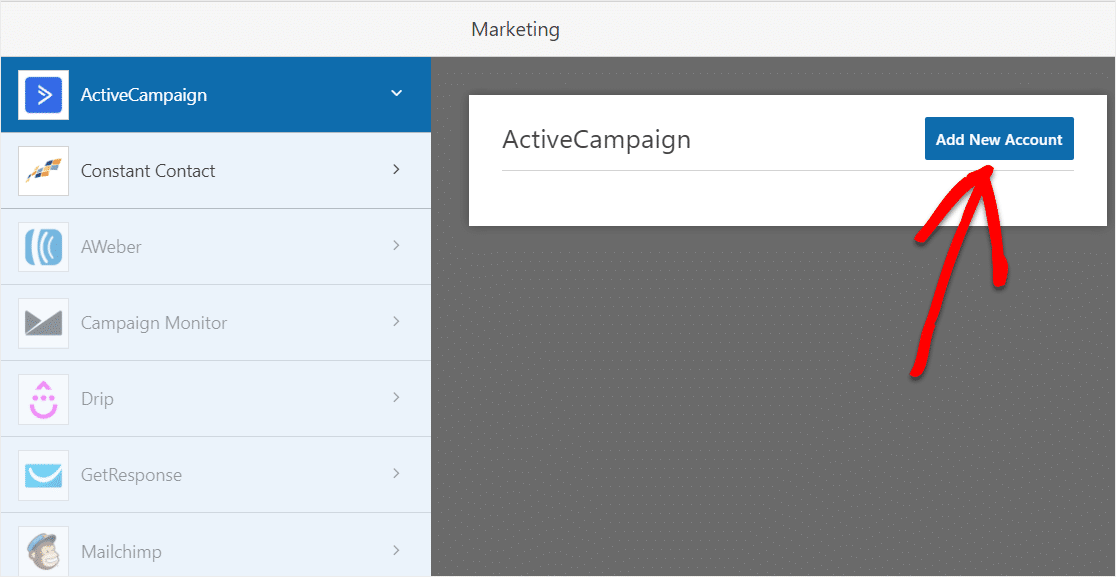
Now, click on Add New Account.
A new window will appear asking for your ActiveCampaign information.
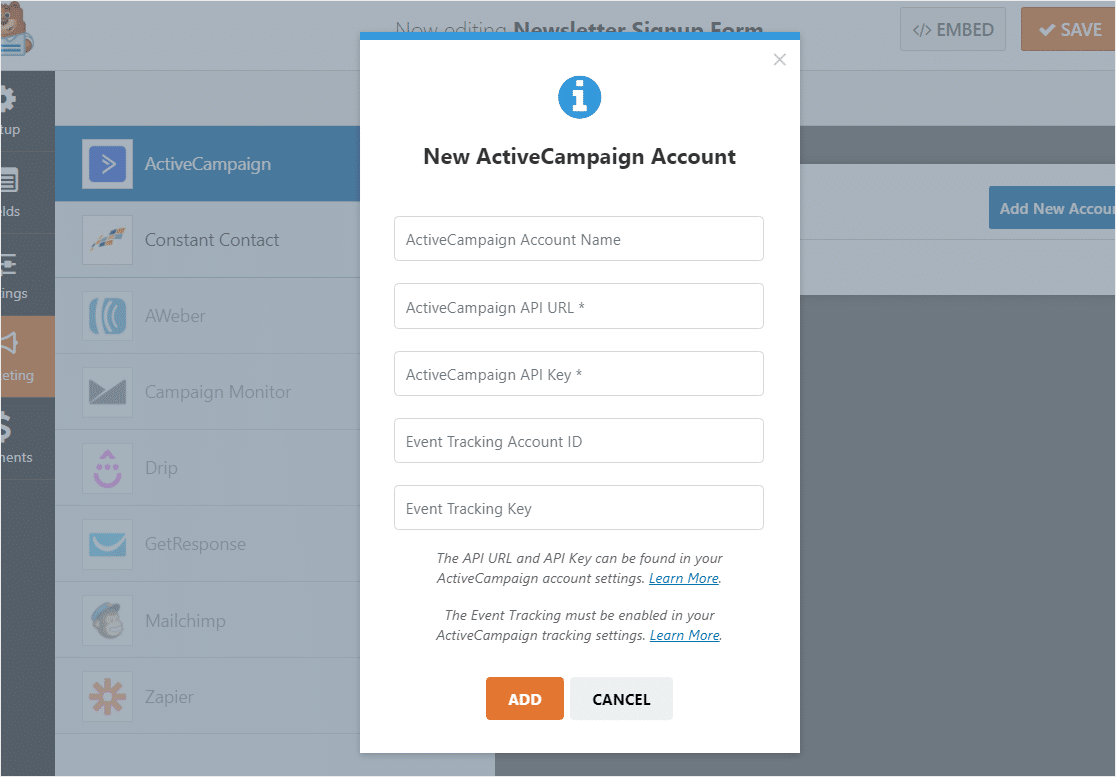
Here’s how to complete each field:
ActiveCampaign Account Name
In this field, you can add any name you’d like. This is for your internal use only, and will be helpful if you add more than one ActiveCampaign account.
ActiveCampaign API URL and Key
Each ActiveCampaign account will have its own unique API. To find this, you’ll first need to log into your ActiveCampaign account.
You might also love our post on ways to reduce SaaS bills with open source alternatives.
After logging into your account, click on the Settings option (near the bottom of the left sidebar).
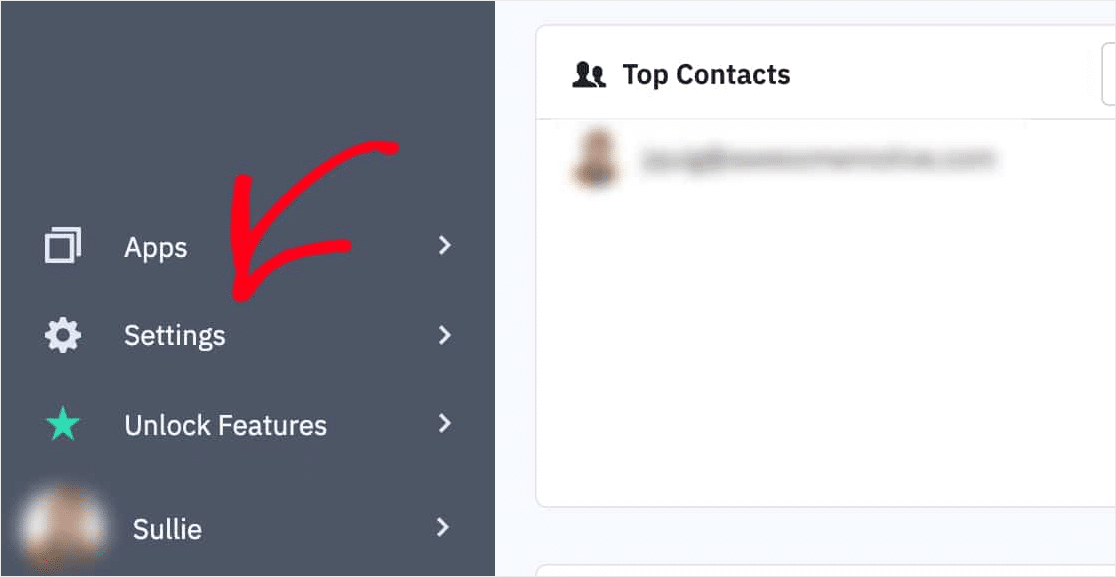
An additional menu should appear in the sidebar. Within this menu, click on Developer.
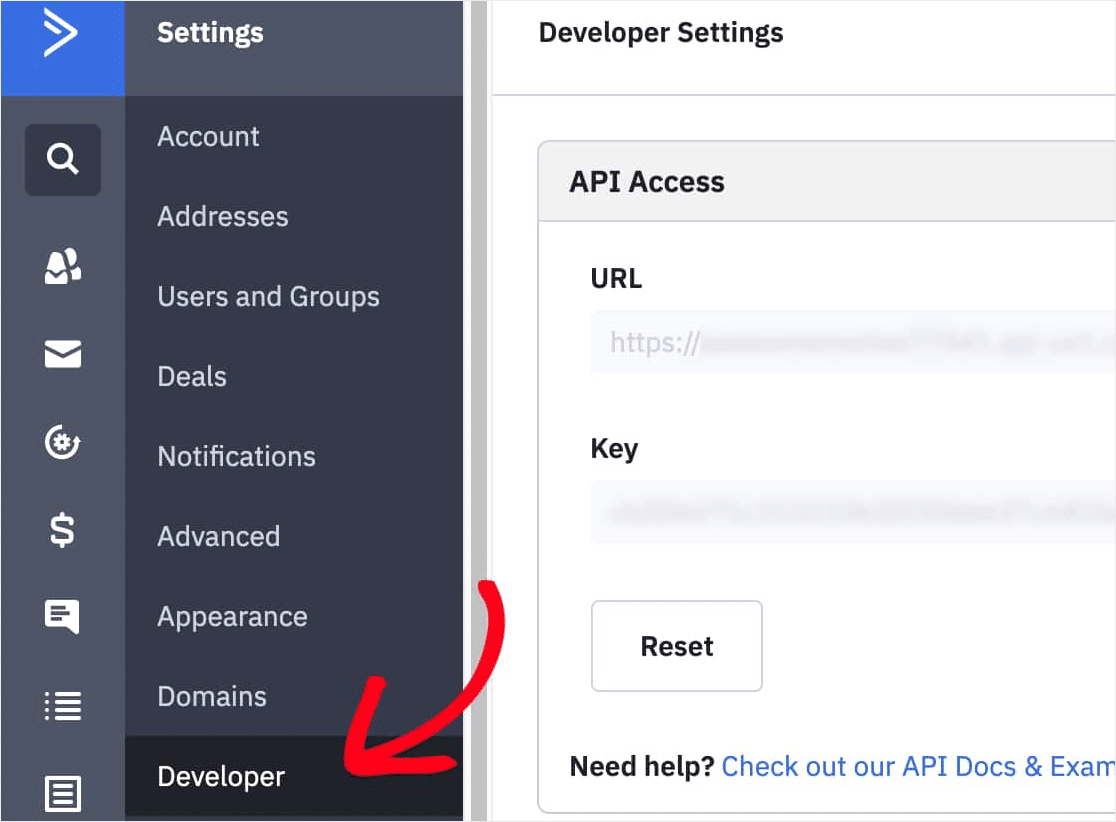
On this screen, you can copy both the URL and the Key into the window on WPForms.
Event Tracking Account ID and Key
Event Tracking is completely optional. For more details on how this feature can be used, check out ActiveCampaign’s Event Tracking overview.
If you want to use Event Tracking, you’ll need to copy a couple of things from your ActiveCampaign account.
From the Settings menu of your ActiveCampaign account, click on the Tracking option. In the Event Tracking section toward the bottom of this page, switch the Status toggle to ON.
![]()
Copy the Event Key that appears into your WPForms settings.
Next, you’ll need to click the Event Tracking API link.
![]()
A popup will show up now. Next to the word actid, you’ll see some text that looks like:
<class="trackId">00000000</>
Copy only the numbers. Next, paste those numbers into the Event Tracking Key field in your WPForms settings.
![]()
Next, you’ll want to click on the Connect to ActiveCampaign button to save the connection.

Once that’s saved, you’ll see a green box that says Connected.

Once you have all the fields filled in on the WPForms settings, click on the Add button.
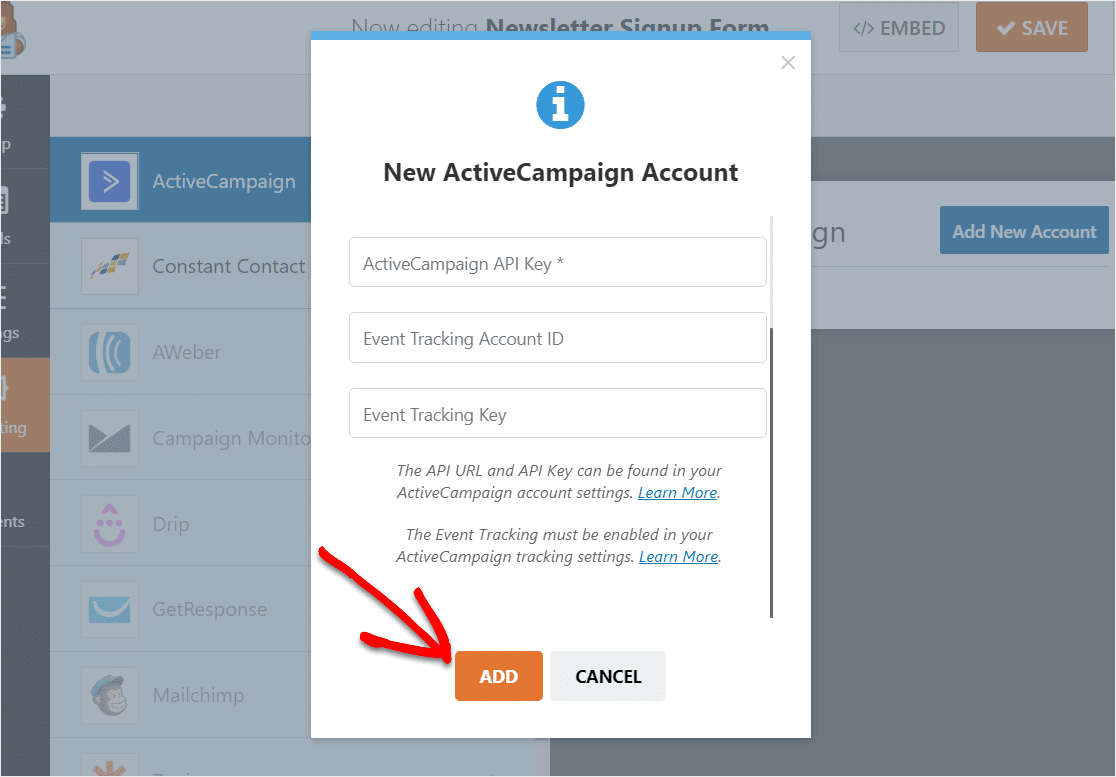
Great job! Your WPForms account is now connected to your ActiveCampaign forms in WordPress. Let’s move on to the next step.
Step 4: Set Up Your ActiveCampaign Form
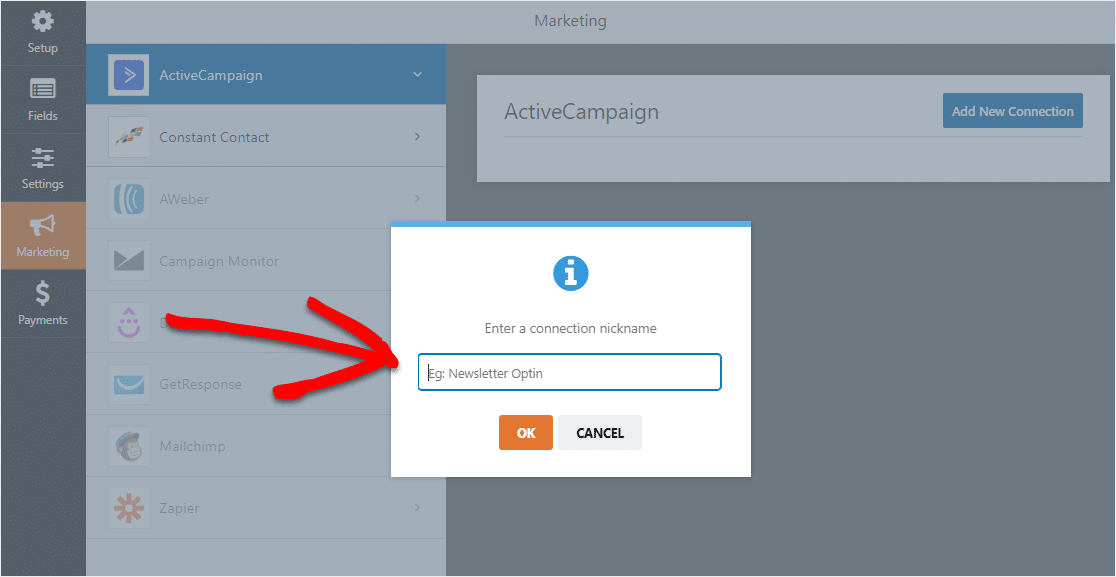
In the popup that appears, enter a nickname for this form (something like Newsletter Signup will work) and click OK. You’re the only one who will see this. This nickname will be especially helpful if you want to connect this form to multiple email lists.
Now, more settings will show up.
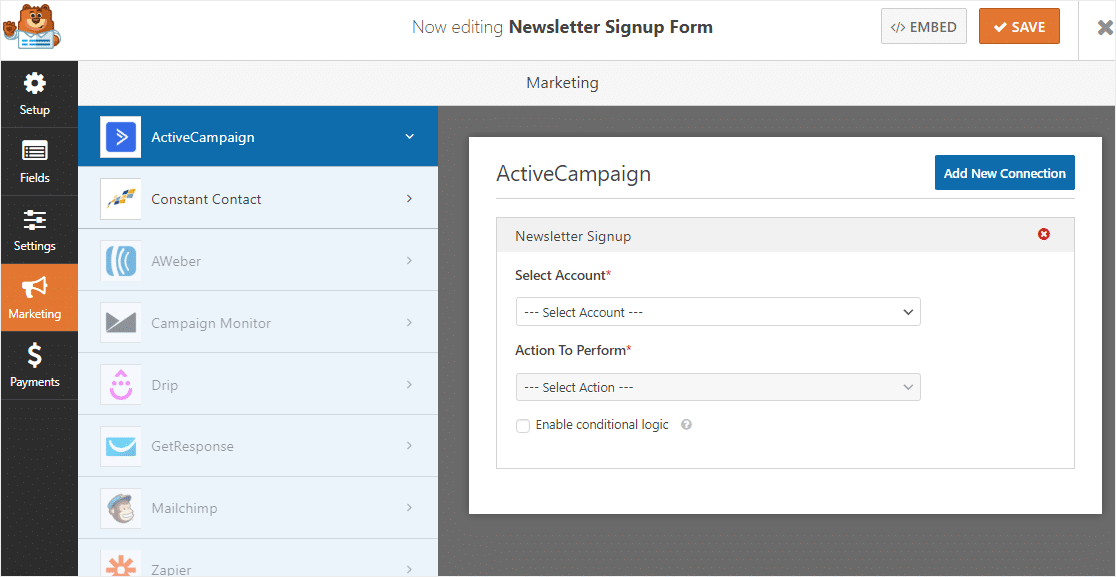
- Select Account: Choose from any of the ActiveCampaign accounts you’ve connected.
- Action to Perform: This is where you’ll select the action you want taken when a user fills out this form. The option selected here will also determine which additional settings are displayed.
Under Select Account, choose your account then under Action To Perform, choose Subscriber: Create or Update. Now, complete the rest of the fields that populate.
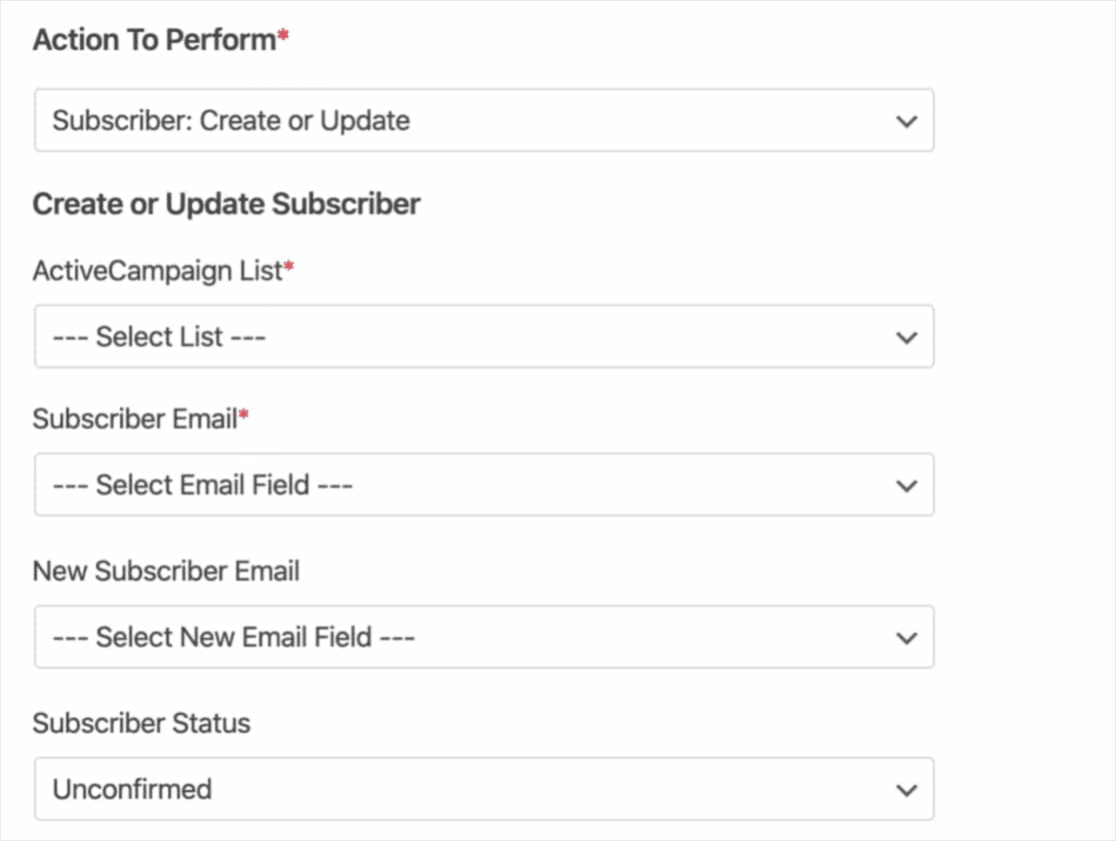
Here are some more details on each field:
- ActiveCampaign List: Choose from your available mailing lists. If you don’t have a list yet, check out ActiveCampaign’s doc on how to create one.
- Subscriber Email: Choose an Email field from your form. If you’re updating an existing subscriber, then this should be their old email address.
- New Subscriber Email: Only use if updating an existing subscriber. Choose the Email field from your form that includes the updated email address.
- Subscriber Status: This status will be automatically assigned to all subscribers from this form. For more details, please see ActiveCampaign’s tutorial on status options.
- Tags To Add: Add any tag(s) from your ActiveCampaign account to this subscriber. See ActiveCampaign’s tutorial for more details on using tags.
- Tags To Delete: Remove any default tags, or (if updating an existing subscriber), remove specific existing tags.
- Note: Automatically add a note to the subscriber.
For more details on the other Actions To Perform options available such as Unsubscribe and Delete, or if you’d like to add the optional Event Tracking, please see our complete documentation on how to install and use the ActiveCampaign addon with WPForms.
Did you know you can accept files on your site through a WordPress upload widget?
When you’re ready, click the Save button in the top right corner.

Congrats! Your form has been created. The last step is to add your ActiveCampaign form to your WordPress website.
Step 5: Add Your ActiveCampaign Form to Your WordPress Site
With WPForms, you can easily add your newsletter subscription form to your blog posts, pages, and even sidebar widgets.
In this tutorial, we’ll show you the most popular option which is embedding a form into a page.
First, create a new page or post in WordPress, or you can simply update one that you previously created. Next, click inside the first block (the blank area below your page title) and then type in WPForms in the search bar. You’ll see the WPForms icon come up.
Now, click on the Add WPForms icon and from the dropdown that appears, select your Newsletter Subscription Form.
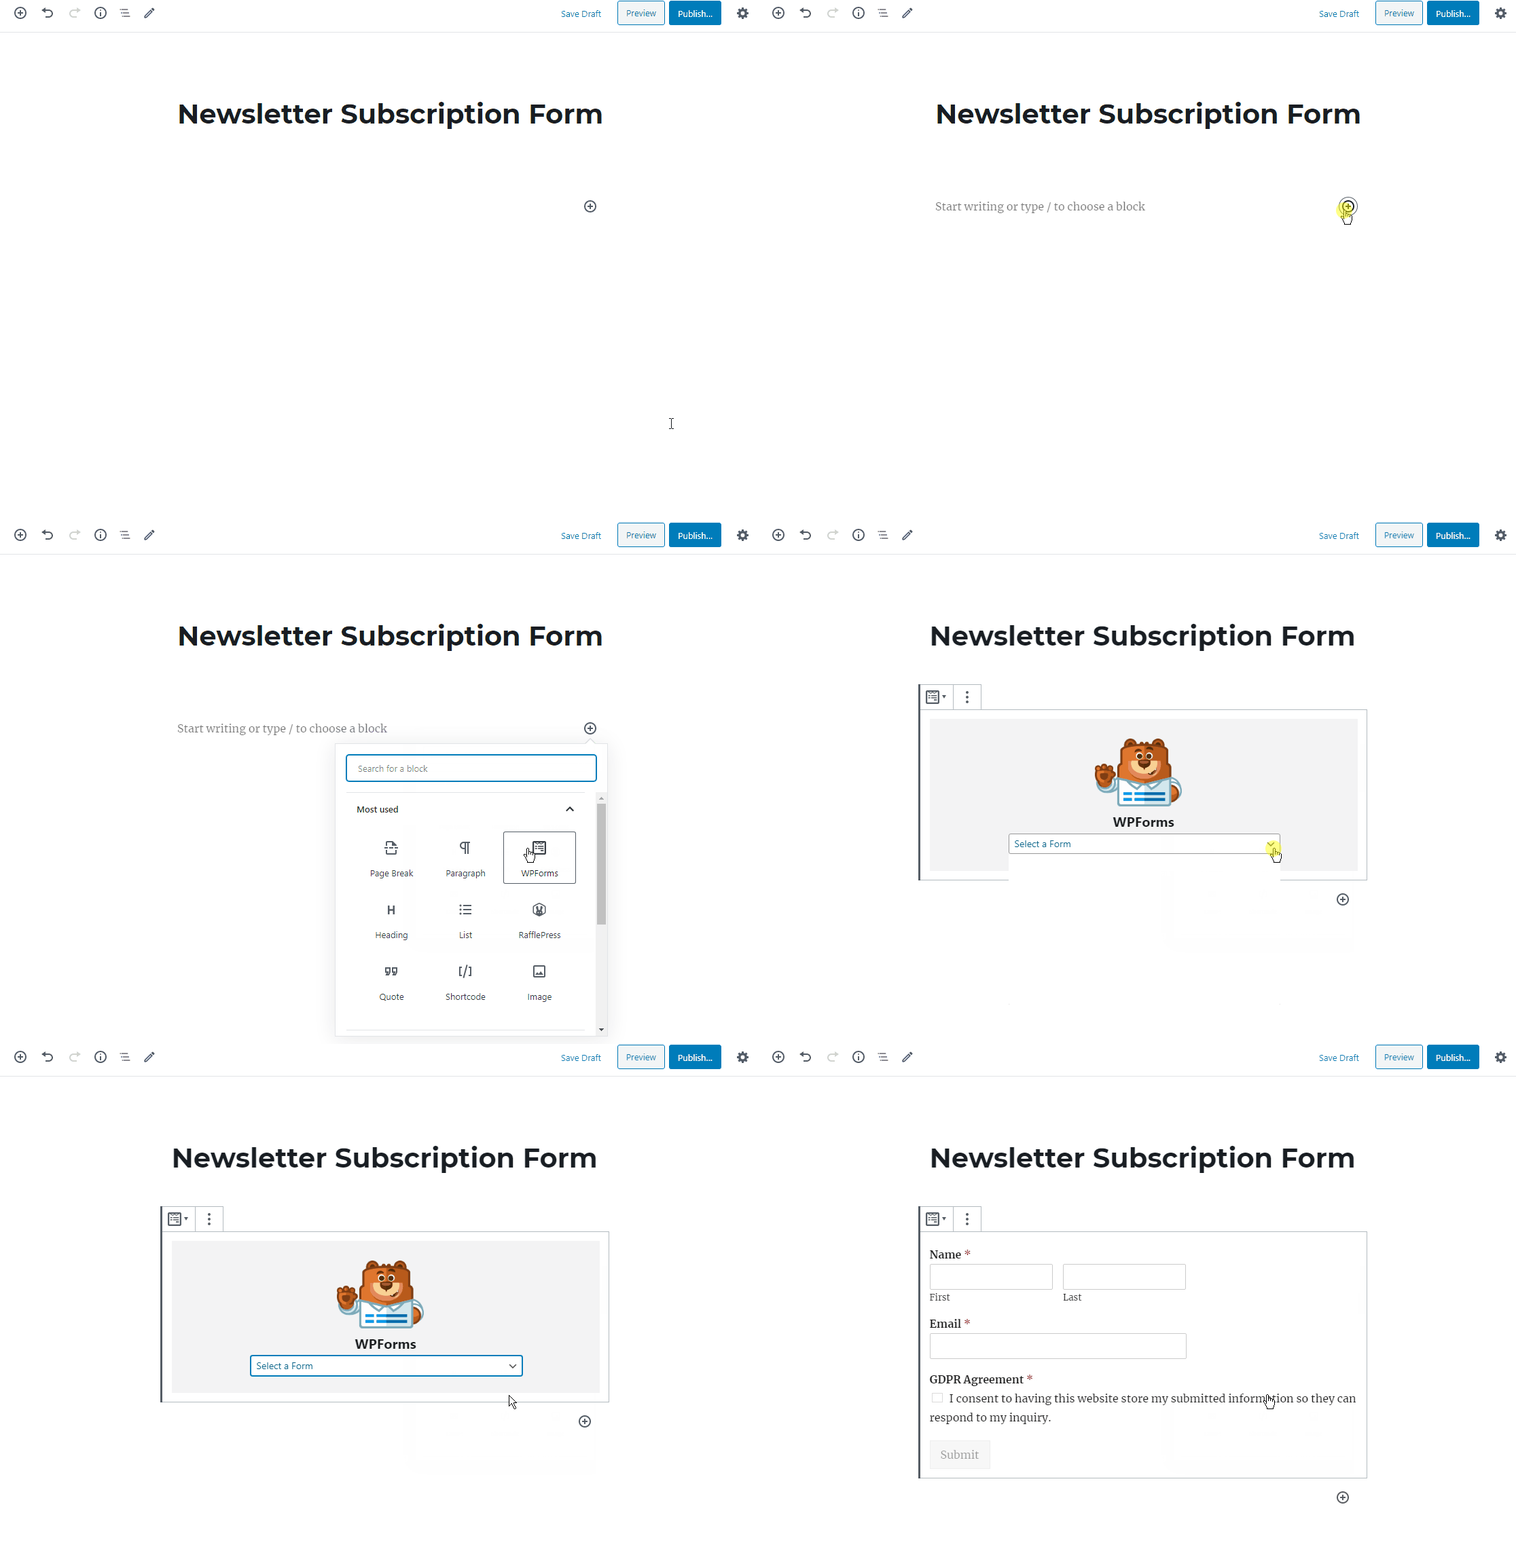
Now, go ahead and click Publish or Update on your page to have your form go live.
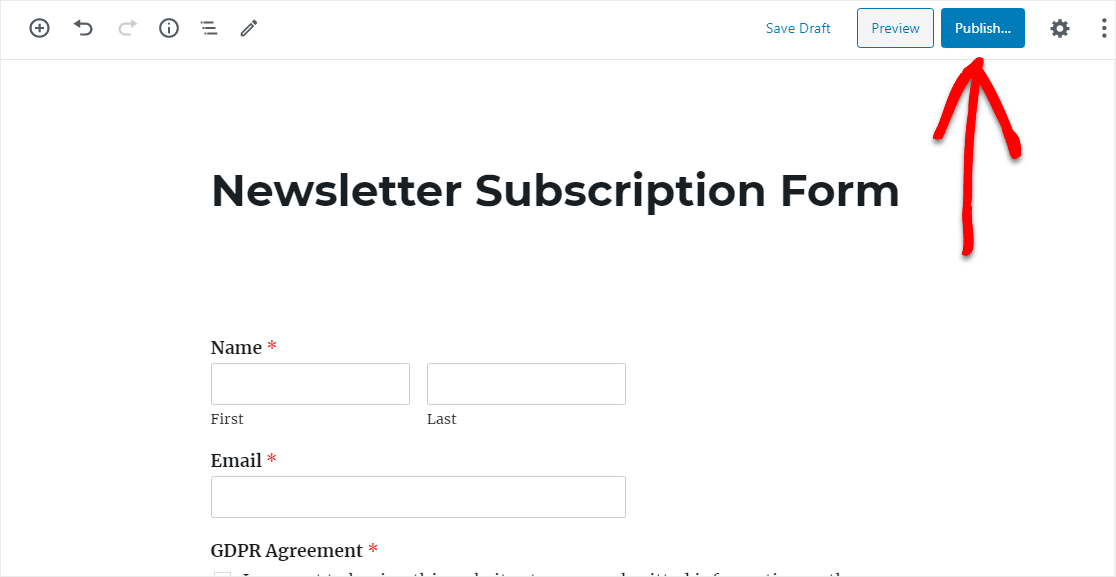
You did it Your ActiveCampaign form is now live on your WordPress site. Great job.
Final Thoughts
That’s it! Now anytime a user fills out your form, they will be added as a new contact in your ActiveCampaign database along with other fields you’ve specified, so you can keep in touch with email marketing.
Want to get more value from your client forms? Check out these hacks to find hidden customer data with WPForms hidden fields.
So what are you waiting for? Get started with the most powerful WordPress forms plugin today.
And if you like this article, then please follow us on Facebook and Twitter for more free WordPress tutorials.
The post How to Create High-Converting ActiveCampaign Forms in WordPress appeared first on WPForms.
source https://wpforms.com/how-to-create-high-converting-activecampaign-forms-in-wordpress/

