
Want to use the Sendinblue mailer to get reliable email deliverability on your WordPress site? Sendinblue is a solid mailer option within WP Mail SMTP, because it’s both super reliable and has a straightforward set up.
So in this tutorial, we’ll show you exactly how to use the Sendinblue mailer in WP Mail SMTP.
Here’s a summary of what’s covered in this post:
What Is Sendinblue Email?
Sendinblue is a cloud-based digital marketing service. They offer a popular email marketing platform and also provide reliable email deliverability solutions. It also works great when paired with WP Mail SMTP.
Sendinblue offers both free and paid pricing plans, depending on how many emails you want to send. Their free plan includes up to 300 sent emails per day. This is usually more than enough for many small business websites.
To use Sendinblue, you’ll want to have an email address associated with the domain that you own. Email addresses ending with @gmail.com, @yahoo.com, etc. are not recommended for use with the Sendinblue mailer.
How to Set up the Sendinblue Mailer With WP Mail SMTP
Follow this step-by-step tutorial to connect and use your Sendinblue mailer with WP Mail SMTP:
1. Activate Your Sendinblue Account (Don’t Skip!)
To get started, you’ll need to have a Sendinblue account. If you don’t have one yet, you can click here to create a Sendinblue account. There’s no credit card required to sign up.
Next, you’ll need to activate your account. You won’t be able to complete this tutorial and setup until your Sendinblue account has been activated. This process might take a while, so it’s important to start at this step.
In order to activate your account, you’ll need to reach out to Sendinblue’s support team.
In your message, you’ll need to include:
-
-
- A request to activate your account
- Your site’s URL
- Details on the types of emails your site will be sending:
- Marketing, transactional, or both (if you’re sending order confirmations/records of form entries, these are transactional.)
- Type of content in emails (subscription confirmations, order confirmations, invoices, etc.)
- How many emails you estimate your site will send per month
-
Now that you’ve sent Sendinblue your account activation request, you can continue with the setup process.
2. Authorize Your Domain
Next, To make sure that your emails deliver successfully, you’ll need to authorize your domain. You can do this step even if your account hasn’t been activated yet.
To start domain verification, go ahead and sign into Sendinblue. Now once you’re logged in, click this link to open your account’s Senders & IPs page.
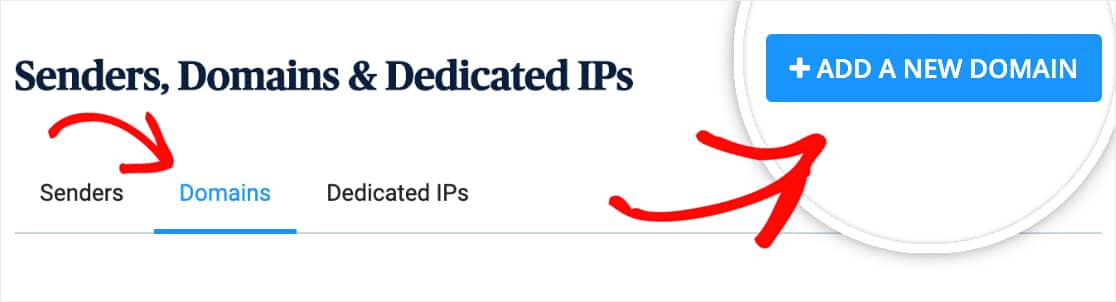
From this page, click on the Domains tab. Then, click the blue + Add a New Domain button.
Next, you’ll need to enter a subdomain.
A subdomain replaces the “www” part of your website’s address; for example: “subdomain.yourwebsite.com.” Subdomains can be used to add separate sections or directories to your website (like how some sites have their blogs on a subdomain such as blog.example.com).
In this case, the subdomain will be used by Sendinblue to send emails and will not be visible on your site at all.
Note: It’s super important to use a subdomain (ie mail.example.com) for this step instead of your regular domain (ie example.com). This helps to protect your domain reputation, which is crucial to successful email delivery.
Your subdomain will show up in the email header details, so we recommend keeping it simple. For example, mail.yourdomain.com.
Be sure to also check the box labeled I would like to use this domain name to digitally sign my emails (SPF, DKIM, DMARC) right under the Domain Name area.
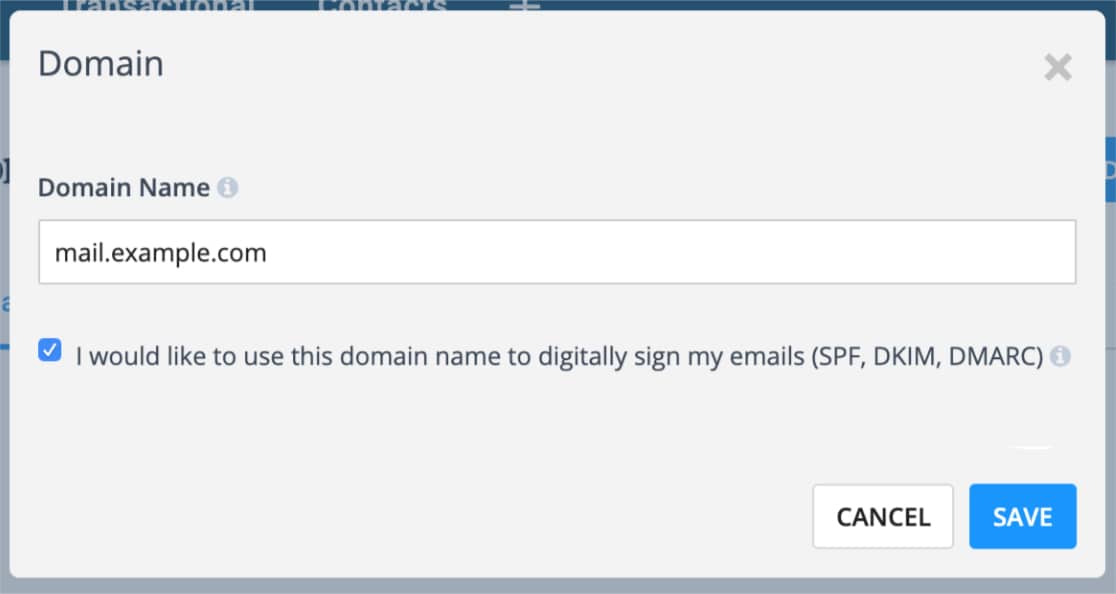
Now, click Save. A screen will appear with some DNS records listed.
You’ll need to authorize your domain by adding records to your site’s DNS. To proceed, open a new tab or window in your browser. Then, log into the service where you purchased your site’s domain (which is most likely your site’s hosting provider) and locate your site’s DNS settings.
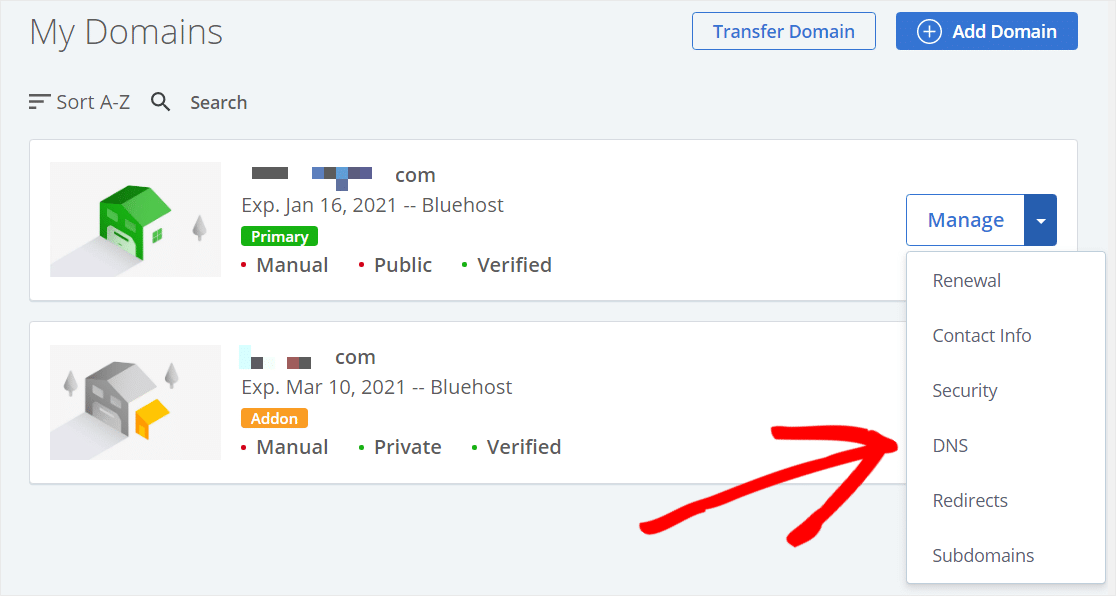
If you’re not sure where to find your site’s DNS settings or feel unsure about making changes, contact your site’s hosting provider first. But here’s an example of where to look if using Bluehost under My Domains.
Now once your DNS settings are open, you should see an option to add a new record.
To let Sendinblue authorize your domain, you’ll need to add 3 TXT records to your site’s DNS. Make sure to copy them carefully, because you’ll need the exact values from your Sendinblue account for the verification to work right.
Our examples below are for the mail subdomain (ie mail.example.com). If you used a different subdomain, then your Host/Name values will also need to be different.
Next, let’s cover some more details on how to add each DNS record below.
TXT (DKIM) Record
-
-
- Host/Name:
mail._domainkey.mail(remember to check that this is your own subdomain) - Record Type:
TXT - TTL:
24 hours(or 1 day/86400 seconds, depending on which units your DNS uses) - Text/Data: Copy from Sendinblue (this will be unique for each domain)
- Host/Name:
-
Note: If your DNS is managed by GoDaddy, then be sure to set the TTL (Time To Live) to 1 hour. You’ll need to use this 1 hour TTL for all 3 of these records.
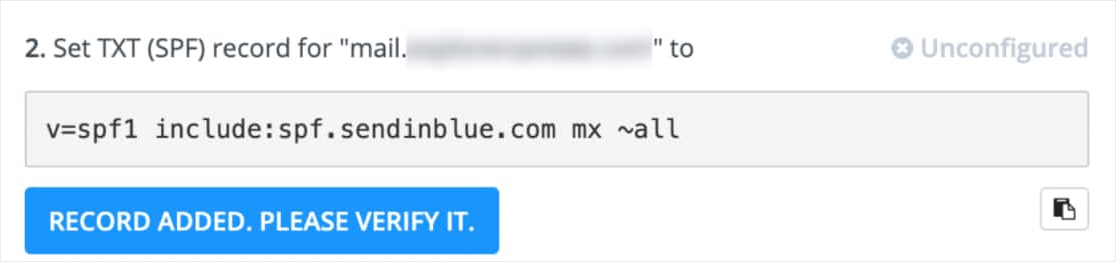
TXT (SPF) Record
-
-
- Host/Name:
mail(remember to check if this includes your subdomain) - Record Type:
TXT - TTL:
24 hours(or 1 day/86400 seconds, depending on which units your DNS uses) - Text/Data:
v=spf1 include:spf.sendinblue.com mx ~all
- Host/Name:
-
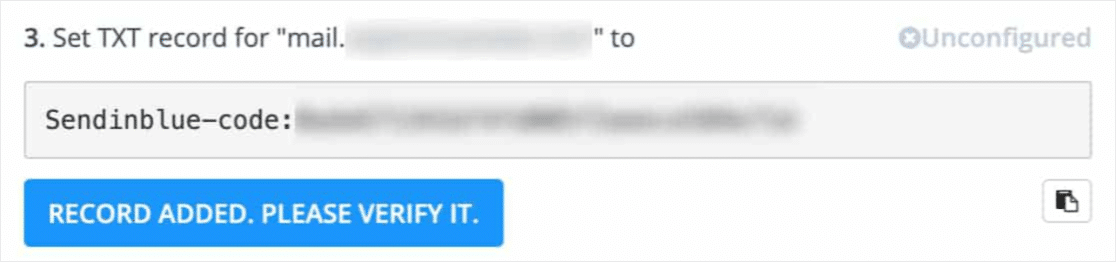
TXT Record (Sendinblue code)
-
-
- Host/Name:
mail(remember to check if this includes your subdomain) - Record Type:
TXT - TTL:
24 hours(or 1 day/86400 seconds, depending on which units your DNS uses) - Text/Data: Copy from Sendinblue (this will be unique for each domain)
- Host/Name:
-
Underneath these 3 records, you’ll also see a DMARC record. Because of common complications with DMARC, we don’t recommend adding this unless you’re a developer and experienced with DMARC configuration. It’s completely fine to skip entering a DMARC record.
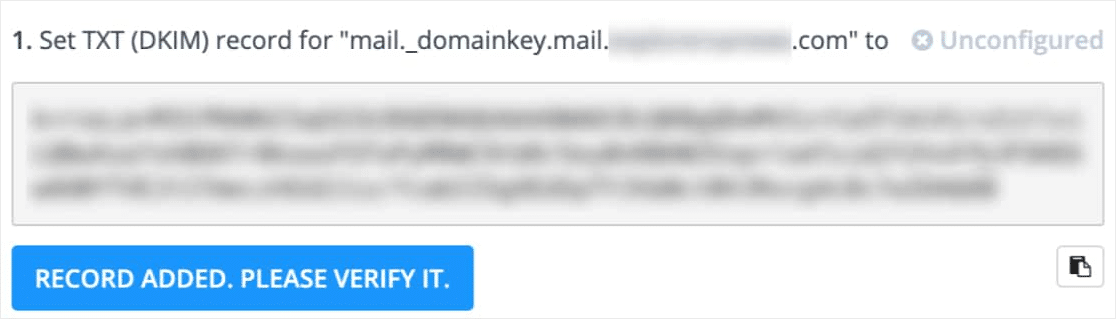
After you’ve added these records, it can take up to 24-48 hours for Sendinblue to verify them. However, in some cases these records can be verified much quicker. You can go ahead and try clicking the Record Added. Please Verify It. button as a quick test to see.
When your records verify, Sendinblue will add a green Configured status to the upper right corner of the record.
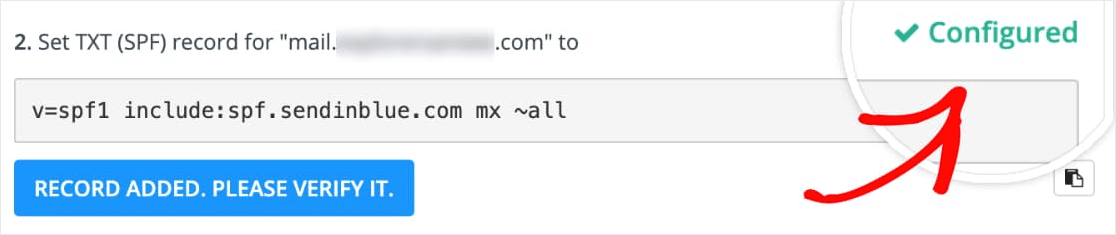
If you don’t see this yet, you don’t need to wait on this to move forward. Head on to the next step while you wait for this verification to complete. Just be sure to keep this tab or window open because we’ll need it a little later.
3. Set up WP Mail SMTP
Next, we’ll switch over to setting up WP Mail SMTP. Before we get started on this step, be sure to install and activate the WP Mail SMTP plugin.
Once WP Mail SMTP is installed, click on WP Mail SMTP in the your WordPress menu on the left-hand side to open the plugin settings page. Here’s how to set up each area of these settings:
WP Mail SMTP From Email
The From Email is the email address that all of your site’s emails will be, you guessed it, sent from. This should be a domain-specific email address like you@yourdomain.com.
If you’d like the From Email to be the same site-wide, you can check the box labeled Force From Email. This will save you the trouble of editing the email settings throughout your site (in all form emails, etc).
We strongly recommend you check this box.

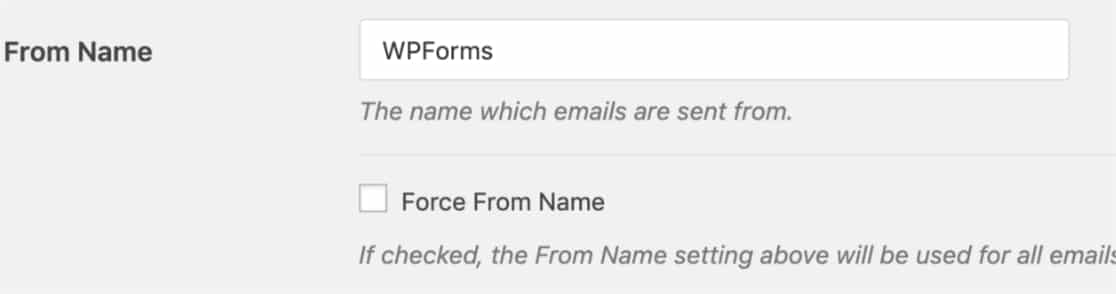
WP Mail SMTP From Name
The From Name will be set to the site name by default. However, you can change this to any text you’d like.
You can also check the box next to Force From Name to apply this setting to all of your emails across your site.
You can skip the Return Path checkbox, as this option is not used by Sendinblue.
WP Mail SMTP Mailer
Next, In the Mailer section, select the Sendinblue option.
The last step on this page is to scroll to the Sendinblue section and enter the API Key.
To locate your API key, you’ll need to go back to the tab or window that has your Sendinblue account is open. Now, click on your name in the upper right corner. In the menu that opens, click on the SMTP & API option.

Now, a new page will open that shows your API keys. You’ll want to copy the key labeled v3.
After copying the v3 key, go back to the WP Mail SMTP settings and paste it into the API Key field. Then click Save Settings.
Great job! Now, let’s move on and send a test email to make sure everything is working correctly.
4. Send a Test Email
Before starting this step, you’ll need your Sendinblue account to be activated and your DNS records verified (see step #1 in this tutorial).
Now that your Sendinblue setup is complete, you’ll want to send a test email to make sure that everything is working right. To do this, double-check that you’re on the Settings » WP Mail SMTP page and then click on the Email Test tab.
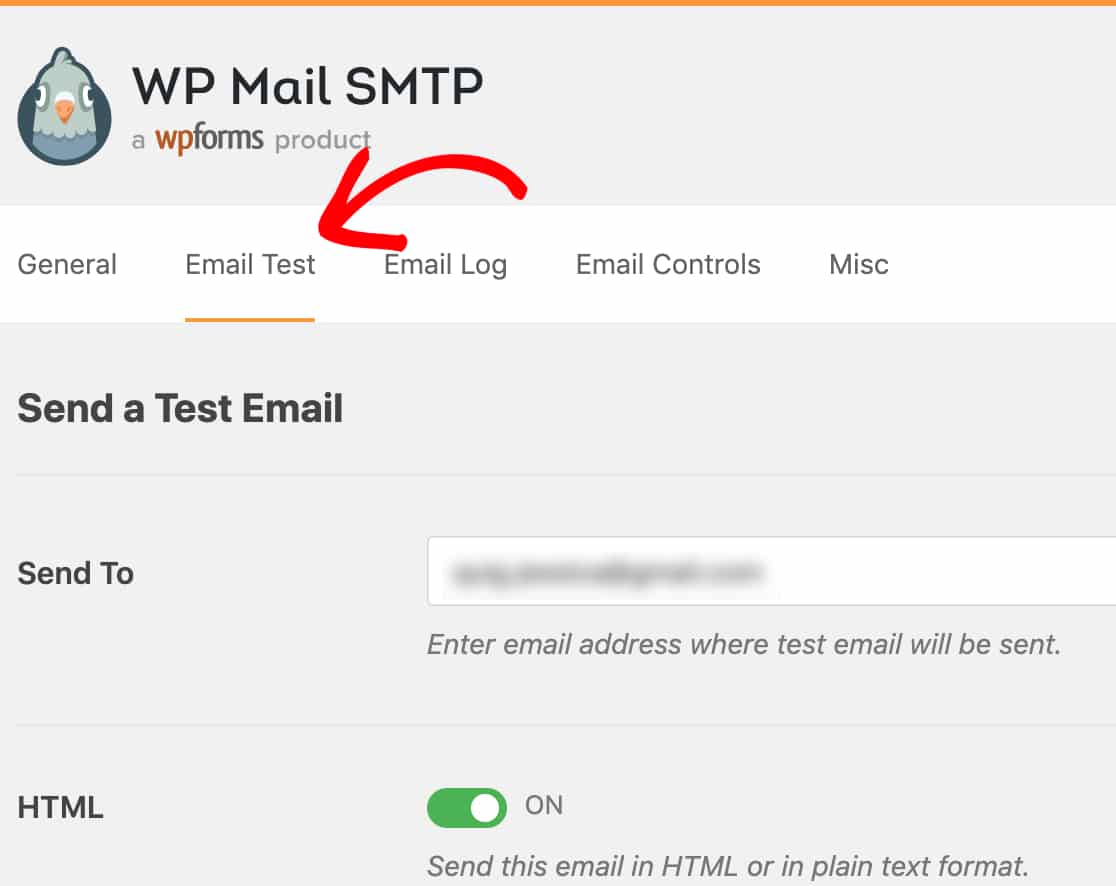
This field will already have your WordPress website’s admin email entered here, but you can enter any email address that you have access to. Then, click on the Send Email button.
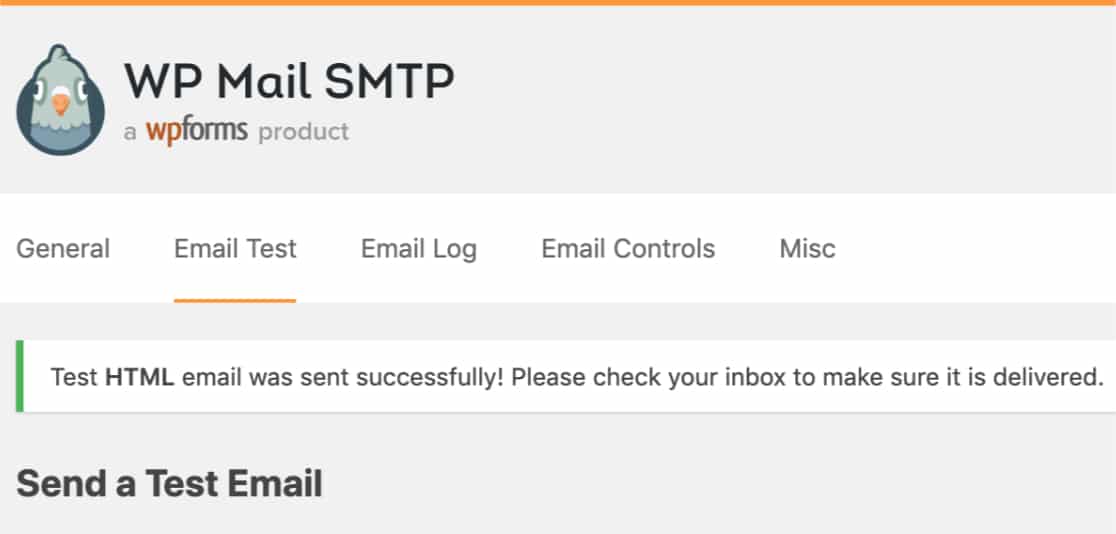
After sending the email, you should see a success message.
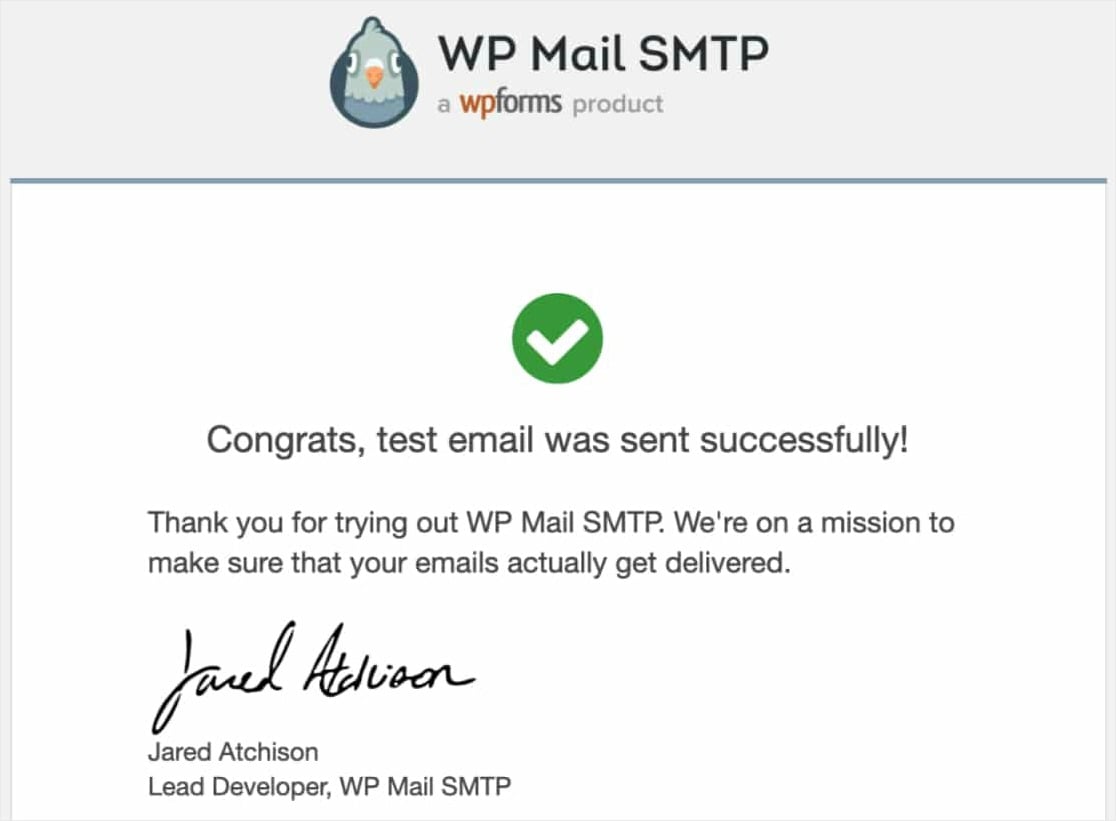
If you visit the inbox for that email address, you should have received the email for this test.
That’s it! You have successfully set up your site to send WordPress emails with the Sendinblue mailer in WP Mail SMTP.
Common Errors With Sendinblue Setup
See this error? [permission_denied]: Unable to send email. Your SMTP account is not yet activated.
This means that your account still needs to be activated. In order to do that, you’ll need to contact Sendinblue’s team. So, scroll up to the first step in this tutorial for more details.
Other Mailer Options in WP Mail SMTP
Also, if you’re interested in trying a different mailer option than Sendinblue with your WP Mail SMTP set up, here are some other options to check out:
In Conclusion
And there you have it! You now know how to set up WordPress email notifications with Sendinblue using WP Mail SMTP.
So now that your emails are working, you can get started by setting up a simple contact form and start getting form notifications whenever someone fills out your form.
So what are you waiting for? Get started with the most powerful WordPress forms plugin today.
And if you liked this post, make sure to follow us on Facebook and Twitter for more free WordPress tutorials.
The post How to Set up the Sendinblue Mailer With WP Mail SMTP appeared first on WPForms.
source https://wpforms.com/how-to-set-up-sendinblue-wp-mail-smtp/
