
Have you noticed that you’re not receiving WordPress emails?
Unfortunately, WordPress not sending emails is a common problem, but it’s easy to fix. In this tutorial, we’ll walk you through how to set up WordPress email notifications with SendGrid using WP Mail SMTP.
When Email Notifications Don’t Work
When WordPress email notifications don’t work, it can be a tricky problem.
That’s because you may not notice that WordPress isn’t sending form notifications until people start filling out your form, and their messages don’t reach your email inbox. Or, you see them in your email marketing list but never knew about the form being filled out — causing you to stumble with your digital marketing campaigns.
You might notice form entries in your WordPress dashboard that haven’t been sent to your email, or discover there’s a problem when frustrated visitors reach out to you using social media or other methods.

Here’s what usually causes the problem…
By default, WordPress uses the PHP mail function to send emails generated by your WordPress installation or any contact plugin like WPForms.
The most common reason for missing these emails is when your WordPress hosting server isn’t configured to use the PHP mail function. Even with both unmanaged and managed WordPress hosts.
Thankfully, you can work around this issue by using SMTP.
SMTP (Simple Mail Transfer Protocol) is the industry standard for sending emails. Unlike the PHP mail function, SMTP uses authentication for improved deliverability with your emails. That’s why we recommend using SMTP to send emails in WordPress.
Make sure to take a look at these shocking digital marketing statistics for some facts that could help your business online.
Why Use WP Mail SMTP with SendGrid in WordPress?
There are many different SMTP services available, but many of these aren’t secure.
While some other methods require you to store sensitive login information in your WordPress dashboard, using a mailer like SMTP.com, Pepipost or SendGrid in WP Mail SMTP will keep your email passwords secure.
And unlike some mailers, SendGrid doesn’t require a credit card to sign up for a free account.
WordPress security is a big deal. You may want to read our post on the top WordPress security plugins.
SendGrid offers a free plan for sending up to 100 emails per day. For most small businesses and personal websites, that’s plenty. If you need to send more, you will likely need a paid service.
Step 1: Find Your SendGrid API Key
Before we start configuring SendGrid to work with your WordPress website, you’ll need to set up an account and find your SendGrid API key. This key is a unique identifier and a secret token for authentication that will let your website interact with your account at SendGrid.
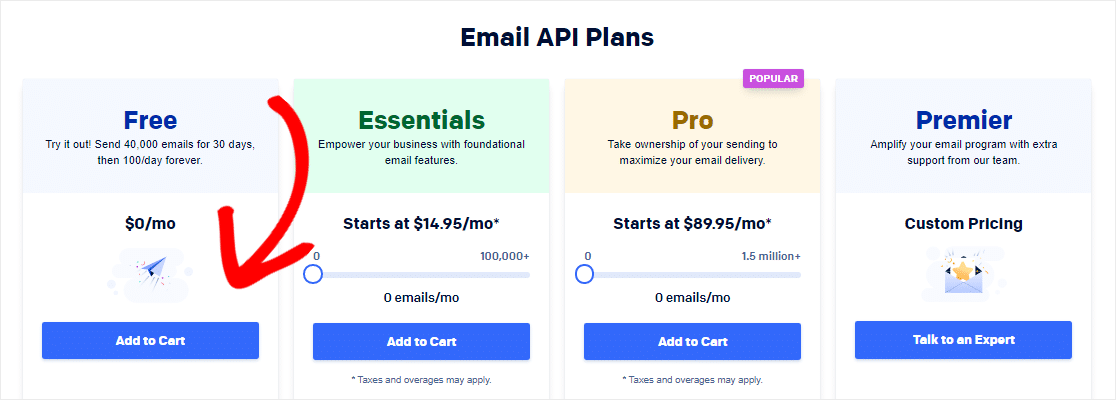
First, you’ll need to sign up for a SendGrid account by visiting their pricing page. From here, you can choose the account type that fits your site’s needs.
For this example, we’ll be signing up for their free account (limited to 100 emails/day). However, the setup will be the same no matter which plan you choose.
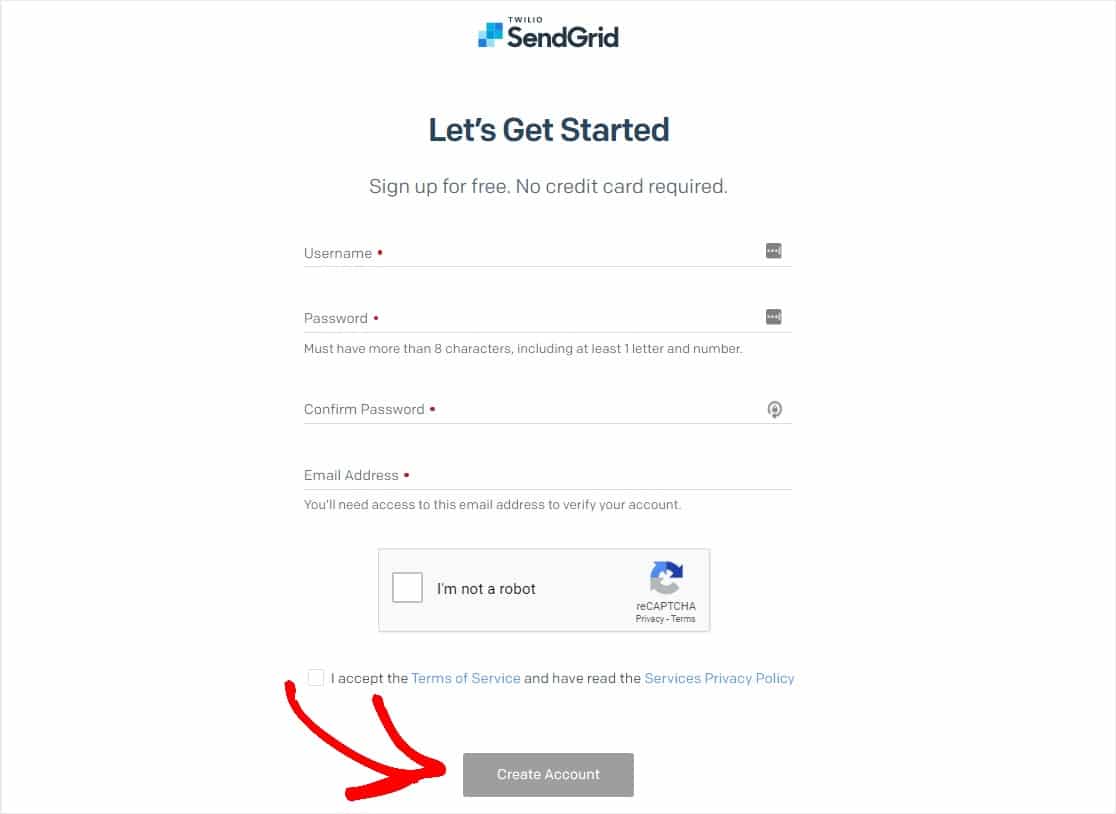
Next, you’ll need to provide some info to SendGrid to create your account and set up a profile. Fill out your information and click on Create Account.
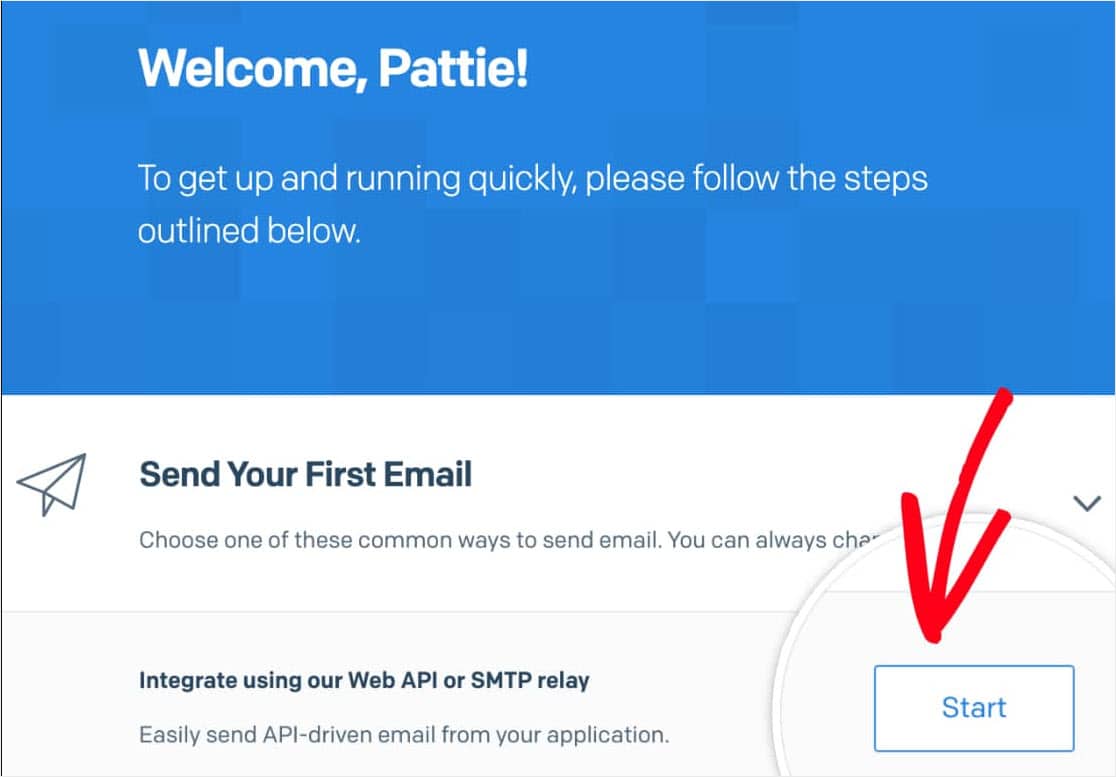
After creating an account, click the Start button next to Integrate using our Web API or SMTP relay.
Still collecting data using Google Forms? You don’t have to! Check out this list of the best Google Forms alternatives.
Next, you’ll be asked to choose a setup method. Click the Choose button under the SMTP Relay option.

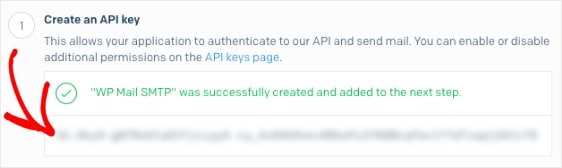
On the next page, you’ll need to enter an API key name and then click Create Key.
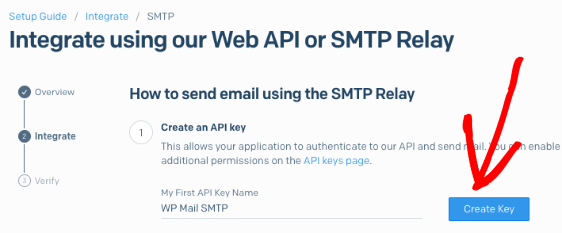
Once the API key has been generated, you’ll be ready to go to the next step. Be sure to leave this page open, as we’ll need this API key a little later.
Thinking about adding a blog to your site? Check out this list of the top ways to use WordPress to make money blogging.
Step 2: Enter Your SendGrid API Key
Now that you have the API key, we can get started setting up SendGrid with WP Mail SMTP on your WordPress site to fix WordPress email issues.
First, install the WP Mail SMTP plugin. Here’s a step by step guide on how to install a WordPress plugin.
Once WP Mail SMTP is installed, you’ll need to click on WP Mail SMTP in the WordPress menu on the left side to open the plugin settings page and scroll to the From Email section.

By default, this will be filled in with your site’s admin email.
We strongly recommend that you also check the box labeled Force From Email. Since the From Emails from anything on your site that sends email must match this email address in order for SMTP to work, this will save you the trouble of editing the email settings throughout your site (in all form emails, etc).
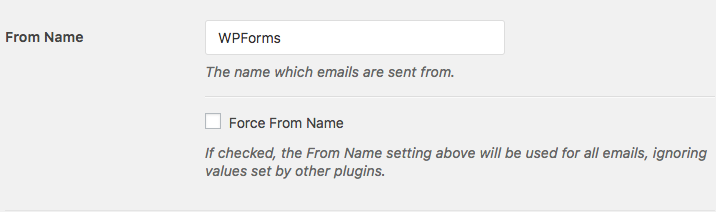
Next, scroll down to the From Name.
By default, the From Name will display the site name. However, you can change this to any text you’d like.
And you can also check the box next to Force From Name to apply this From Name site-wide.
Next, scroll down to the Mailer field. Select the SendGrid option.
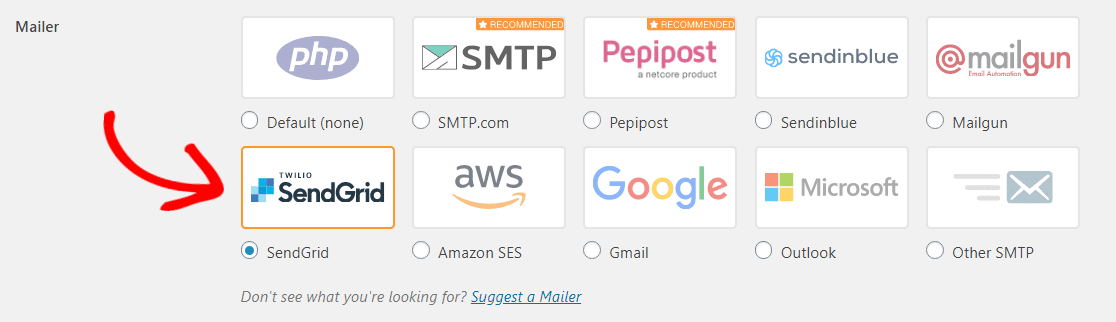
And feel free to check out our tutorials on some of the other mailers available with WP Mail SMTP like Mailgun, Pepipost, Amazon SES, Gmail, or Microsoft Outlook.
We also strongly recommend checking the Return Path option to Set the return-path to match the From Email. That way, you’ll be automatically emailed if any messages bounce due to issues with the recipient’s email.

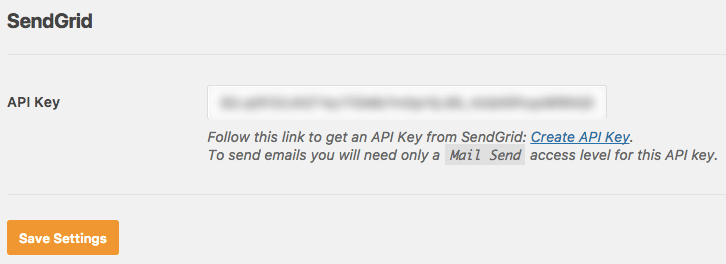
The last step on this page is to scroll to the SendGrid section and enter the API Key. Go ahead and leave the WordPress window and head back to the tab or window where your SendGrid account is open to copy the key you generated earlier.
After copying the key, return to the WP Mail SMTP settings and paste it into the API Key field. Then, be sure to click the Save Settings button.
Step 3: Verify Your Domain in SendGrid
The best way to ensure that your emails continue to deliver successfully over time is to verify your domain.
First, you’ll need to verify the integration that you just created with SendGrid. To do this, you’ll send a test email from WP Mail SMTP to yourself.
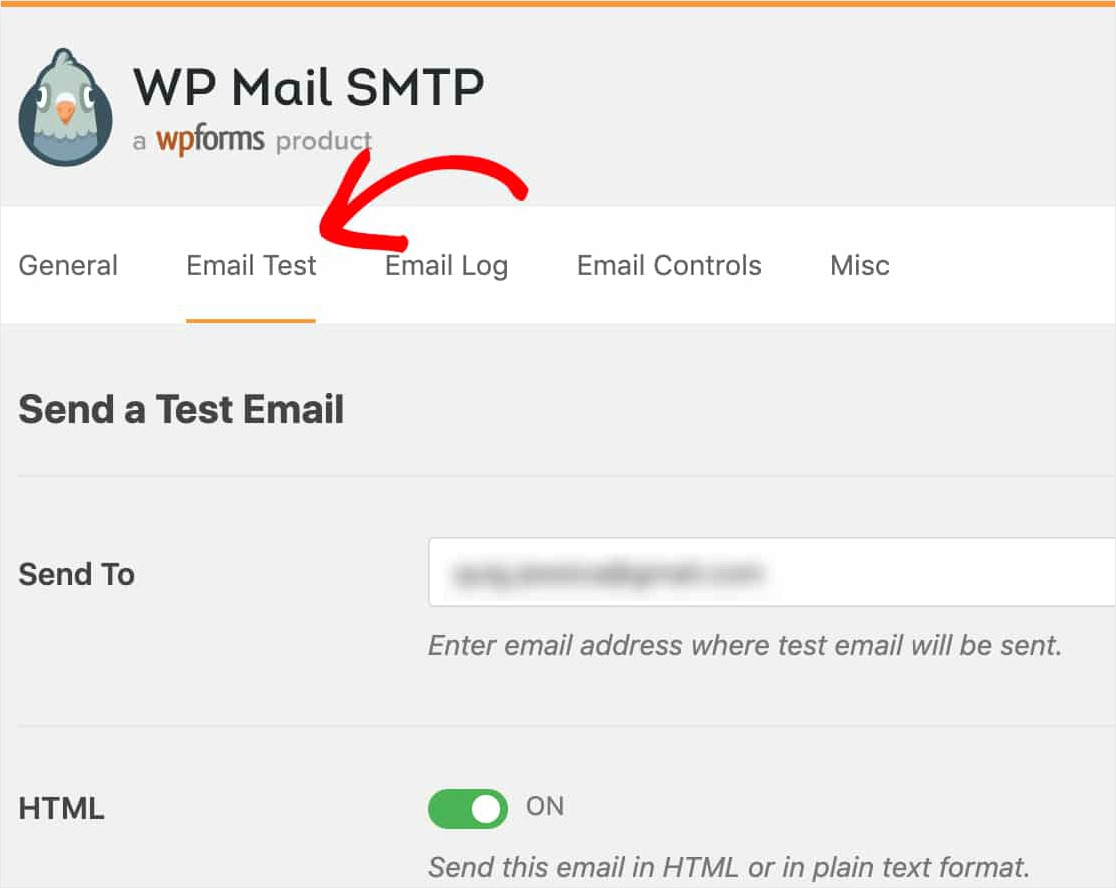
Here’s how — Inside your WP Mail SMTP settings, click on the Email Test tab.

On this tab you’ll see a Send To field, you can enter any one of the email addresses that you have access to. Then, click the Send Email button.
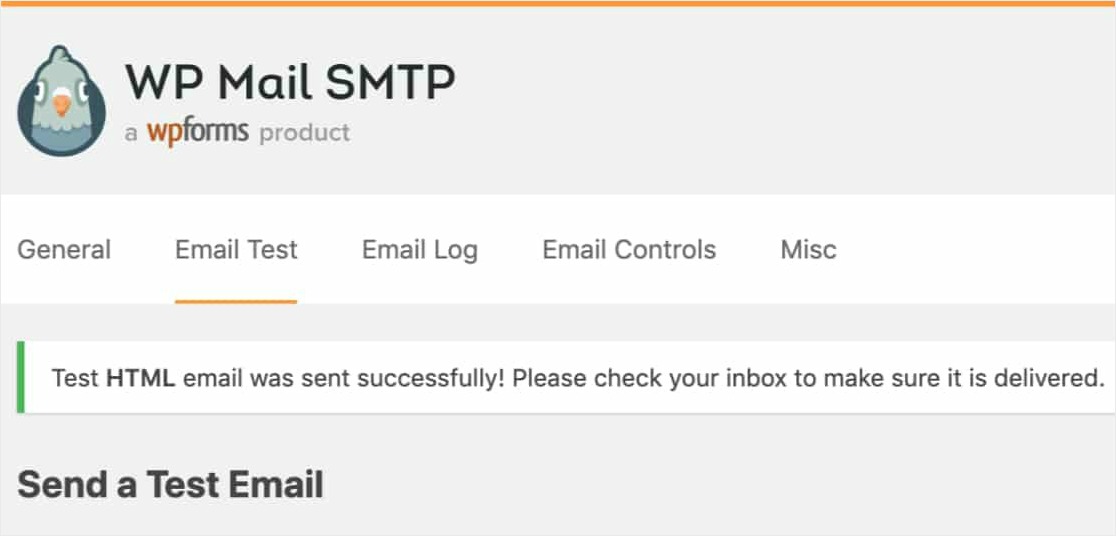
Once the email has processed, you’ll see a success message displayed.
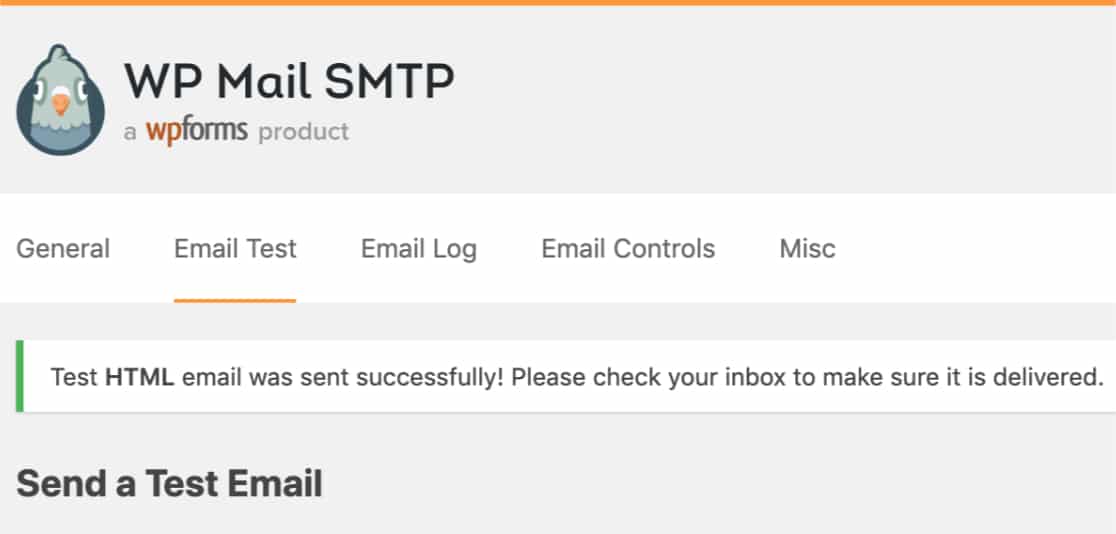
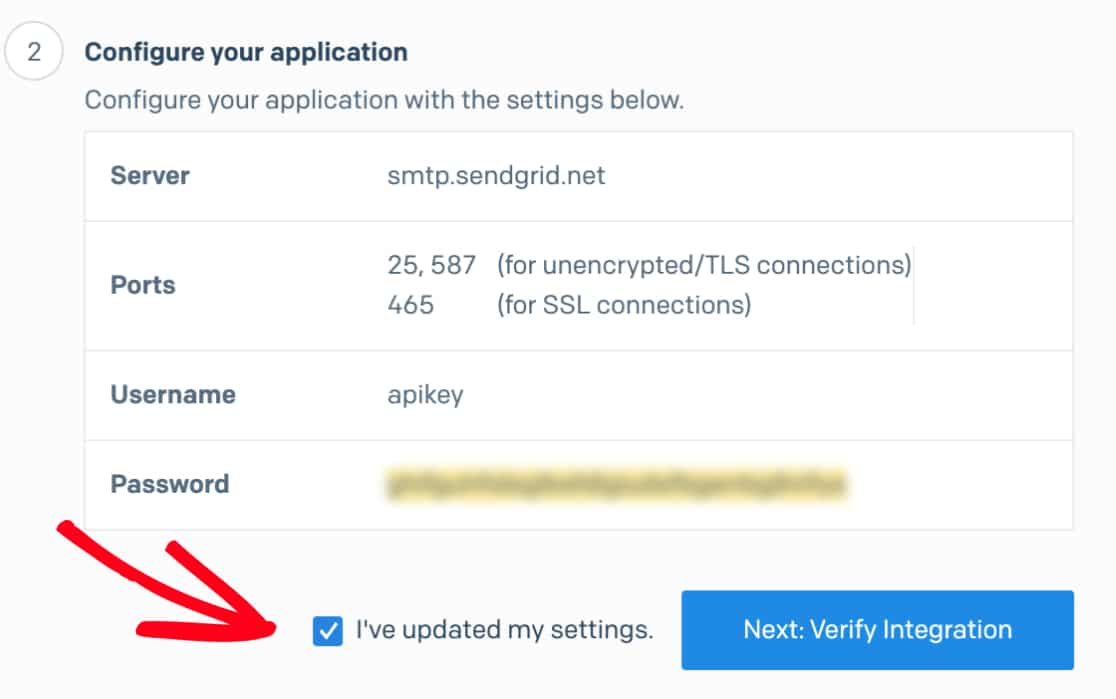
Great. Your test email was sent successfully. Now, you’ll need to go back to your SendGrid account’s API page. From there, check the box labeled I’ve updated my settings and then click Next: Verify Integration.
On the next page, click the Verify Integration button. This will send an email to SendGrid for verification.

Once SendGrid has detected that your test email has already been sent, they’ll let you know with a success message. This may take a few moments to complete, so don’t worry if there’s a bit of a delay. There’s a lot of cool stuff happening.
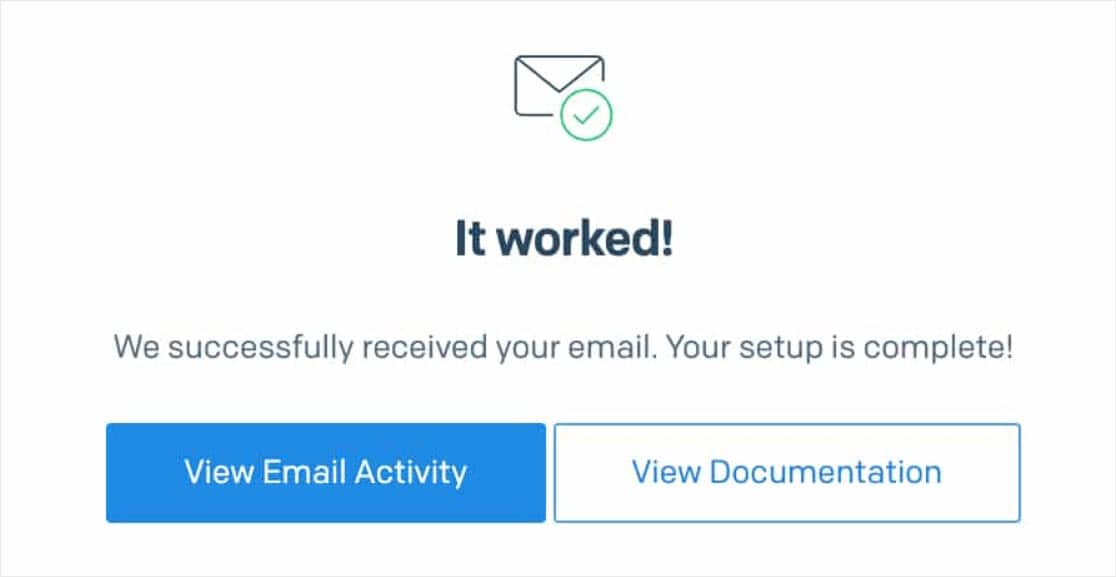
If everything is working correctly, you’ll see a success message screen. At this point, it may look like your SendGrid setup is ready to go. But make sure you don’t skip the next step to ensure long-term, reliable email delivery.
Step 4: Authenticate Your Domain in SendGrid
The best way to make sure that your WordPress emails continue to deliver successfully over time is to authenticate your domain in SendGrid.
Authentication proves that your emails come from a domain that you own. This helps identify your domain’s reputation as a legitimate email source. Plus, authentication will also remove the “via sendgrid.net” message that would otherwise get added to your emails.
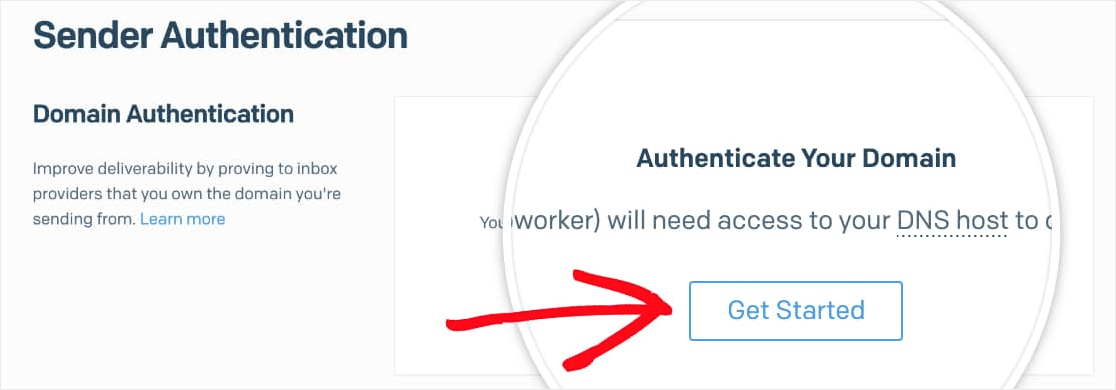
To get started on authentication, in SendGrid’s left menu go to Settings » Sender Authentication (or follow this link).
Near the upper right of the page, click the Get Started button.
On the 1st authentication setup page, you’ll need to answer these 2 questions:
- Which Domain Name Server (DNS) host do you use? Select your DNS provider from the list. If you don’t see yours, choose Other Host (Not Listed).
- Would you also like to brand the links for this domain? We recommend selecting Yes. This will allow any links in sent emails to use your domain instead of SendGrid’s. Branded links help even more with deliverability since they show all links are tied to your site.
After you’ve answered these questions, click the Next button to continue your SendGrid setup in WordPress.
If you’re not sure where to find DNS settings, or feel unsure about making changes, please contact your site’s hosting provider before making adjustments.
For the next step, you’ll need to enter your site’s domain. For example, wpforms.com is our domain.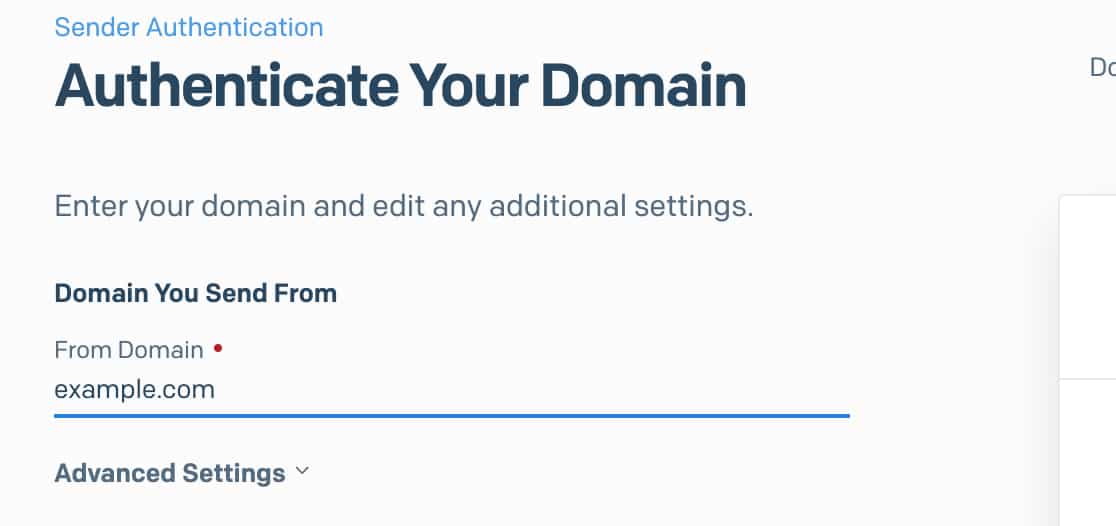
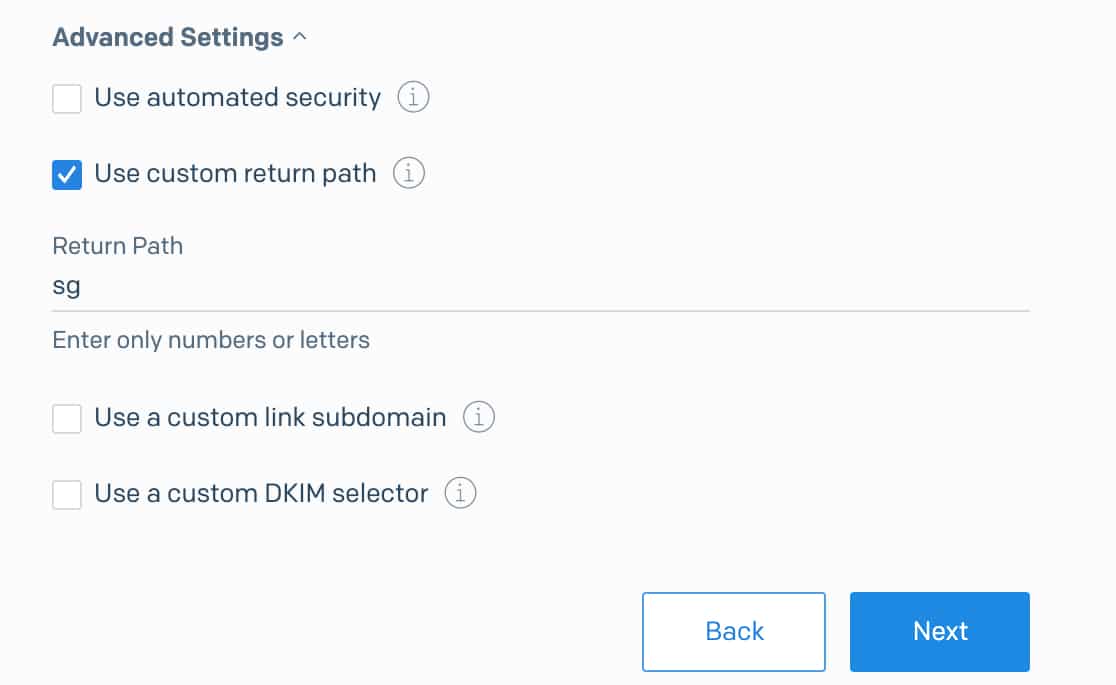
After entering the domain, click on the Advanced Settings dropdown. You’ll need make a couple of adjustments here:
- Uncheck the box labeled Use automated security
- Check the box labeled Use custom return path
- In the Return Path field, add a subdomain (see below for details)
What is a subdomain (Return Path)?
A subdomain replaces the “www” part of your website’s address. For example: subdomain.yourwebsite.com. Subdomains can be used to add separate sections or directories to your website (for example, a site’s blog might be at blog.example.com).
In this case, the subdomain will only be used by SendGrid to send WordPress emails and other emails and will not be visible on your site at all.
Unless you have a specific subdomain in mind, consider using “sg” — this is what we’ll use in our example here.
The subdomain can be anything you’d like, however SendGrid recommends:
– Not using “mail” as many hosting companies will already use this and it could cause conflicts.
– Not including any underscores (_) as this might not be compatible with some DNS providers
So, after you’ve clicked Next…
The following page will display a list of DNS records that you’ll need to add for your site.
After you’ve opened up the DNS settings for your site, you’ll see an option to add a new record.
To make it possible for SendGrid to verify your domain, you’ll need to add 3 records to your site’s DNS.
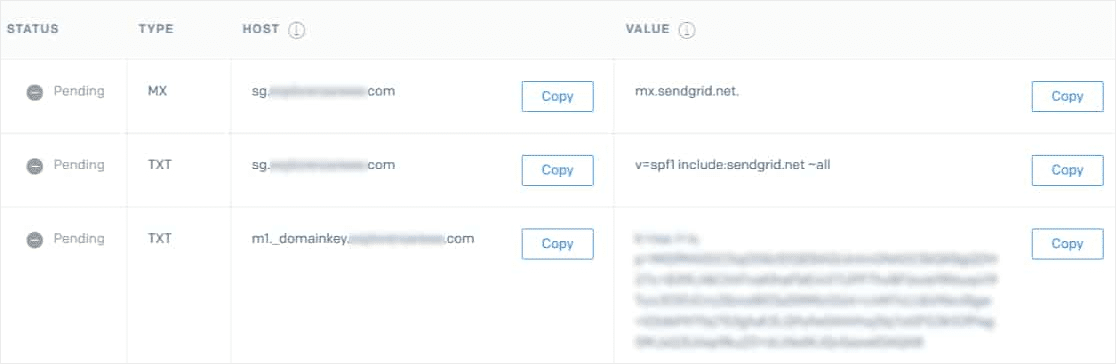
Using GoDaddy? If your DNS is managed by GoDaddy, then you’ll adjust the Hostname shown in SendGrid for WordPress. When entering the Hostname into your GoDaddy DNS, you’ll need to remove your normal domain. For example, instead of entering sg.yourdomain.com for the first TXT record’s Hostname, you’ll only enter sg.
In your site’s DNS settings, you may also see a TTL (Time To Live) field for the record. If you’re given a way to change this, we recommend setting the TTL to one day (or 86,400 seconds, depending on the units your DNS uses).
After adding all 3 DNS records, check the box labeled I have added these records. Then, click the Verify button. DNS changes can take up to 48 hours to be recognized, so you may need to check back on this later.

If the verification worked, you should see a success message.
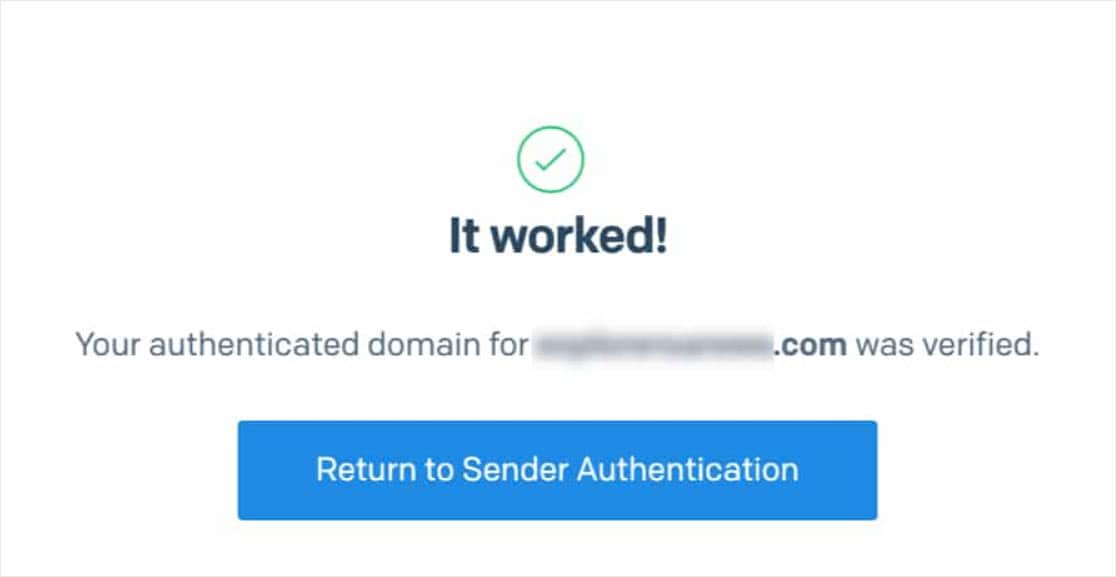
Great job! Now, let’s send a test email to make sure everything is working properly.
Step 5: Send a Test Email
Now that your setup is complete, you’re ready to try sending a test email. First, click on the Email Test tab in WP Mail SMTP.
On this tab, enter any email address that you have access to and click the Send Email button.
Once the SendGrid test email in WordPress has processed, you should see a success message.
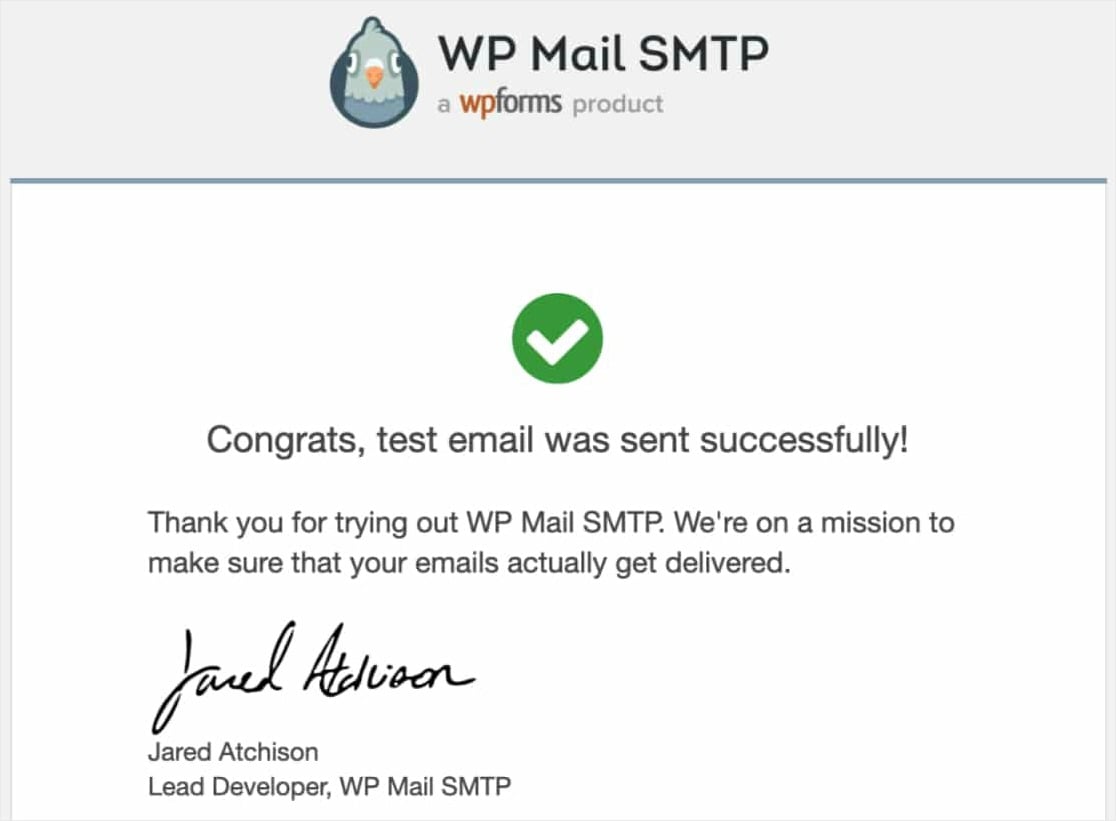
If you check the inbox for that email address, you should also receive this email for this test.
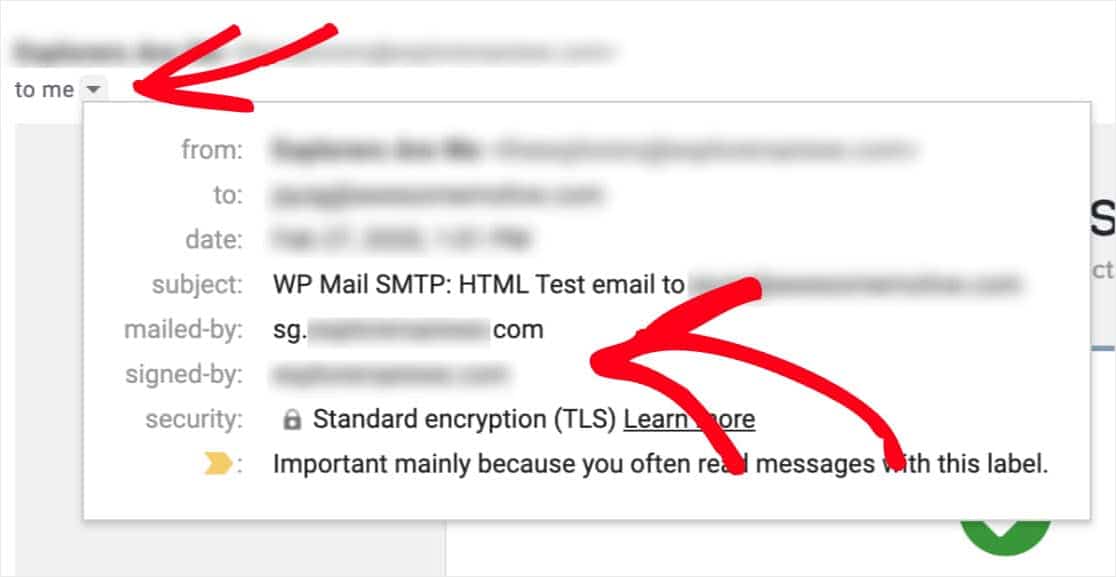
At this stage, it’s also important to check that your domain authentication worked. Each email provider will place this information in a different spot, but we’ll go ahead and share Gmail/G Suite as an example.
Within a Gmail or G Suite email, you’ll need to click the arrow under the sender details. This should open more details about the email header. From here, check that the mailed-by value matches your subdomain. For example, sg.yourdomain.com.
Then, check that the signed-by value matches your regular site domain like yourdomain.com.
If these domains don’t match your subdomain/domain yet, then SendGrid may require a little more time to fully apply your WordPress setup. We recommend waiting at least an hour, then repeating this test process.
And there it is! You should now be able to get WordPress email notifications with SendGrid.
Final Thoughts on SendGrid for WordPress Email
That’s it! You now know how to set up WordPress email notifications with SendGrid using WP Mail SMTP.
Now that your emails are working, you can get started by setting up a simple contact form and start getting form notifications whenever someone fills out your form.
So what are you waiting for? Get started with the most powerful WordPress forms plugin today.
And if you like this article, then please follow us on Facebook and Twitter for more free WordPress tutorials.
The post How to Set Up WordPress Email Notifications with SendGrid + WP Mail SMTP appeared first on WPForms.
source https://wpforms.com/fix-wordpress-email-notifications-with-sendgrid/
