
Do you want to make a Pardot WordPress form on your website? With Salesforce Pardot forms on your site, you can easily capture and manage leads in your favorite marketing platform.
So in this guide, we’ve put together step-by-step directions on exactly how to use Zapier and WPForms to create a custom Pardot form in WordPress.
Click Here to Create a Pardot WordPress Form Now
Here’s a helpful table of contents to help you navigate this tutorial:
- Create a Pardot WordPress Form
- Publish Your Pardot Form on Your Site
- Connect WPForms to Zapier
- Connect Zapier to Pardot
- Test Your Pardot WordPress Integration
What Is Pardot Used For?
Pardot is a SaaS marketing automation platform created by Salesforce, one of the best CRM software in the world. It offers some powerful digital marketing tools to help grow your business including:
- Email automation
- Drip email campaigns
- Lead generation
- Lead management
- Landing page personalization
- Customer behavior tracking
- ….and more
It can be used with or without Salesforce CRM. However, it’s built to work great for those already using Salesforce’s popular Customer Relationship Management software.
So, now that you know the answer to what does Pardot do, let’s take a look at how to make a Pardot WordPress form so you can start using it on your site!
How Do I Create a Pardot Form in WordPress?
Follow these simple steps to build a Pardot WordPress form and integrate it with your website’s contact forms.
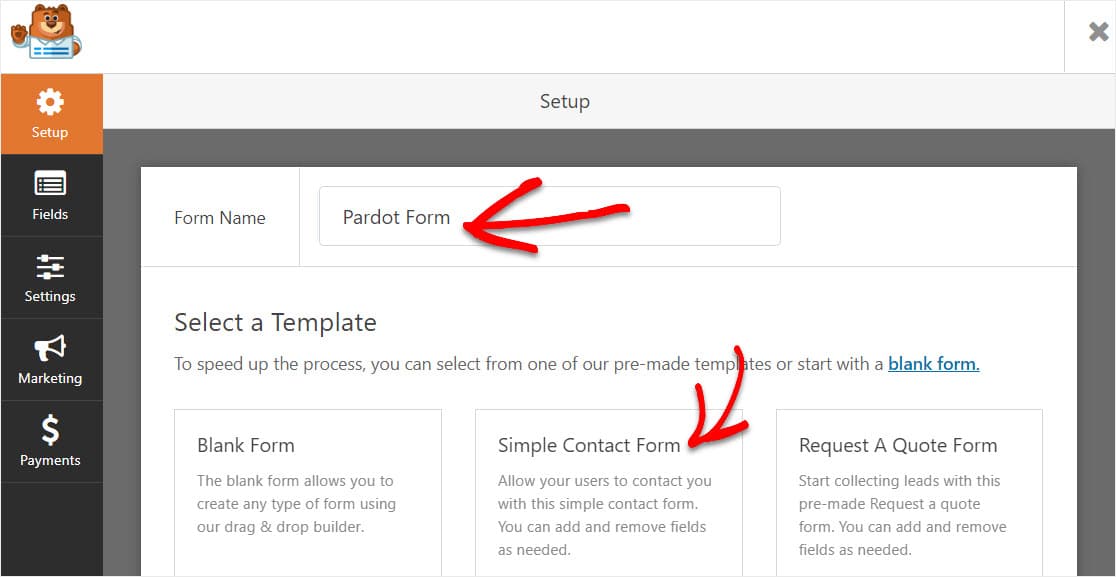
Step 1: Create a Pardot WordPress Form
Pardot is a powerful software that will let you map a lot of fields from your forms. But to keep this tutorial simple, we’ll just be creating a new prospect in Pardot with a few fields in our simple contact form. If you want more fields in your contact forms, feel free to add them — just make sure that you include those during your Zapier + Pardot form set up in Step #4!
So to get started, go ahead and install and activate the WPForms plugin. For step-by-step instructions, check out this post on how to install a WordPress plugin.
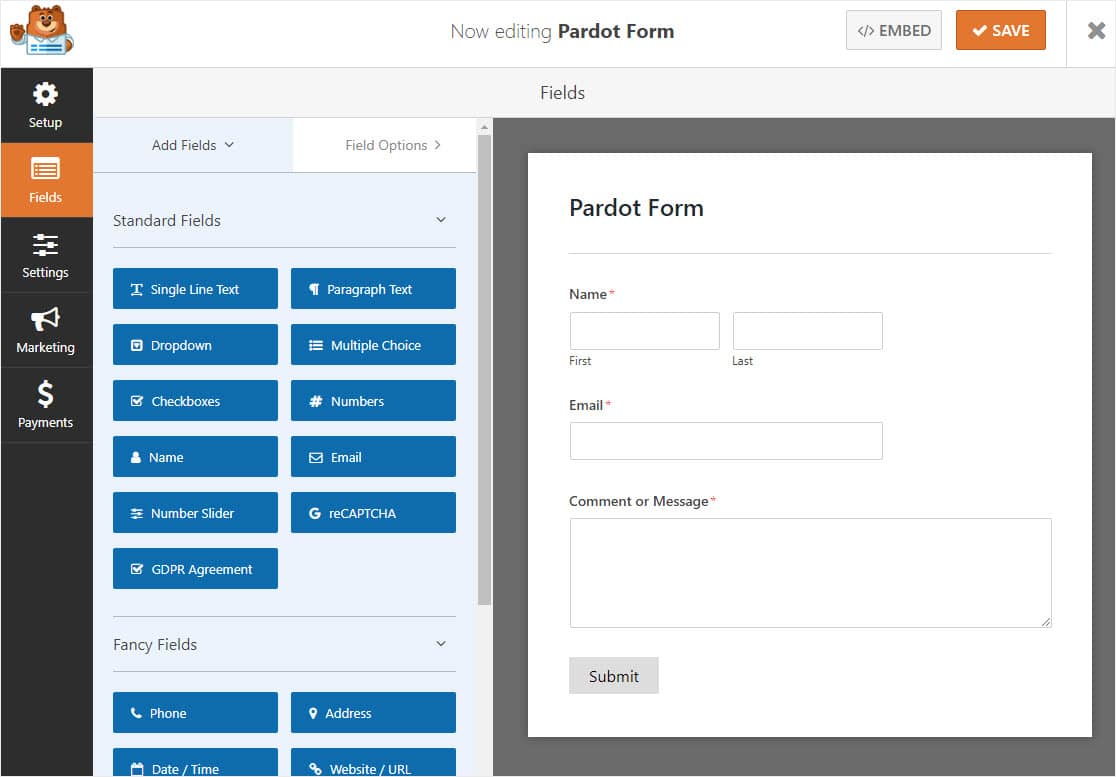
We’re going to build the form first, then we’ll connect it. So once your plugin is activated, head to your WordPress dashboard and click on WPForms » Add New, then click on the Simple Contact Form template.
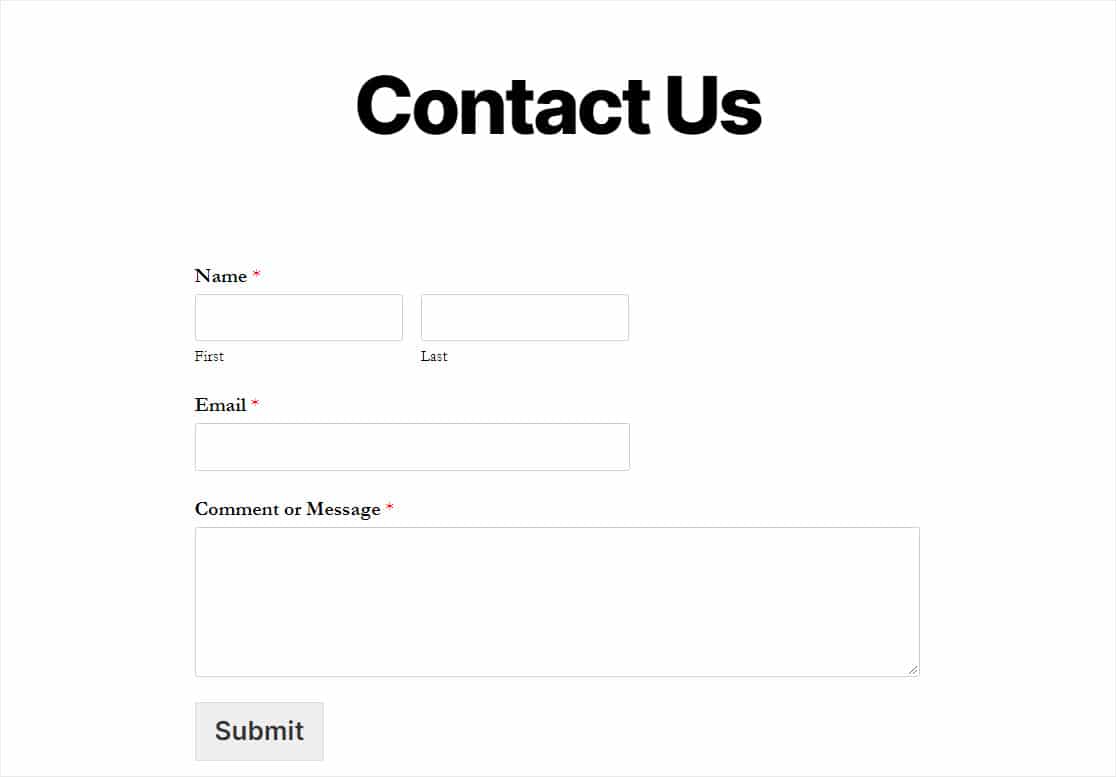
WPForms will create the form and load it for you with these 4 fields:
- First Name
- Last Name
- Comment/Message
It’s easy to add fields and customize them if you’d like. Just drag them from the left hand panel to the right hand panel.
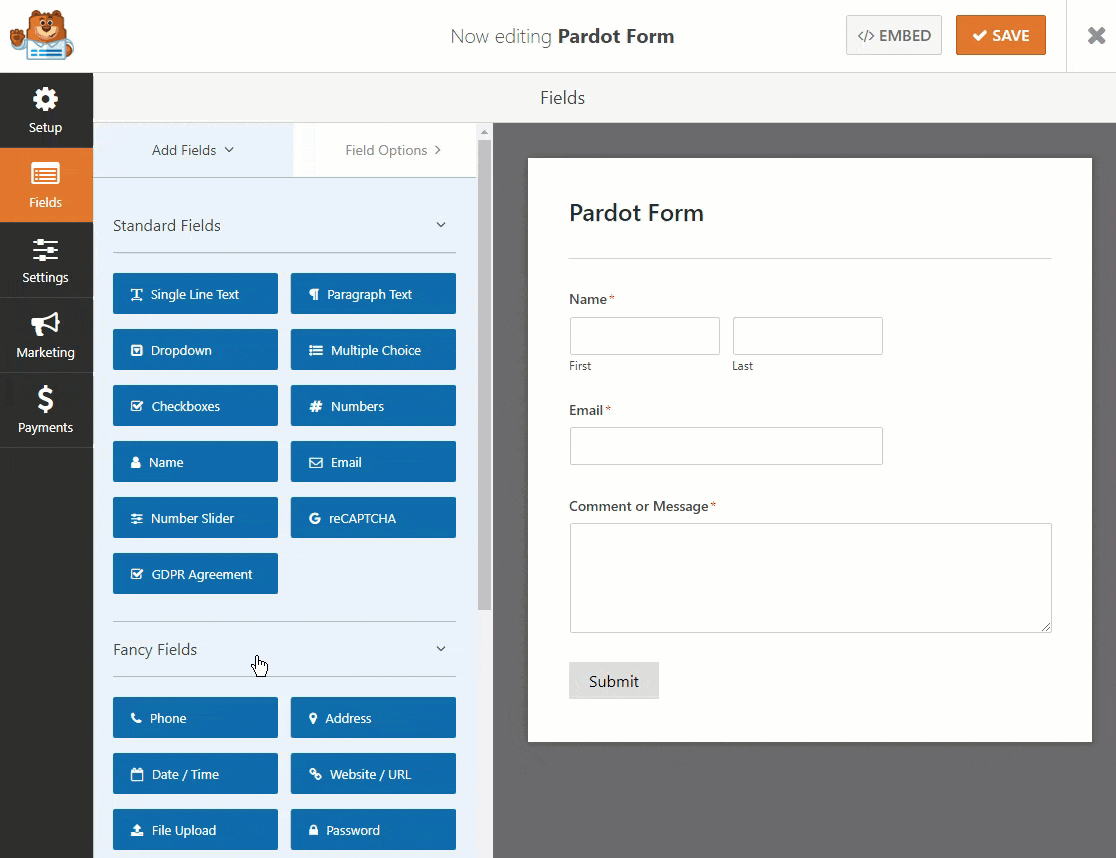
Then, click on the field to make any changes. You can also click on a form field and drag it up or down to rearrange the order on your Pardot WordPress form.
Click Save when you’re happy with your form.
Step 2: Publish Your Pardot Form on Your Site
Now that you’ve built your form, you’ll need to add it to your WordPress website to start collecting leads to send to Pardot. WPForms let you add your forms to lots of locations on your website, including your blog posts, pages, and even sidebar widgets.
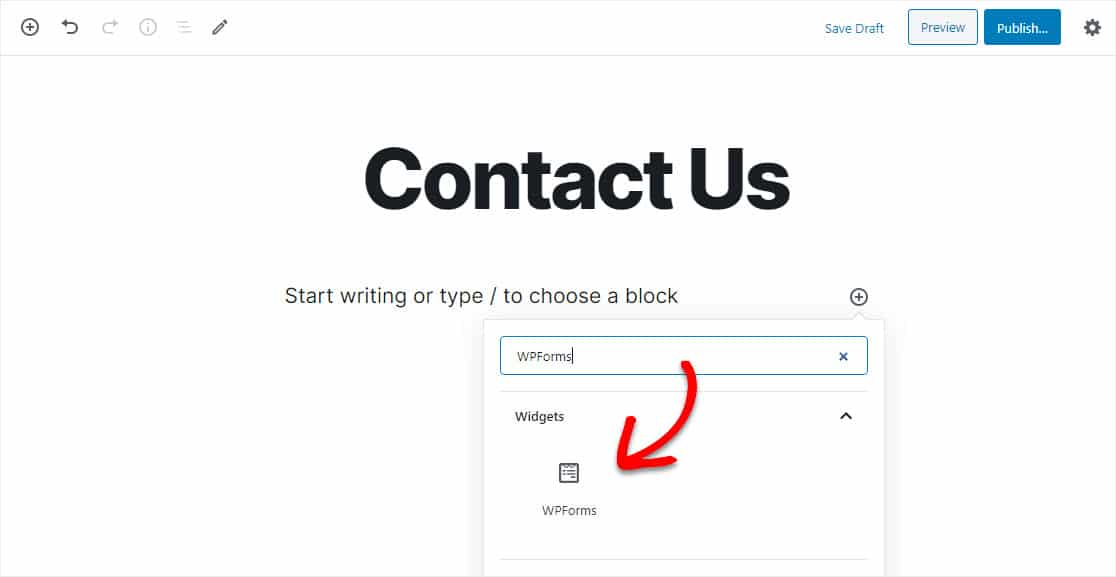
Let’s go ahead and create a Contact Us page in WordPress. You can call yours whatever you’d like. This will simply be the page where your Pardot WordPress form will live.
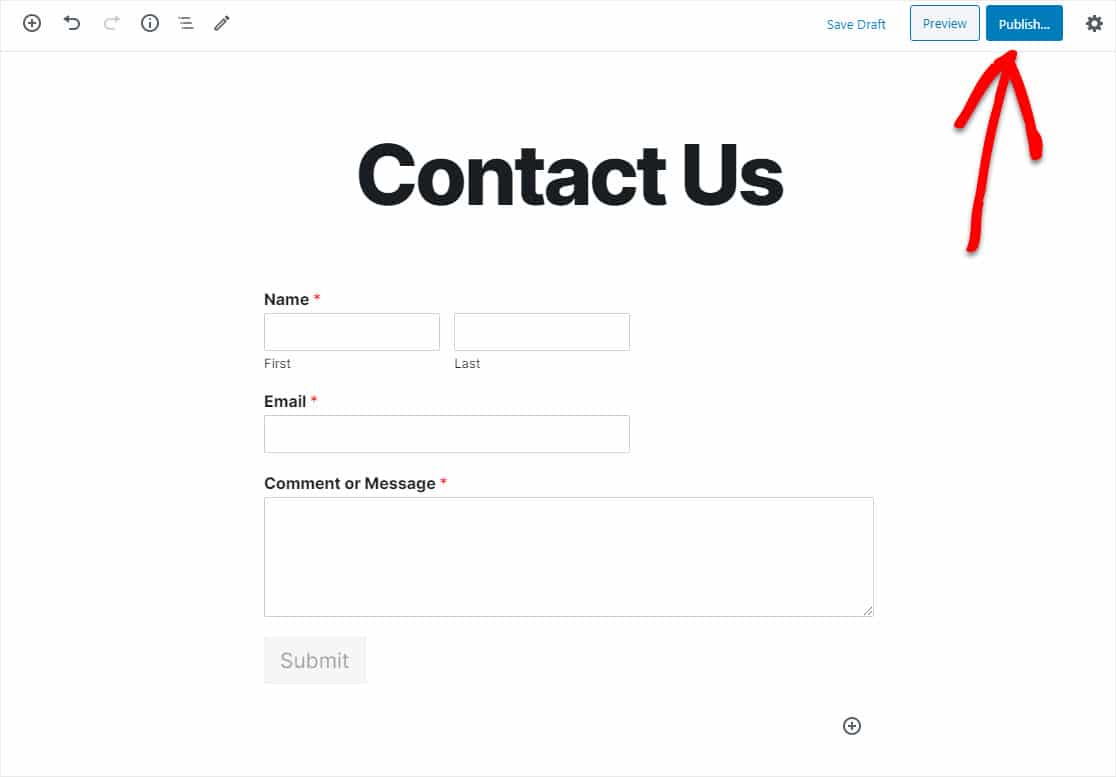
On this page, first click the plus icon to add a block. Next, search for WPForms and click on the WPForms widget that appears.
Now, just pick your Pardot form from the dropdown to add it to the page.

The form will show up, and you can check to make sure you like the way it looks. Now click Publish or Update in the top right corner to publish the form on your website.
Make sure to preview the page so you can check out exactly how your Pardot WordPress form looks!
Also, you’ll want to send a test entry through the form before moving on to the next step. Go ahead and fill out the form and submit it. Use a unique email address for this, so there’s so risk of another lead being overwritten.
Step 3: Connect WPForms to Zapier
Let’s connect WPForms and Pardot through Zapier now. When Zapier senses a trigger (a new form submission in WPForms) we’ll set it up to automatically create a record in Pardot.
First, enable the Zapier addon if you haven’t already. Check out our tutorial on how to install and use the Zapier addon in WPForms.
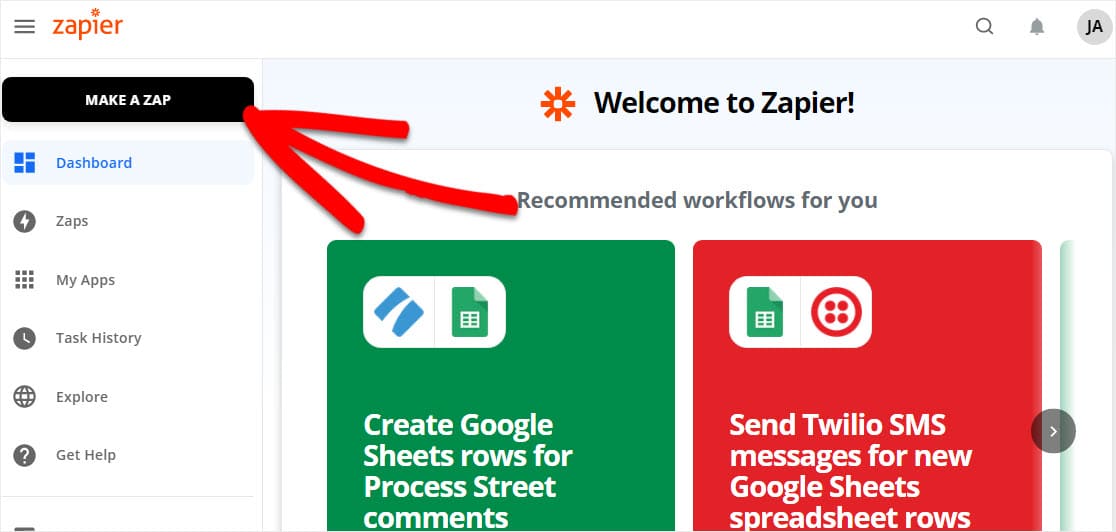
Next, log in to your Zapier account and click on Make a Zap found on the top left.
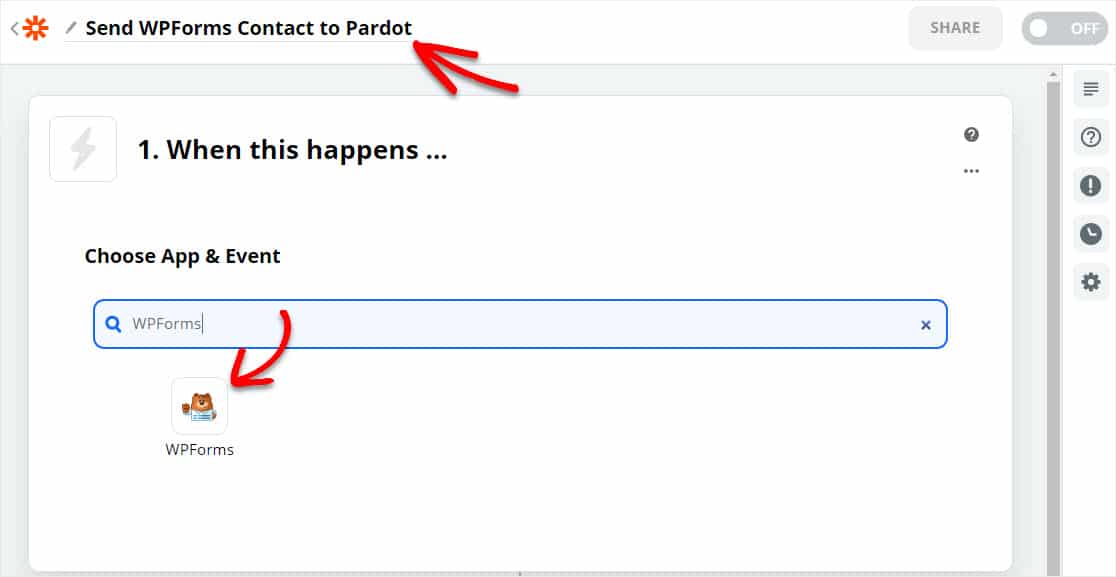
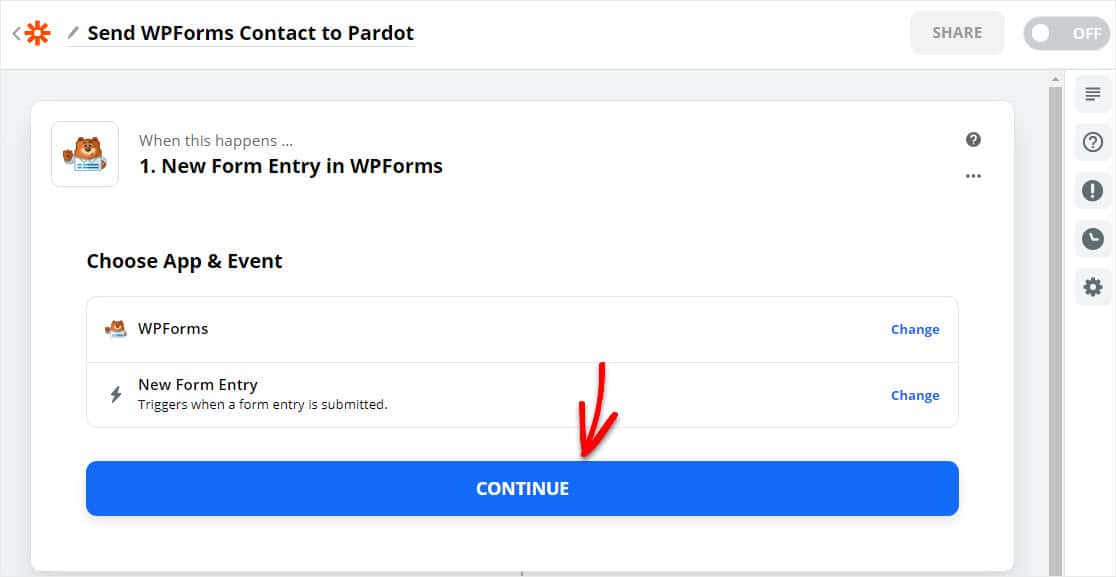
Now, name your form in the top left corner and search for WPForms under Choose App and Event and select it.
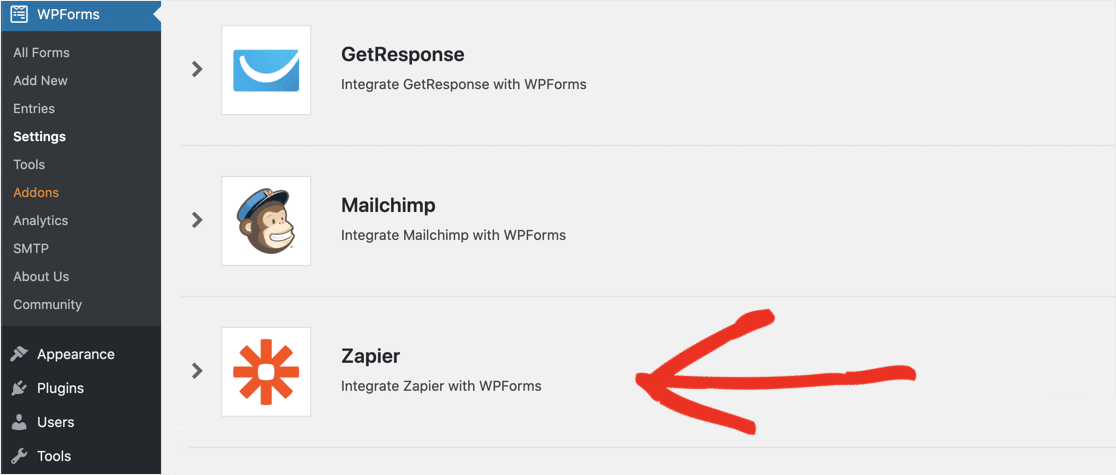
Next, Zapier will ask for your WPForms key. So head back to your WordPress site. In the dashboard, go to WPForms » Settings » Integrations.
In the list, click Zapier to find your key.
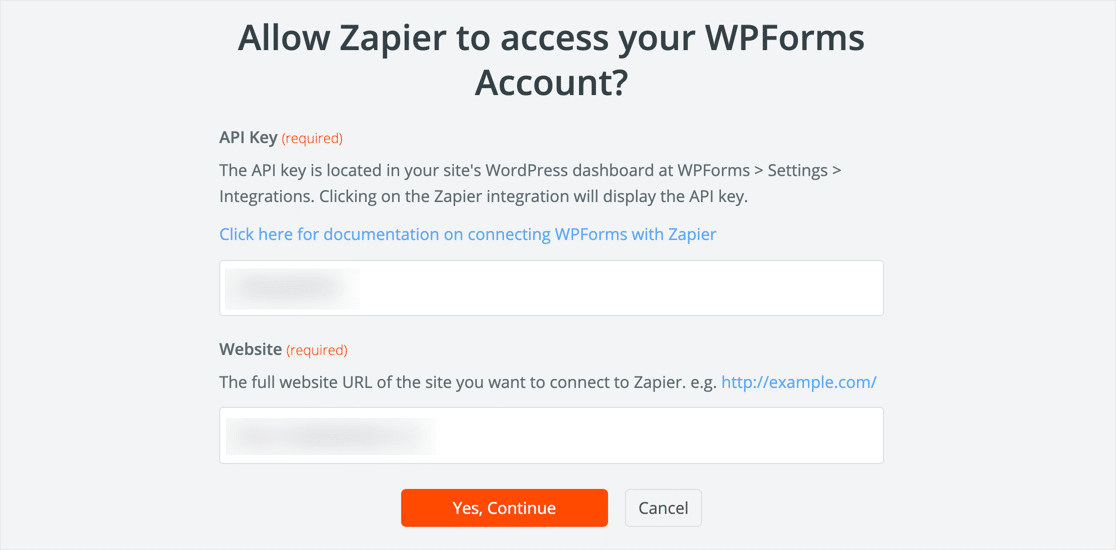
From here, copy and paste your key into Zapier. Then, enter your domain name in the next box. Now go ahead and click on Yes, Continue.
Once Zapier has a connection with your site and the trigger is a New Form Entry (or whatever you’d like your trigger to be), then you can click on Continue.
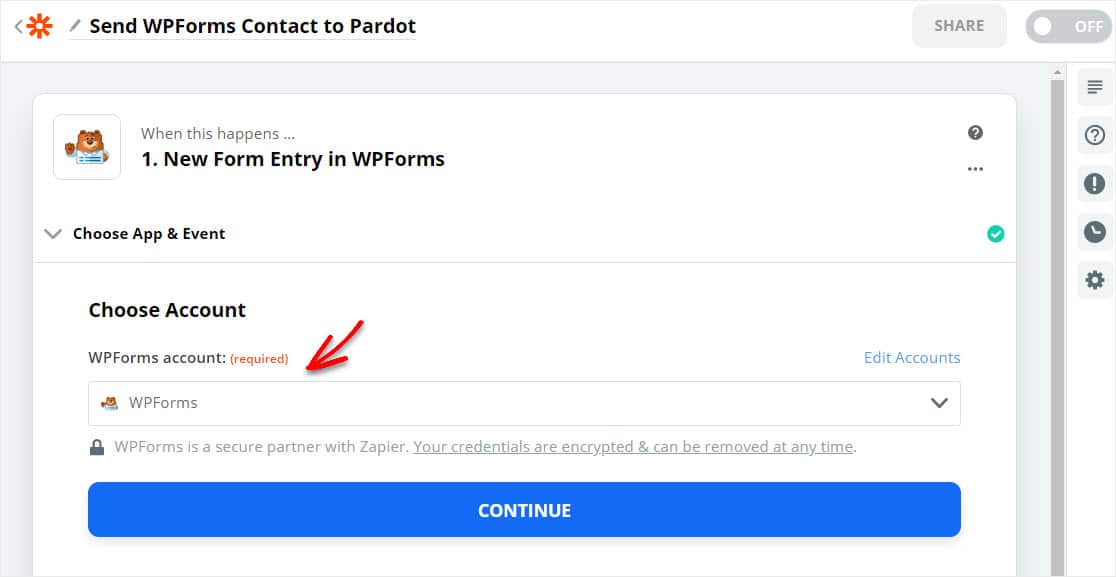
Now, confirm your account and click continue if you see this screen.
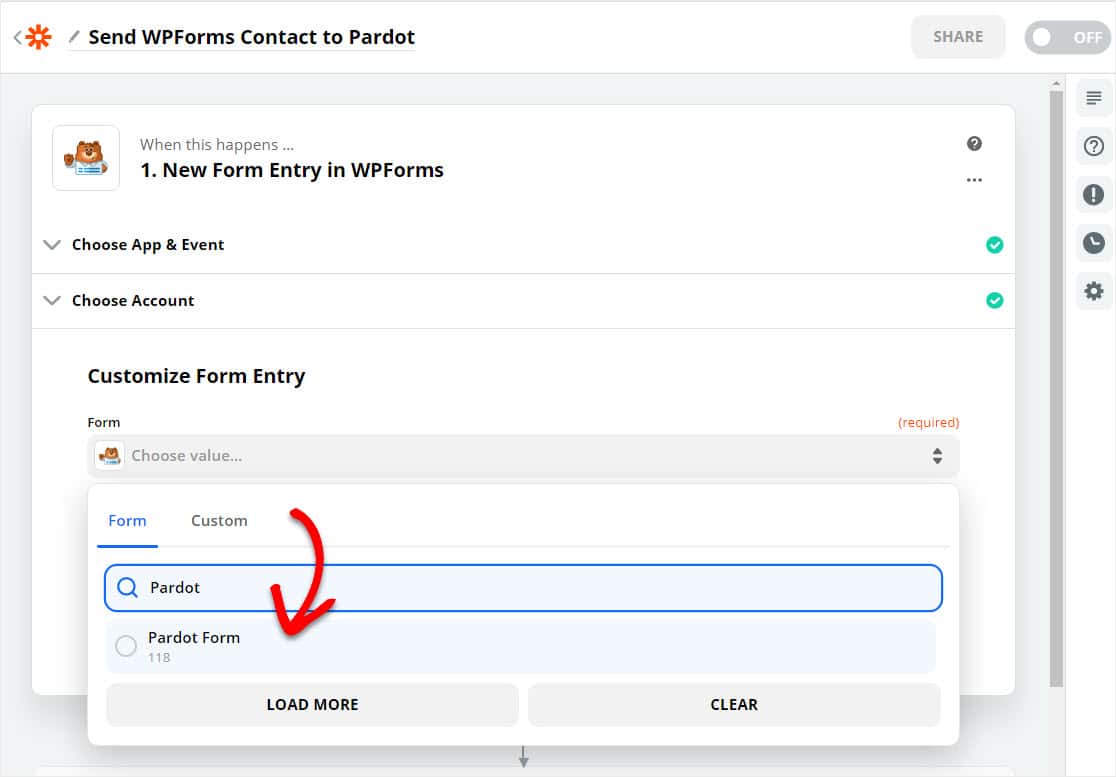
In the next step of creating your WordPress Pardot form, you’ll need to select the form you created in step 1 from the ‘Form’ list and click Continue.
Next, click on the Test Trigger button.
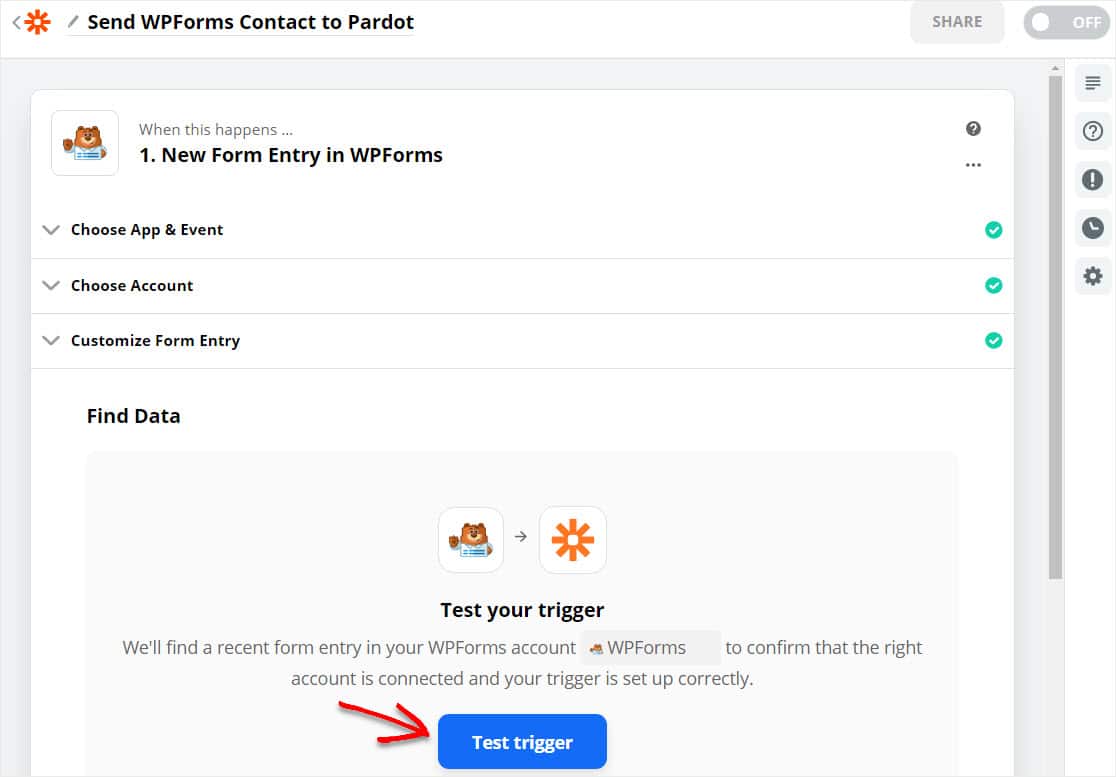
If you’ve already entered a test entry into the form, and everything is set up correctly, you’ll see a successful test confirmation screen next.
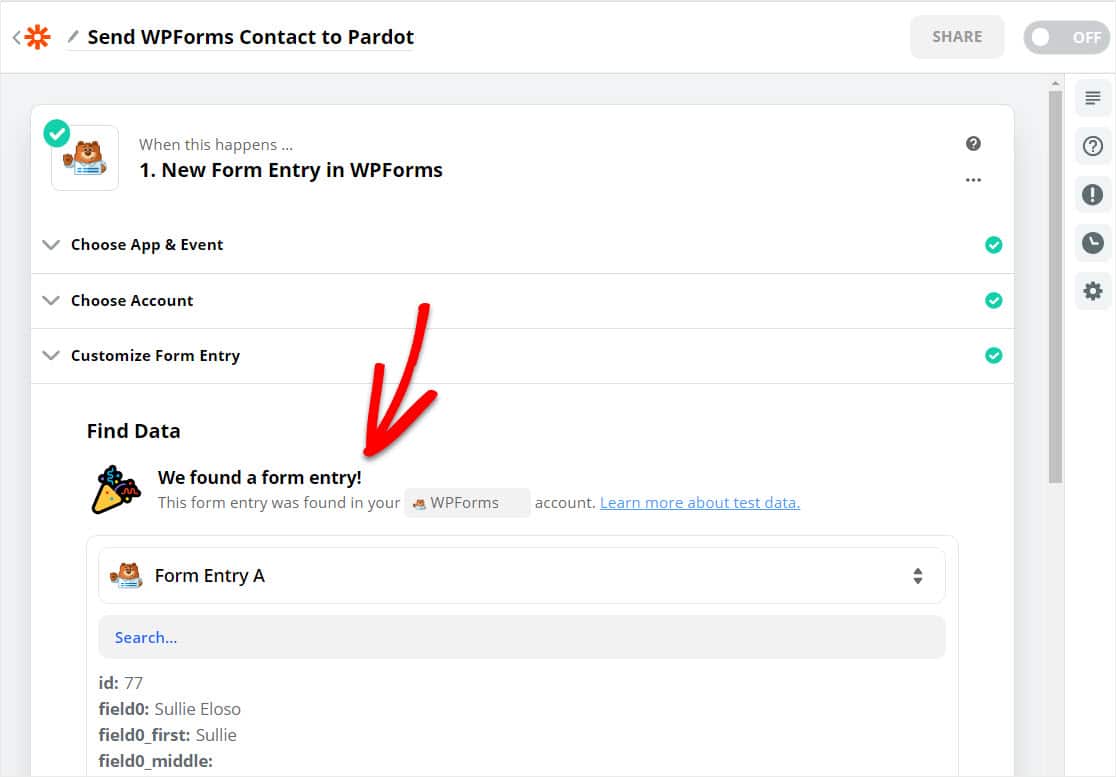
Great job! Click Continue and you’re now ready to move on to securely connect Zapier to Pardot.
Step 4: Connect Zapier to Pardot
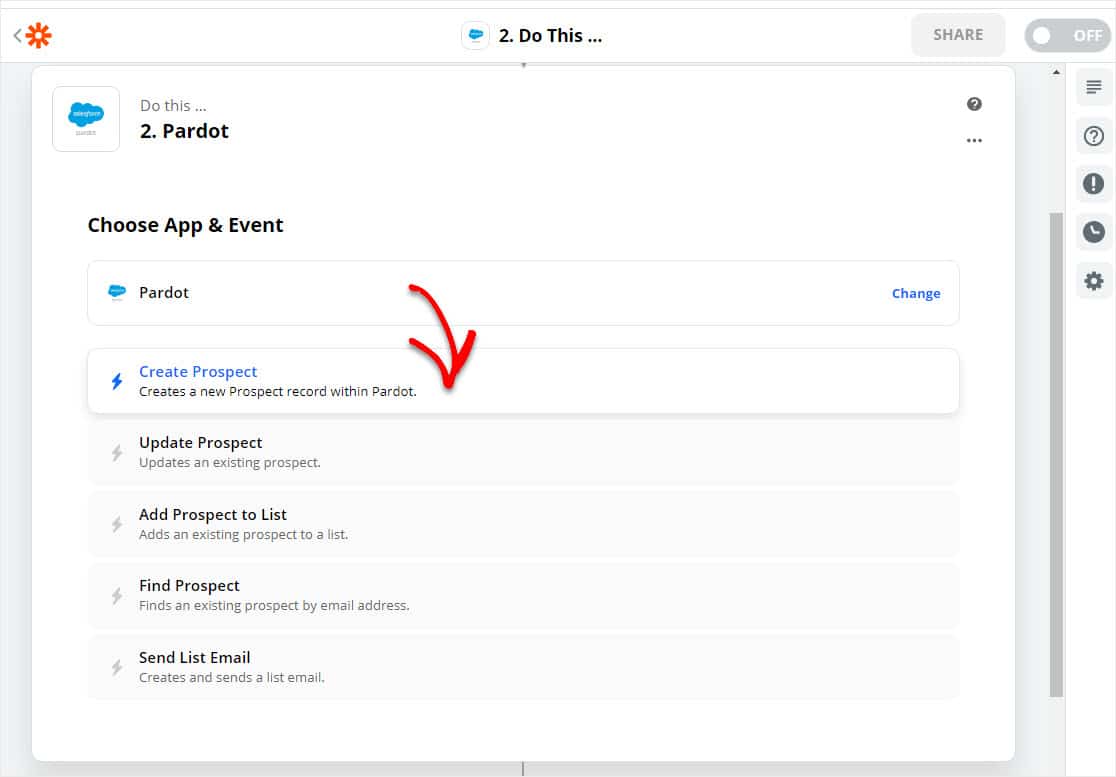
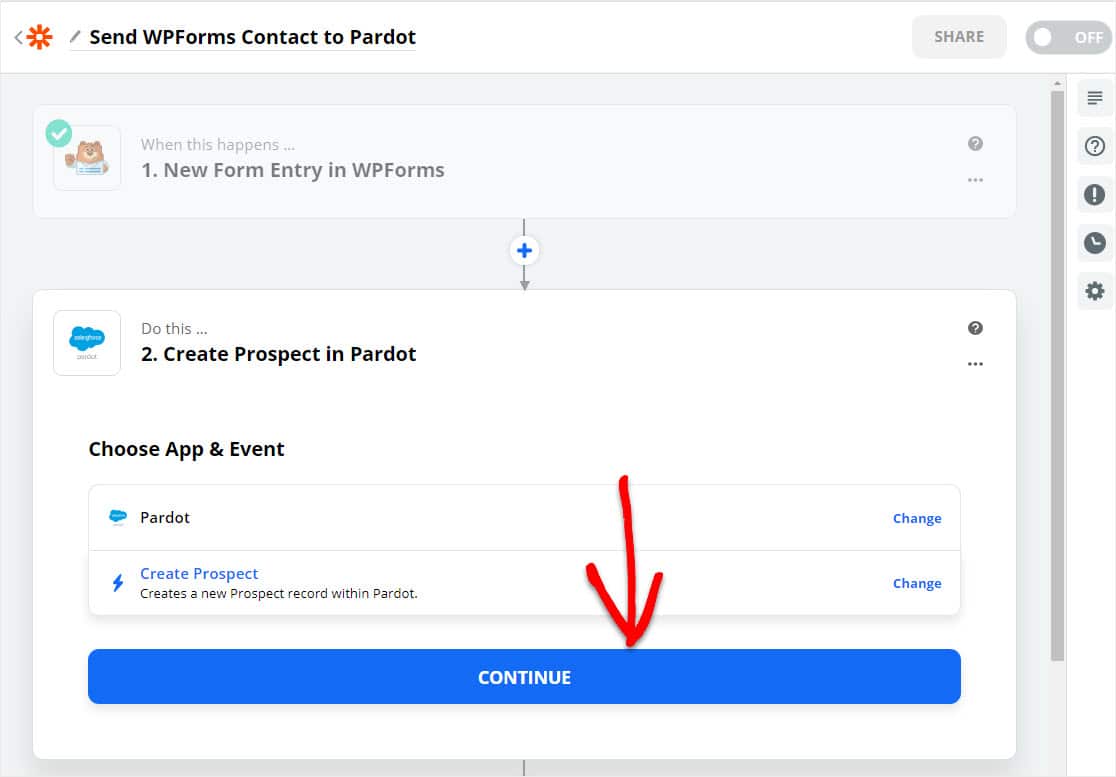
Under Do This, search for Pardot and click on it. Then, select Create Prospect.
Next, click on Continue to move forward with creating your Pardot WordPress form.
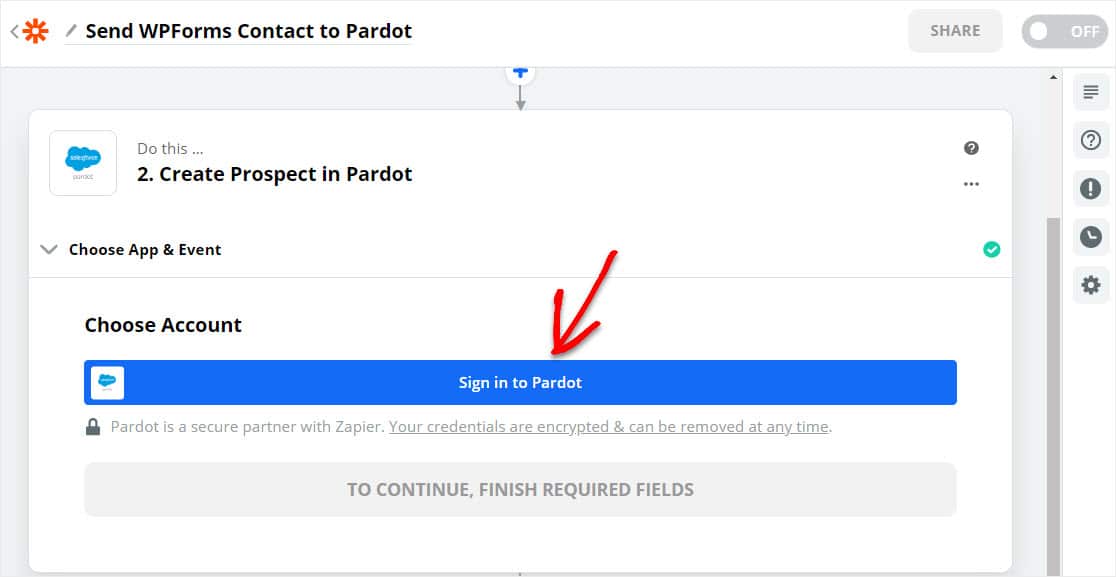
On the next page, Zapier will ask you to sign in to Pardot. Click on the blue button to access your Pardot account.
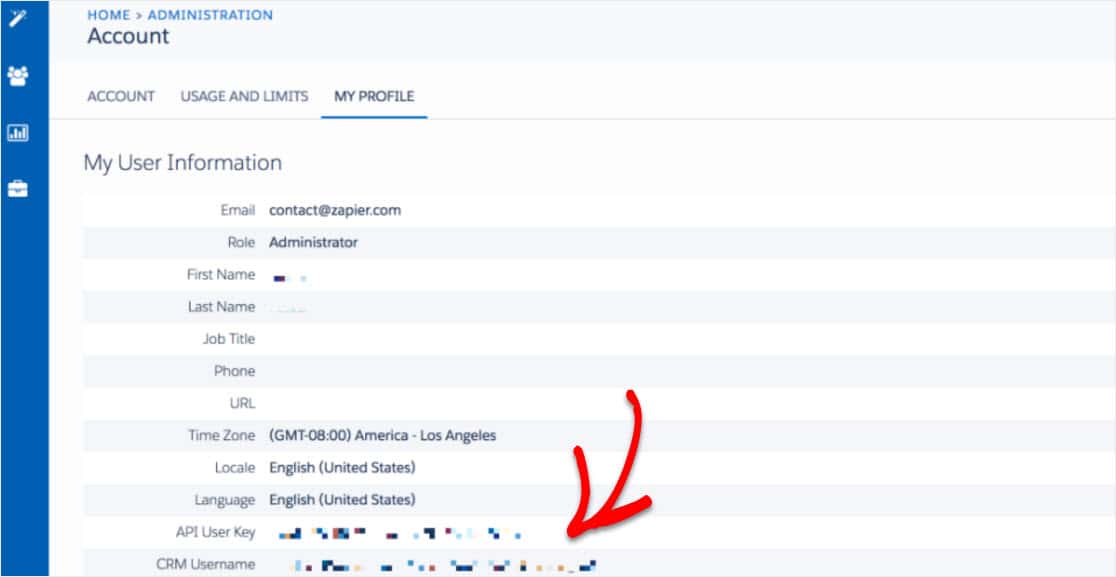
A screen will appear asking you for your Pardot credentials. To find your API Key in your Pardot account, head to the Pardot settings page and select the API User Key
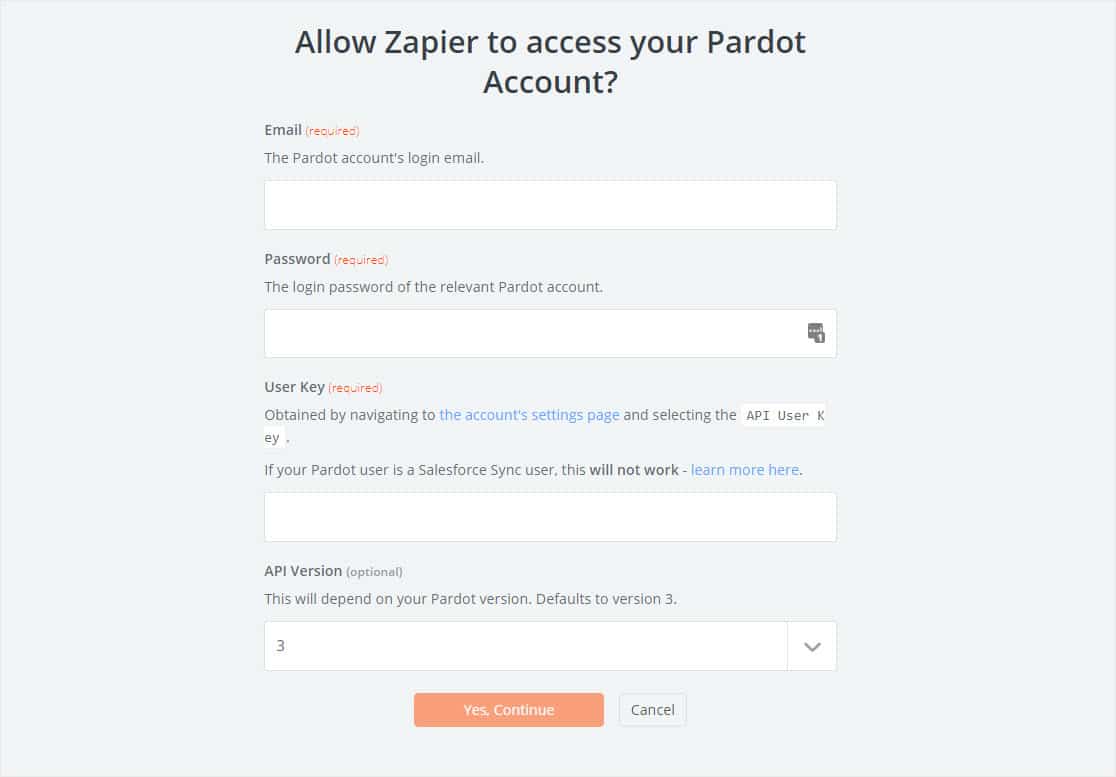
Once you’ve located your Pardot API Key, return to Zapier page to fill it out and click on Yes, Continue.
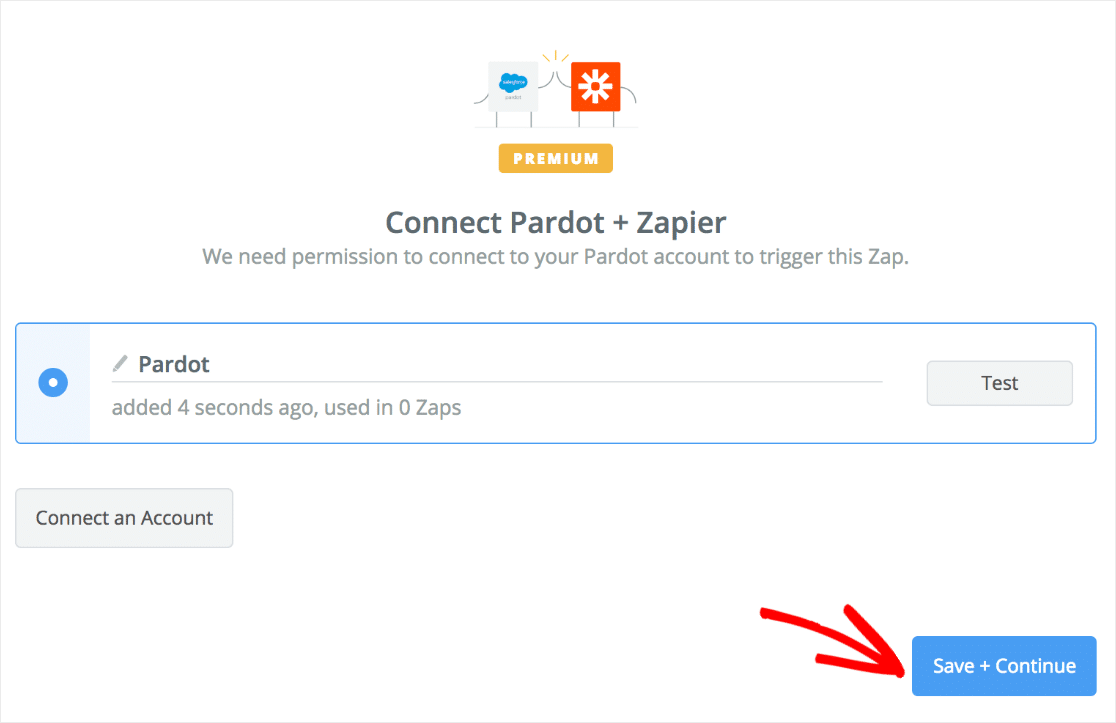
If everything was set up correctly, your Pardot account will be connected to your Zapier account! From here, set up your fields and customize the form in Pardot exactly the way you want it to map from the Pardot WordPress form on your site.
Next, click the Save + Continue button to move on.
Great job — let’s make sure everything is working.
Step 5: Test Your Pardot WordPress Integration
Now, head back to your published Pardot form that you already embedded on a WordPress page, post, or sidebar and enter another test entry.
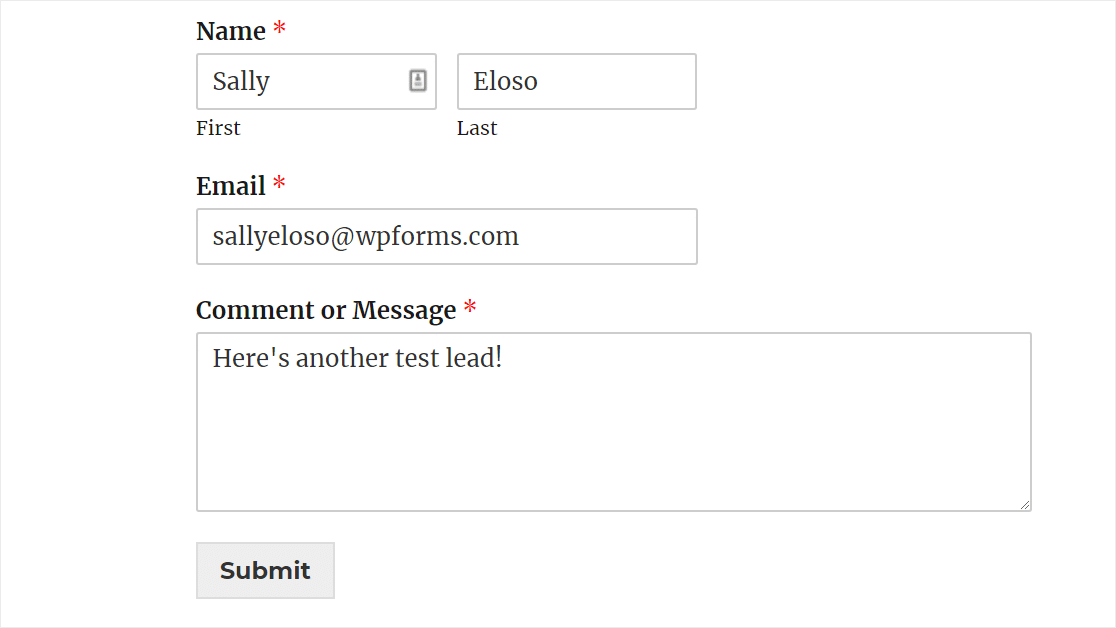
Now head over to Pardot. If everything is set up correctly, you should be able to see your lead in Pardot! Congrats.
Click Here to Create a Pardot WordPress Form Now
Final Thoughts
And there it is! You now know how to create a Pardot form in WordPress.
Need some inspiration? Check out this incredible story about how one of our customers used WPForms to pivot during COVID.
So what are you waiting for? Get started with the most powerful WordPress forms plugin today. WPForms Pro includes a free Pardot integration with Zapier and offers a 14-day money-back guarantee.
And if you enjoyed this post, follow us on Facebook and Twitter for more free WordPress tutorials.
The post How to Create a Custom Pardot Form in WordPress (Step by Step) appeared first on WPForms.
source https://wpforms.com/how-to-create-a-custom-pardot-form-in-wordpress/
