Do you want to capture leads from WordPress and save them to Zoho CRM? If you capture leads from your website, you can save time by building a form for WordPress to automatically add your leads to Zoho CRM.
In this article, we’ll show you how to make Zoho forms in WordPress.
Create a Zoho WordPress Form Now
What Is Zoho CRM?
Zoho CRM is a customer relationship management (CRM) application that runs in your browser. It lets you capture and manage leads, track them through your sales pipeline, and convert them into paying customers.
In Zoho CRM you can:
- Manage leads, contacts, and accounts
- Track deals
- Make to-do lists
- Create workflows
- Customize the layout of different modules.
Zoho CRM is free for up to 3 users. If you want to use Zapier with Zoho CRM, you’ll need the Standard plan or higher.
Now you know more what Zoho CRM can do, let’s start to integrate it with WordPress.
How to Make Custom Zoho CRM Forms in WordPress
We’re going to use the WPForms plugin to quickly build a Zoho form in WordPress.
WPForms lets you build forms for any purpose and embed them on your WordPress site without touching any code. This makes it easy to capture leads from your contact form.
WPForms also has some handy features like:
- Form Abandonment – capture leads who filled out their details but didn’t submit the form
- Offline Mode – capture leads on a device without an internet connection – for example, at an outdoor event
- File upload fields – let leads upload files that are larger than Zoho’s 20MB limit.
Let’s start off with an easy example. We can make a WordPress contact form that sends information to Zoho CRM.
Here’s a table of contents so you can quickly skip to the right place:
- Install the WPForms Plugin
- Create Your Zoho Form in WordPress
- Publish Your Zoho CRM Form on Your Website
- Connect WPForms to Zapier
- Connect Zapier to Zoho CRM
- Test Your WordPress Zoho Integration
Step 1: Install the WPForms Plugin
Start by installing and activating the WPForms plugin.
If you need help with this step, see this guide on how to install a plugin in WordPress.
Once you have WPForms installed, it’s time to move ahead and create the Zoho CRM form.
Step 2: Create Your Zoho Form in WordPress
WPForms comes with form templates to help you to get started.
Go ahead and create a new form by clicking WPForms » Add New in your WordPress dashboard. Let’s use the Simple Contact Form template and customize it with extra fields.
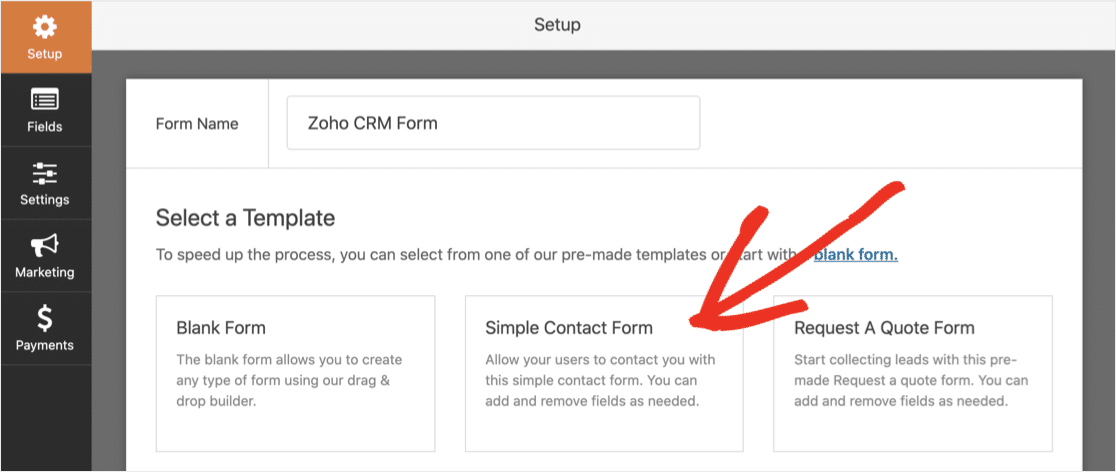
The contact form template has 4 fields by default:
- First Name
- Last Name
- Email address
- Message
You can add more fields to match Zoho CRM.
By default, the Company field is mandatory in Zoho CRM. So we’ll need to add that to our example form.
To do this, drag a Single Line Text field from the left-hand pane to the right-hand pane. Don’t forget to make it a Required field by clicking the the checkbox:
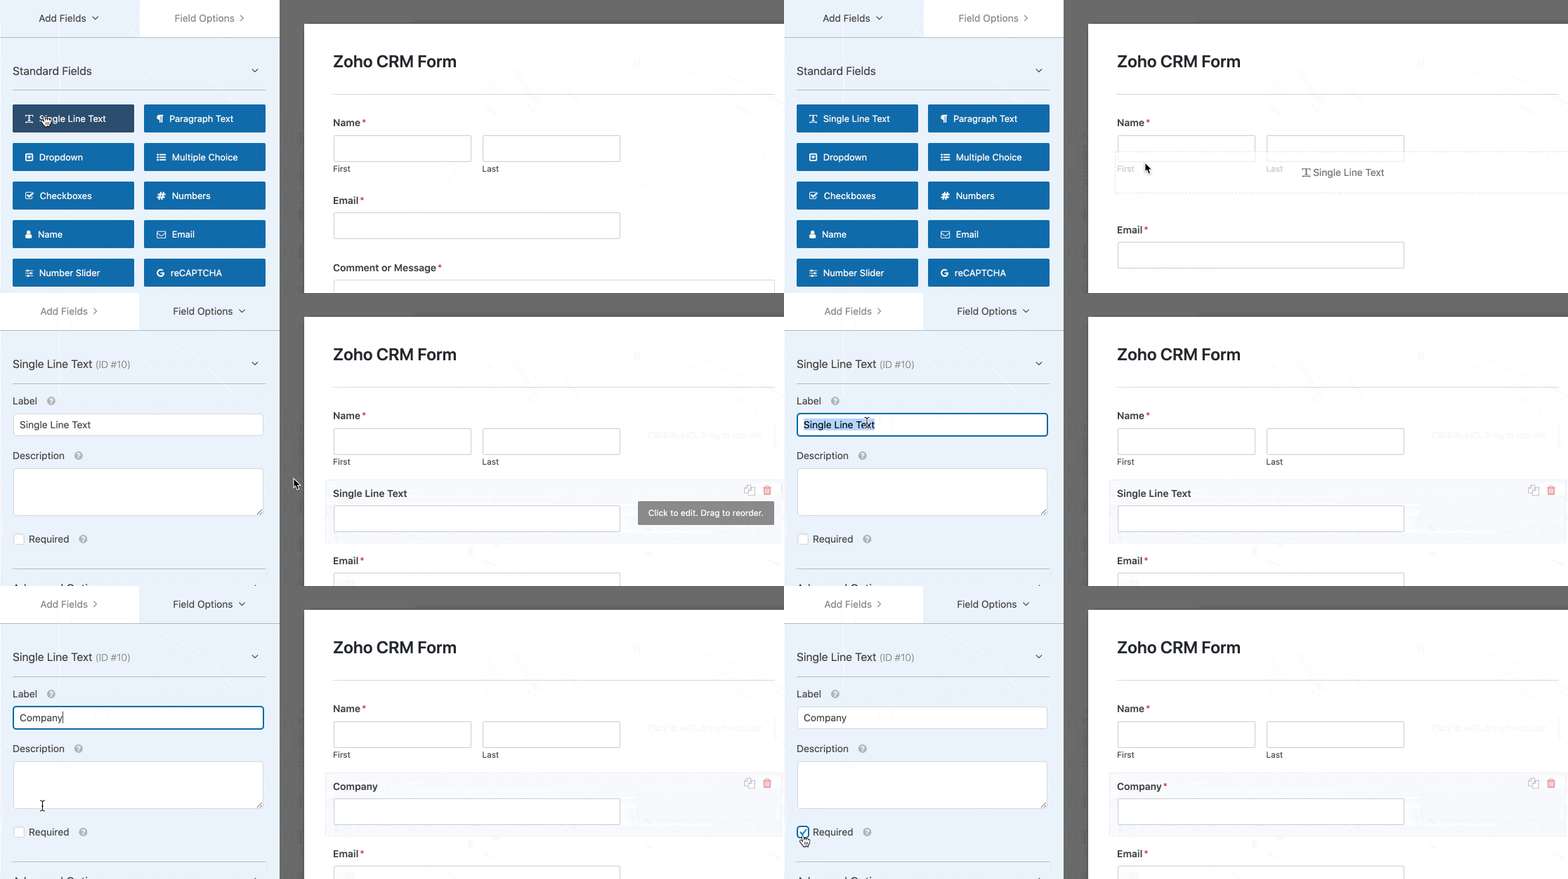
If you aren’t sure which fields are mandatory in your Zoho CRM, check Customization » Modules and Fields in the Zoho CRM Setup screen.
Go ahead and add more fields to match the data you want to capture in Zoho CRM. You can also use the form builder to:
- Change the order of the fields by dragging them up or down
- Rename your fields
- Remove fields you don’t need.
If you need help, check out this guide on creating your first form in WPForms.
Click the Save button when you’re done.
Step 3: Publish Your Zoho CRM Form on Your Website
It’s really easy to publish a form in WPForms. You can add your form to a page, a post, or even place it in the sidebar.
In this example, we’ll create a new Contact Us page.
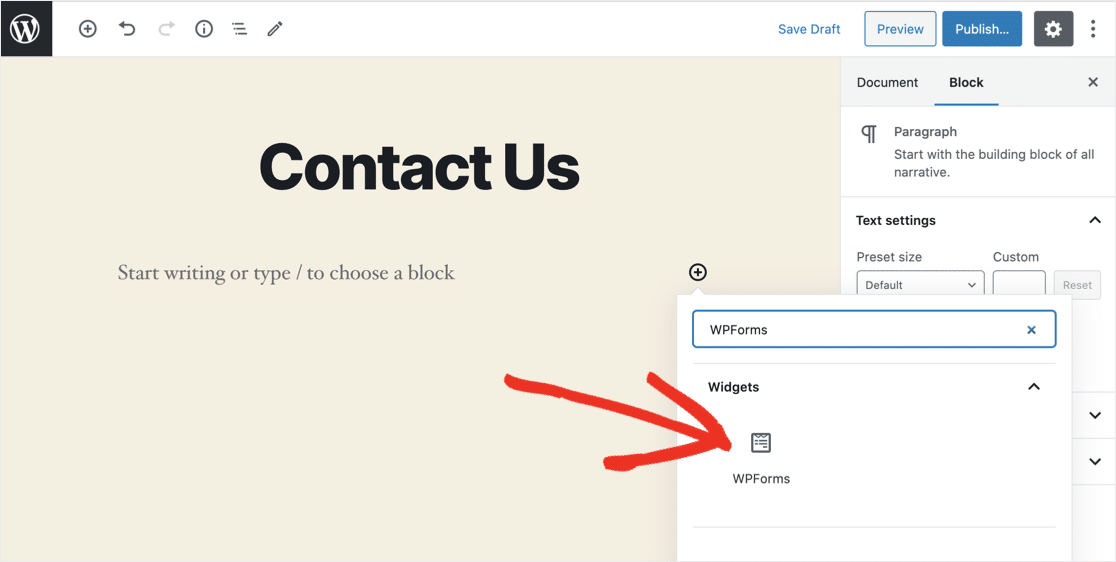
In the WordPress dashboard, head to Pages » Add New. Then, in the block editor, click the plus icon and search for WPForms.
Click the widget to add it to your page.
In the dropdown, select the form you created in Step 2.
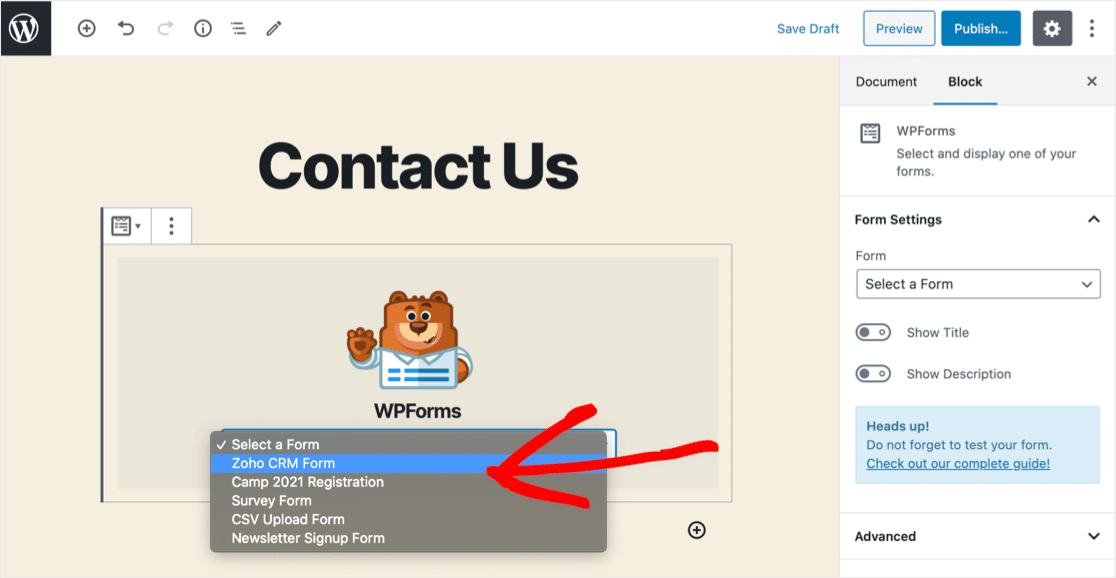
Now click the blue Publish or Update button.
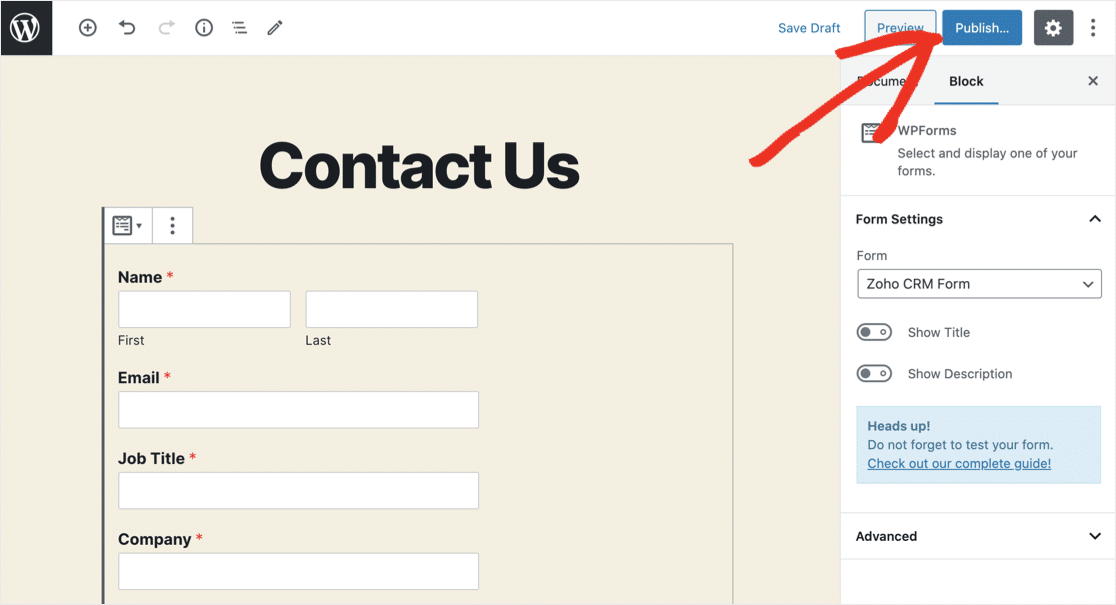
That’s it! Your form is live and ready to capture leads.
One more thing: you’ll need to send a test entry through the form before moving on to the next step. Go ahead and fill out the form and submit it.
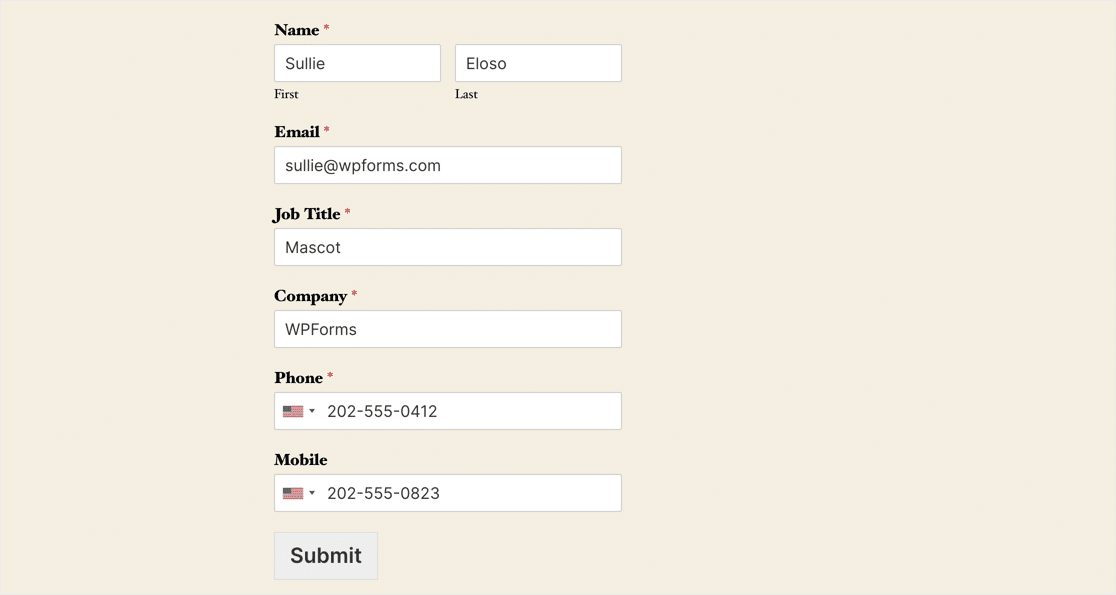
We recommend that you use a unique email address in your test submission. That way, there’s no risk of overwriting a real lead.
Step 4: Connect WPForms to Zapier
Now you’ll need to log in to your Zapier account.
At the top-left, click Make a Zap.
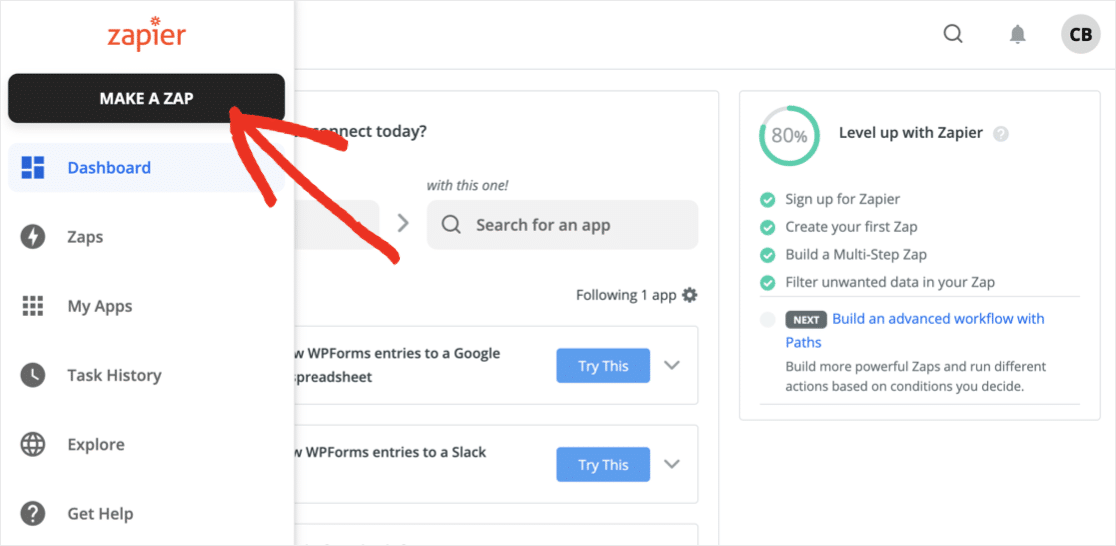
We’re going to use the Zoho WordPress form to trigger the zap.
Search for WPForms and select it. Then click Continue.
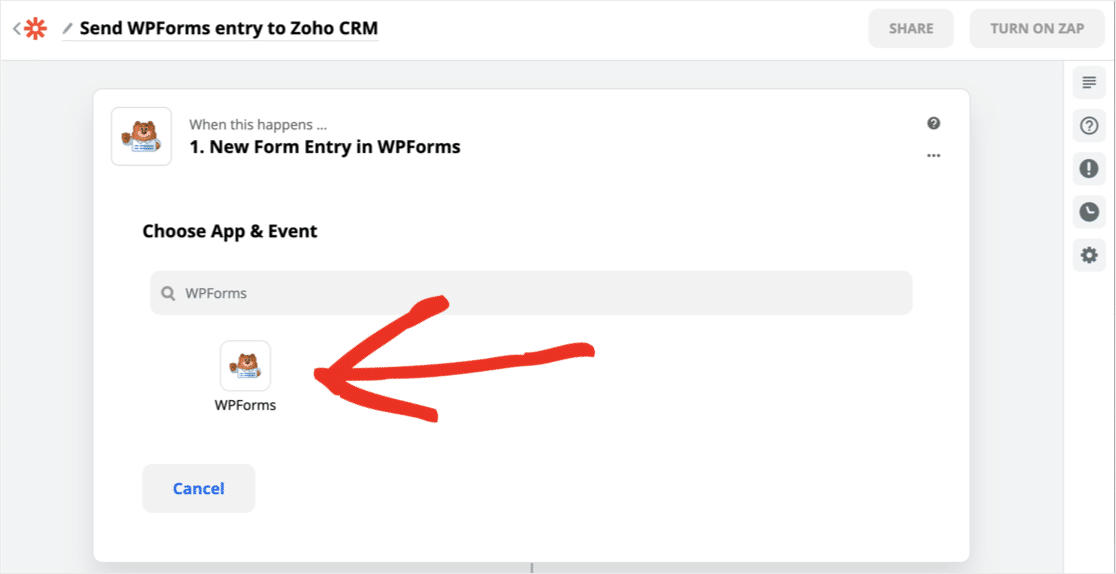
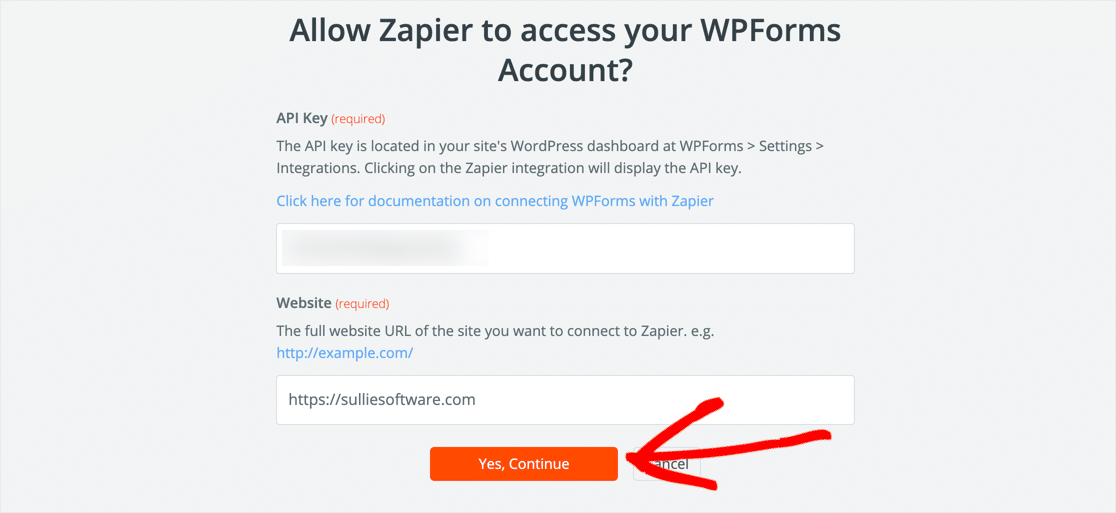
Zapier will open a new window to connect to WPForms. You’ll need to grab your API key from WordPress for this.
You’ll find the key under WPForms » Settings » Integrations. Scroll down and click on Zapier to reveal your key.

Head back to the Zapier connection window.
Copy and paste your API key into the authorization screen and type your URL below it. Then click Yes, Continue.
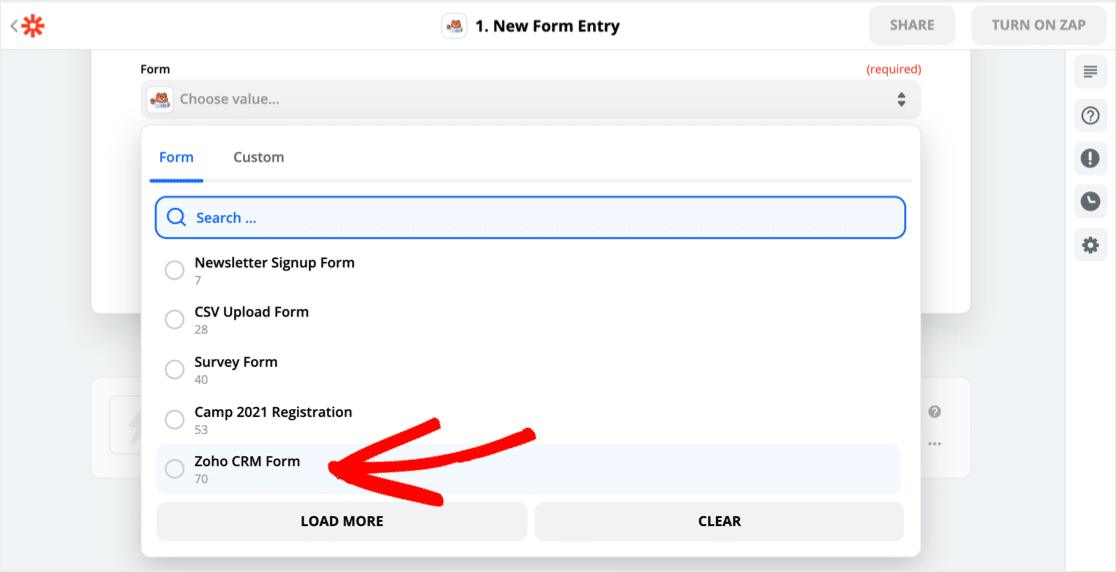
From the dropdown, choose the form you created in Step 2. Then click Continue.
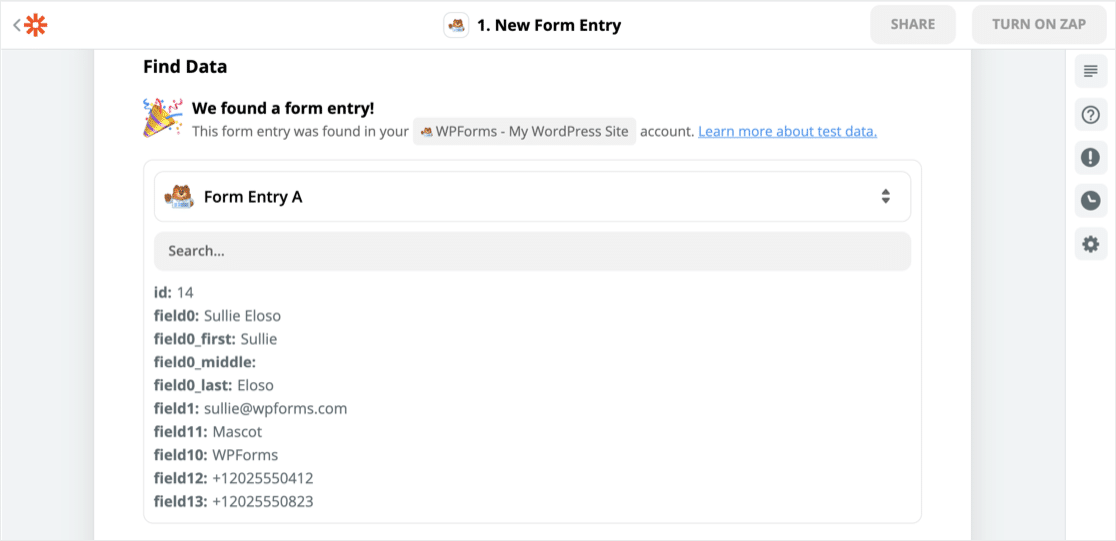
When you click Test Trigger, Zapier will connect to WPForms and pull in the test entry that we created earlier.
Great! Now let’s connect Zapier to Zoho CRM.
Step 5: Connect Zapier to Zoho CRM
To start, search for Zoho CRM and click the icon.
Under Choose App and Event, select the action that you want from the list. Leads are a type of Module, so we’re going to select Create Module Entry. Then click Continue.
Now you’ll need to give Zapier secure access to your Zoho CRM account. Be sure to select the correct Zoho domain when Zapier asks. You can find your domain at the start of the URL here:
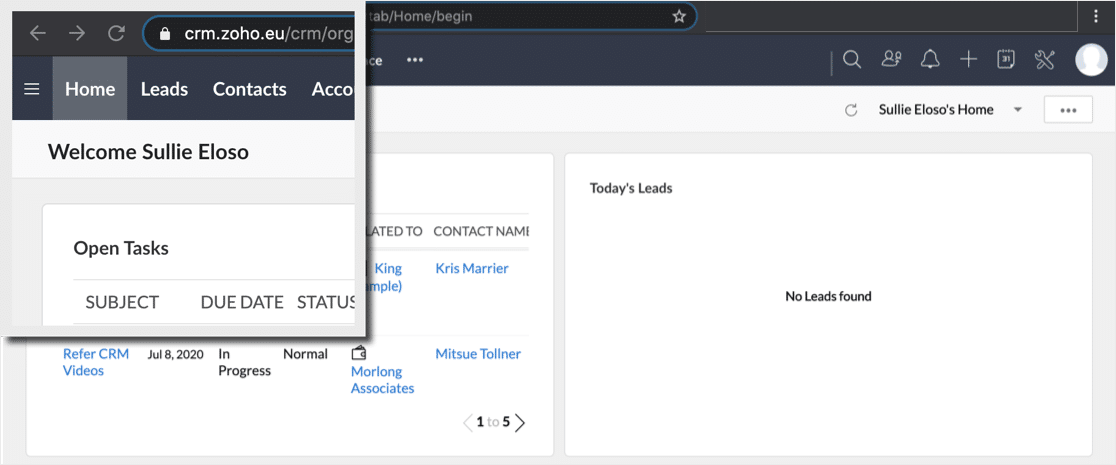
If you pick the wrong domain, you may see an Oauth error.
Once you’ve connected Zoho CRM, Zapier will load the Customize Module Entry form. You can use this form to decide what Zoho CRM will do when a new entry is found.
Set up the first 3 fields like this:
- Module – choose Leads
- Layout – select the Layout you want to use
- Trigger – decide which workflow you want to trigger when the Lead is received into Zoho CRM.
Now go ahead and map the rest of the fields from your WordPress Zoho form to your Zoho CRM Lead record.
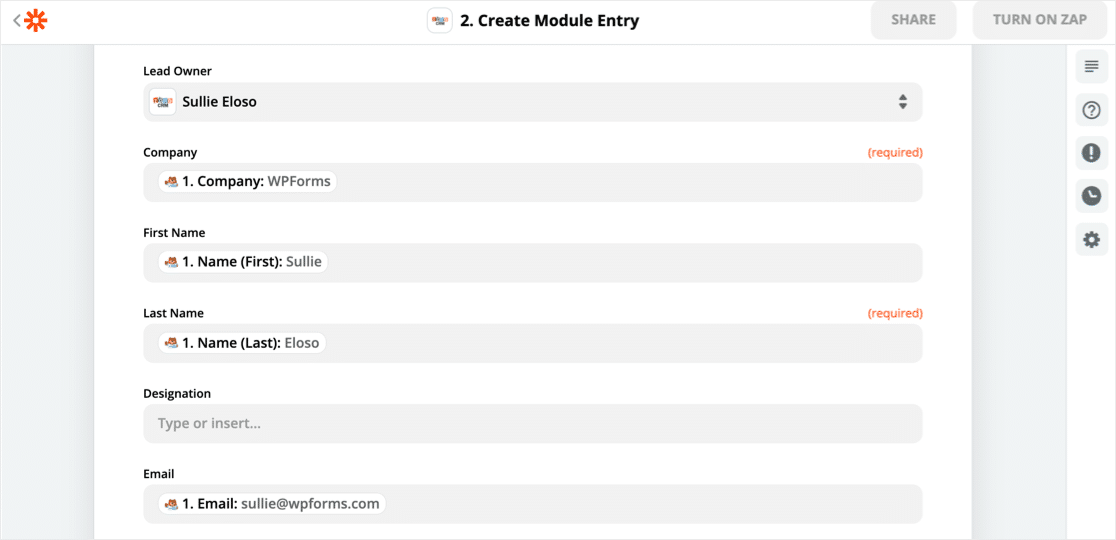
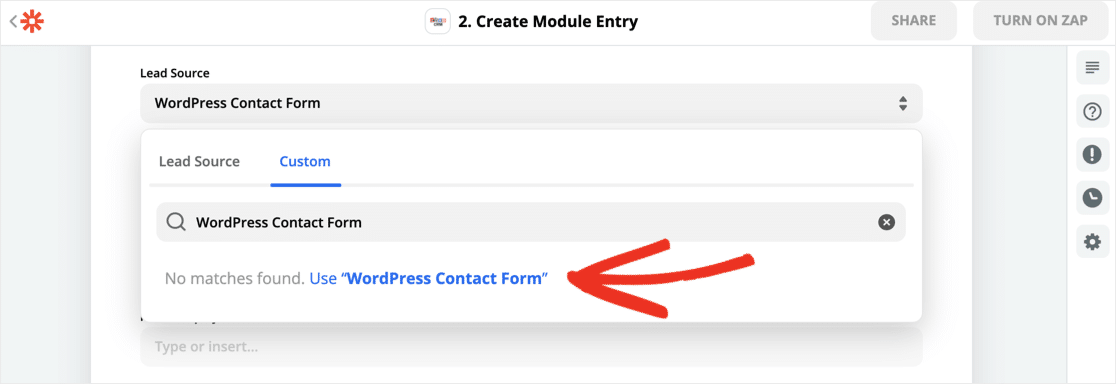
You can add tags to remind you where your lead came from originally. Here, we’ve added a custom tag for the Lead Source so that we can easily identify leads that came from WPForms.
Step 6: Test Your WordPress Zoho Integration
When you’ve set up the WordPress Zoho integration in Zapier, the final step is to click Test and Continue.
It worked! Here’s my WordPress form data in Zoho:

You can use exactly the same technique to build a larger form to capture every field in your Zoho CRM layout.
Don’t forget: you can also view your form submissions in the WordPress dashboard. If you’d like more information about this, read how to save contact form data in the WordPress database.
Create a Zoho WordPress Form Now
Final Thoughts on Zoho Forms in WordPress
And that’s it! Now you know how to build a form for WordPress that will automatically add your leads to Zoho CRM.
If you’re looking for more ways to collect leads, you’ll find tons of helpful ideas in this article on the best lead generation tools to get more targeted leads.
Ready to build your Zoho WordPress form? Get started today with the easiest WordPress form builder plugin. WPForms Pro includes free templates for your Zoho forms and offers a 14-day money-back guarantee.
If this article helped you out, please follow us on Facebook and Twitter for more free WordPress tutorials and guides.
The post How to Make Custom Zoho CRM Forms in WordPress (The Easy Way) appeared first on WPForms.
source https://wpforms.com/zoho-forms-wordpress/

