
Do you want to create an RSVP form in WordPress? Collecting RSVPs on your site is an easy way to keep track of attendees so you can plan your event more easily.
In this article, we’ll show you the easy way to create an RSVP form in WordPress. We’ll also explain how you can limit the number of RSVPs if you need to.
Create Your WordPress RSVP Form Now
Why Set Up an RSVP Form in WordPress?
When you plan an event, you’ll need to know who’s coming and what their requirements are.
With WPForms, you can easily publish an RSVP form on your website without writing any code. You can get your attendees’ contact details and requirements all in one place.
We’re going to use WPForms to create a RSVP form. WPForms is the best form builder plugin for WordPress. It comes with 100+ form templates that you can customize using the easy drag and drop builder.
With WPForms, you can quickly make an RSVP form for any kind of event, including:
- Business conferences
- Parties
- Weddings
- Online webinars
- Training sessions
- Summer camps
- Class reunions
Later on, we’ll show you how to limit the number of people who can RSVP. This is optional, but it’s super helpful if you have a set capacity.
How to Create an RSVP Form in WordPress
Here’s a list of steps that we’ll walk through in this tutorial.
- Install the WPForms Plugin
- Create Your WordPress RSVP Form
- Edit Your RSVP Form Settings
- Edit Your RSVP Form Notifications
- Edit Your RSVP Form Confirmations
- (Optional) Limit the Number of RSVPs You Receive
- Add Your RSVP Form to Your Website
Let’s dive in and get the plugin set up first.
Step 1: Install the WPForms Plugin
To start, you’ll want to install the WPForms plugin on your site. If you need help installing the plugin, hop over to this beginner’s guide to installing a plugin in WordPress.
You don’t need a WordPress RSVP plugin, but we recommend that you install the Form Templates Pack addon to speed things up.
To do this, click WPForms » Addons and scroll down to the addon labeled Form Templates Pack addon.
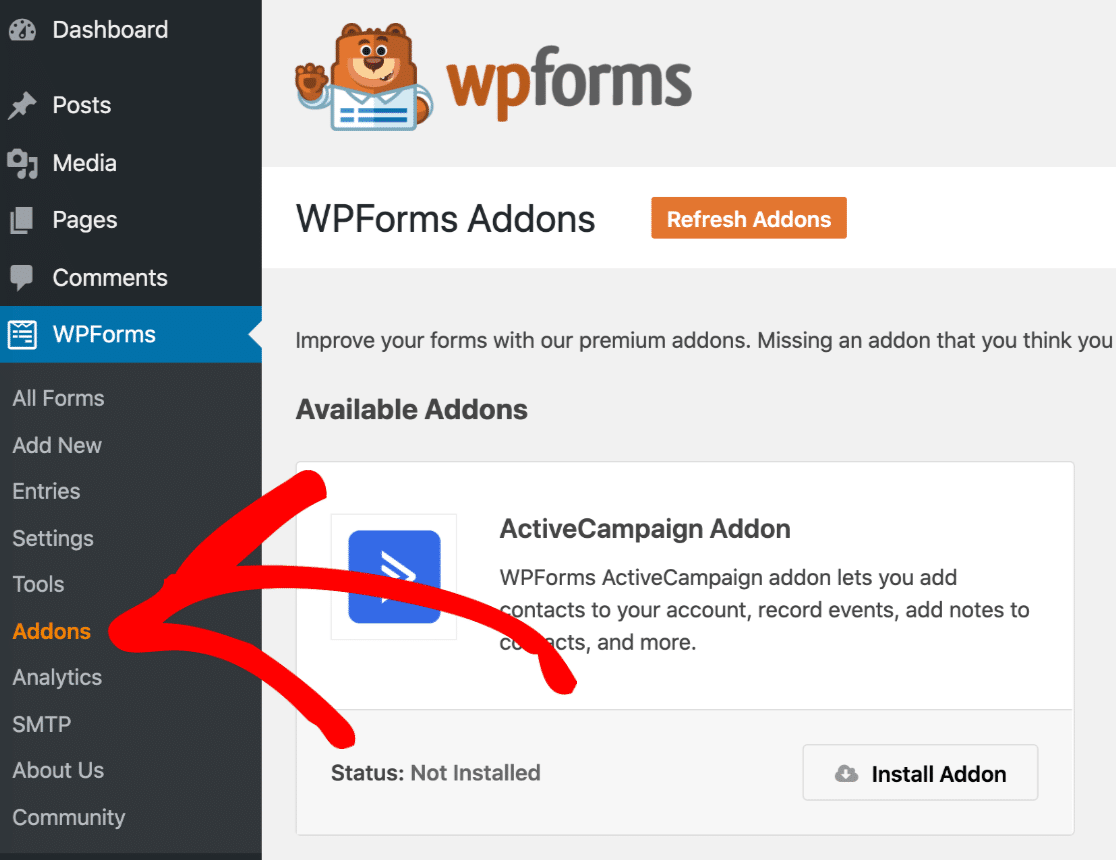
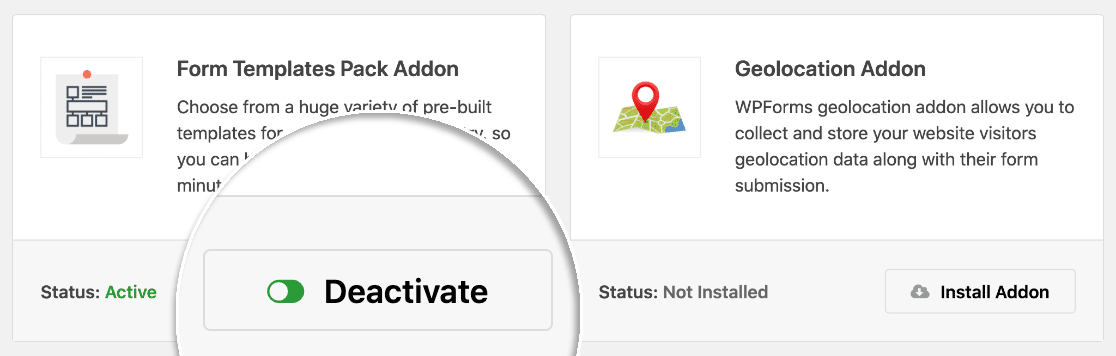
Click Install Addon » Activate. You’ll know that it’s active when the switch here is green:
That’s it! Let’s open up the form and customize it for your event.
Step 2: Create Your WordPress RSVP Form
Customizing your form will take just a few minutes. We’ll walk you through it.
Go ahead and click WPForms » Add New. You can type in a name for your form at the top.

Next, scroll down to the section labeled Additional Templates and search for RSVP. We’re going to click on Simple RSVP Form to open the template.

When the form builder opens, you’ll see a list of fields on the left. The form is shown on the right.

You can add more fields to your form if you want to. Just drag a field from the left-hand panel to the right-hand panel.

You can also click on any field to change the settings. And you can click and drag any field to move it up or down.
Did you know that you can also take payment through your forms? It’s a great way to collect a booking fee or donation. To add a payment field to your form, check out our guide on how to accept payments with Stripe on your website.
When your RSVP form looks the way you want it to, click Save.
Don’t close the form builder window. We’re going to look at the Settings in the next step.
Step 3: Edit Your RSVP Form Settings
Now let’s make sure your RSVP form is set up correctly.
To start, click the Settings button on the left-hand side of the form builder window. The General settings will open automatically on the right-hand side.
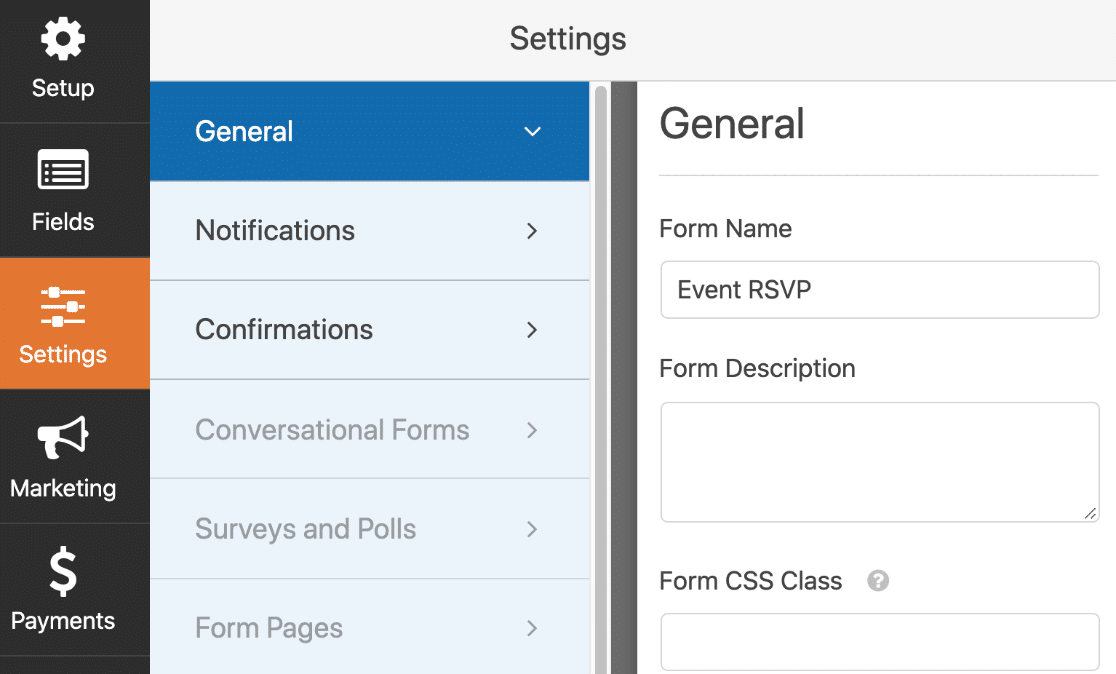
Here are the important settings you’ll want to check:
- Form Name – Change the name of your form if you need to.
- Form Description – Give your form a description.
- Submit Button Text – Customize the words on the submit button.
- Spam Prevention – Stop contact form spam with the anti-spam feature or Google reCAPTCHA. The anti-spam feature is automatically enabled on all new forms.
- AJAX Forms – Enable AJAX settings so that your page doesn’t reload after your attendee submits the form.
- GDPR Enhancements – Disable the storage of some types of information to comply with the GDPR. Check out our step-by-step instructions on how to add a GDPR agreement field to your form to learn more.
All set? Great. Click Save.
Now we just need to set up the notification emails. Stay in the form builder window for just a bit longer.
Step 4: Edit Your RSVP Form Notifications
With WPForms, you can customize the email that you get when someone submits your RSVP form.
To set this up, click Notifications on the left.
By default, WPForms will send a notification to {admin_email} – the administrator’s email address in WordPress. If you want to change that, you can delete the {admin_email} smart tag and replace it with a different email address.
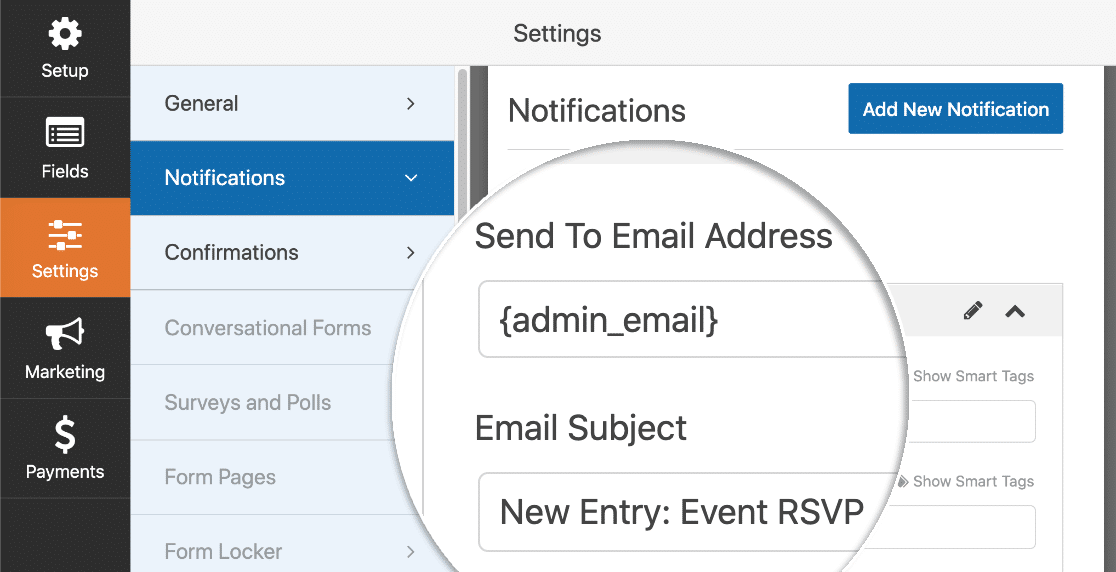
You can go ahead and customize the subject line and message here too.
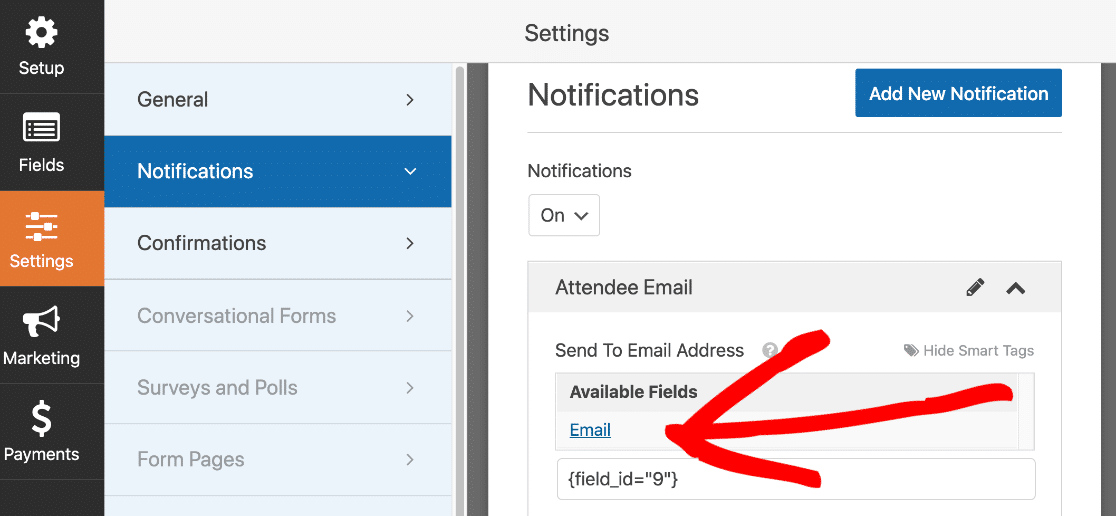
Would you like to send an email to your attendee as well? Just click Add New Notification to set up another email.
This time, you can use smart tags to automatically send the email to the attendee’s email address. Click the Show Smart Tags link above any field and choose the smart tag you need from the list.
Check out our step by step tutorial on how to send multiple form notifications in WordPress if you want more details on how this works.
For now, let’s move on to the final settings screen: Confirmations.
Step 5: Edit Your RSVP Form Confirmations
Form confirmations are messages that display to site visitors once they submit a form. To customize these settings, click the Confirmations menu item on the left.
In WPForms, you can choose between 3 different Confirmation types:
- Message – This is the default choice. It loads a message right after the form is submitted.
- Show Page – This lets you open a different page on your website when the form is submitted. For example, you could load a page that has a map to the venue. For help with this, check out our tutorial on redirecting customers to a thank you page.
- Go to URL (Redirect) – You can use this to send visitors to a different website.
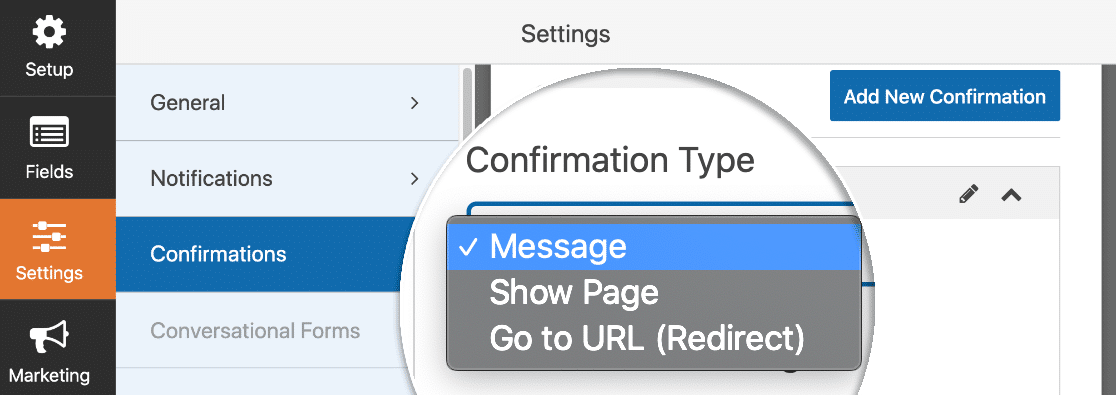
For this example, we’ll keep it simple and select Message from the dropdown.
In the Confirmation Message field, you can delete the default text and write your own message. You can also add links and images here if you want to.
All done? Be sure to click Save.
The next step is optional, but you might want to follow on if you have limited seats at your event.
Step 6 (Optional): Limit the Number of RSVPs You Receive
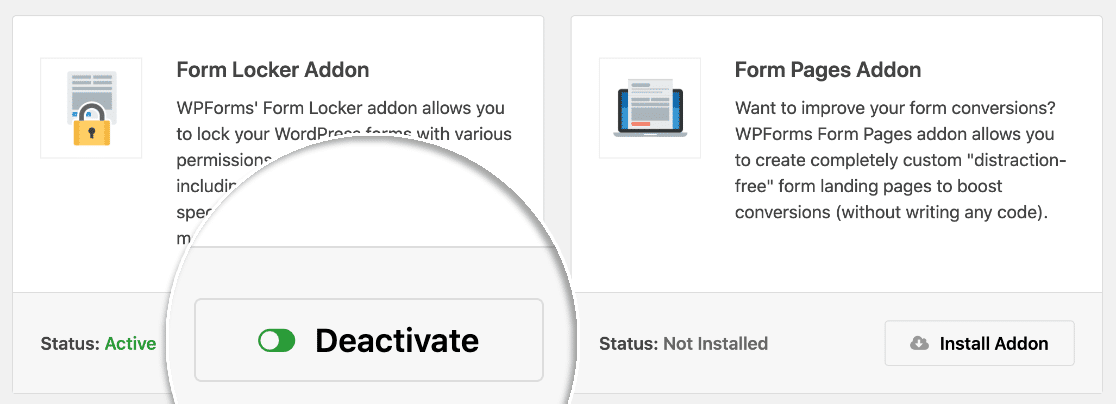
Using the Form Locker addon, you can have WPForms automatically close the form when you reach the maximum number of entries.
Before we set this up, check your form is saved and then click the X at the top-right to close the form builder.
Next, click WPForms, then Addons. Scroll down until you find the Form Locker addon and activate it. The switch turns green when the addon is active.
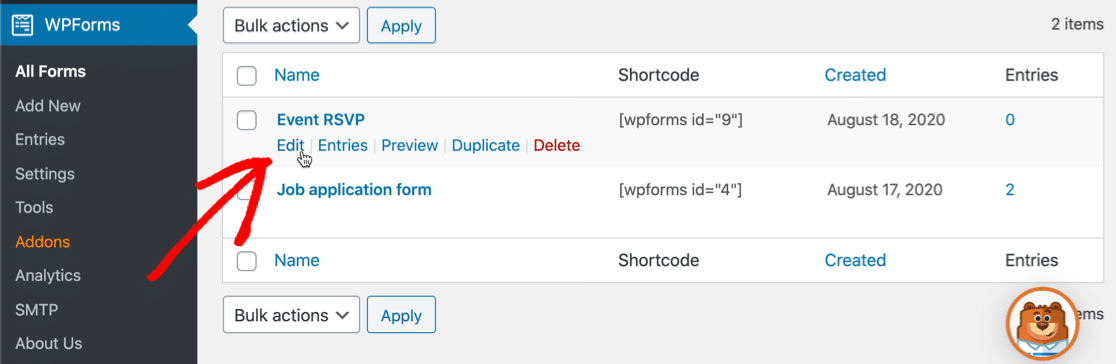
Now we’re going to go back to WPForms and then All Forms. Edit the form you were working on the previous steps.
Now, click Settings on the left-hand side. You’ll notice that the Form Locker menu is now available. Go ahead and click it to open up the Form Locker settings page.
All of these settings are handy for events. We’re just going to zoom in on the Entry Limit here.

Go ahead and click the checkbox labeled Enable limit on total form entries to set this up.
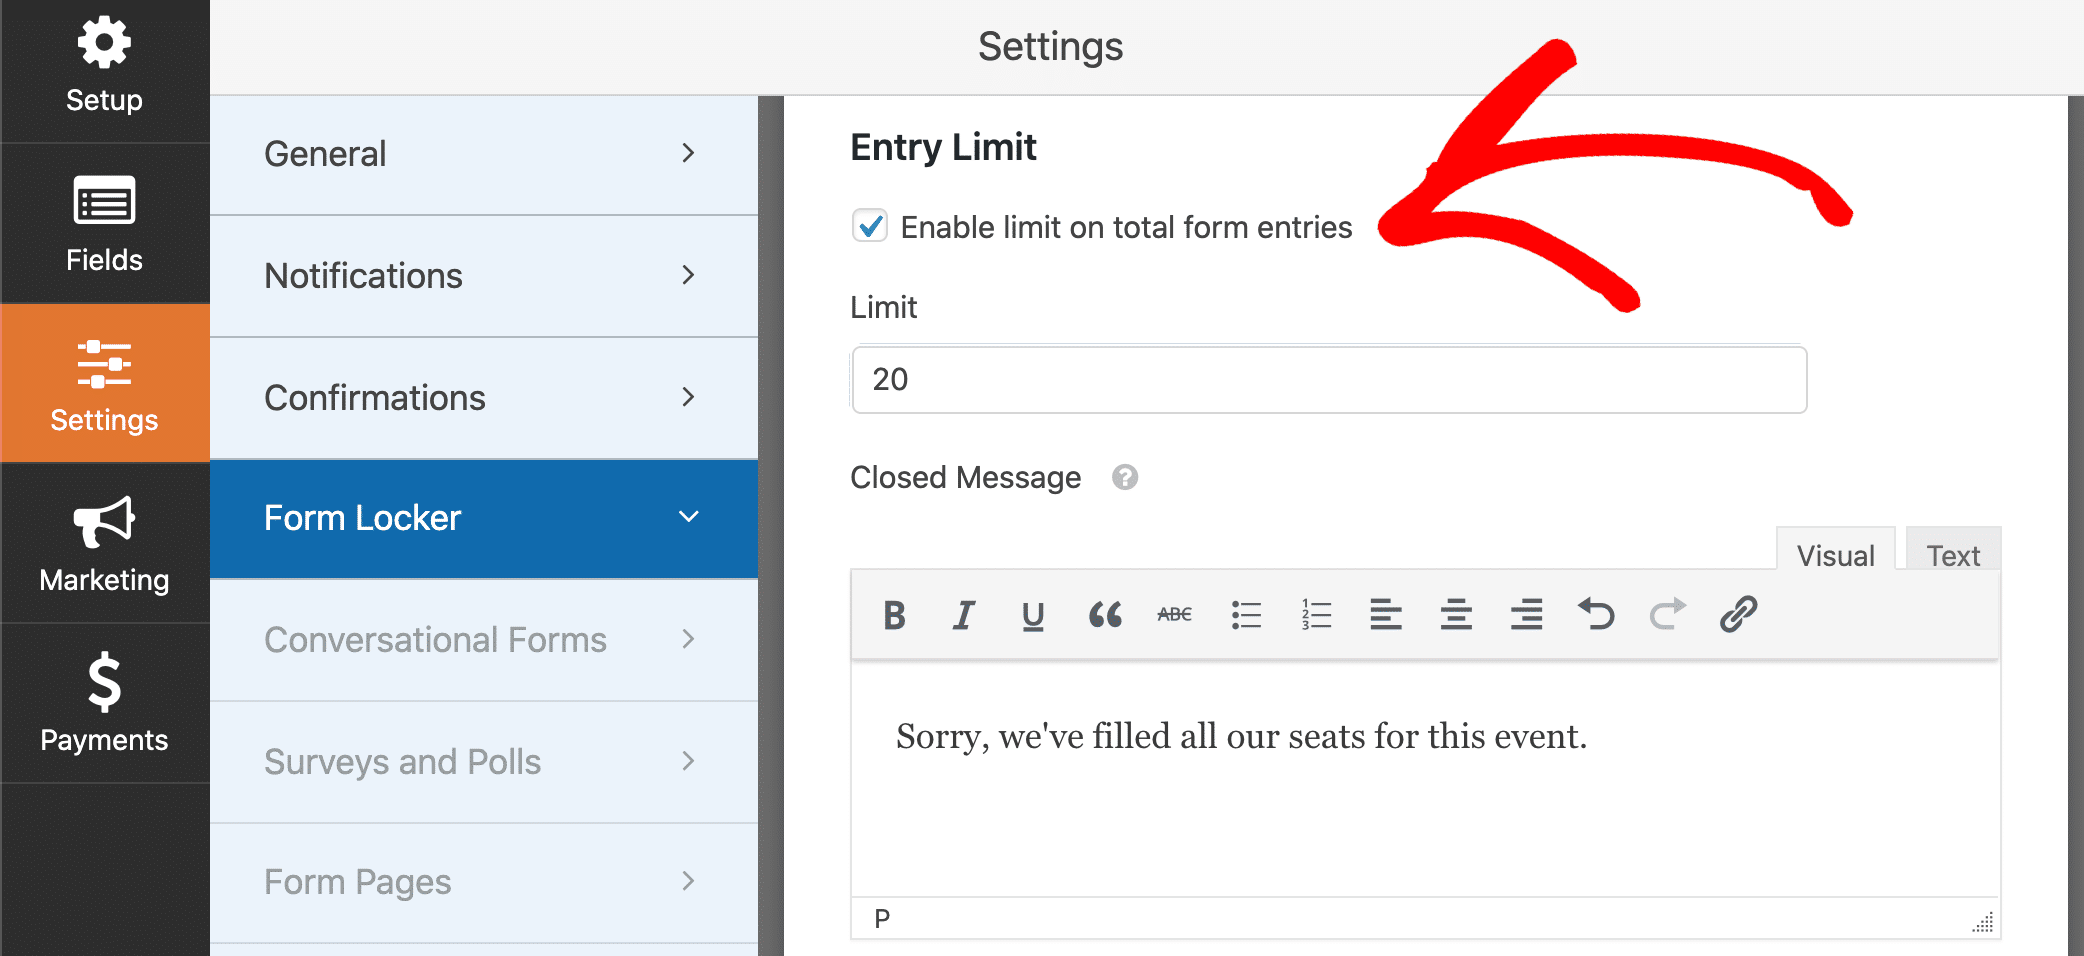
In the Limit box, type in the maximum number of RSVPs that you want to receive.
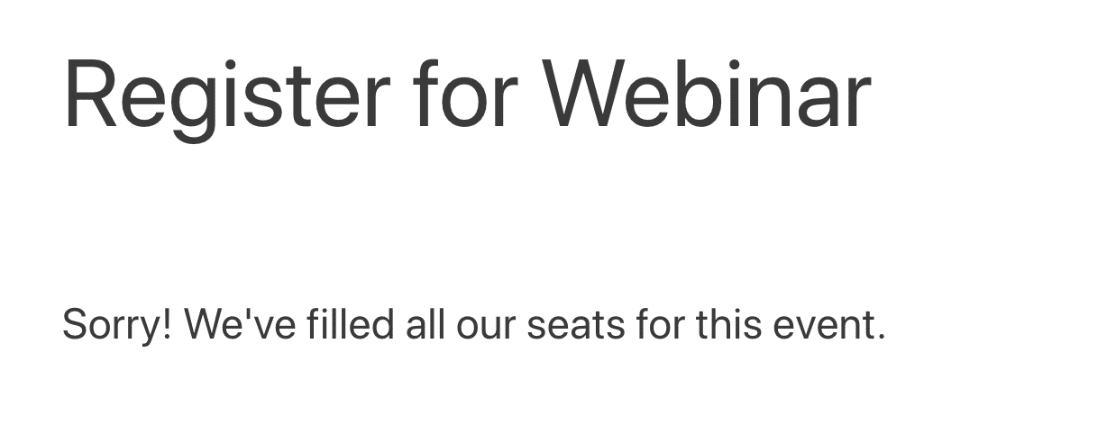
In the field underneath, you can customize the Closed Message. When your form receives the maximum number of entries, your form page will show this message instead of the form, like this:
There are other ways to lock your form using the Form Locker. For example, you could set an automatic expiry date for your form. That way, WPForms will automatically close your form on the date you choose, even if your maximum capacity hasn’t been reached yet.
OK, we’re done making the form, so let’s publish it. This is the final step, and it just takes a couple of minutes.
Step 7: Add Your RSVP Form to Your Website
WPForms allows you to add your forms to many locations on your website, including:
- Blog posts
- Pages
- Sidebar widgets.
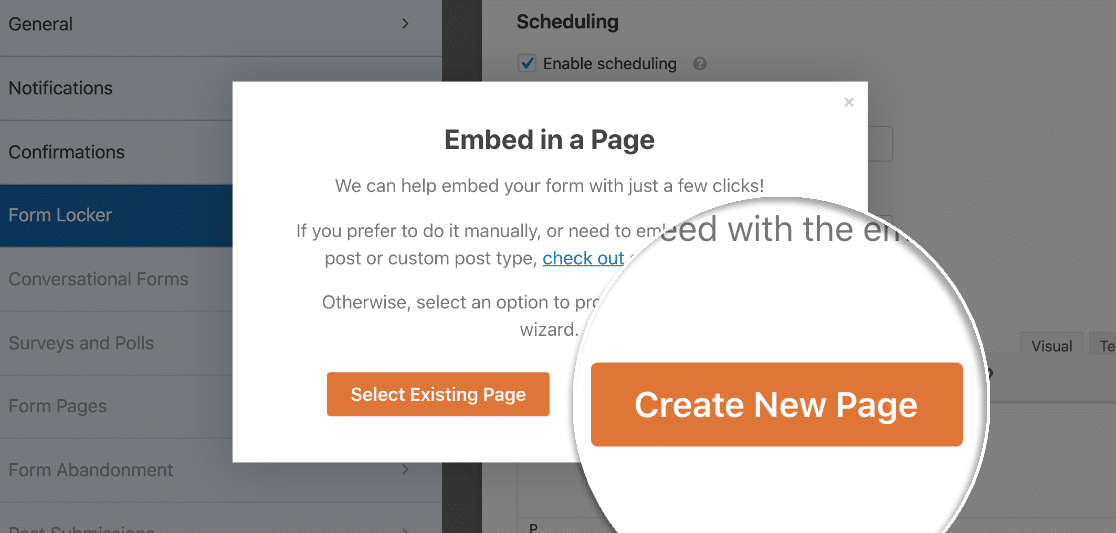
In this example, we’ll use the Embed button to put the form on a new page.
If you’re using Elementor, check out how easy it is to add your form to an Elementor page using the WPForms widget.
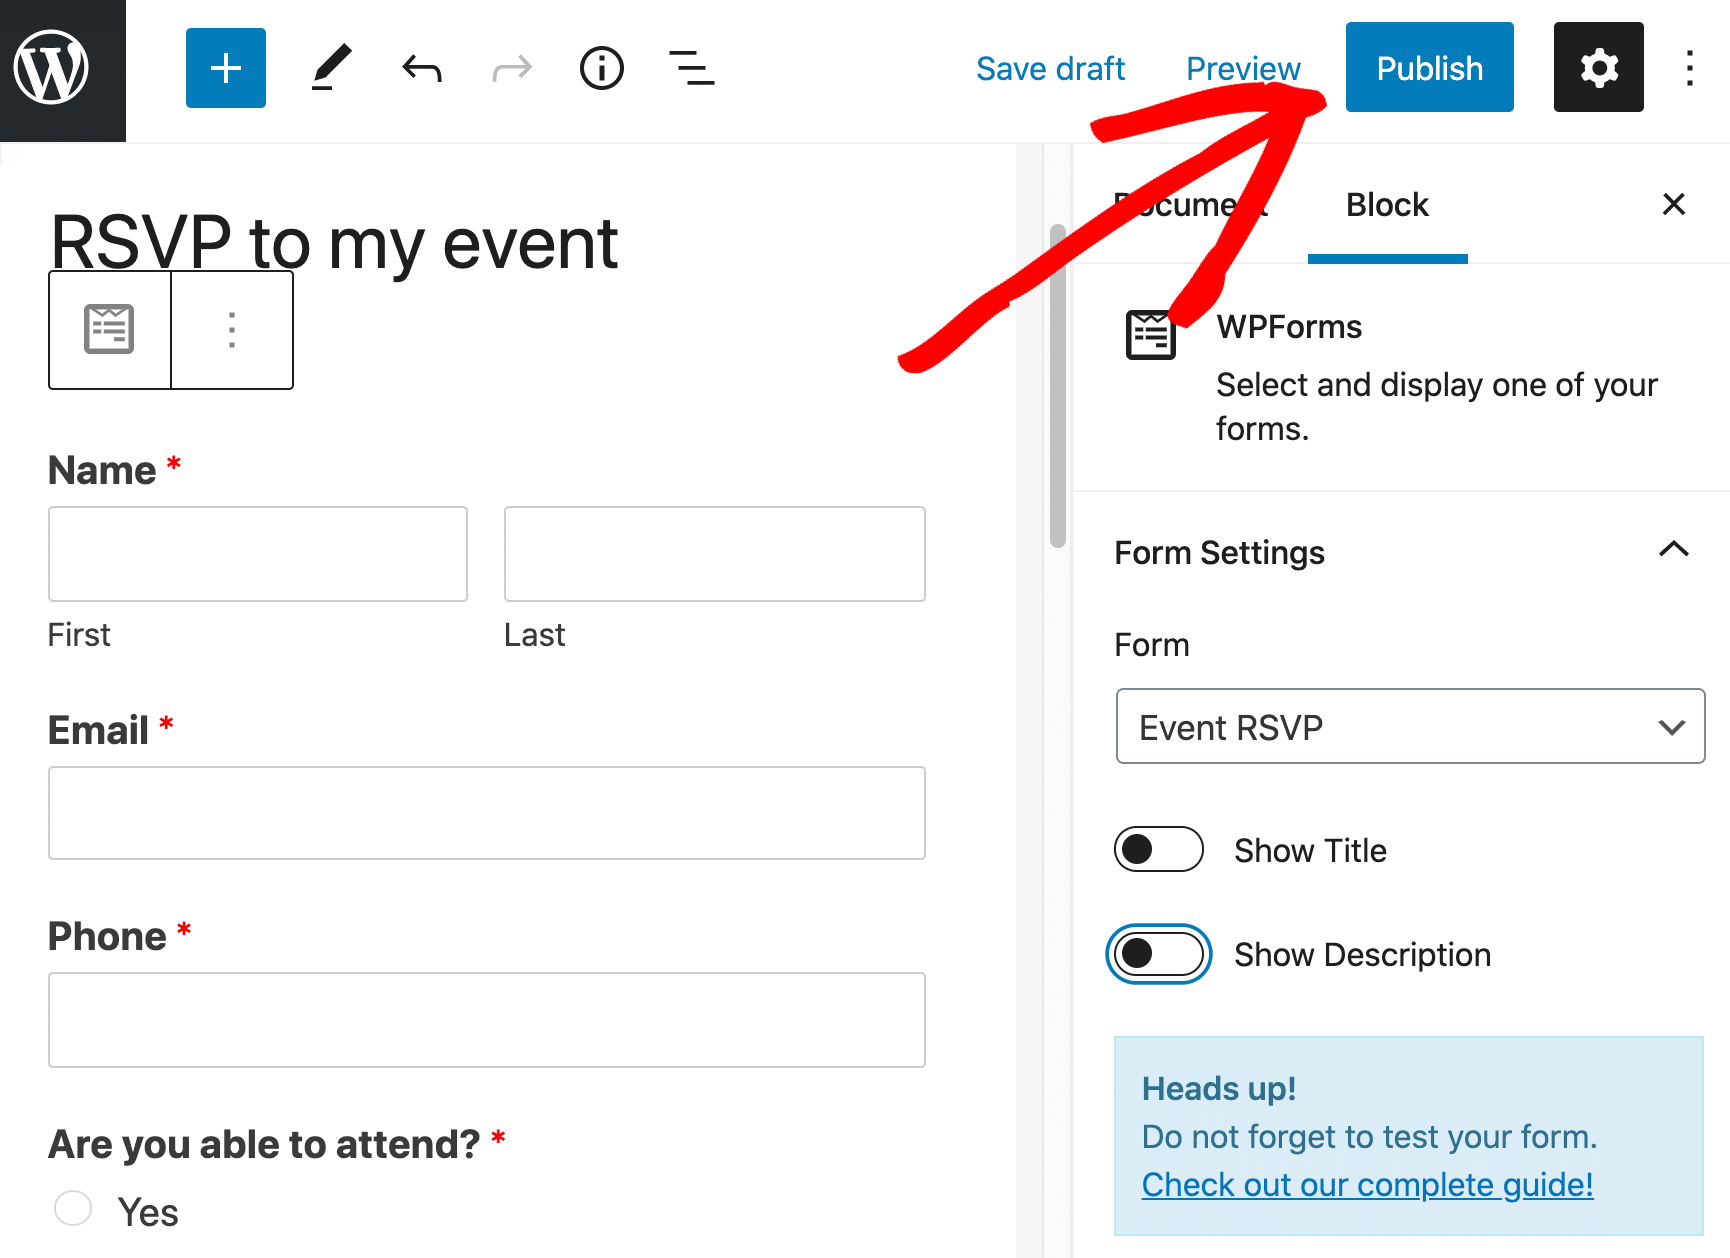
Go ahead and click Embed at the top of the form builder. In the popup, we’re going to click Create New Page.
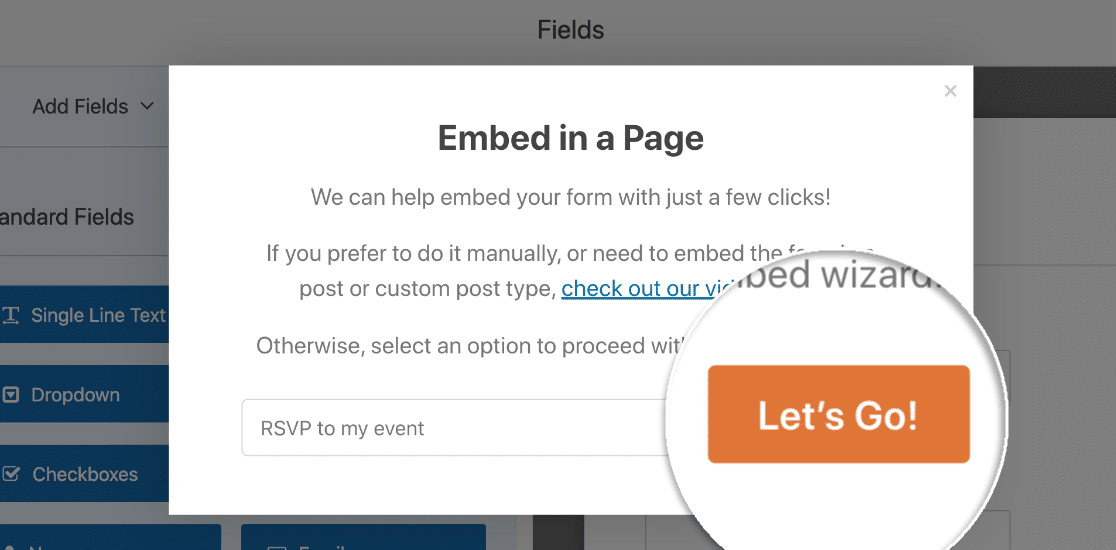
Type a name for your new Page and click the Let’s Go button.
WordPress will open up your new page so you can customize it. When you’re ready to publish your RSVP form on your website, just click Publish at the top.
Now your form is live and ready to accept RSVPs.
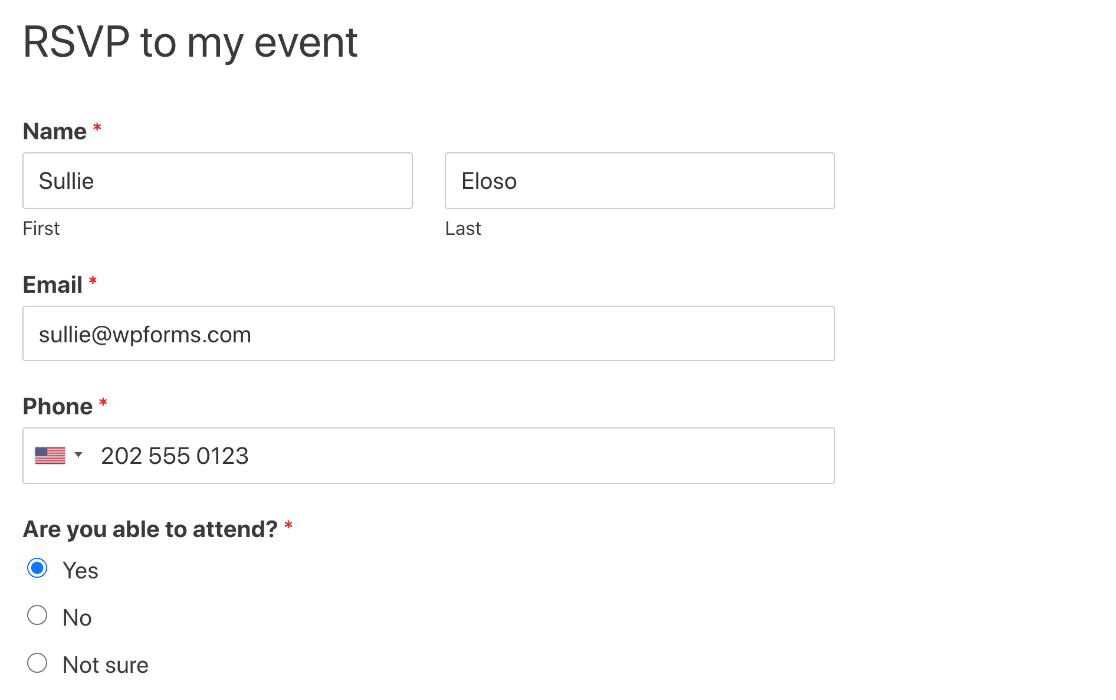
The form looks basic right now. But you can customize the page to make it more interesting. Need some design inspiration? Check out these contact form designs you can steal.
That’s it! Now your RSVP form’s done, you can share the link on social media, or embed the link in your invite.
Create Your WordPress RSVP Form Now
Next Up: Review Your RSVP Entries
Did you know that you can save your RSVPs in WordPress? This makes it really easy to see all of your responses in one place.
To get this set up, check out our guide on how to save your form data in the WordPress database.
And we’re done! Ready to build your form? Get started today with the easiest WordPress form builder plugin. WPForms Pro includes free RSVP form templates and offers a 14-day money-back guarantee.
If this article helped you out, please follow us on Facebook and Twitter for more free WordPress tutorials and guides.
The post How to Create an RSVP Form in WordPress (Step by Step) appeared first on WPForms.
source https://wpforms.com/how-to-create-an-rsvp-form-in-wordpress/
