Do you want to send form entries from WordPress to Podio? When you create a WordPress Podio integration, you can send form submissions from your website to any webform in a Podio app.
In this article, we’ll show you the easy way to connect WordPress to Podio using WPForms.
Create Your WordPress Podio Form Now
What Is Podio?
Podio is an online collaboration tool that lets you share information and track activity in different parts of your business.
You can add apps, communicate with workmates, and build webforms to capture data.
Podio workspaces can be customized for almost any purpose. And integrating Podio with WordPress makes it even more useful. For example, you could:
- Send job application forms from a WordPress form to a HR workspace in Podio
- Connect your Podio support desk workspace to a WordPress ticket form
- Send entries from your lead generation forms to your sales team automatically using a Podio workflow.
Now we know a little more about Podio, we’re going to go ahead and create a WordPress Podio integration using WPForms.
How to Make a WordPress Podio Integration in WPForms
In this example, we’re going to create a WordPress form for a webinar. When someone visits our landing page and signs up to the webinar, their details will be sent to our Podio event workspace.
Here’s a table of contents to help you find the section you need:
- Install the WPForms Plugin
- Create Your Podio Form in WordPress
- Add Your Podio Form to Your Website
- Connect WPForms to Zapier
- Connect Podio to Zapier
- Test Your WordPress Podio Integration
Before you start, you’ll need to have a Podio workspace and app set up. We added the free Simple Event Pack to our workspace. Then, we customized the form in the Participants app so that it has all of the fields we need.
If you need help getting a webform set up in Podio, here’s a guide from the Podio Help Center. Once you have your fields set up in Podio, jump back to this article.
Step 1: Install the WPForms Plugin
Start by installing the WPForms plugin on your WordPress site.
If you need help, read this guide on how to install a plugin in WordPress.
Once you’ve activated the WPForms plugin, you can go ahead and create a new WordPress form.
Step 2: Create Your Podio Form in WordPress
To get started, go to your WordPress dashboard and click WPForms » Add New.
Type a name for your form in the Form Name field.
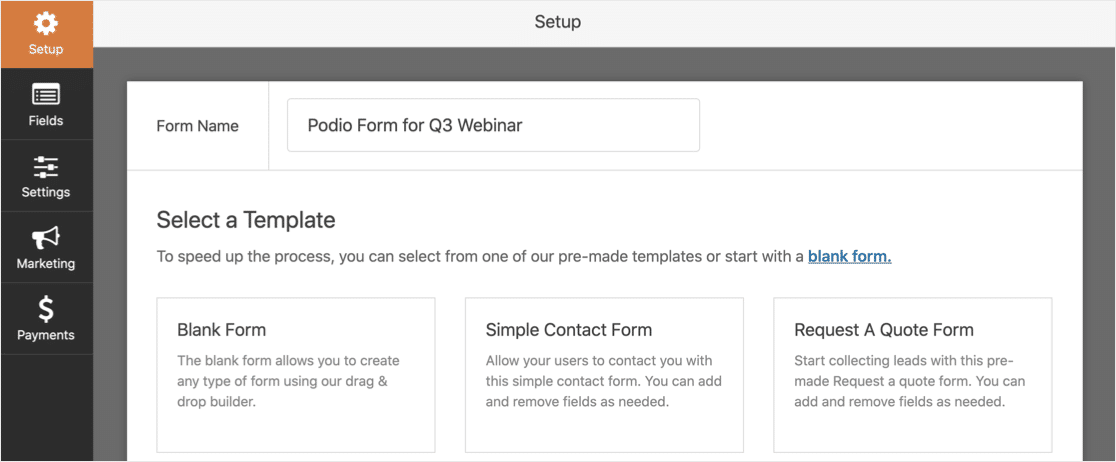
WPForms comes with form templates that make it easy to get started. Let’s use the Webinar Registration Form template from the Form Templates Pack Addon.
Search for the template, then click it.

Next, you’ll want to customize the fields on the WordPress form to match your Podio webform.
You can drag the fields you need from the left-hand pane to the right-hand pane to add them to your form like this:
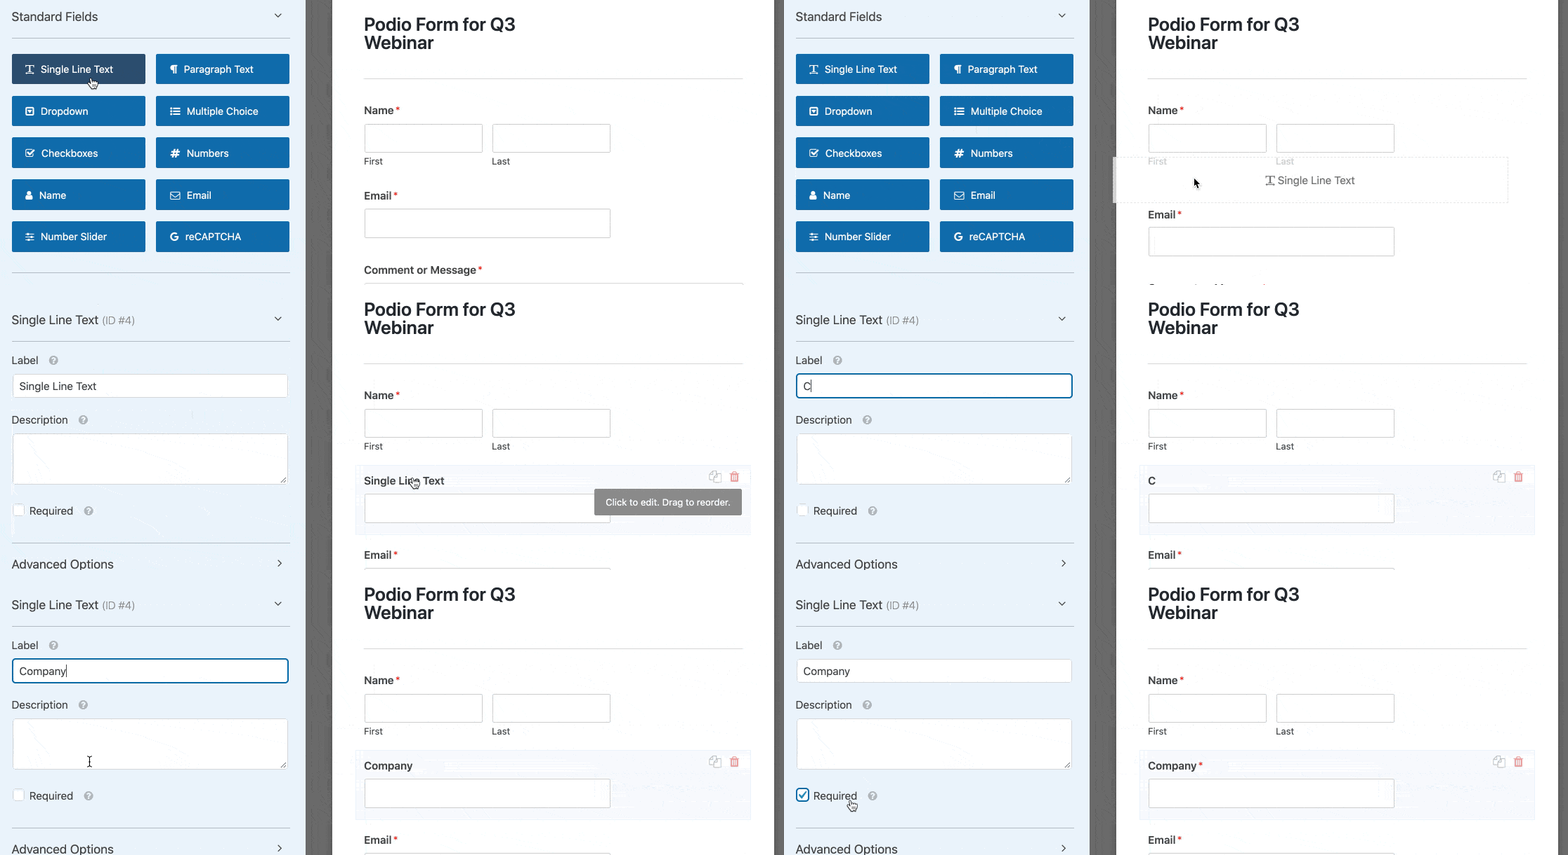
You can also use the WPForms form builder to:
- Drag fields up and down to reorder them
- Mark fields as Required
- Change the labels that appear above the fields.
When the form is done, the next step is to add it to your website.
Step 3: Add Your Podio Form to Your Website
It’s really easy to add a form to WordPress using WPForms. You don’t need to use any code. And you can place forms in 3 places:
- On a post
- On a page
- In the sidebar
In this example, we’ll create a page for the form.
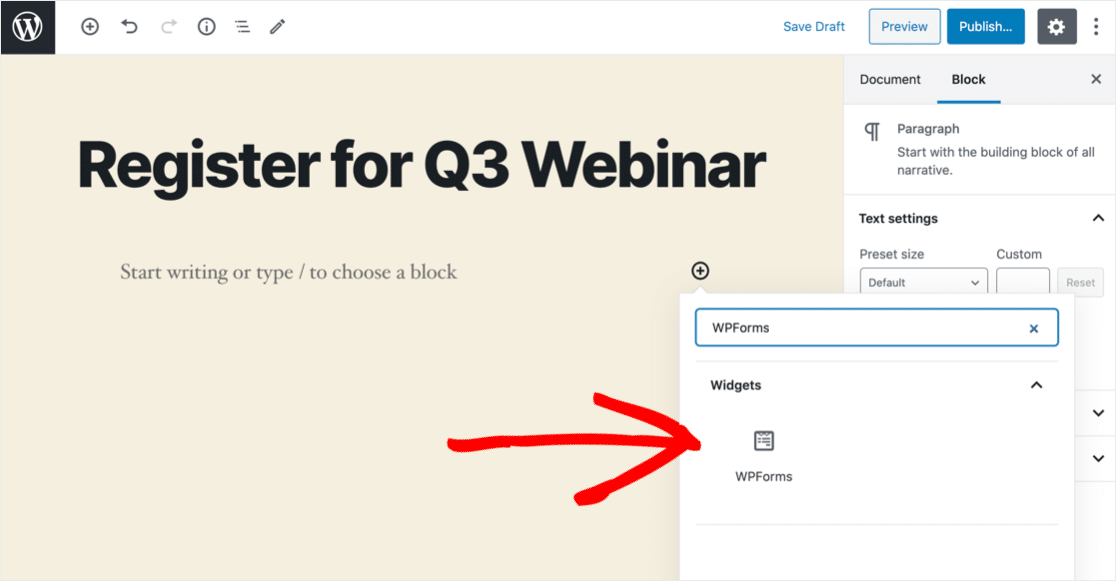
To start, click the plus icon to add a new block. Search for WPForms and click the icon.
From the dropdown, select the Podio form you created in Step 2.
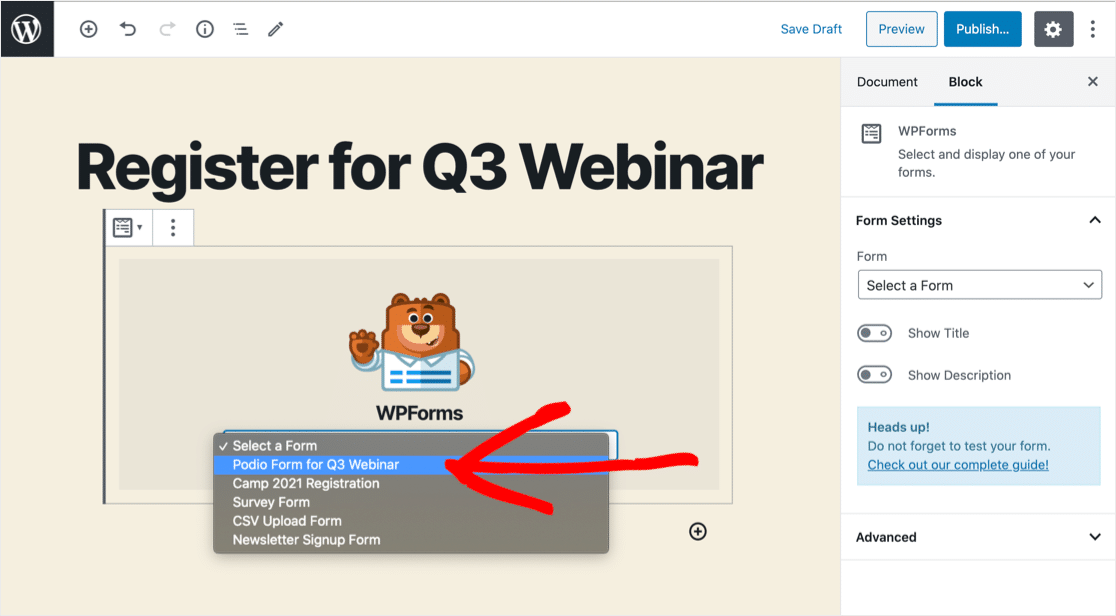
Now click Publish or Update to publish your form.
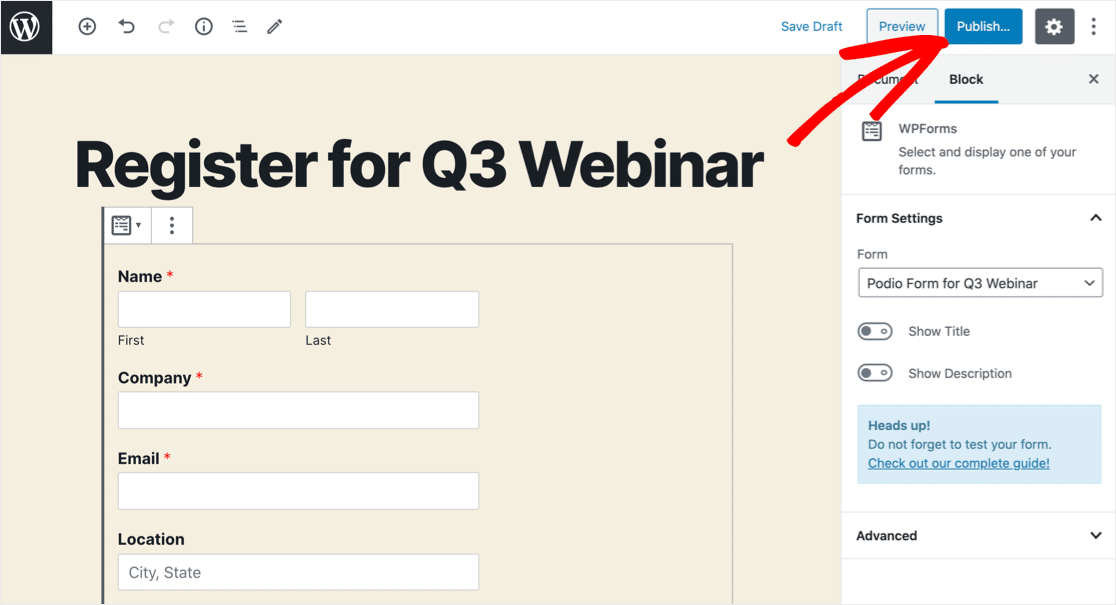
Great! Now the form is live on your website.
Our landing page is very basic. If you want to make a really compelling page for your form, you’ll find tons of tips in this article about the anatomy of a perfect landing page.
Just 1 more thing: we need to add a test entry so that Zapier has some data to work with. Here’s ours:
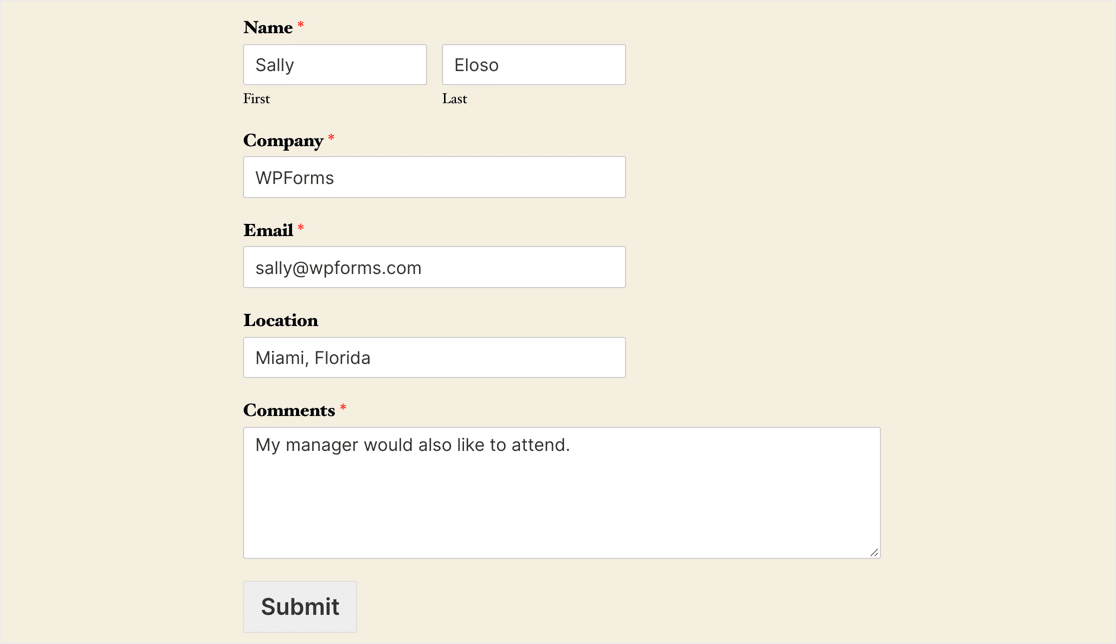
Go ahead and submit your test entry. Now let’s make the magic happen in Zapier.
Step 4: Connect WPForms to Zapier
Zapier is a service that connects different web apps together.
We’re going to create a Zap that sends data from WPForms to Podio automatically when our form is submitted.
To start, click Make a Zap.
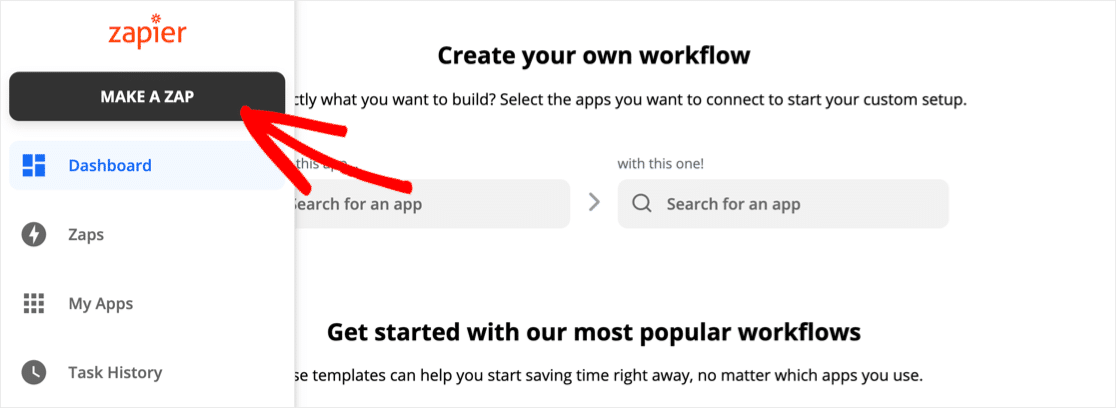
Under Choose App and Event, search for WPForms and click the icon. Then click Continue.

Next, click Sign in to WPForms.
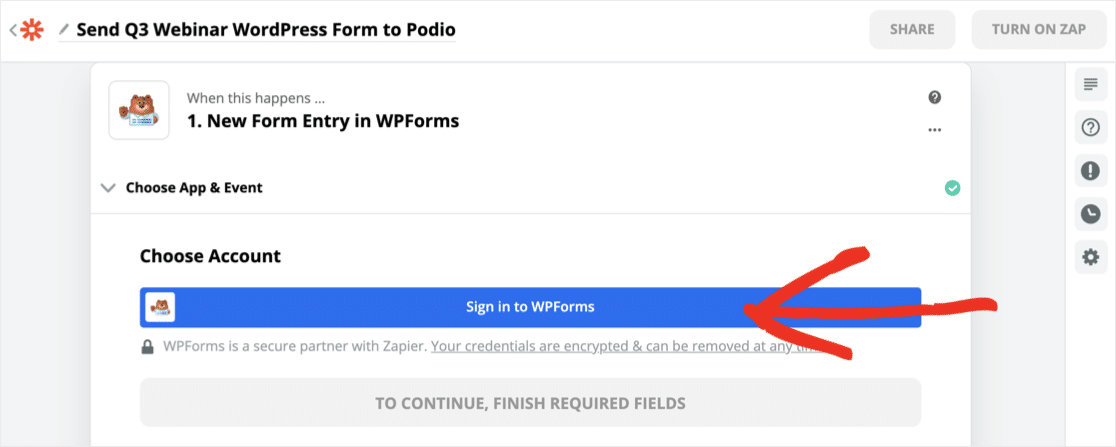
Now you’ll need to switch back to your WordPress dashboard to grab the WPForms API key. You’ll find it under WPForms » Settings » Integrations.
Click the Zapier icon to reveal your key.

Switch back to Zapier and copy and paste the API key into the connection window. You’ll also need to type your URL underneath.
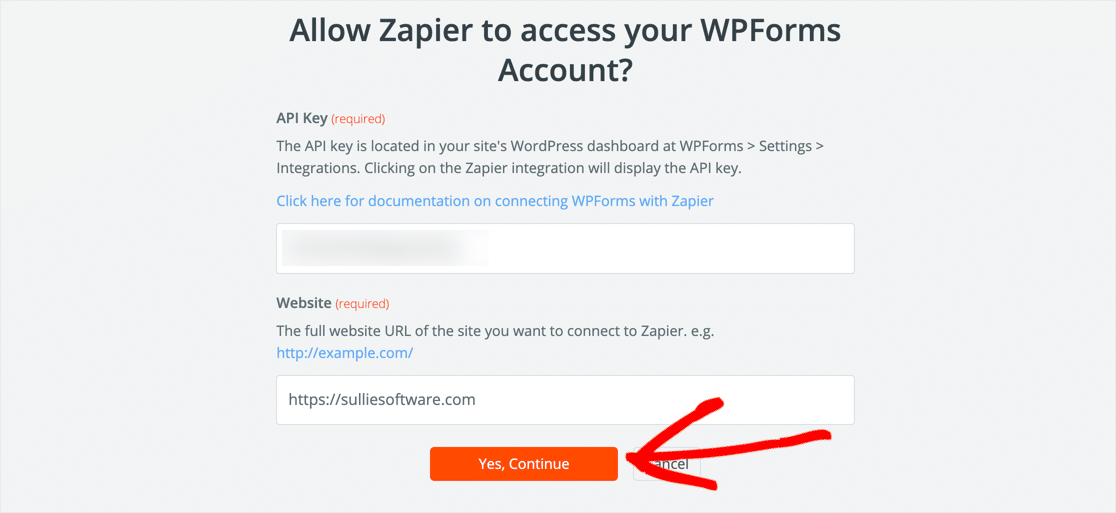
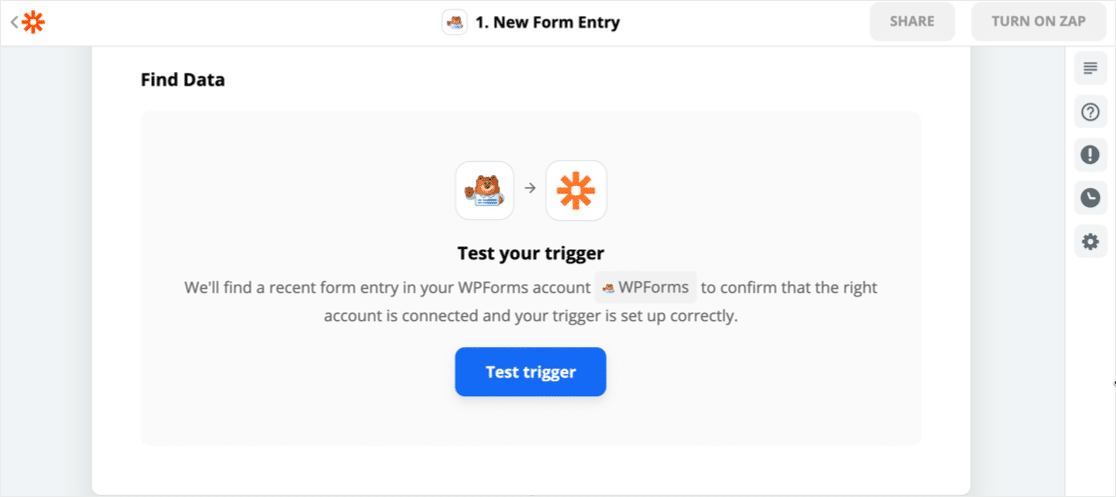
Click Yes, Continue to connect. Then click Test Trigger.
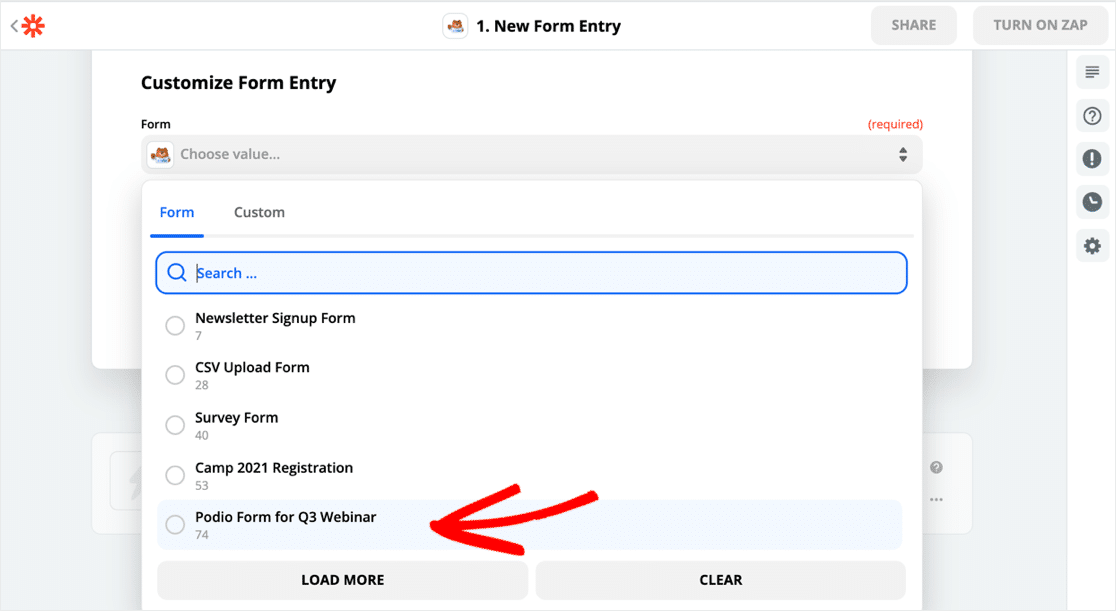
Zapier will connect to WPForms and get a list of all of the forms on your website. Under Customize Form Entry, click the Podio form you created in WordPress.
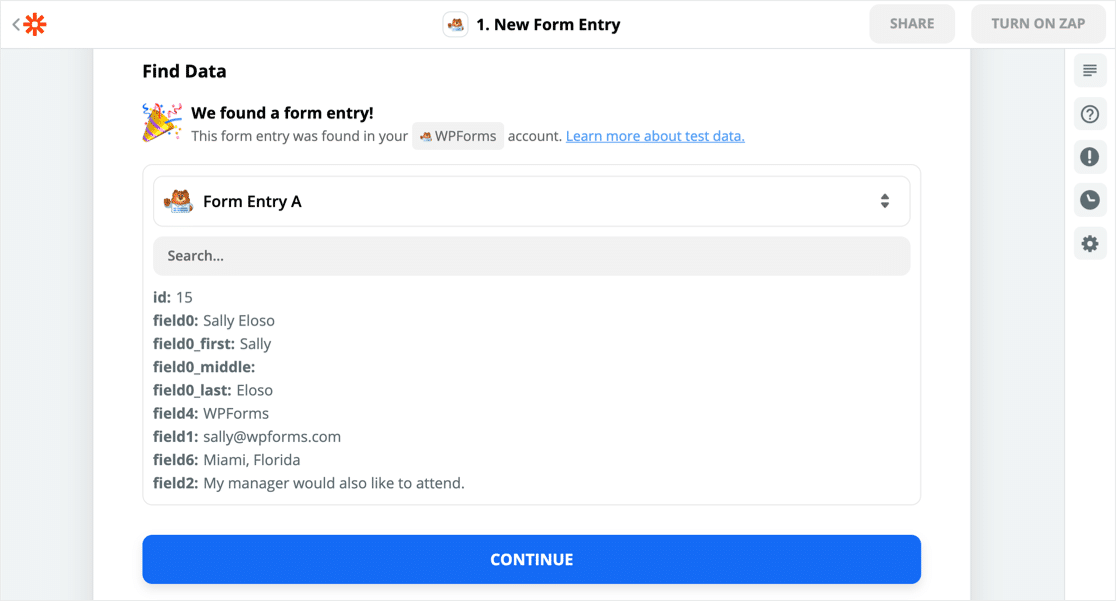
Everything worked. Here’s our test form data in Zapier:
That’s the first part of the connection ready. Now we need to connect Podio to Zapier.
Step 5: Connect Podio to Zapier
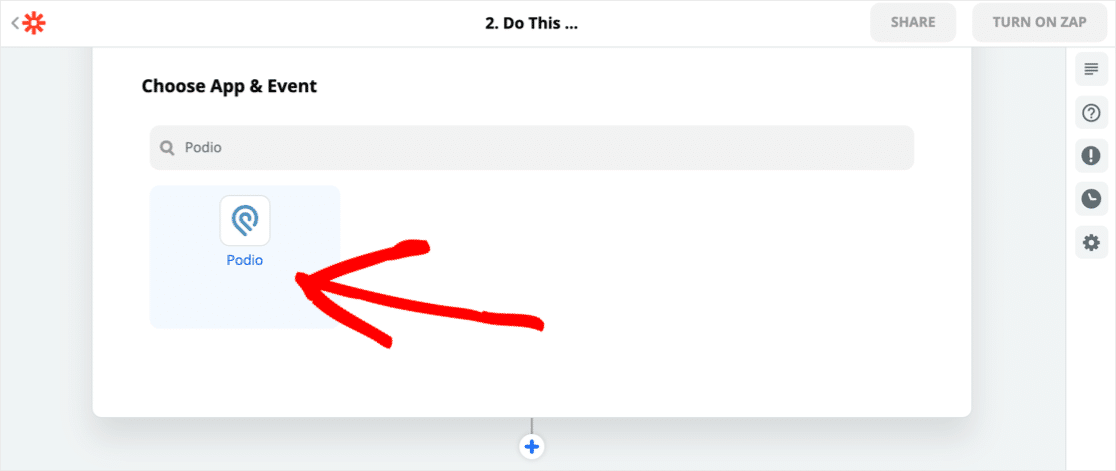
To start, search for Podio and click the icon.
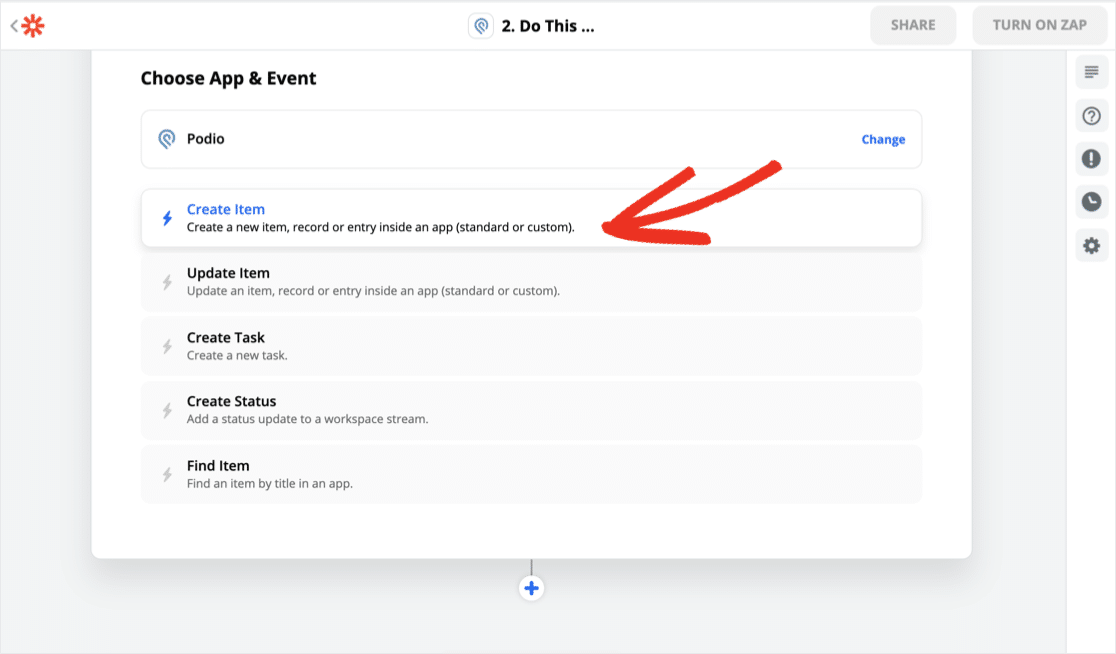
Next, Zapier will ask you what you want to do. There are a number of options you can choose depending on what your WordPress Podio integration is going to do.
We need to create a form entry, so we’re going to click Create Item.
Now connect to your Podio account. You’ll just need to click the green Grant Access button if you’re already logged in to Podio.

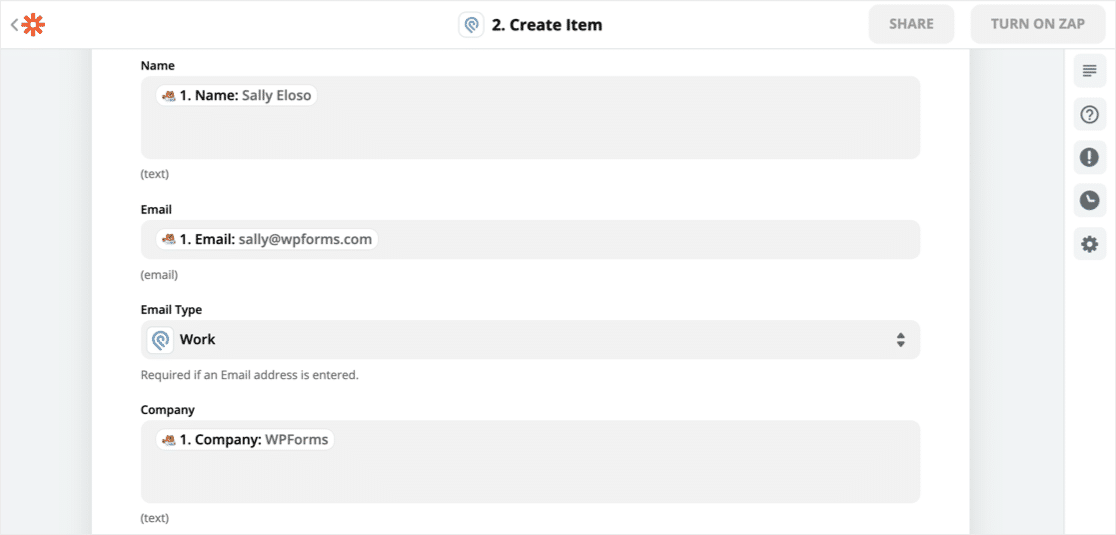
The Customize Item section is the really important part. This is where we’ll match our WPForms fields with the fields in Podio.
You can see that the Organization, Workspace, and Application here are all mapped. This tells Zapier where the webform is in Podio.

Go ahead and map the form fields from your WordPress webinar form to the webform in your Podio app.
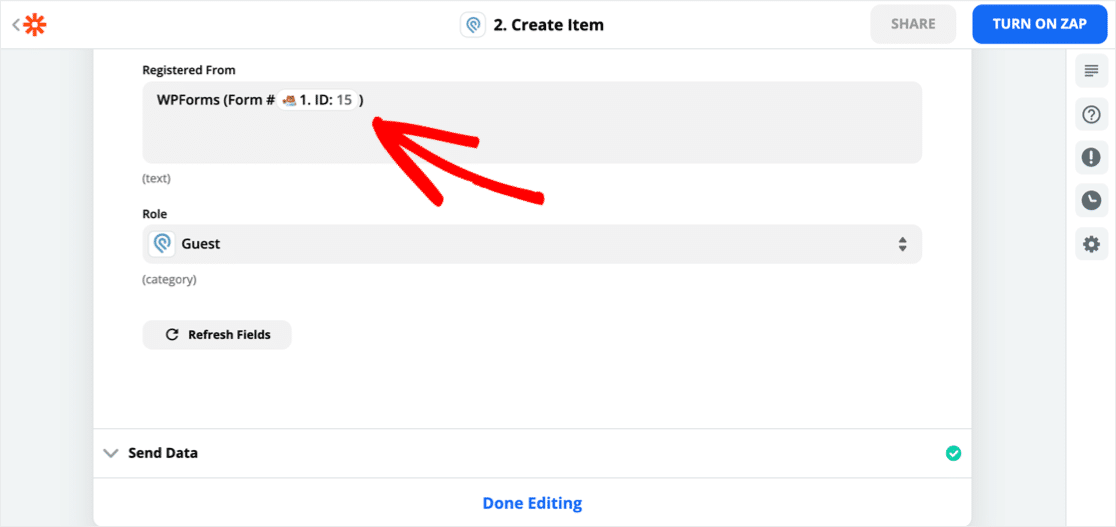
If you have different forms for the event, you might want to track which form the visitor signed up through. We mapped the WPForms form ID to the Registered From field to capture this.
Step 6: Test Your WordPress Podio Integration
Now for the final step. Zapier will send the test data from WordPress through to Zapier using your new integration.
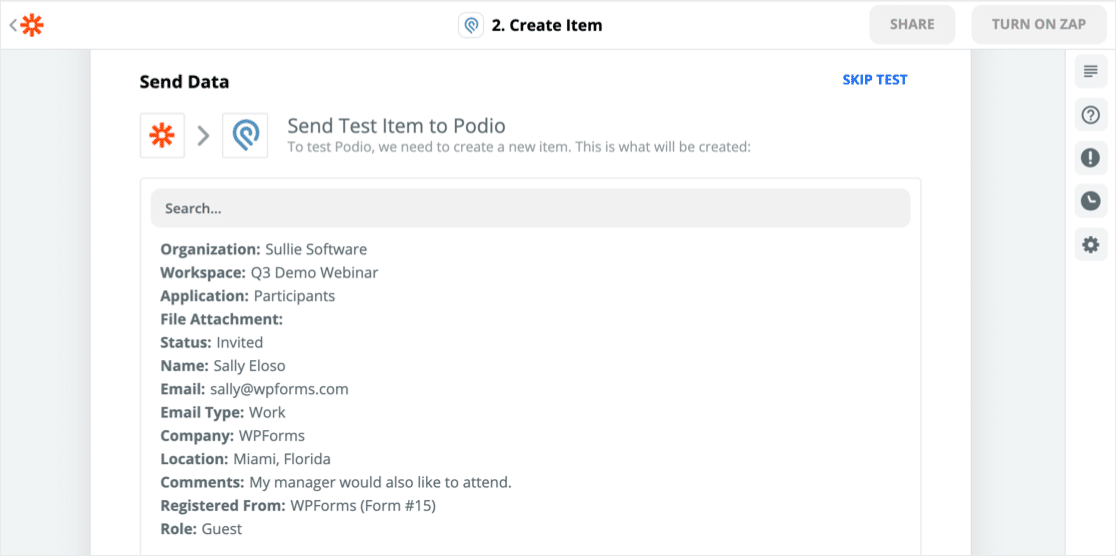
Let’s switch over to Podio and see if it worked.
Yes! Here’s the entry exactly as it was submitted in WordPress:
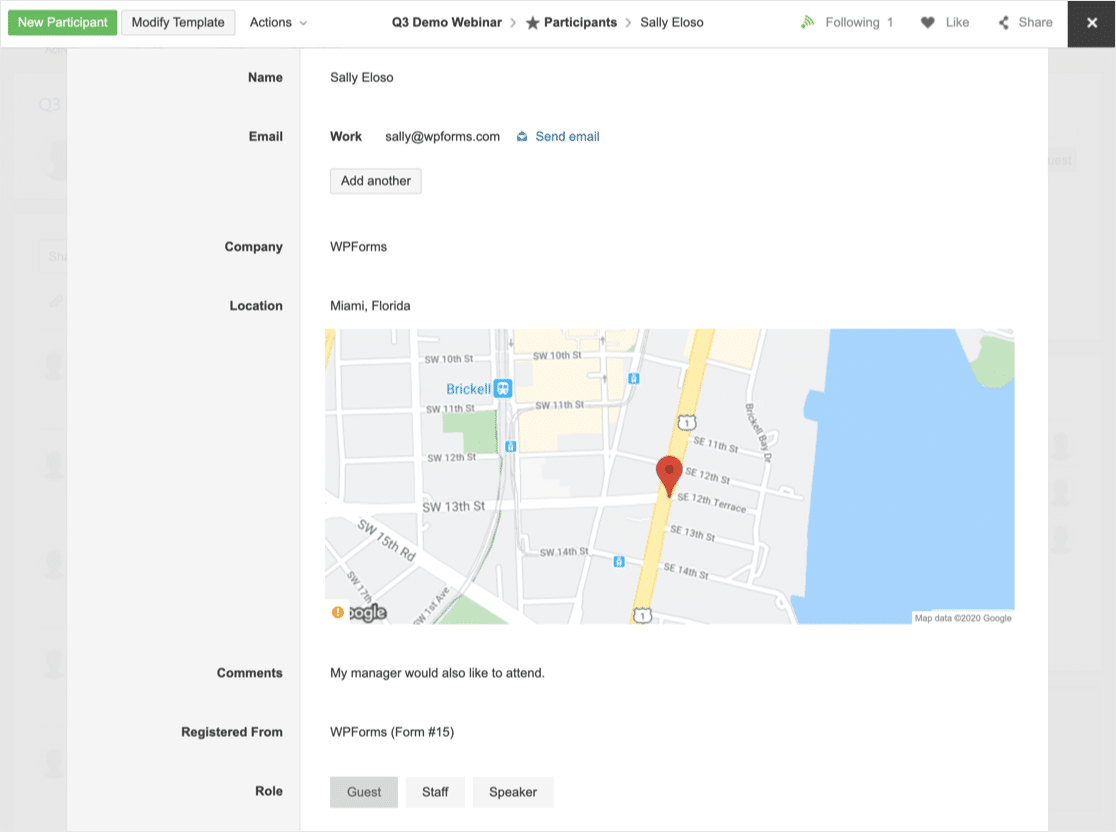
Looks like our WordPress Podio integration is working perfectly.
Don’t forget to turn on your Zap in Zapier before you finish up.
Create Your WordPress Podio Form Now
Final Thoughts
We’ve shown you how easy it is to make a WordPress Podio integration. You can use this method to send data to Podio from any form on your website.
If you’re looking for other ways to automate parts of your business, you’ll get tons of ideas from this article on killer marketing automation tools.
Ready to build your WordPress Podio integration? Get started today with the easiest WordPress form builder plugin. WPForms Pro includes a free webinar registration form and offers a 14-day money-back guarantee.
If this article helped you out, please follow us on Facebook and Twitter for more free WordPress tutorials and guides.
The post How to Make a WordPress Podio Integration in WPForms (2020) appeared first on WPForms.
source https://wpforms.com/wordpress-podio-integration/

