
Would you like to embed a GoToWebinar registration form on your website? Embedding your own registration form looks professional and makes it easy for your visitors to sign up.
In this article, we’ll show you the easy way to create a WordPress form and connect it to GoToWebinar. You don’t need to use set up a GoToWebinar connector or write any HTML code.
Create Your Webinar Registration Form Now
How to Customize the GoToWebinar Registration Page
In this tutorial, we’ll create a custom GoToWebinar registration page using the WPForms plugin.
WPForms lets you change any of the fields on the registration form and add custom questions.
Using WPForms, you can also:
- Use the geolocation addon to automatically see where your registrants are
- Create password-protected forms for internal webinars
- Add surveys and polls to your webinar forms
- Save form entries in the WordPress database.
Creating a custom registration page also gives you control over your design. By using your own company branding, your form will look more professional.
Now we’ve talked about the benefits of creating a custom GoToWebinar registration form, let’s dive in and create one.
How to Embed a GoToWebinar Registration Form in WordPress
To speed things up, we’re going to use the webinar form template and then customize it with some additional questions. Here are the steps we’re going to work through:
- Install the WPForms Plugin
- Create Your Webinar in GoToWebinar
- Create Your Custom GoToWebinar Registration Form
- Connect WPForms to Zapier
- Connect GoToWebinar to Zapier
- Test Your Custom GoToWebinar Registration Form
First, let’s get the WPForms plugin set up so we can install the template pack.
Step 1: Install the WPForms Plugin
WPForms is the best form plugin for WordPress. It lets you create forms for any purpose using an easy drag and drop builder.
Start by installing the WPForms plugin on your website.
If you need help, take a look at this guide on how to install a plugin in WordPress.
Next, you can install the form templates pack addon for WPForms. This is optional, but using a form template will help to speed things up in the next step.
From the WordPress dashboard, click WPForms » Addons.
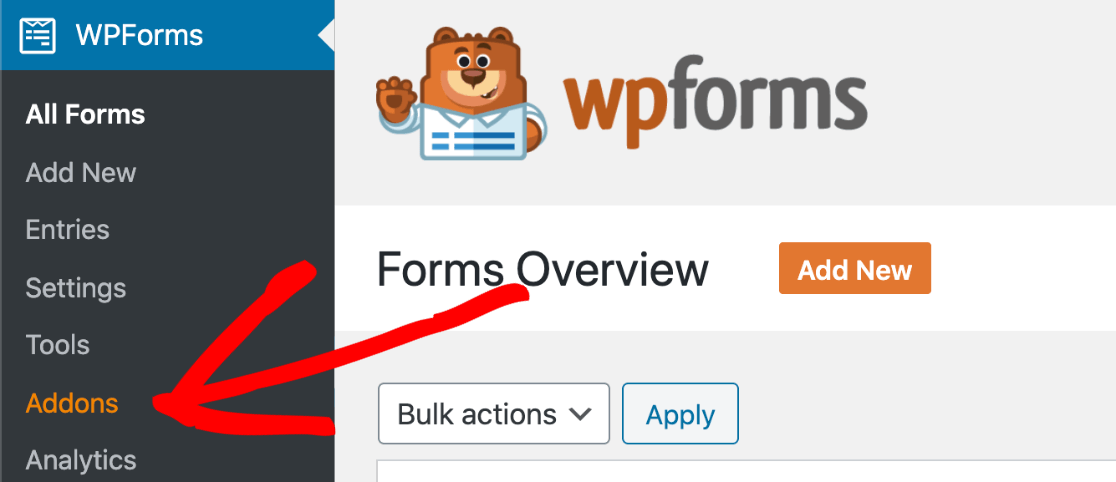
If you scroll down a little, you’ll see the Form Templates Pack. Click Install Addon to install and activate your form templates.
The switch on the Form Templates Pack item will turn green to show you it’s ready to use:

Great! Now we have WordPress set up, let’s go ahead and make our custom GoToWebinar registration form.
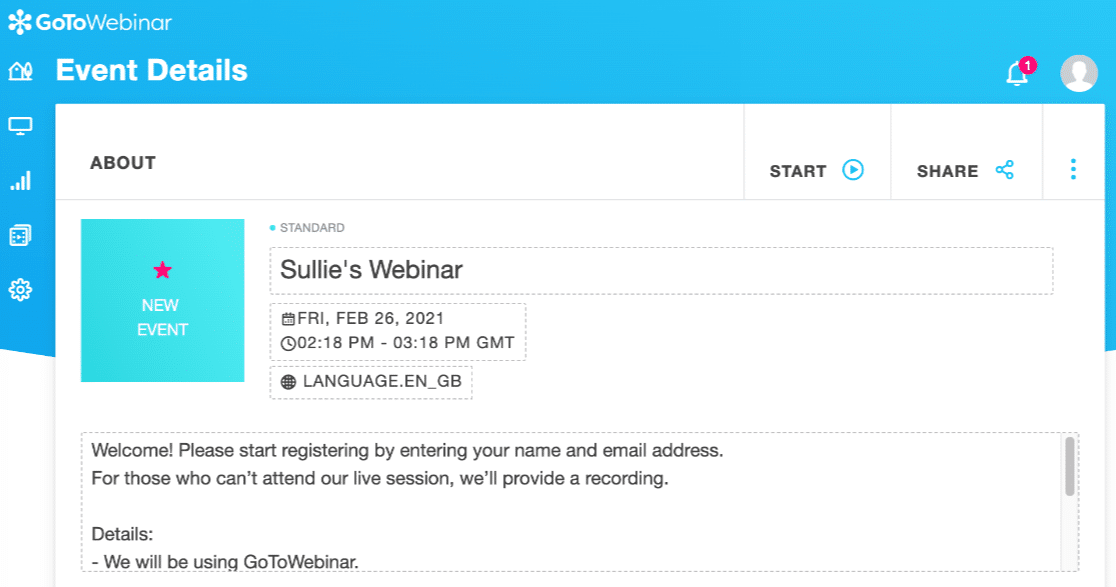
Step 2: Create Your Webinar in GoToWebinar
In GoToWebinar, you’ll need to create a webinar before you move on. Here’s a test webinar that we created:
Within the webinar settings, you can create custom questions if you want to.
To show you how this works, we’ll ask 4 questions:
- What product are you interested in?
- What department do you work in?
- What questions do you have for the speaker?
- How did you hear about this webinar?
Remember: asking too many questions could be a barrier to conversions. If you don’t want to ask anything, it’s fine to skip the rest of this section.
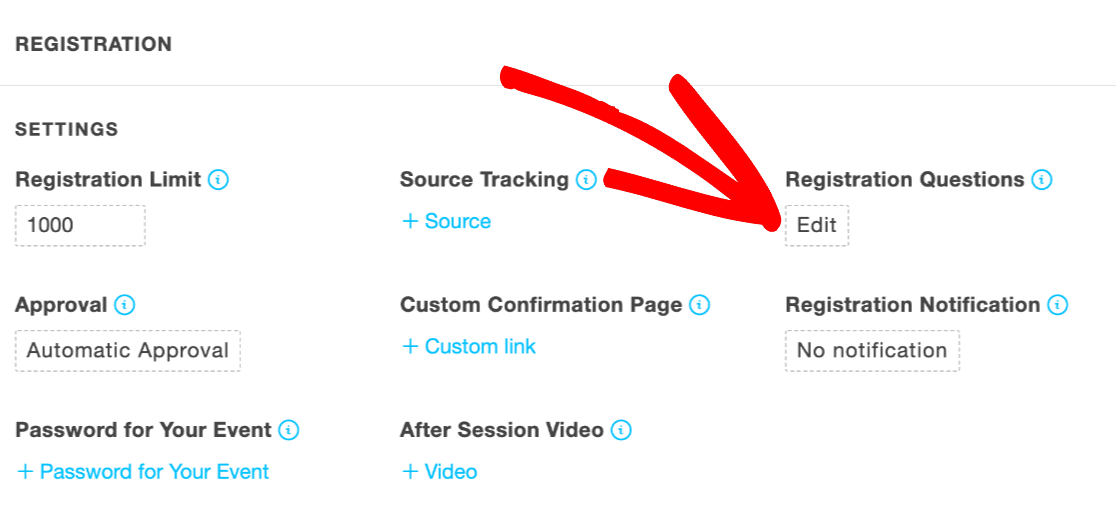
To customize your registration questions in GoToWebinar, scroll down to the Registration section and click on it to expand it. Click on Edit in the panel that opens:
Now you can add your custom questions by typing them in to the Create Custom Question box:
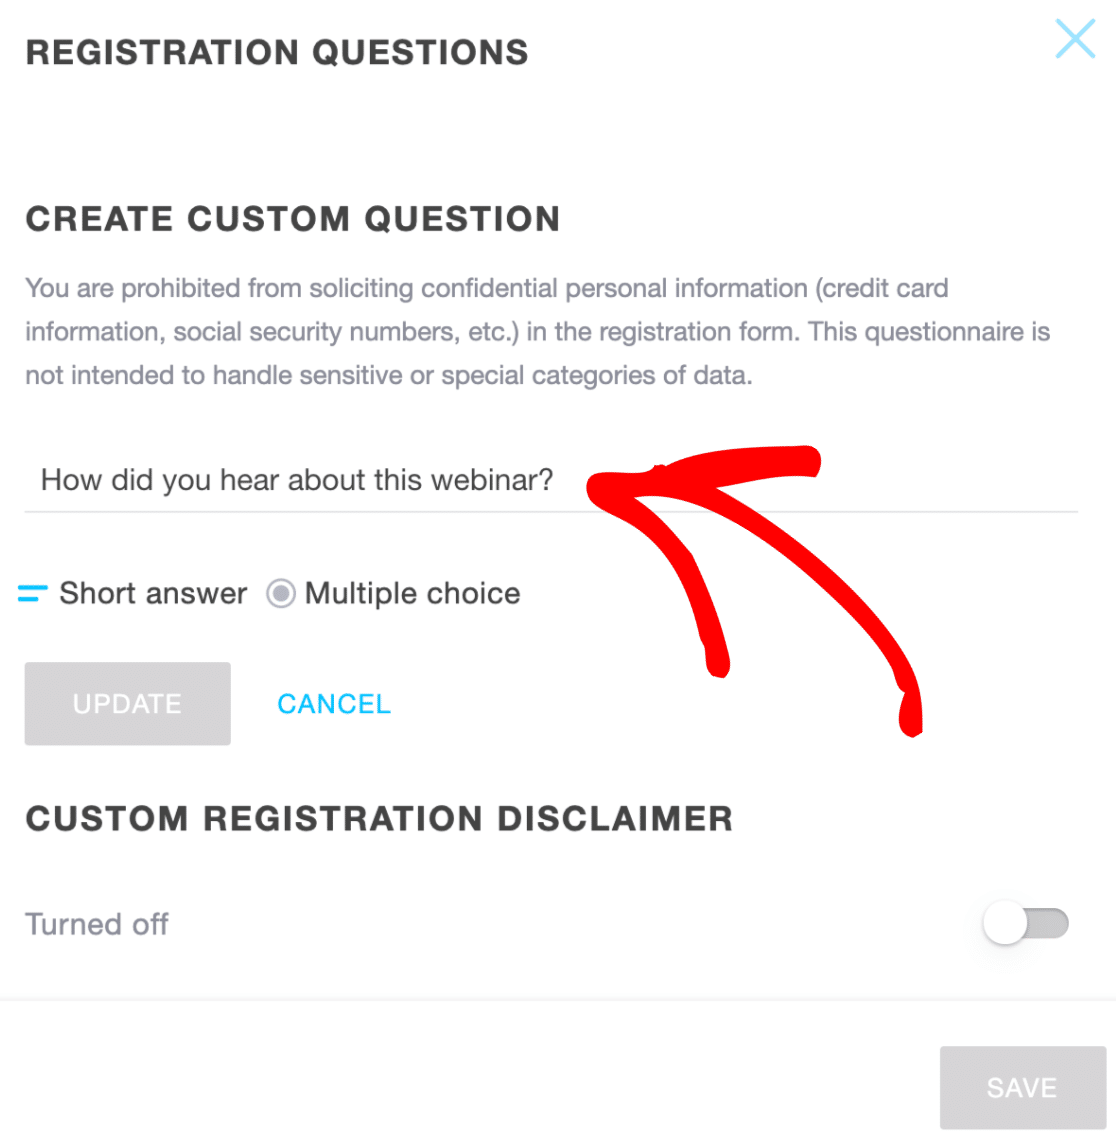
The other 3 questions are already set up for us, so that’s all we need to do.
Now we can create our custom GoToWebinar form. This will only take a few minutes because we won’t need to write any code.
Step 3: Create Your Custom GoToWebinar Registration Form
In this step, we’re going to make a custom GoToWebinar form in WordPress.
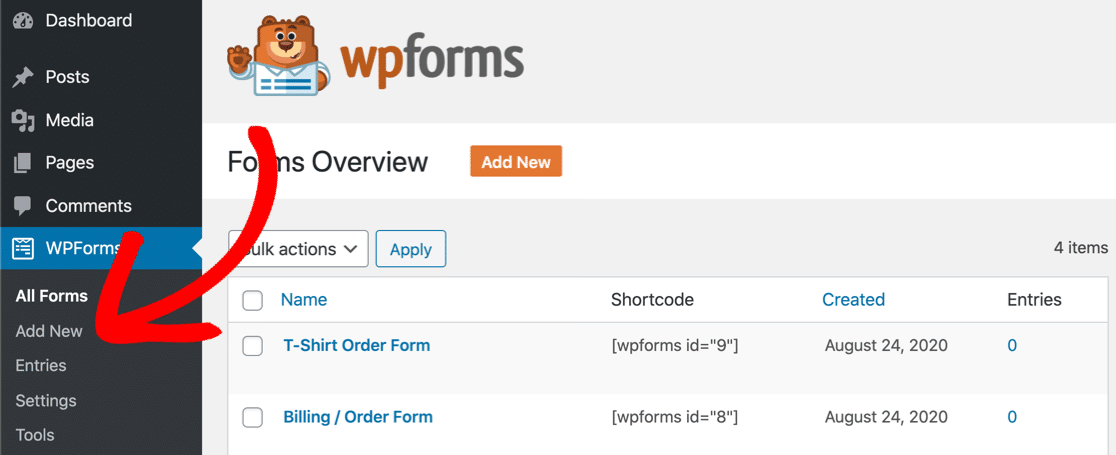
Start in the WordPress dashboard and click WPForms » Add New.
Type a name for your form at the top of the form builder window:

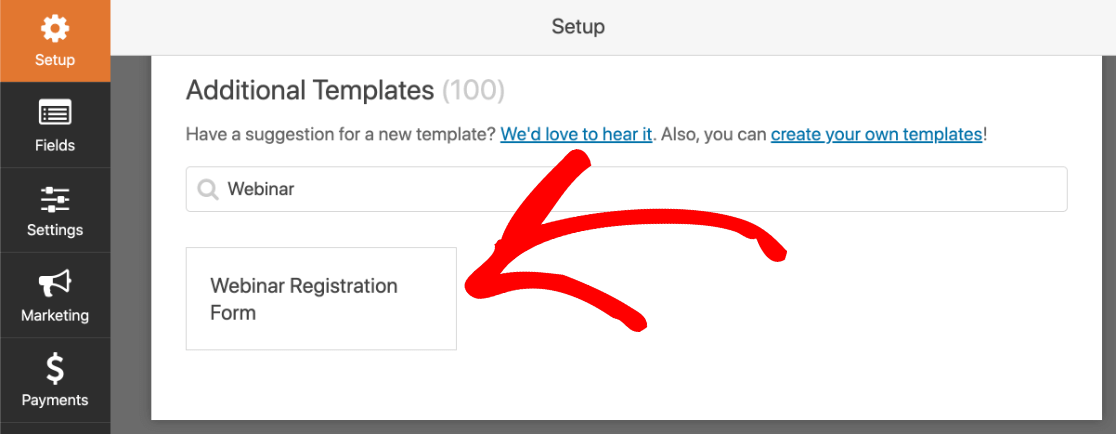
Now scroll right down to the Additional Templates section. Search for ‘webinar’ and click the Webinar Registration Form template to open it.
Now we’re ready to customize the form.
Remember the questions we set up in GoToWebinar? You’ll need to create one field to match each question.
To add a field for a question, just drag and drop it from the left-hand panel to the form preview on the right-hand side. Then change the label to match your custom question:
We don’t want to force registrants to answer these questions because we don’t want to increase form abandonment rates. So we left the Required box unticked.
Now we have our finished form set up, let’s embed it in a web page. This is super easy and takes just a few clicks.
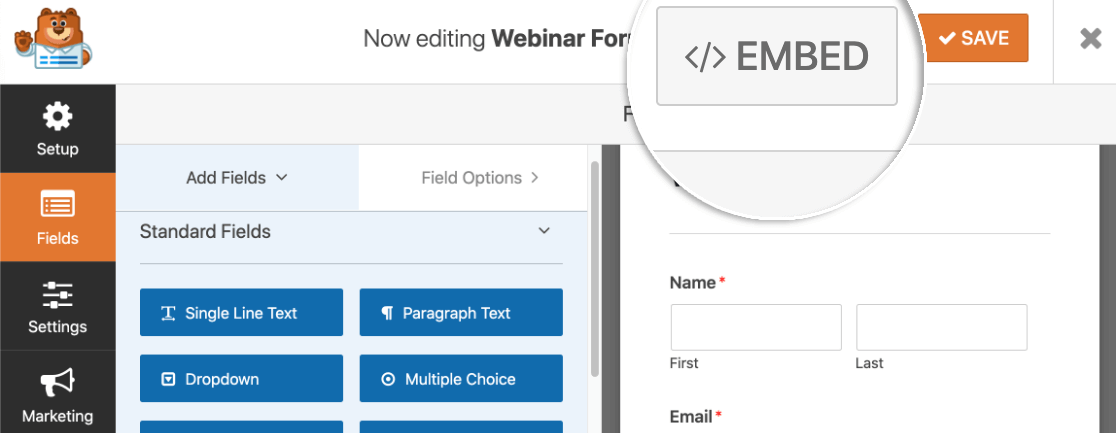
First, be sure to click Save at the top of the form builder.
Then click the Embed button just to the left.
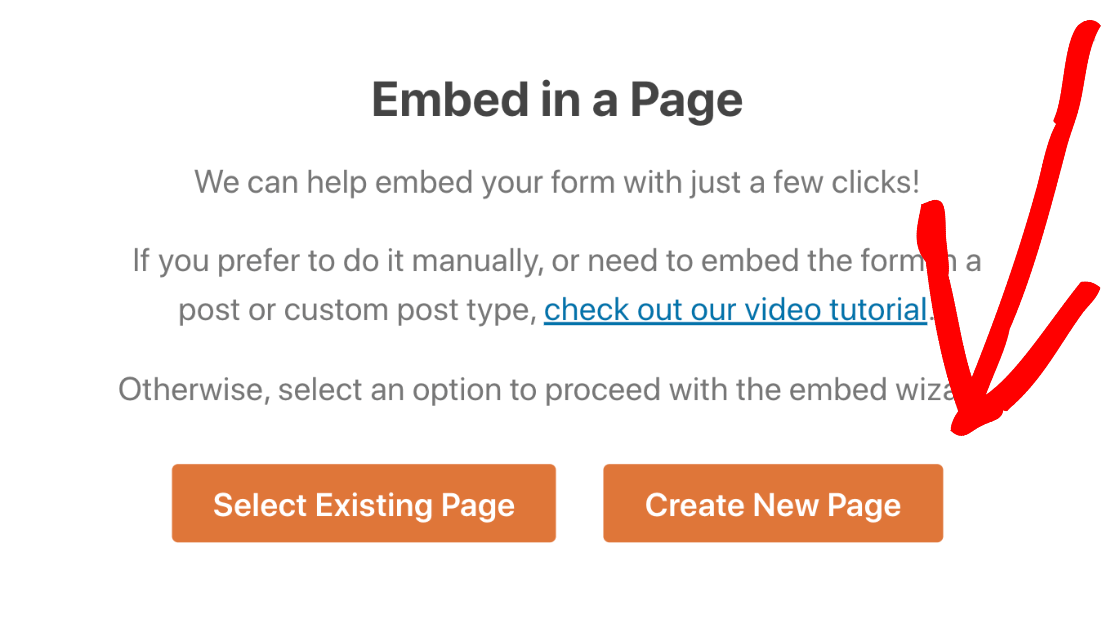
A popup will appear to help you quickly embed your form on a page. Let’s click Create New Page in the popup.
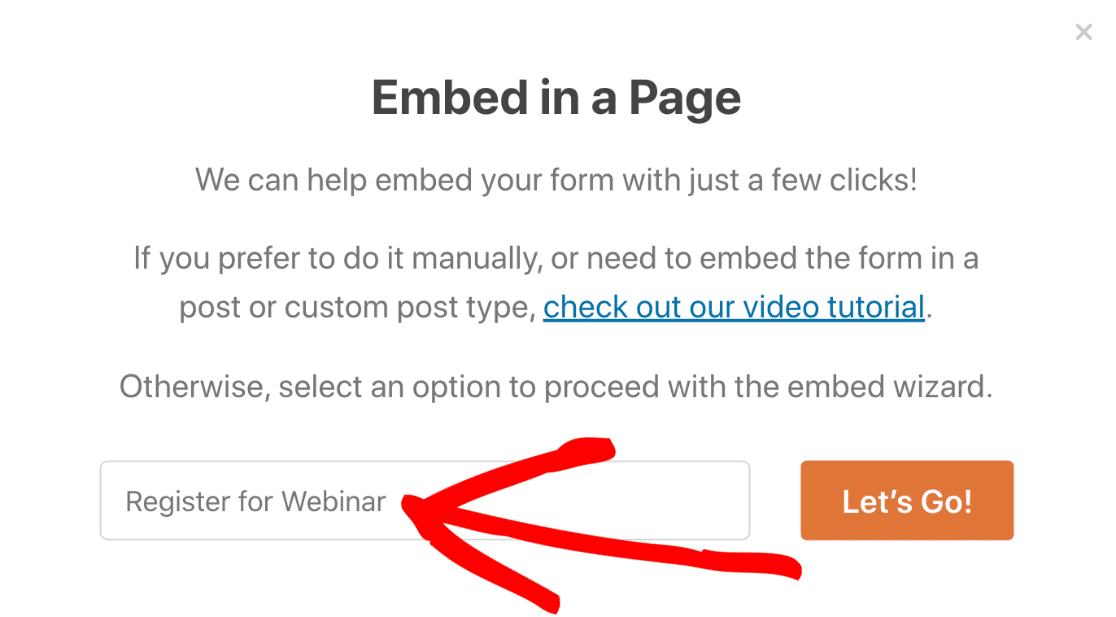
You can type in a name for your page here. Then click Let’s Go.
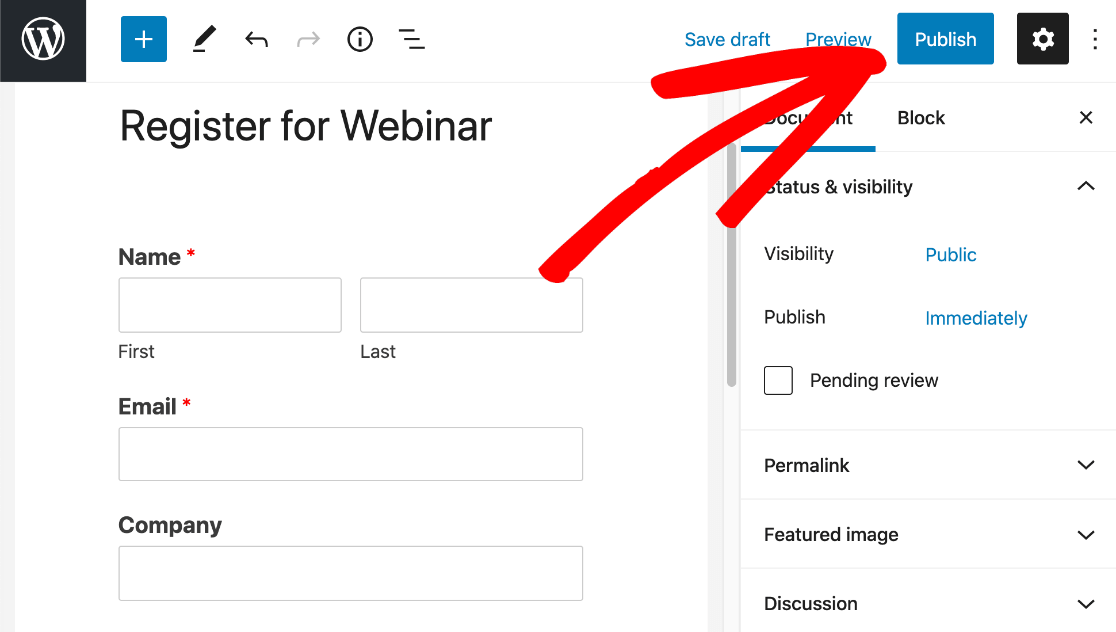
And finally, click the blue Publish button to publish your embedded custom GoToWebinar form.
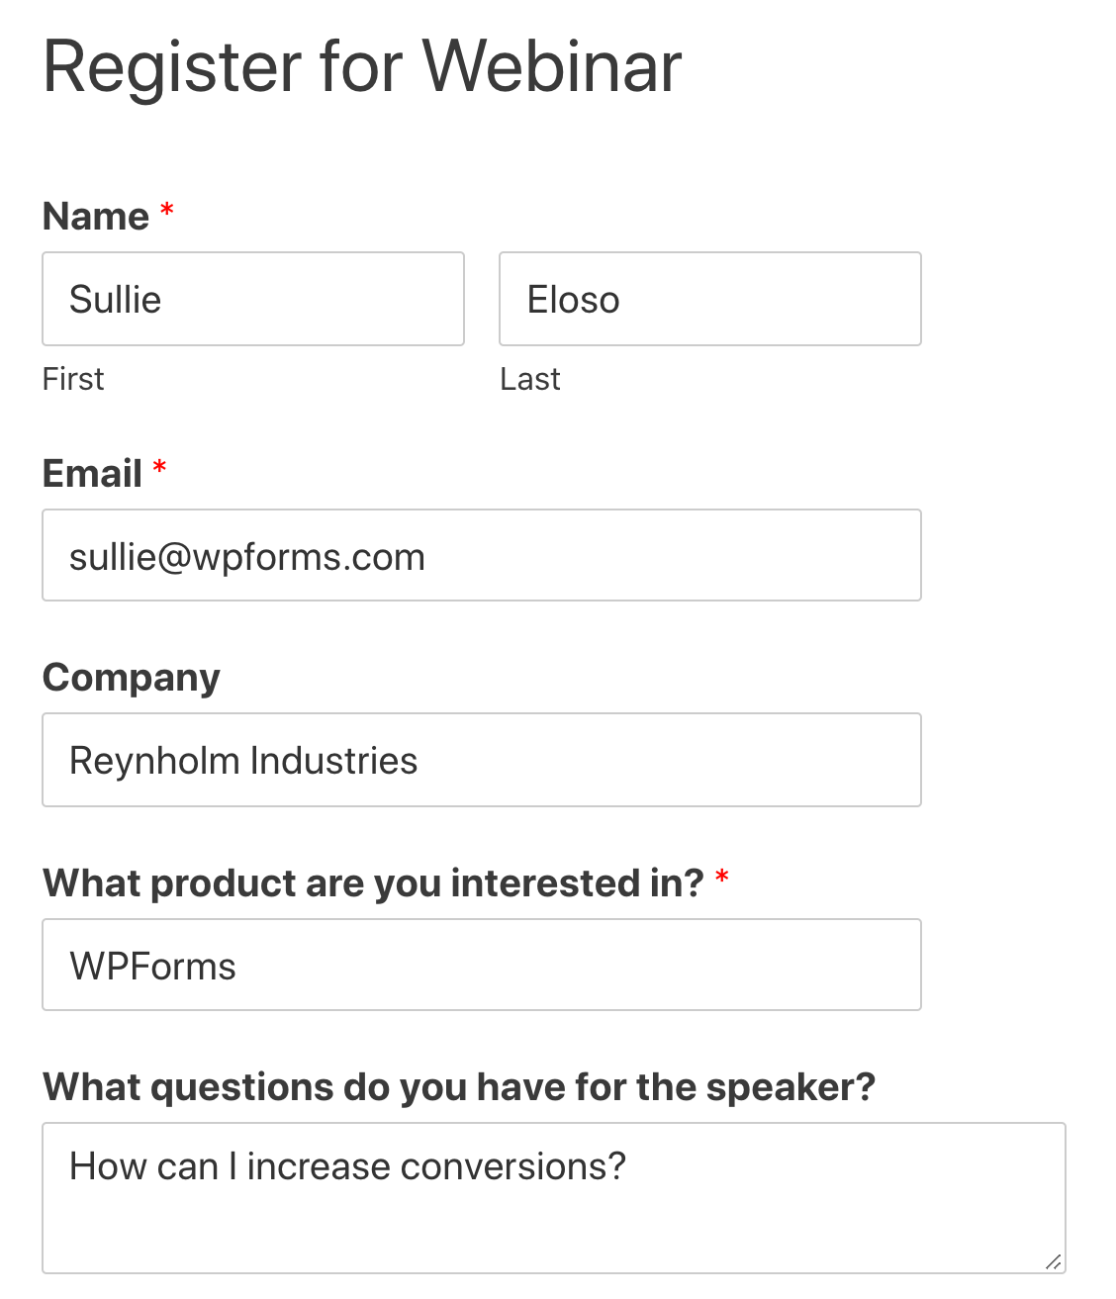
And that’s it! We now have a custom GoToWebinar registration form on our website.
Before moving on to the next step, be sure to fill out the form and submit it. Zapier needs to see at least one entry in the next step.
Also, keep the WordPress dashboard open in a tab. We’ll need to switch back to WPForms in the next step.
Step 4: Connect WPForms to Zapier
Zapier is a service that connects different sites and services together. It lets you use one service to trigger an action in another.
If you use Zapier, you don’t need to use GoToWebinar connectors or APIs.
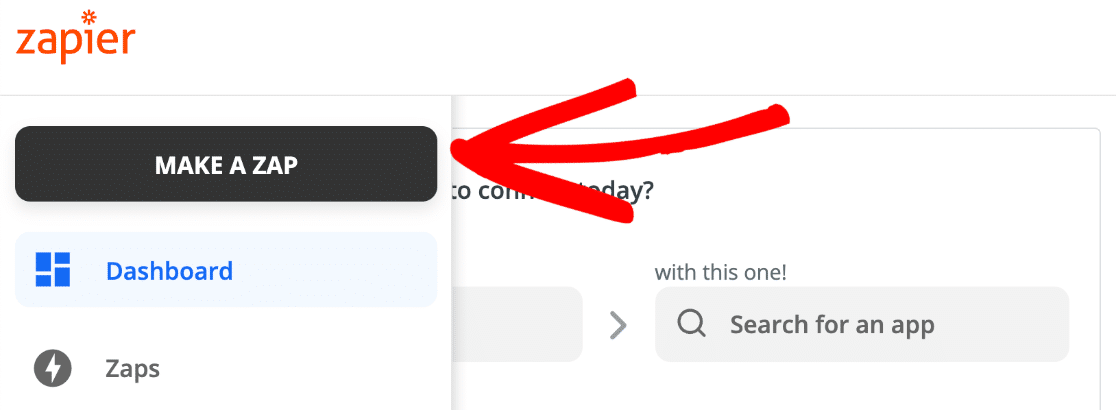
In a new tab, log in to your Zapier account, then go ahead and click Make a Zap.
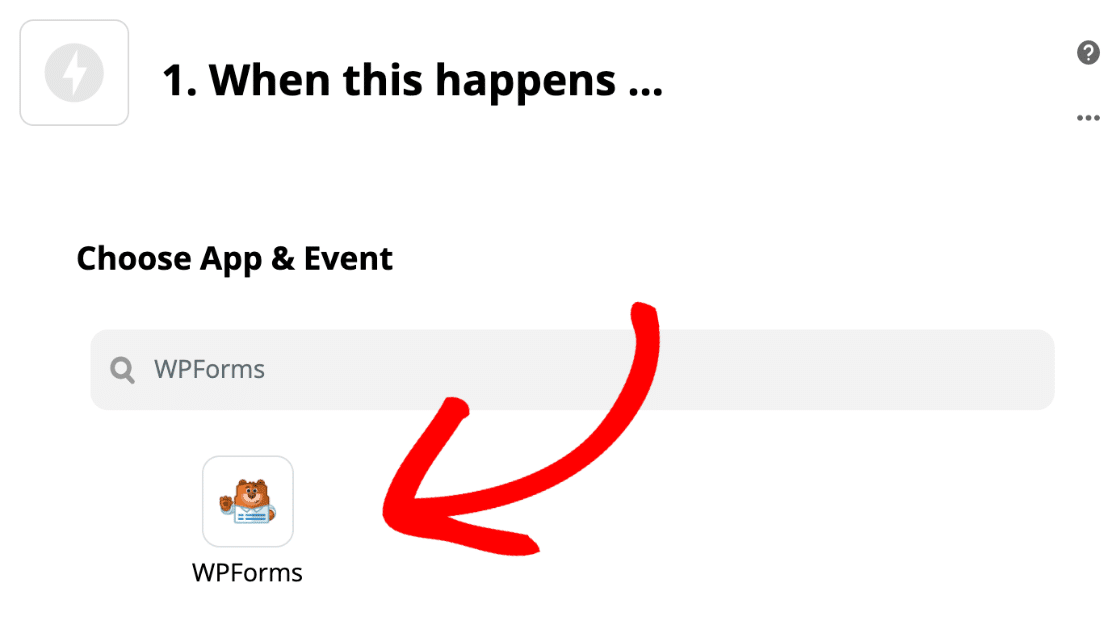
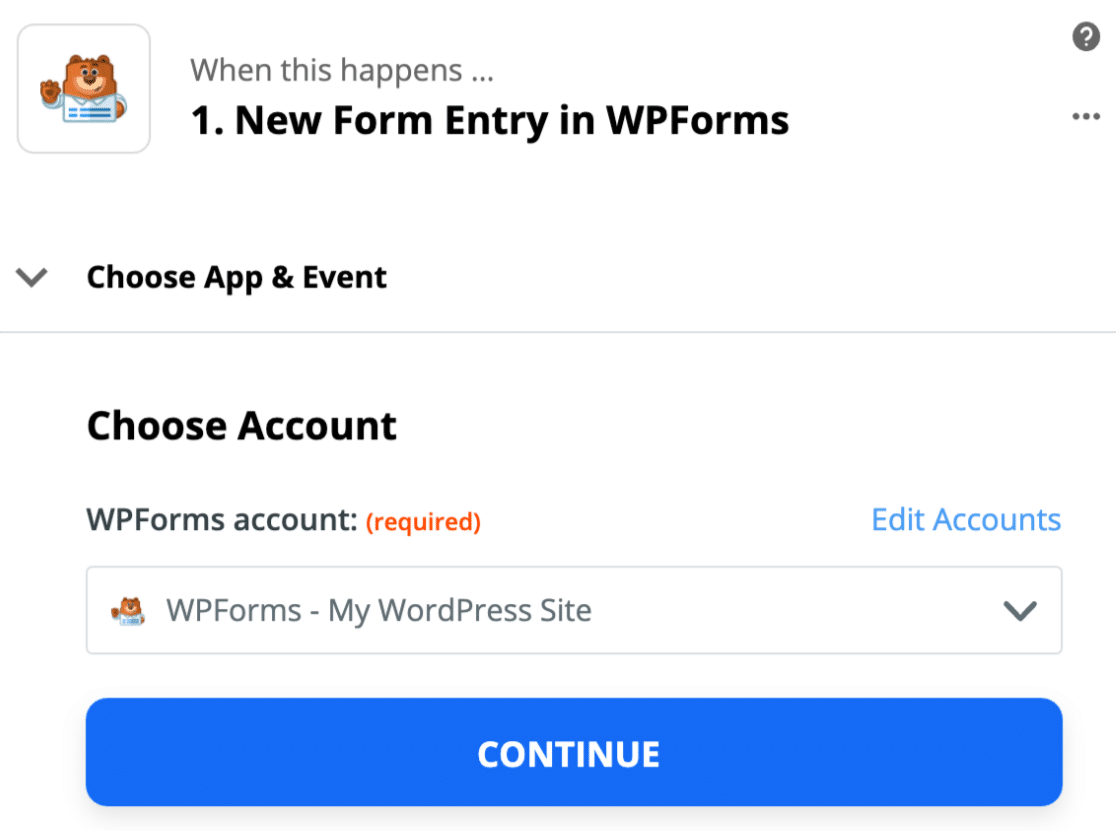
First, under Choose App and Event, search for WPForms. Click on the WPForms icon to select it.
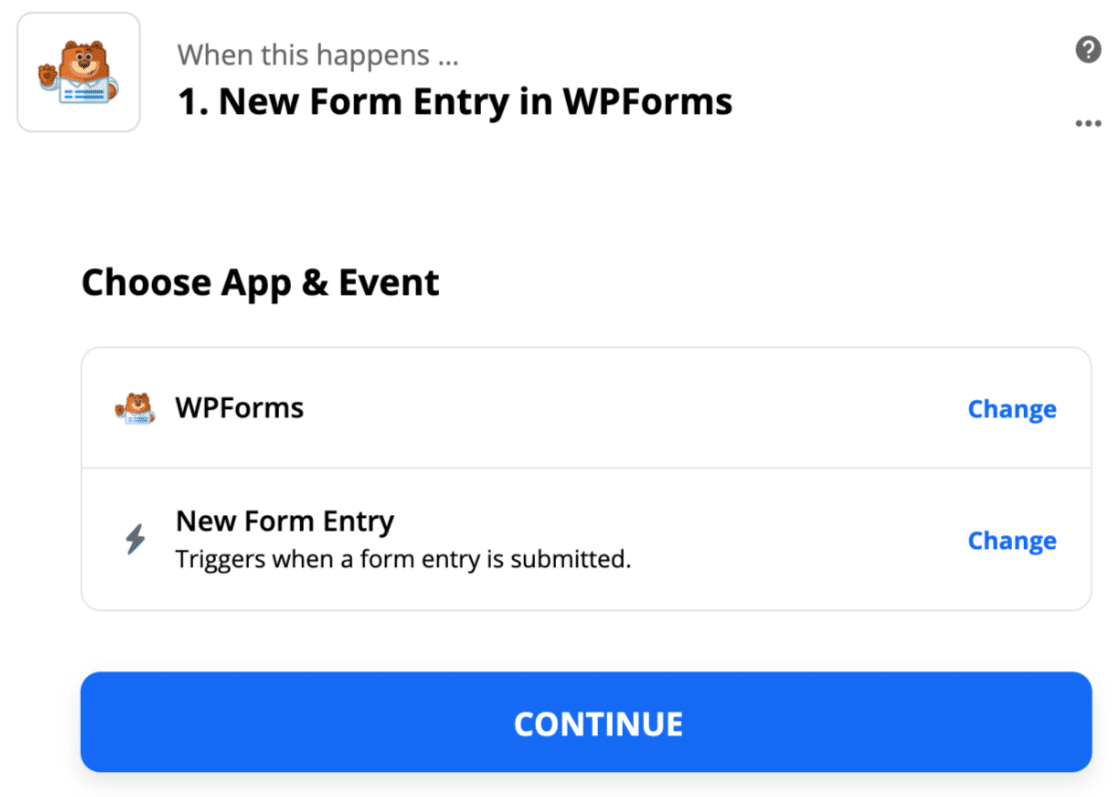
The trigger will be a new form entry. That’s already selected. We can click Continue here.
Now Zapier will prompt you to choose an account. For this step, you’ll want to grab your API key.
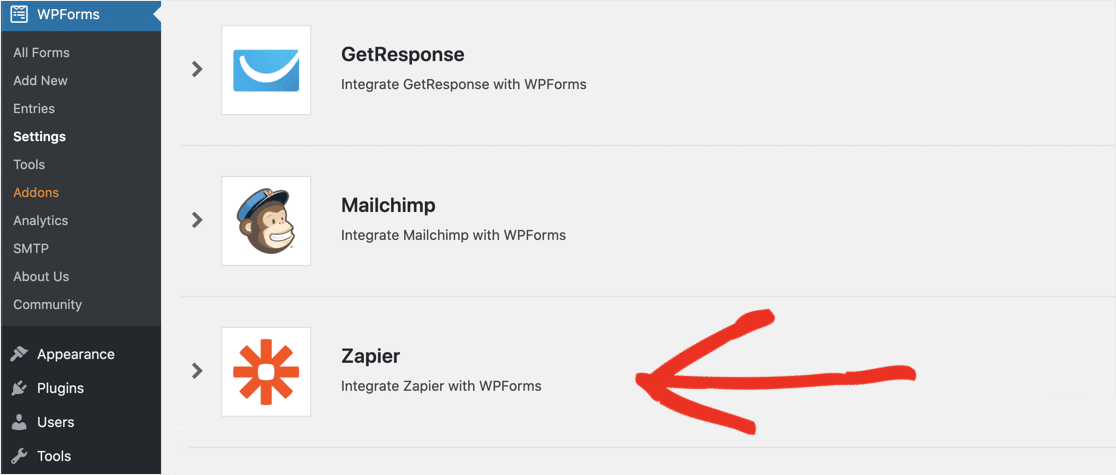
Switch back to the WordPress dashboard and click WPForms » Settings. Then click the Integrations tab.
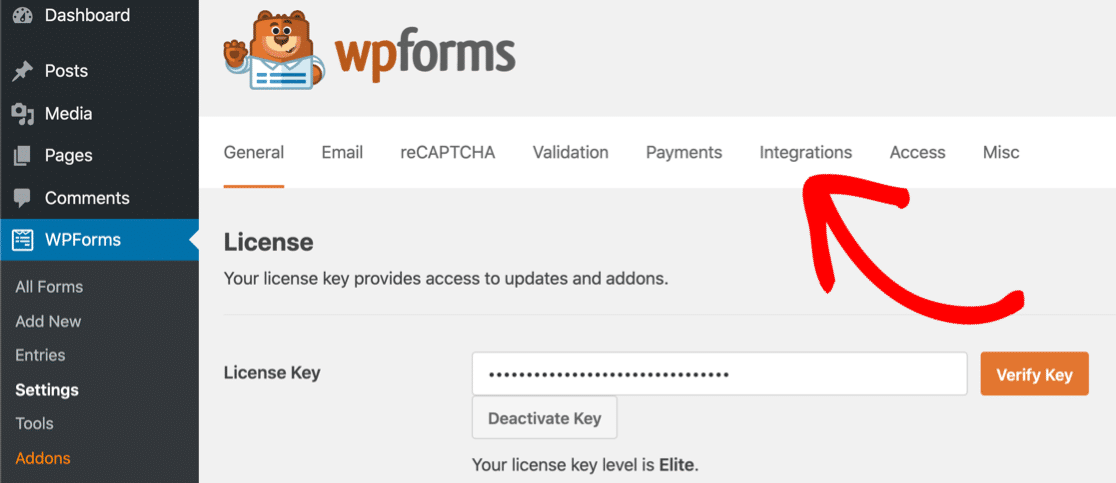
Scroll down and click Zapier to reveal your API key.
Copy the Zapier API key and paste it into the connection window. Then click Yes, Continue.
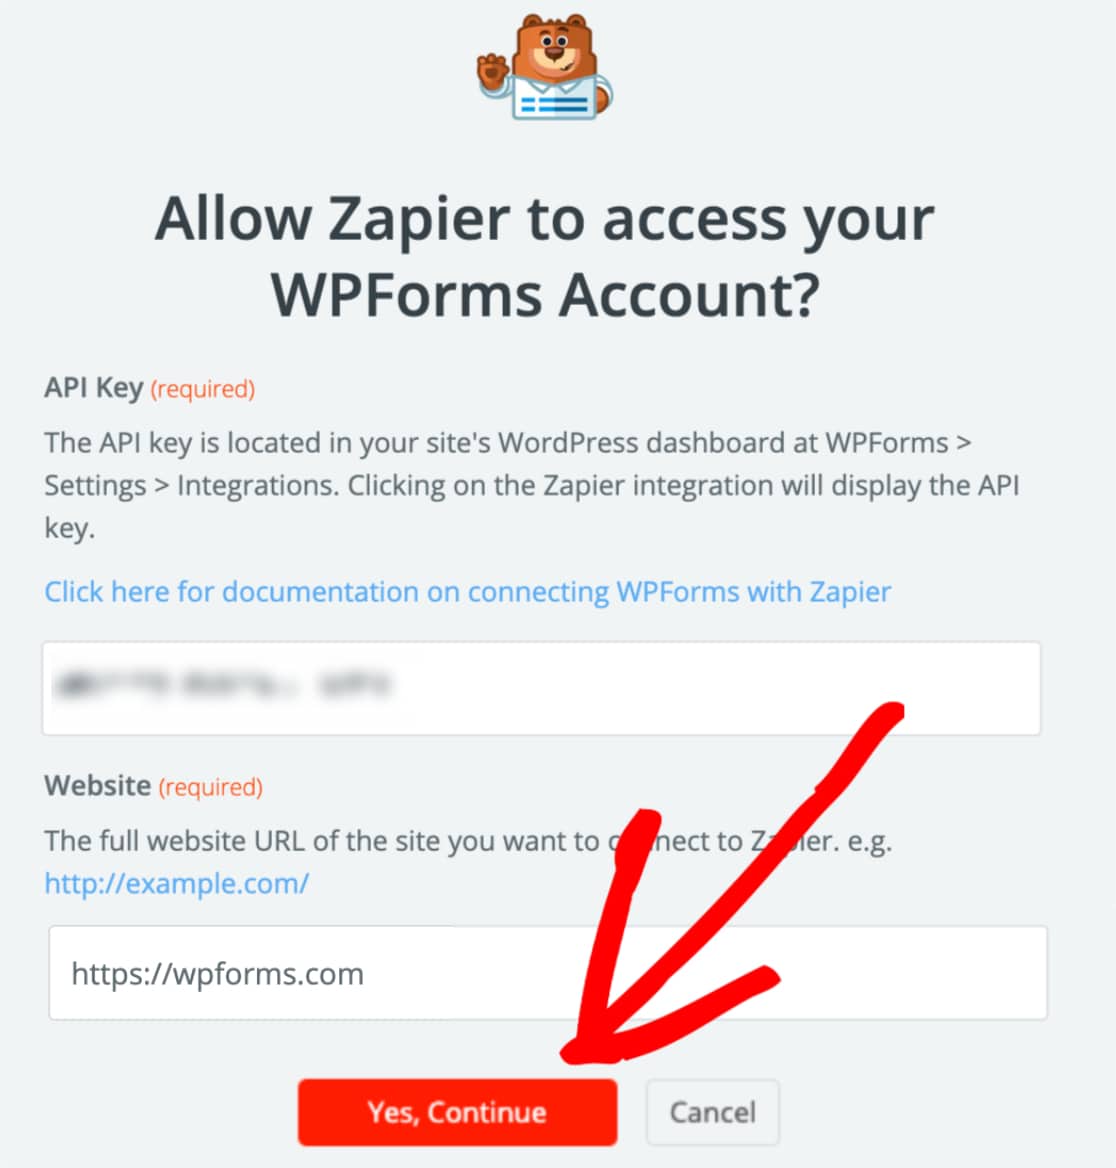
Now your site is connected, you can click Continue again.
Now we need to tell Zapier which form we’re using for GoToWebinar registrations.
In the dropdown, select the custom GoToWebinar form that we created in step 1.
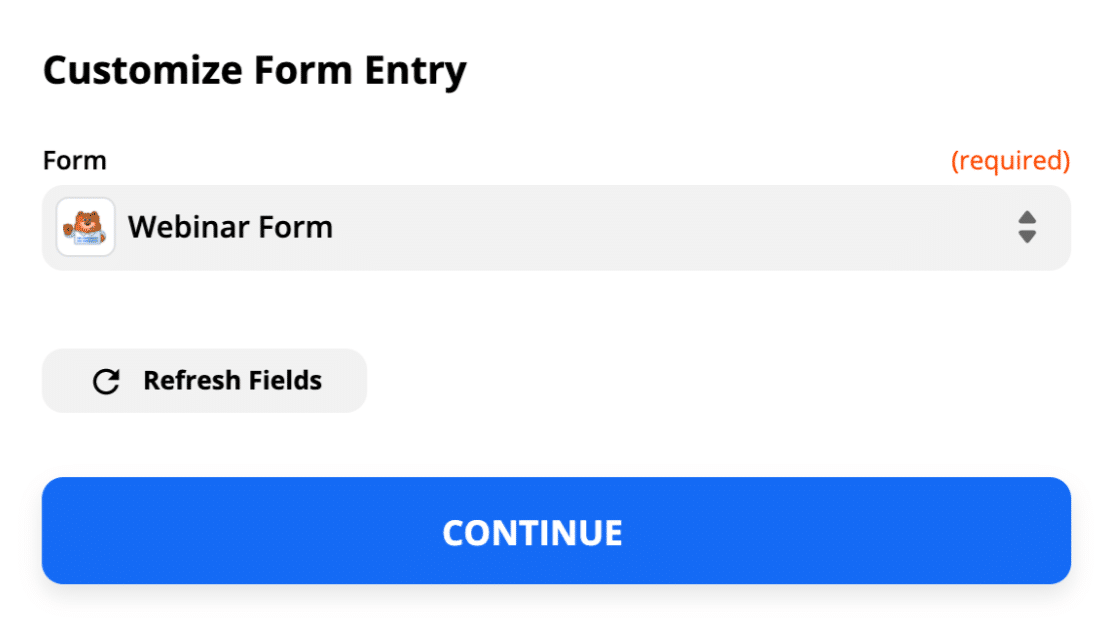
Now click Test trigger to try it out.
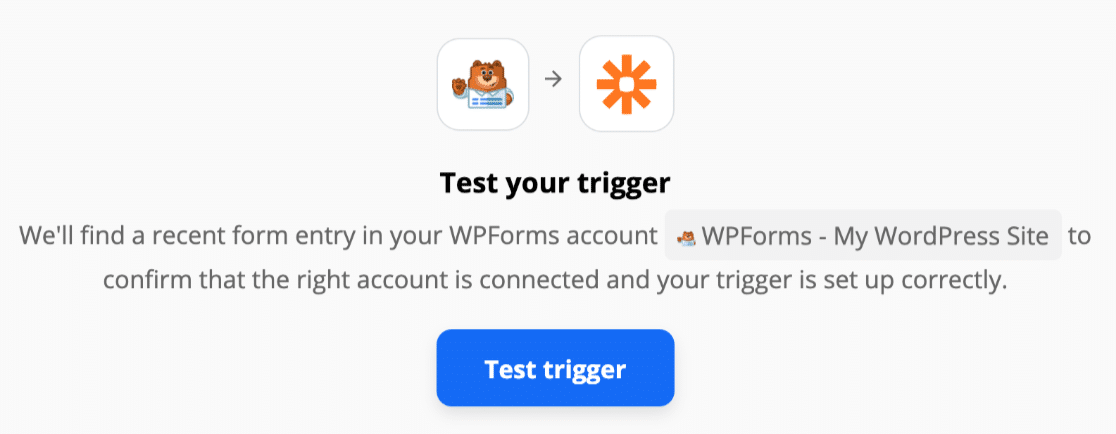
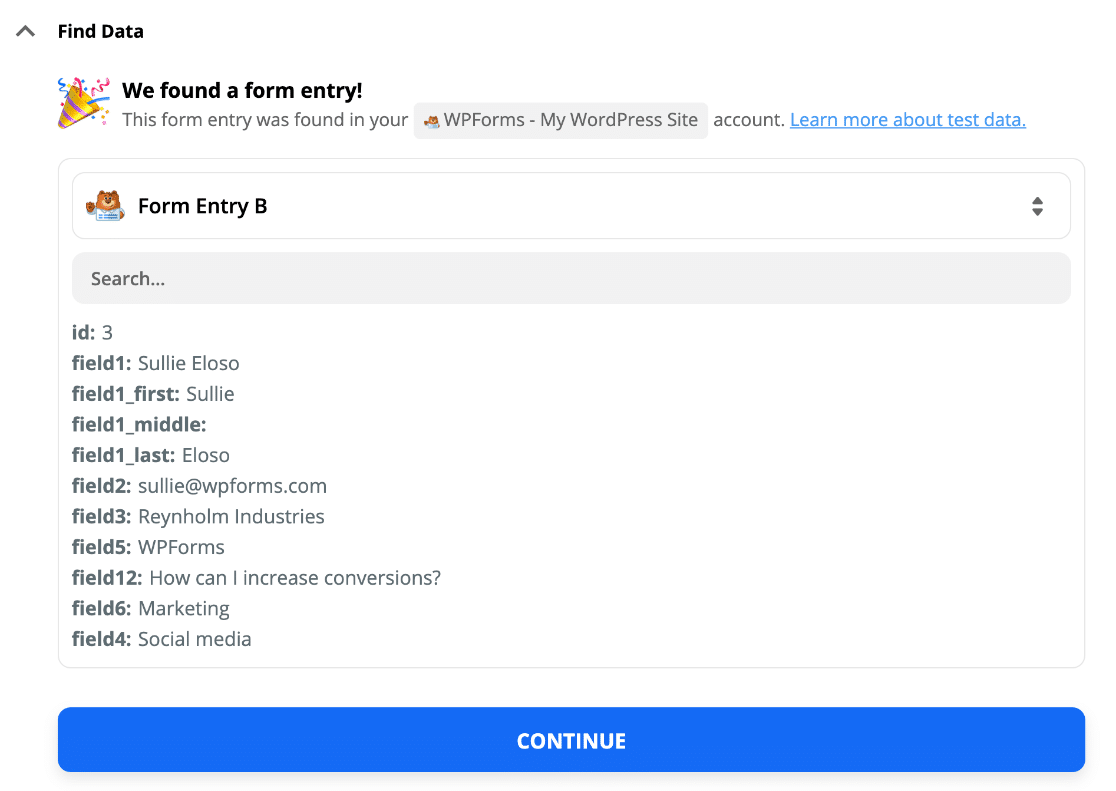
Zapier will connect to your website and pull in the test entry that we created.
You can see here that everything worked. Great! We have a form entry in Zapier:
That’s the connection to WPForms complete! Let’s connect Zapier and GoToWebinar.
Step 5: Connect GoToWebinar to Zapier
When Zapier detects a new entry in WPForms, it will create webinar registrant automatically.
Let’s set up the rest of our Zap.
To start, search for GoToWebinar and click the icon.
![]()
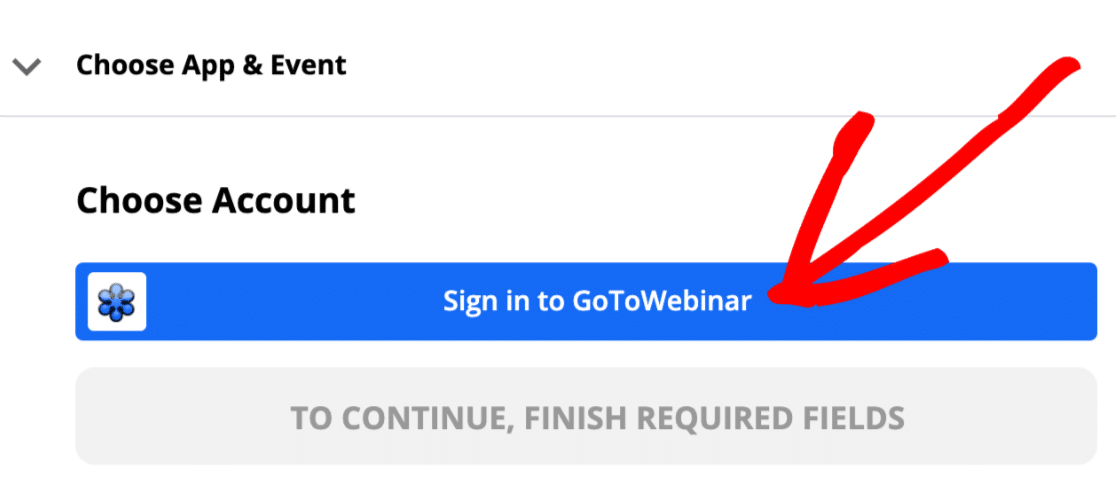
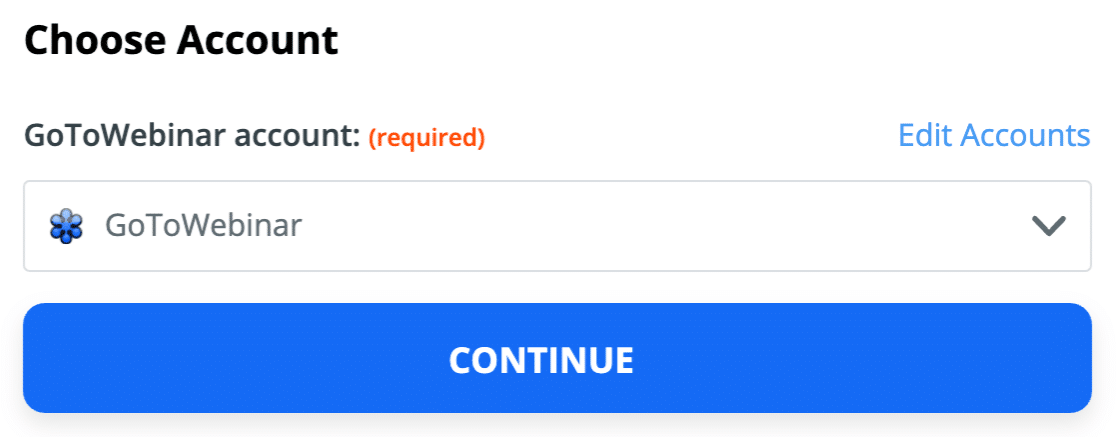
Now we’re going to log in to our GoToWebinar account.
Click the Sign in to GoToWebinar button here.
And then click Allow when the permission box pops up.
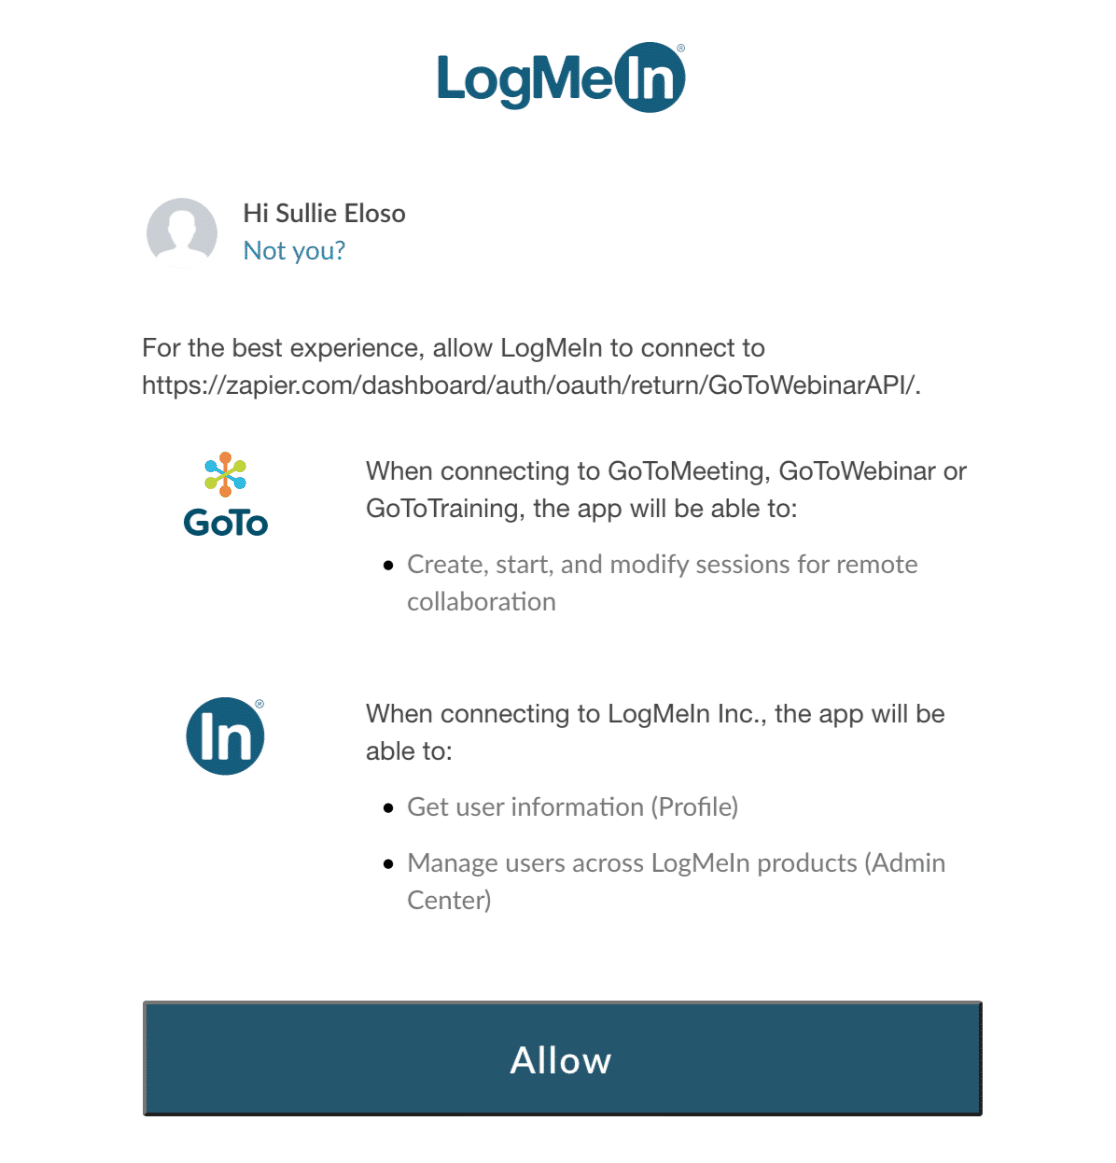
Then click Continue to confirm and move on.
Next up, Zapier needs to know what we want to do in GoToWebinar. Let’s click Create Registrant.
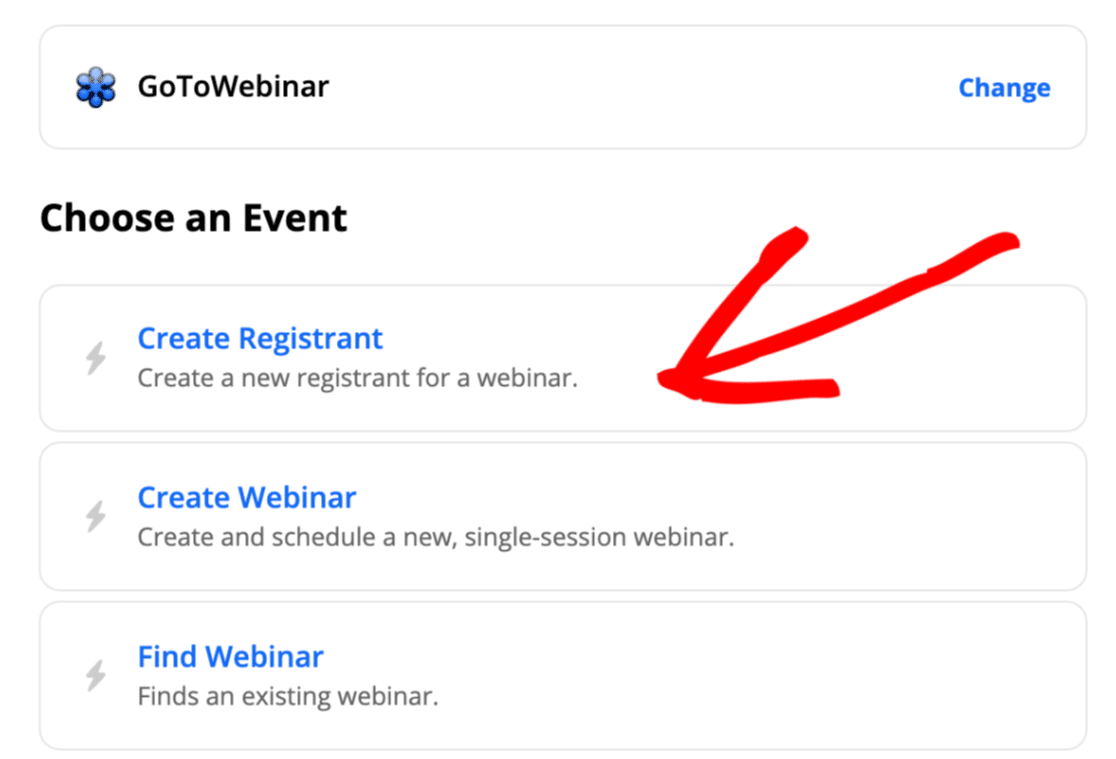
Now click Continue to confirm what we’ve done so far.
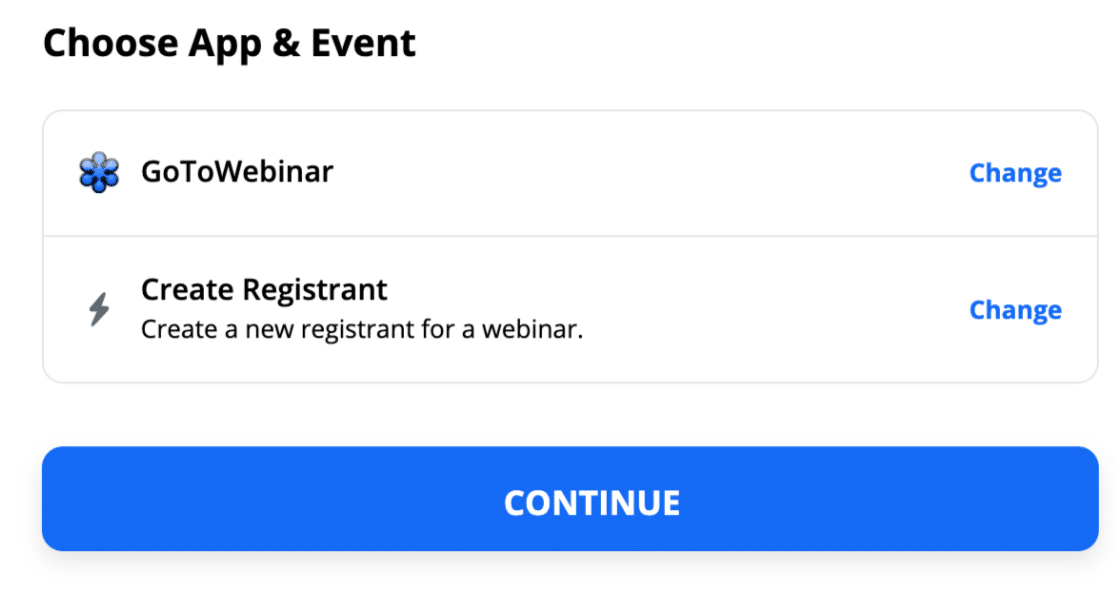
Great! Now we can bring everything together.
The next screen shows you the fields available in GoToWebinar for each registrant. If you created custom questions, you’ll see them here.
Go ahead and match each field from GoToWebinar to the information in the form using the dropdowns.
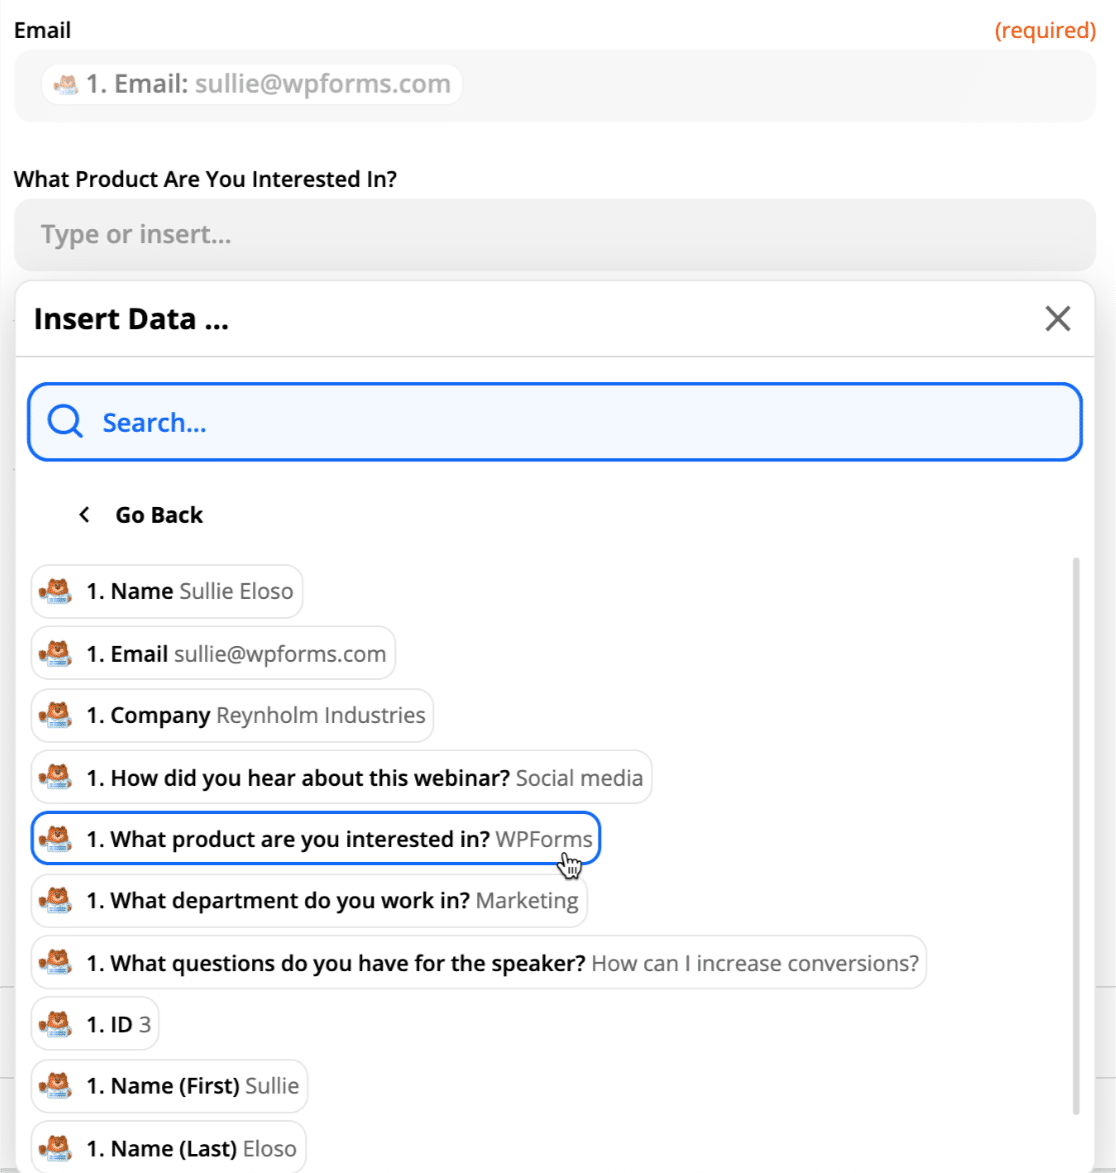
Did you notice how Zapier shows you the test entry next to the field names? It’s super helpful. You can easily match up the fields as you work down the list.
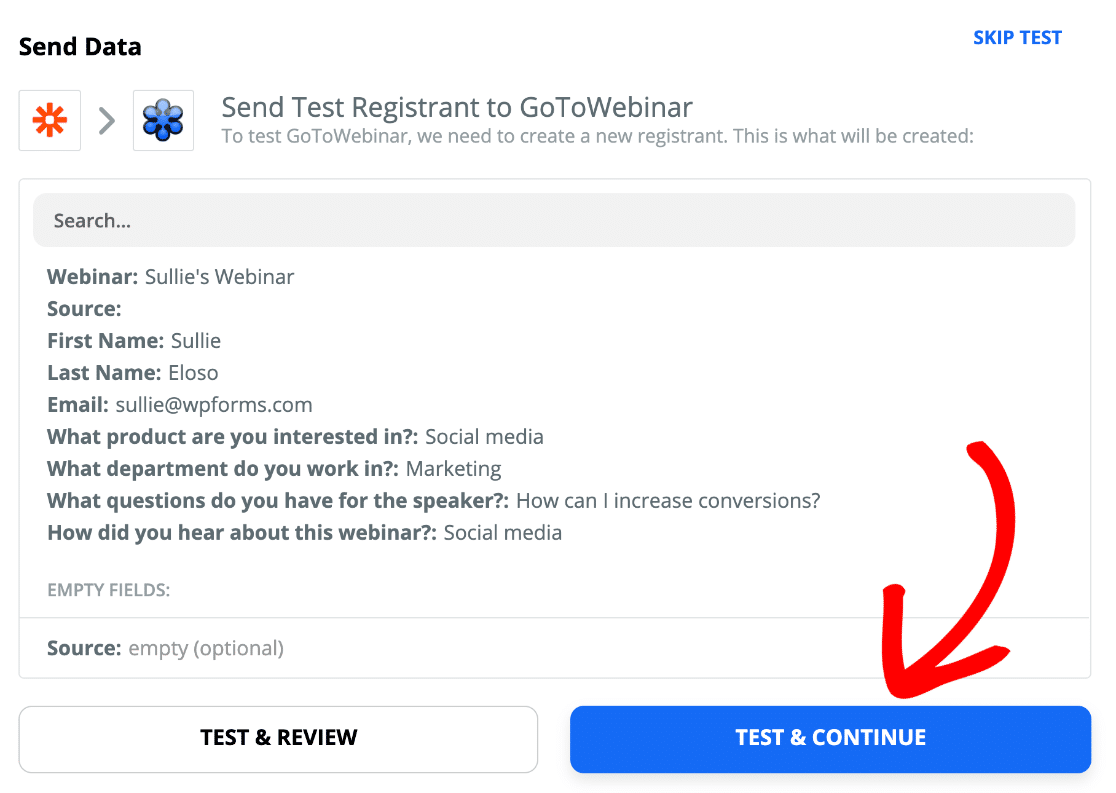
Test Your Custom GoToWebinar Registration Form
You’re done setting everything up. We’re going to send the test entry from Zapier through to GoToWebinar now.
Click Test and Continue.
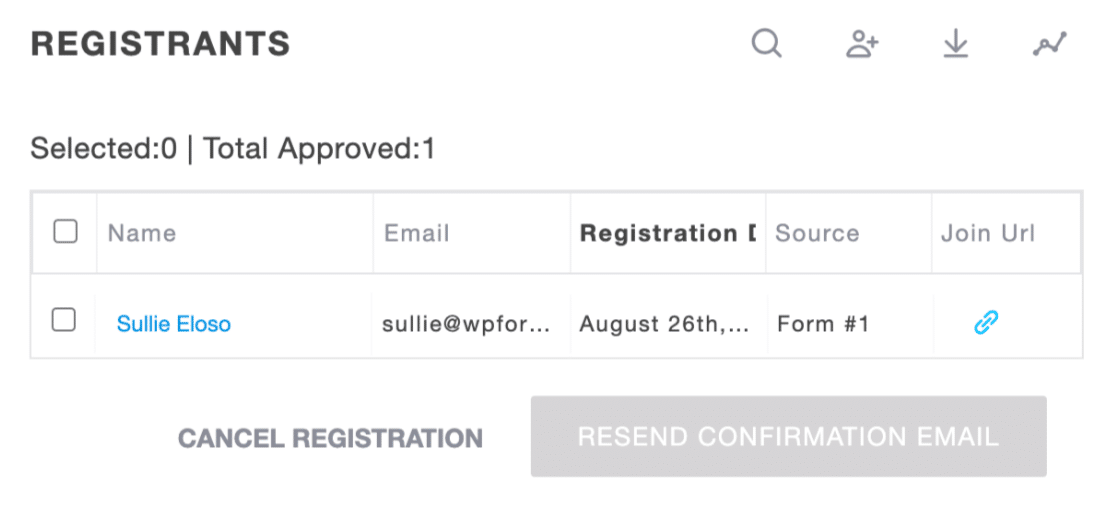
And it worked! Here’s the new record in GoToWebinar.
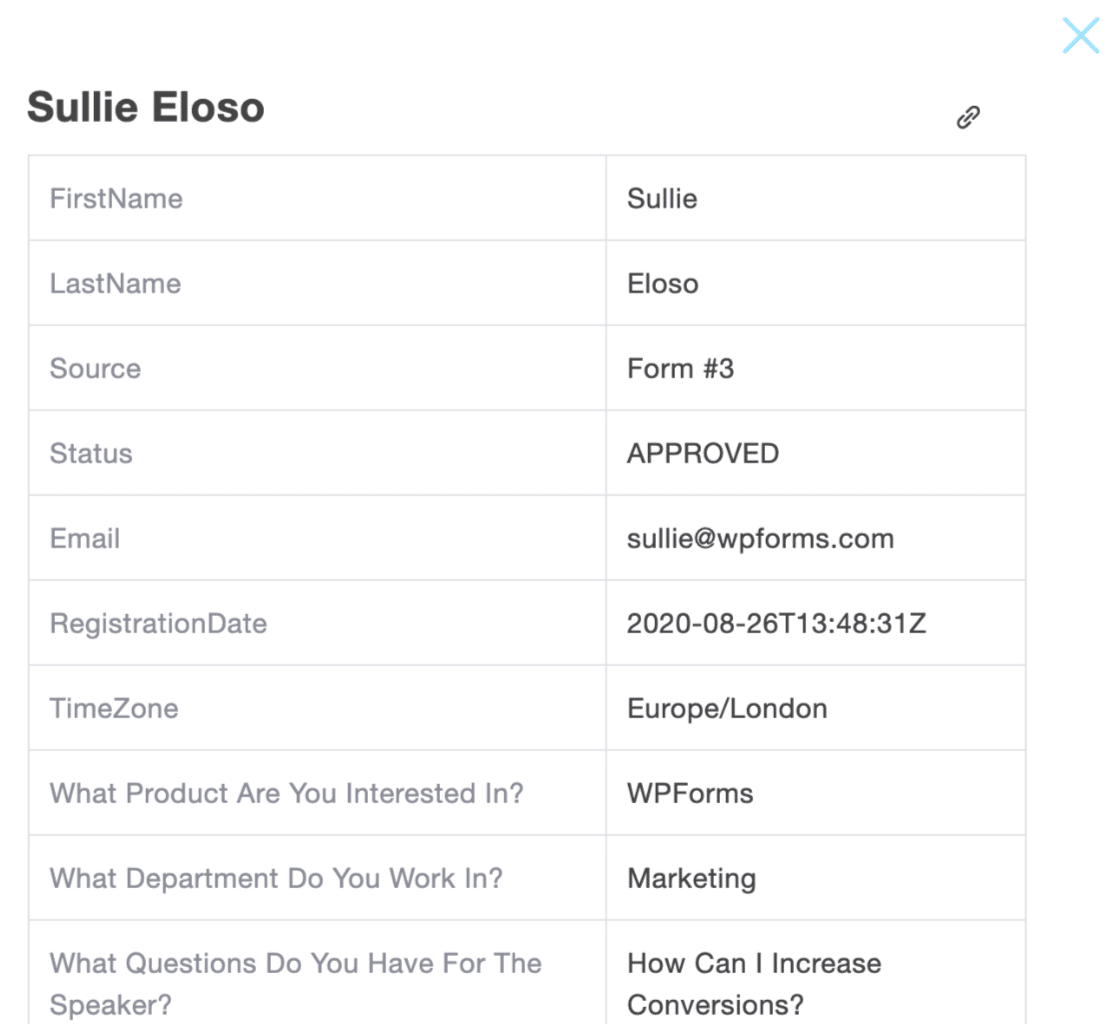
You can click on the name here to open the record and check that everything got mapped to the right place:
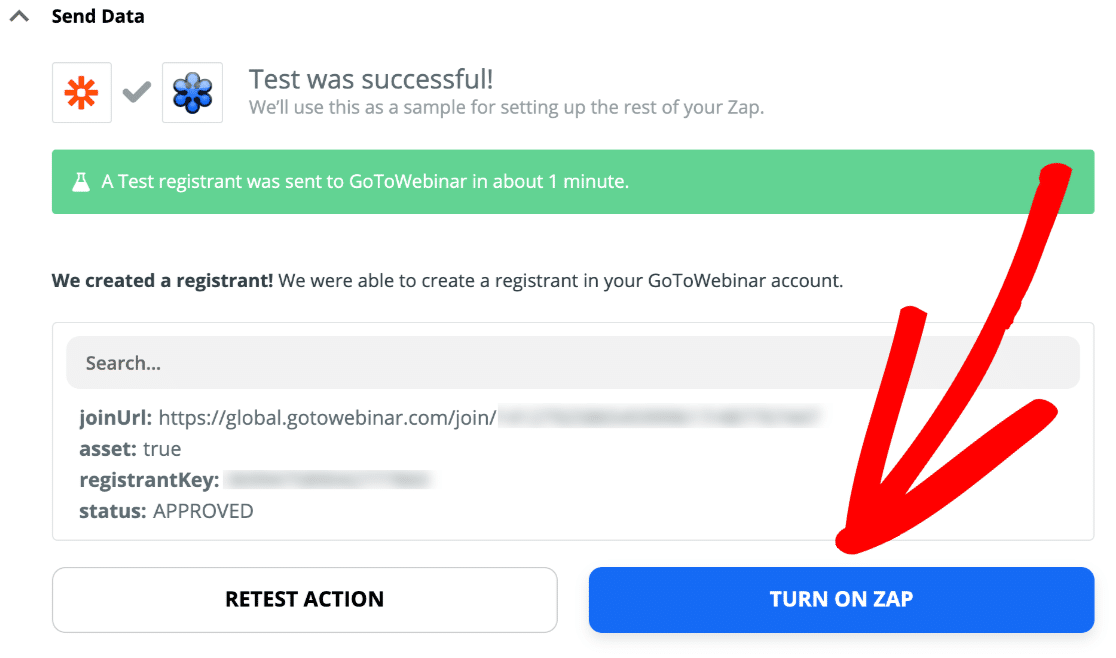
Don’t forget to turn on your Zap so all of your registrants will automatically be sent to GoToWebinar:
That’s it! You successfully created a custom registration form for GoToWebinar without using any code. Now you can share your registration URL via email or social media.
You can do lots of useful things with WPForms in Zapier. For example:
- You can use Zapier to create Pardot forms in WordPress
- You can save webinar attendees to your company’s workspaces using a Podio WordPress integration
- It’s also easy to create a WordPress ManyChat integration and engage with your registrants using a Facebook chatbot.
Create Your Webinar Registration Form Now
Next Up: Create a Killer Webinar Landing Page
Do you want to encourage more visitors to register for your webinar? You can embed your form in a killer landing page to encourage more people to sign up. Here’s a list of the best landing page plugins for WordPress to help with that.
Ready to build your custom GoToWebinar form? Get started today with the easiest WordPress form builder plugin. WPForms Pro includes a free webinar form template and offers a 14-day money-back guarantee.
If this article helped you out, please follow us on Facebook and Twitter for more free WordPress tutorials and guides.
The post How to Embed a GoToWebinar Registration Form in WordPress (2020) appeared first on WPForms.
source https://wpforms.com/how-to-embed-custom-gotowebinar-registration-form/


