Do you want to use Zoho Mail SMTP to send email from your WordPress site? Using Zoho’s SMTP servers will authenticate your emails so that delivery is more reliable.
In this tutorial, we’ll set up Zoho Mail on your website with a plugin. This is a really easy way to send all of the emails from your web forms using your Zoho account.
Create Your WordPress Contact Form Now
How Do I Use Zoho SMTP?
To use Zoho Mail SMTP, you’ll need to create a Zoho Mail account. You can then easily and securely connect the account to your WordPress site with a plugin.
Zoho Mail lets you use a Zoho email domain as part of the package. If you prefer to use a custom domain, you can connect a domain you own to create a distinctive business email address.
Using your own domain is easy. You’ll just need to change your DNS settings to point to Zoho’s mail servers. Zoho Mail has a really easy onboarding wizard that will walk you through that.
Once your account is set up, it’s really easy to add it to WordPress with WP Mail SMTP. Let’s take a look at how it’s done.
How to Set Up Zoho Mail SMTP in WordPress
We’re going to walk you through the process of adding Zoho Mail to WordPress with the WP Mail SMTP plugin.
If you don’t have a Zoho Mail account yet, you’ll want to sign up before working through these steps:
- Install the WP Mail SMTP Plugin
- Set Up Zoho SMTP in WordPress
- Set Up the Zoho API
- Set Up the Zoho Mail WordPress Connection
- Send a Test Email With Zoho SMTP
To follow along, you’ll need the WP Mail SMTP Pro plan or higher.
Step 1: Install the WP Mail SMTP Plugin
First up, let’s install WP Mail SMTP. It’s the best SMTP plugin for WordPress.
WP Mail SMTP lets you send all of the emails from your WordPress site through Zoho instead of relying on your webserver to deliver them.
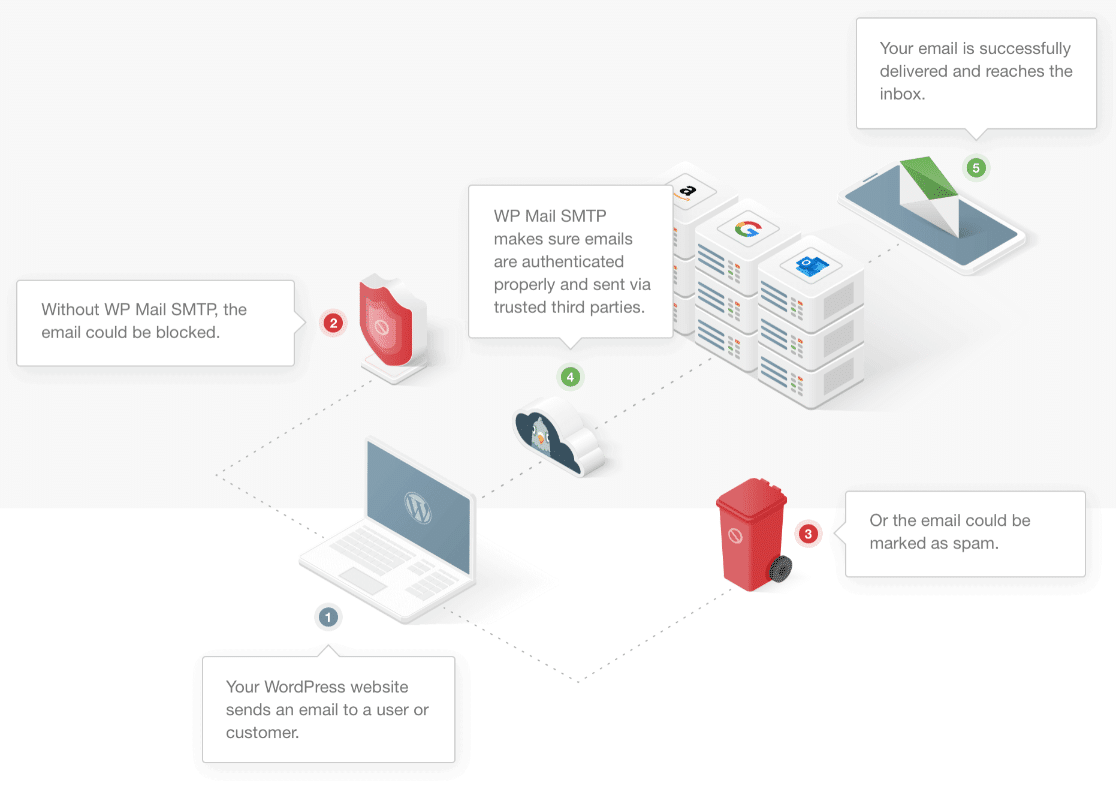
You’l want to start by installing and activating WP Mail SMTP on your site. If you need help installing the plugin, check out this guide to installing a plugin in WordPress.
Don’t forget to enter your license key in the plugin before you move on to the next step.

Now everything’s ready, we can select Zoho Mail in WordPress.
Step 2: Set Up Zoho SMTP in WordPress
Now we have the plugin activated, we’re going to set up Zoho as our WordPress mailer.
Start in the WordPress dashboard and click WP Mail SMTP, then Settings.

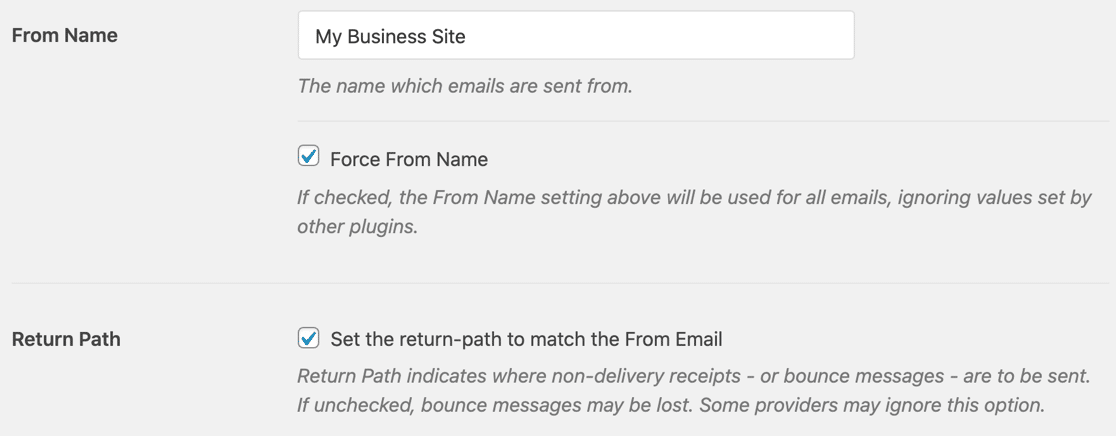
For now, we can skip over the From Email and head to the From Name field. Type in your name, or the name of your site if that makes sense for you.
It’s also a good idea to check the Return Path checkbox so that any bounced emails always get sent back to you.
Now scroll down and click the Zoho Mail picture in the Mailers section.

WP Mail SMTP will open up all of the options for Zoho Mail. Let’s pause and set up the API before we fill in anything else here.
But wait – keep this page open in a tab. We’ll need to switch back to WP Mail SMTP in a second.
Step 3: Set Up the Zoho API
Now we’re going to create an API connection in Zoho.
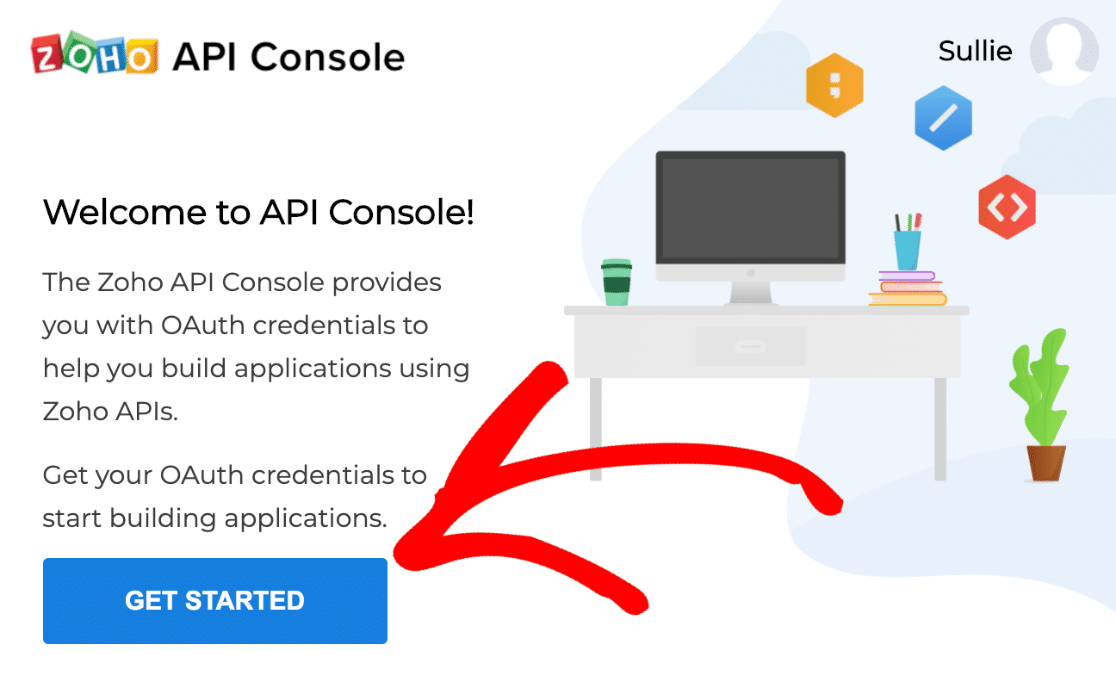
Start by opening the Zoho API console in a new tab. You might need to sign in to Zoho as well.
Once you’re logged in, click Get Started.
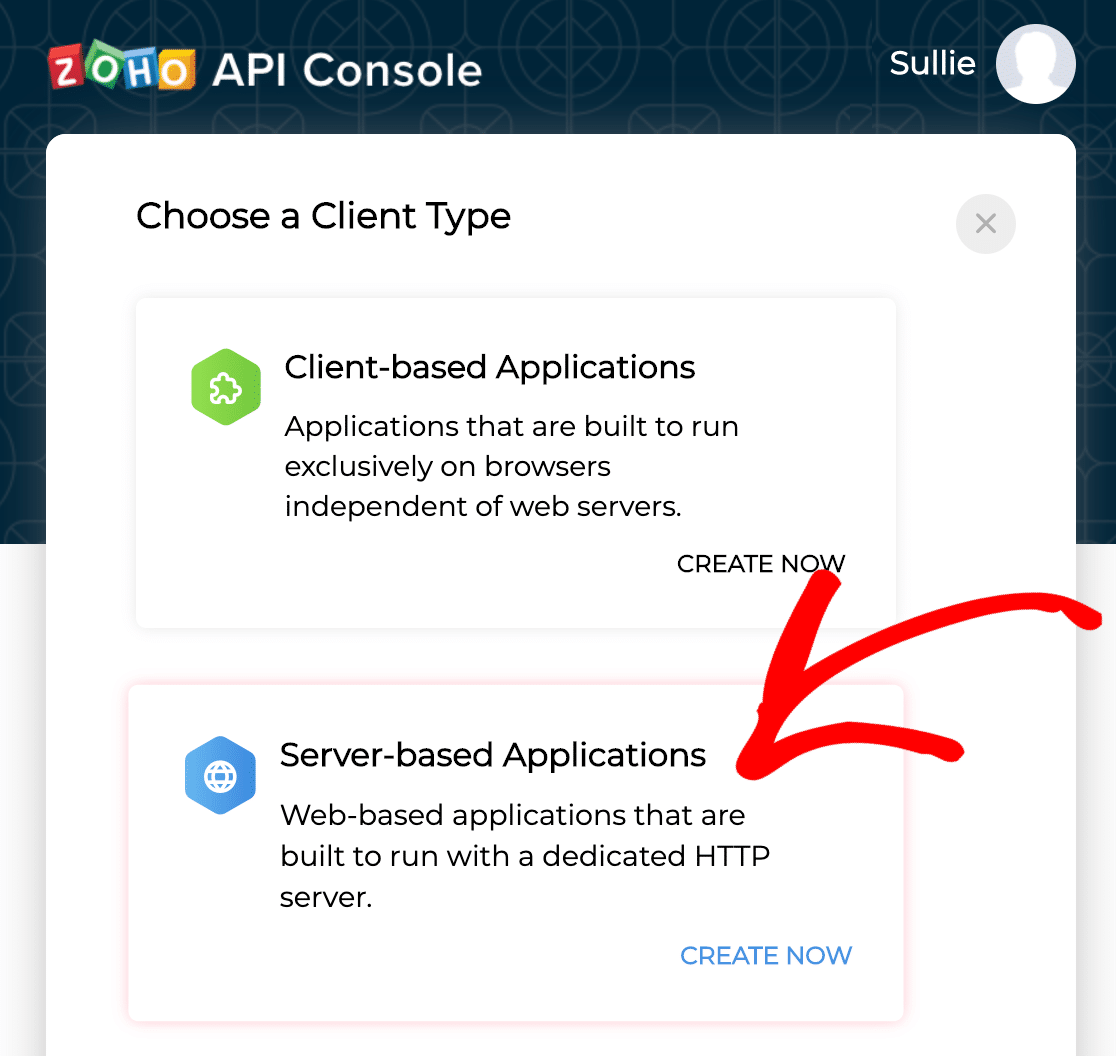
We’re adding a client for a website, so you’ll want to click Server-Based Applications here.
Now let’s fill in these 2 fields to start setting up the API:
- In Client Name, type in any name. If you’re setting up SMTP on more than one site, you might want to include the site name here so that your connection is easy to identify.
- In Homepage URL, type your full website address.
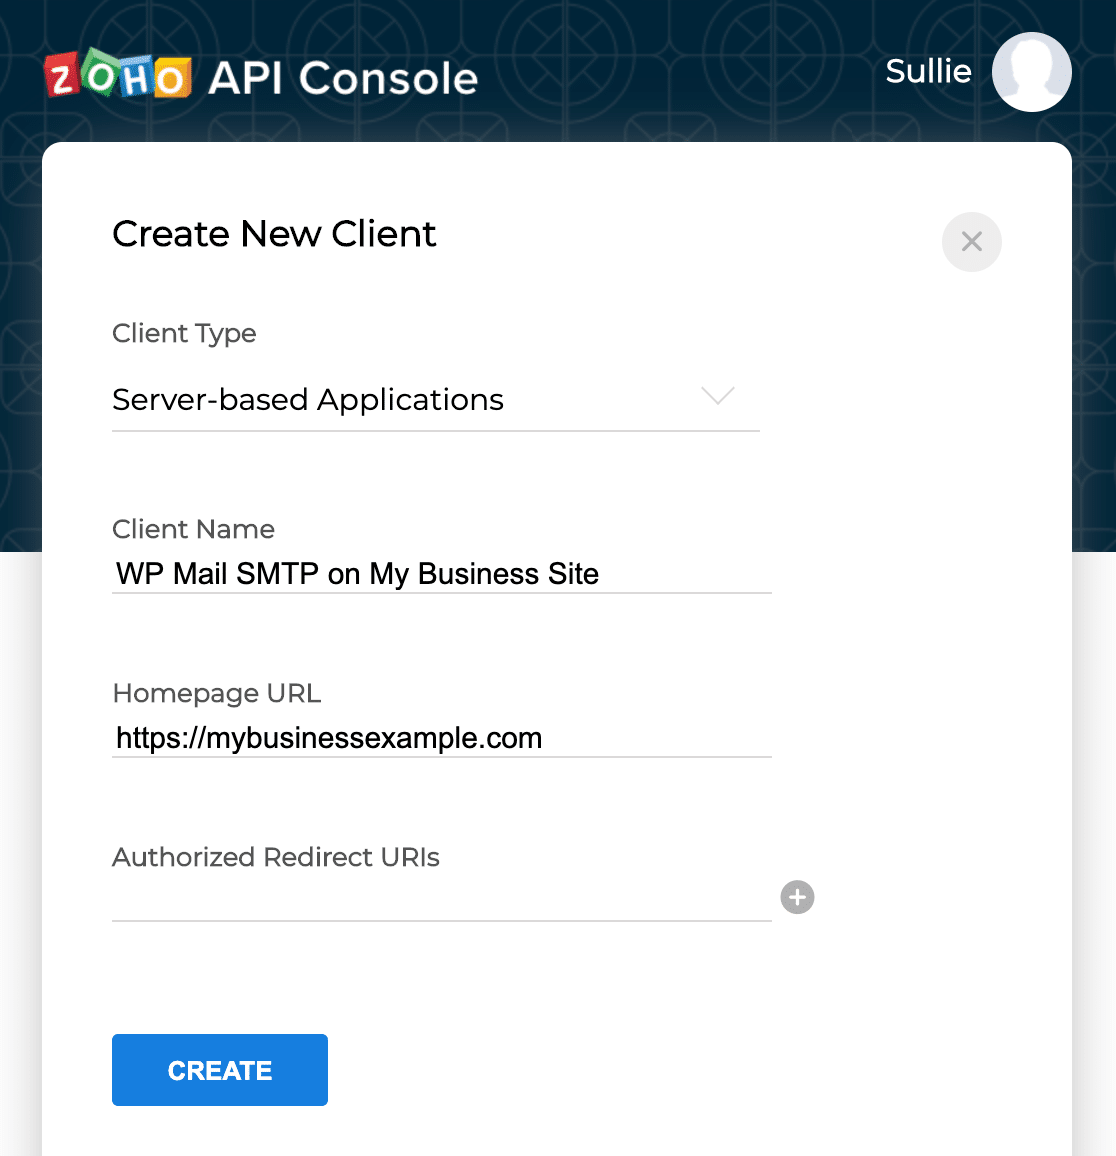
Now let’s switch back to the tab we kept open in step 2.
In WP Mail SMTP, scroll down to the Authorized Redirect URI and press the button to copy it.

Now switch back to the Zoho tab and paste that web address into the Authorized redirect URI box.
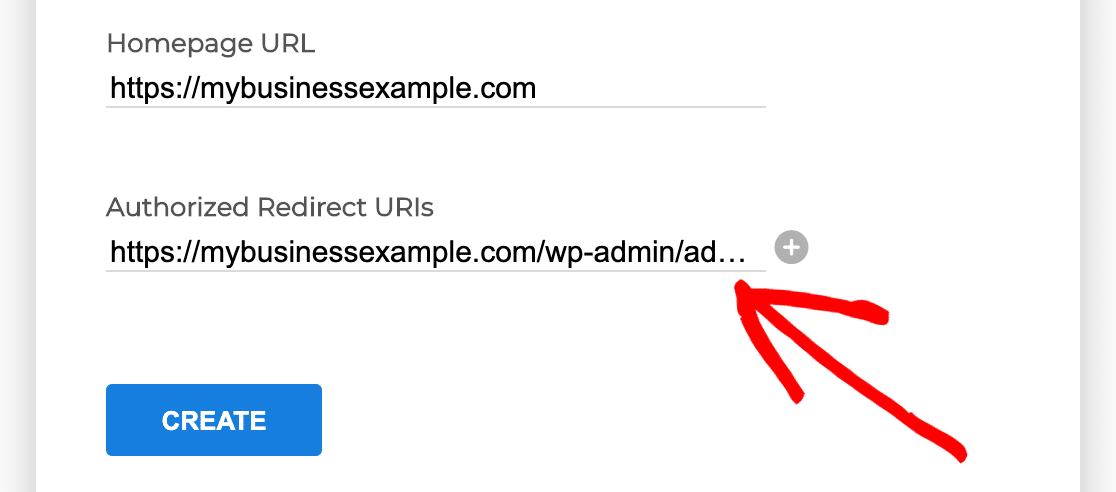
Go ahead and click the Create button to move on to the next tab.
Zoho will now display your API connection details.
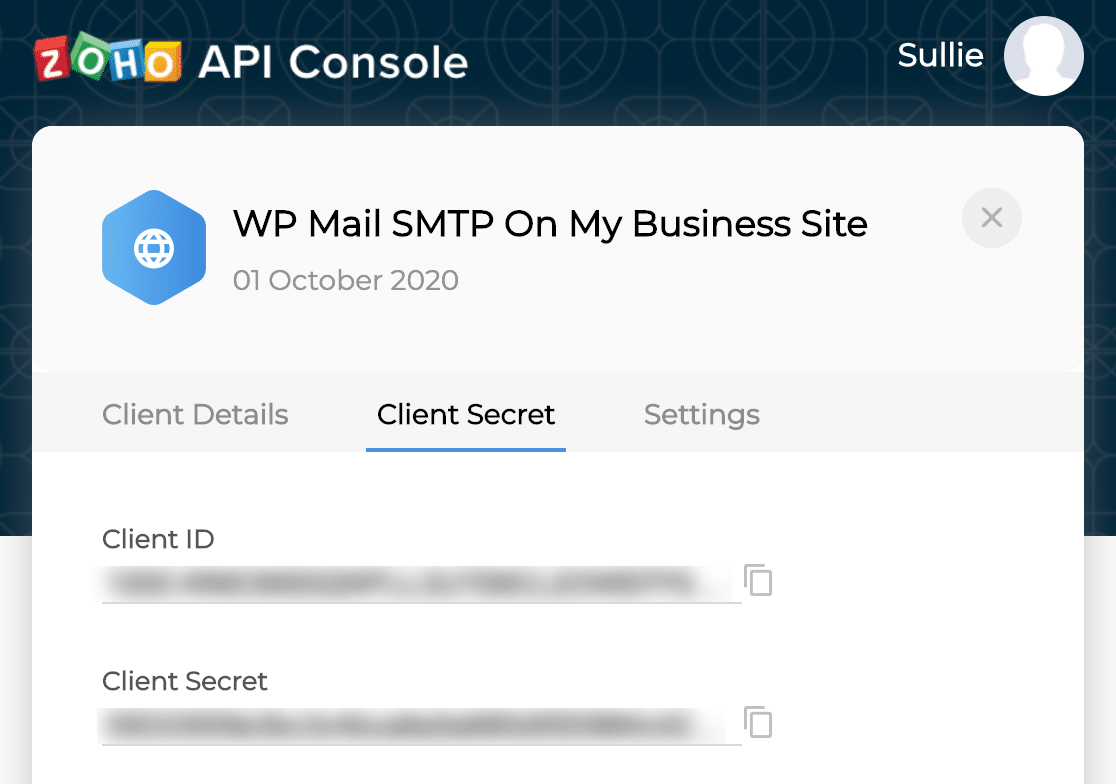
On this screen, copy the Client ID. Switch back to your WP Mail SMTP tab and paste it into the corresponding field.
Do the same thing for the Client Secret.
Then go ahead and click the X icon at the top right to close this window.
Let’s switch back to WP Mail SMTP to complete the connection. Keep the Zoho tab open for now.
Step 4: Set Up the Zoho Mail WordPress Connection
Now we have the connection set up, let’s switch to the WordPress tab and work on the settings in WP Mail SMTP.
First, you’ll want to find the Region dropdown. This should match the data center that Zoho is using for your account.
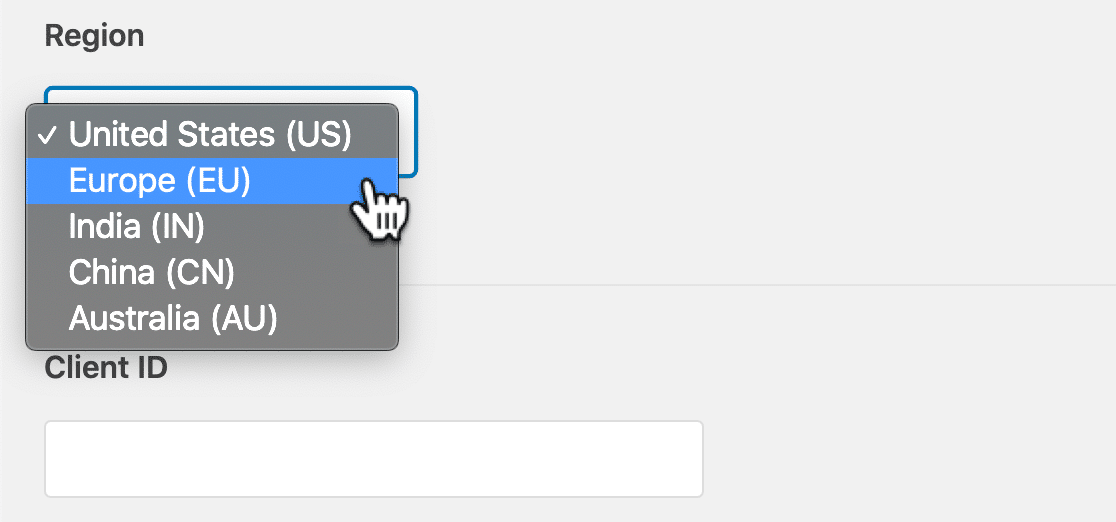
To find yours, switch back to the Zoho Mail tab and look to the URL bar in your browser. Notice the last 2 letters in the domain name here.

Use this table to figure out which Region to pick in the dropdown:
| URL ends with | Region |
|---|---|
| .us | United States |
| .eu | Europe |
| .in | India |
| .cn | China |
| .au | Australia |
Once you’re done, it’s important to click Save Settings in WP Mail SMTP to save the selection.
Phew. We’re almost done! In WP Mail SMTP, scroll right down to the bottom and click Allow plugin to send emails using your Zoho Mail account.

And then click Accept.
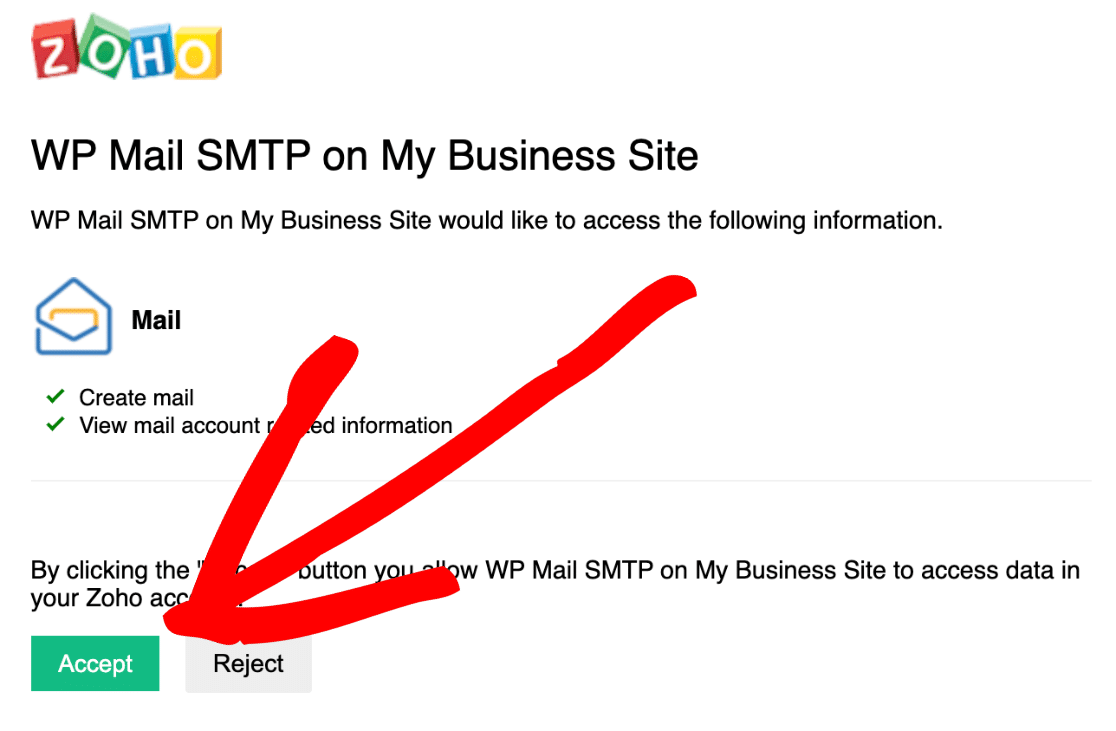
We’re connected! You can see we have a success message at the top.

If you see an invalid_client message in WP Mail SMTP, don’t worry. This can happen if the region isn’t set correctly, so it’s a good idea to go back and check that. Remember: you need to save this setting before you click the authenticate button.
Before we finish up, you’ll notice that the From Email section in WP Mail SMTP is grayed out now:

That’s because all of the emails will come from your Zoho Mail account address, so this setting will be ignored in WP Mail SMTP.
We’re done with the Zoho API, so you can close that tab if you want to. Let’s test that our emails are working now.
Step 5: Send a Test Email With Zoho SMTP
Before we finish up, let’s test that everything works.
Click Email Test at the top of WP Mail SMTP.

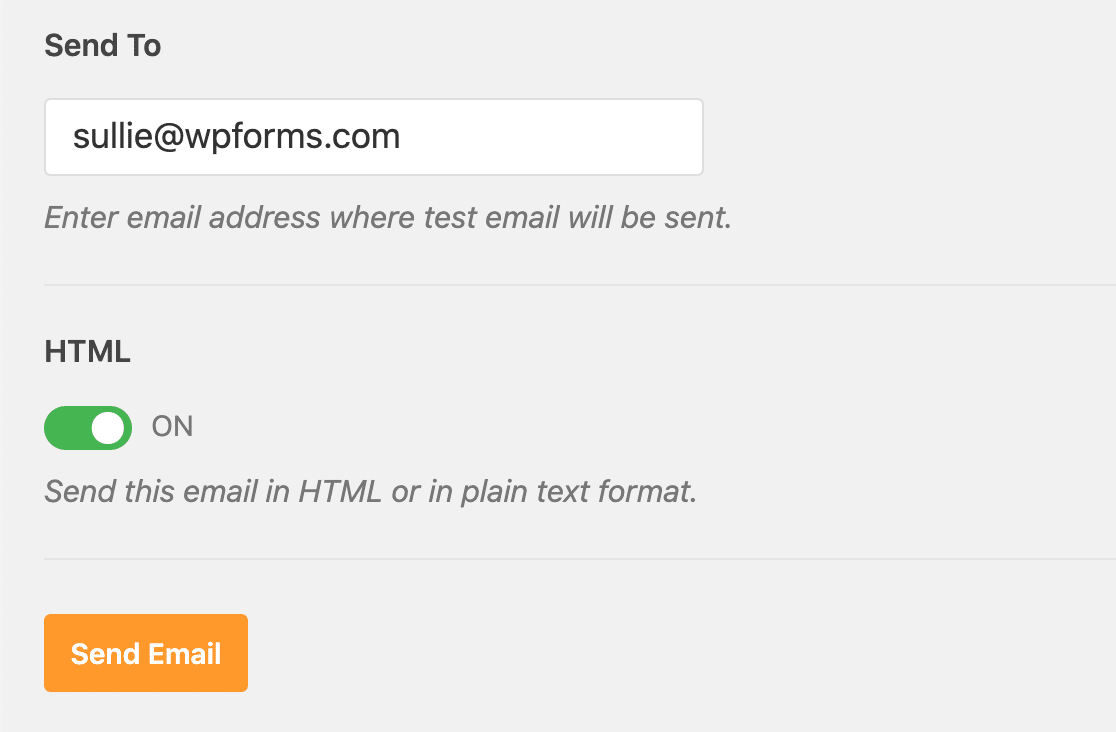
In the Send To field, type in the email address you want to send the test email to. Then click Send Email.
After a few minutes, you’ll receive a test email with your Zoho Mail email address as the sender.
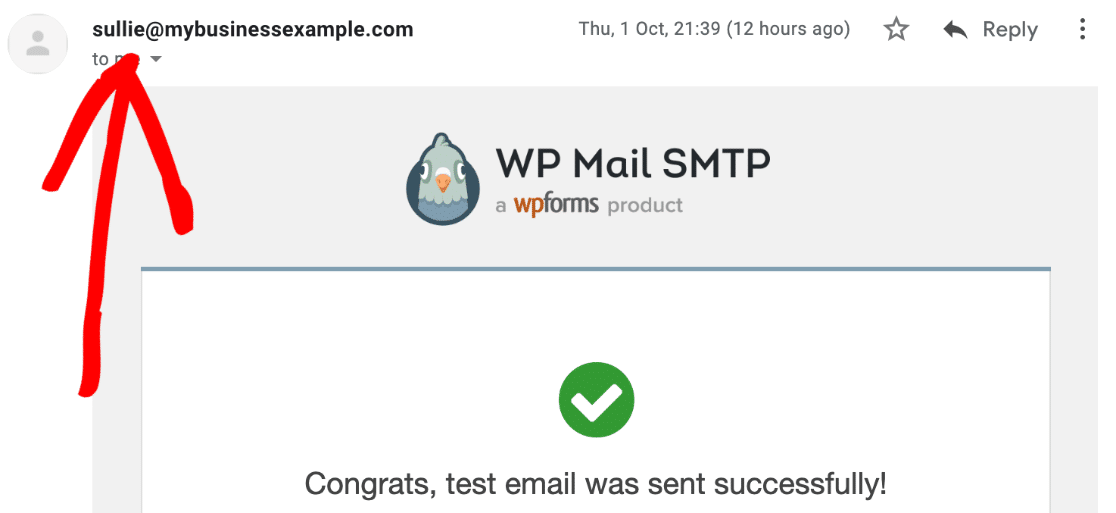
And that’s it! You’ve successfully set up Zoho Mail SMTP in WordPress.
Now all of the emails from your contact forms, eCommerce transactions, and plugin alerts will be sent securely with Zoho CRM.
Create Your WordPress Contact Form Now
Next Step: Connect WordPress to Zoho CRM
Did you know that you can connect WordPress to Zoho CRM? Using the WPForms plugin, you can easily send your form submissions to Zoho CRM automatically.
Check out this article on how to make a custom Zoho CRM form in WordPress. It’s just one of the useful features that make WPForms better than Contact Form 7.
Ready to try the world’s best form builder plugin? Get started today. WPForms Pro includes tons of free templates and offers a 14-day money-back guarantee.
If this article helped you out, please follow us on Facebook and Twitter for more free WordPress tutorials and guides.
The post How to Set Up Zoho Mail SMTP in WordPress (The Easy Way) appeared first on WPForms.
source https://wpforms.com/how-to-zoho-mail-smtp-wordpress/

