
Do you want to accept user submitted WordPress posts? Publishing guest posts from other people is a great way to grow a community or business blog.
In this article, we’ll show you how to allow users to submit blog posts to your WordPress site. That way, you can quickly publish them on the frontend. This is super easy to set up, and you can allow posts from registered or unregistered users.
Create Your Guest Post Form Now
How Can I Use User Submitted Posts?
User generated content is a powerful tool when you’re growing an audience for your website. You can use user submitted posts to:
- Publish more content on your website – Posting user submitted content can help if you’re struggling to find the time to blog.
- Increase your keywords – Accepting guest posts in your niche can help you to rank for keywords that you might not have thought of yet.
- Increase your readership – Get a different perspective on important topics so that you attract a wider audience.
- Engage your community – Give people a voice by publishing their posts on a multi-author blog. A community blog is a perfect space for everyone to share their thoughts and ideas.
Check out this guide to awesome user-generated content to get even more ideas.
With WPForms, you can easily create a WordPress form to accept guest posts. And because you can map the form fields to the fields on your blog, you can publish user generated content on the frontend quickly and easily.
Our method lets your writers:
- Add content to their post
- Upload their own featured image
- Select categories for the post
- And more.
Let’s take a look at how we can easily accept user submitted posts in WordPress.
How to Allow User Submitted Posts on Your WordPress Blog
We’re going to show you the easy way to accept blog posts on your site. If you’d prefer to have your visitors add events, jump over to this guide on how to let visitors add user submitted events to a calendar.
We created this video to show you the basic steps in this tutorial.
If you prefer to follow a written tutorial, here are the steps:
- Install and Activate the WPForms Plugin
- Create Your User Submitted Post Form
- Check Your Submission Form Settings
- Set Up Your Submission Form Notifications
- Map Your Form Fields to Your Blog Post Fields
- Publish Your User Submitted Post Form in WordPress
All set? Let’s set up the user submitted posts plugin.
Step 1: Install and Activate the WPForms Plugin
The first thing you’ll need to do is install and activate the WPForms plugin. For more details, see this step by step guide on how to install a WordPress plugin.
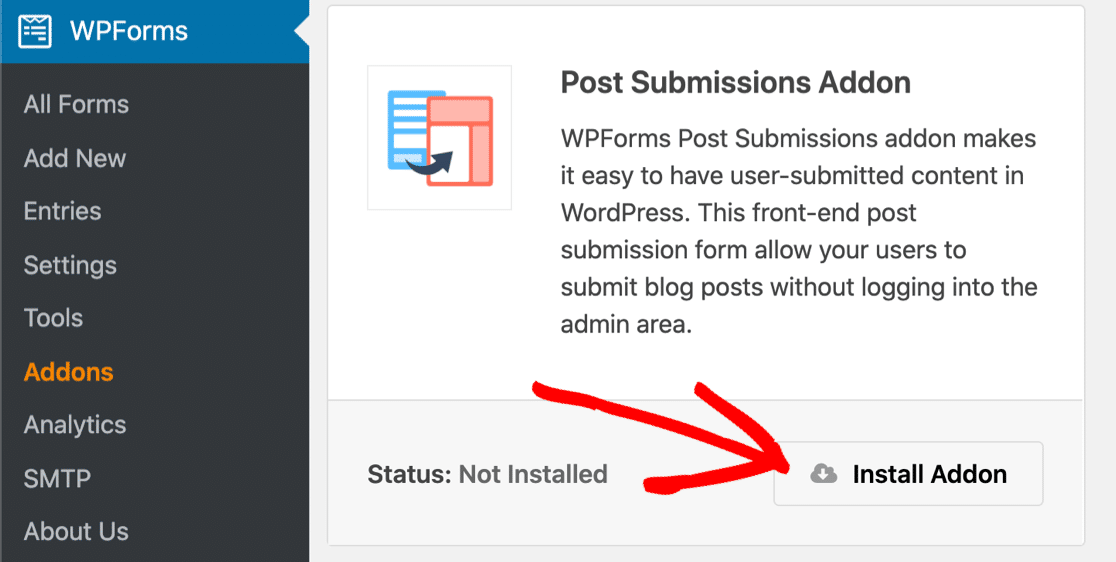
Next, you’ll need to install and activate the WPForms Post Submissions addon. It’s available with the Pro version of WPForms and higher.
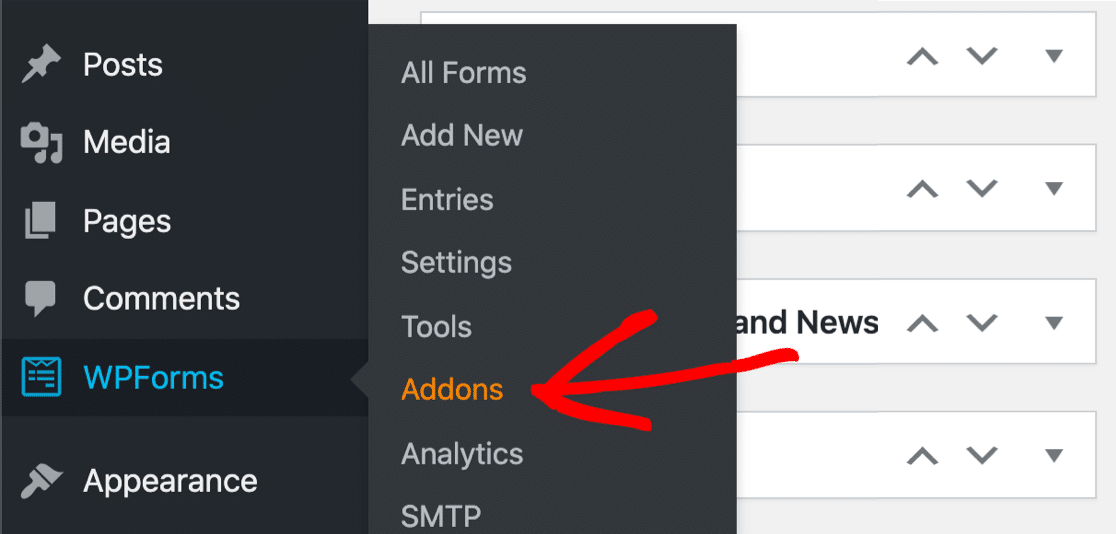
To do this, stay in the WordPress admin area. On the left hand side, go to WPForms » Addons.
Next, find the addon labeled Post Submissions. Click Install Addon and then Activate.
We’re all set. Let’s make our post submission form next.
Step 2: Create Your User Submitted Posts Form
Now we’re going to make a form we can publish on our website to accept guest posts from visitors.
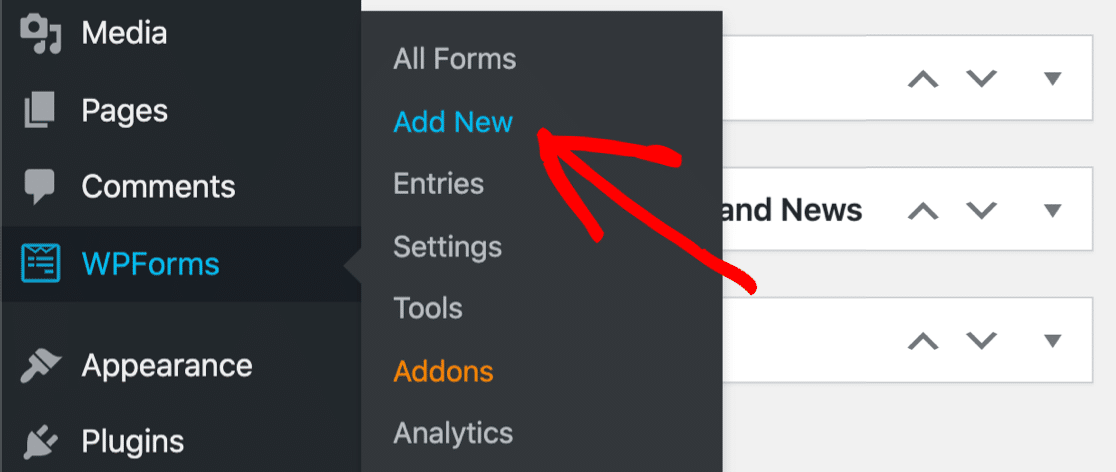
To start, click WPForms » Add New.
Type in a name for your form at the top.
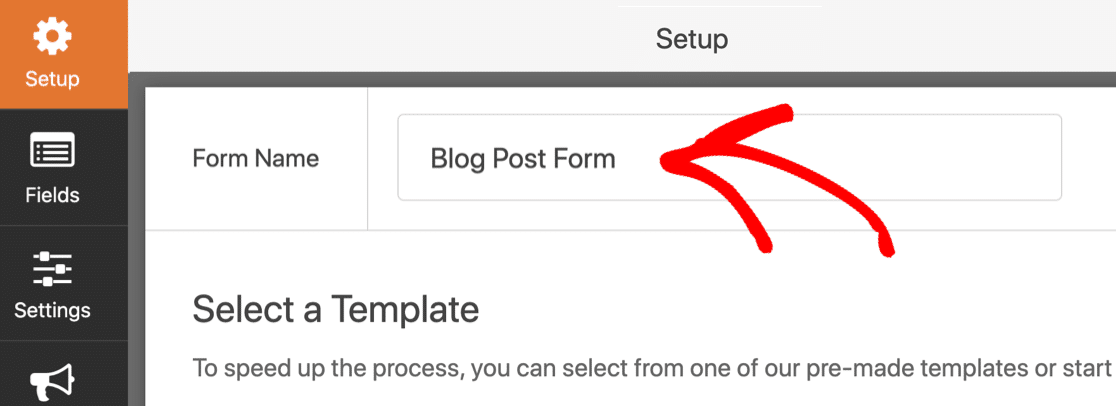
Next, scroll down a little and click on the Blog Post Submission Form template.
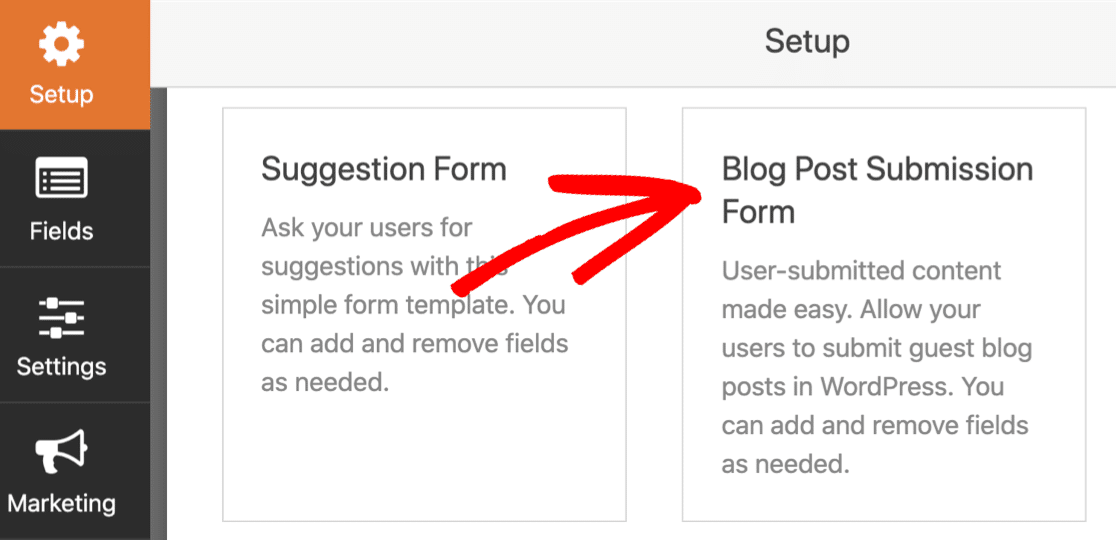
If you don’t see the Blog Post Submission Form template, you’ll want to go back a step and check that the Post Submissions addon is activated.
When you click on the template, WPForms will create a form with 2 sections:
- Author Details – Your visitor can type in their name, email, and author bio here.
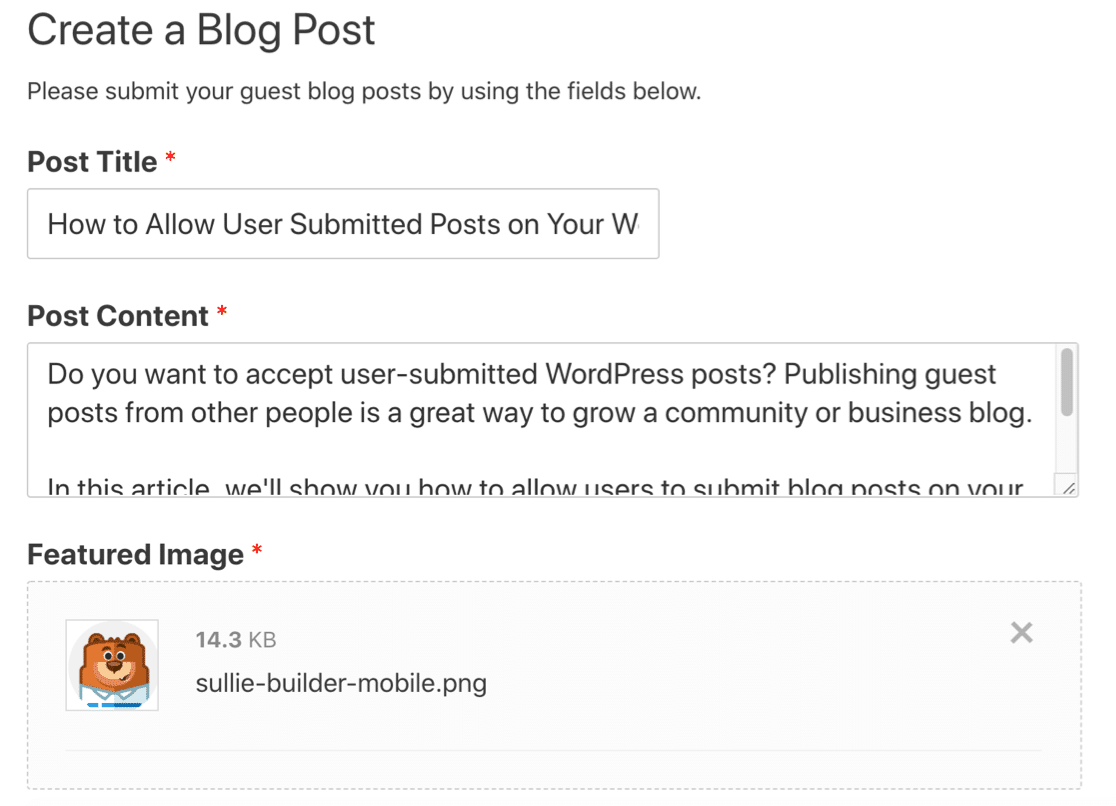
- Create a Blog Post – This is where they’ll type their post title, post content, and excerpt. There are also fields for a featured image and category.
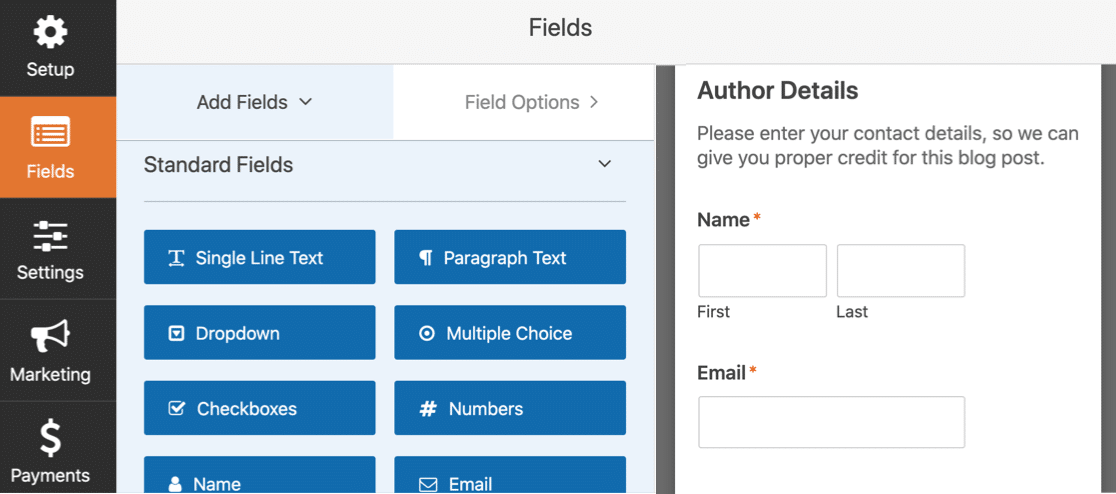
This template is completely customizable. You can add more fields with different types of validation. For example, you can easily add:
- HTML field: Place a notice on the form to remind your writers how to format their post.
- Captcha or challenge question (Custom Captcha): Stop spam submissions on your form.
It’s also easy to edit any field for customization. Go ahead click on the field in the form builder to open up its settings on the left.
We can show you how this works by editing 2 important fields.
Add Featured Images to the Media Library
The featured image is the image that’s displayed next to the post in WordPress. Sometimes it’s shown as a thumbnail image.
When accepting user submitted WordPress posts, your users can create and upload their own featured image for their post. If you store them in the Media Library, they’ll be easier to use.
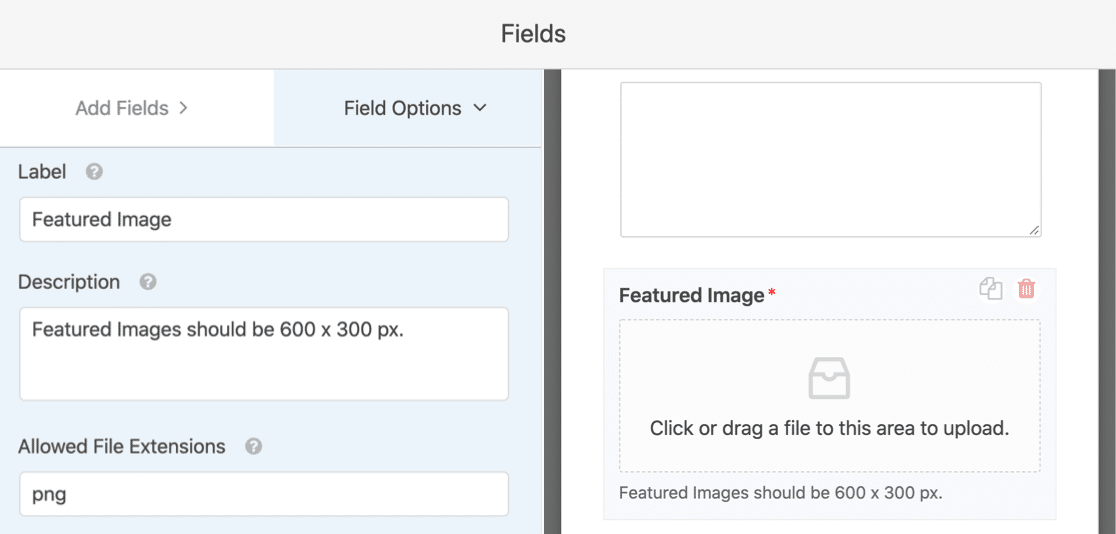
To check this setting, click on the Featured Image form field on the right. You’ll see the settings open up on the left hand side.
First, you can use the field Description to specify the size for the featured image.
You can see in the screenshots below that we also limited the Allowed File Extensions to .png. You can use other file extensions here or leave it blank.
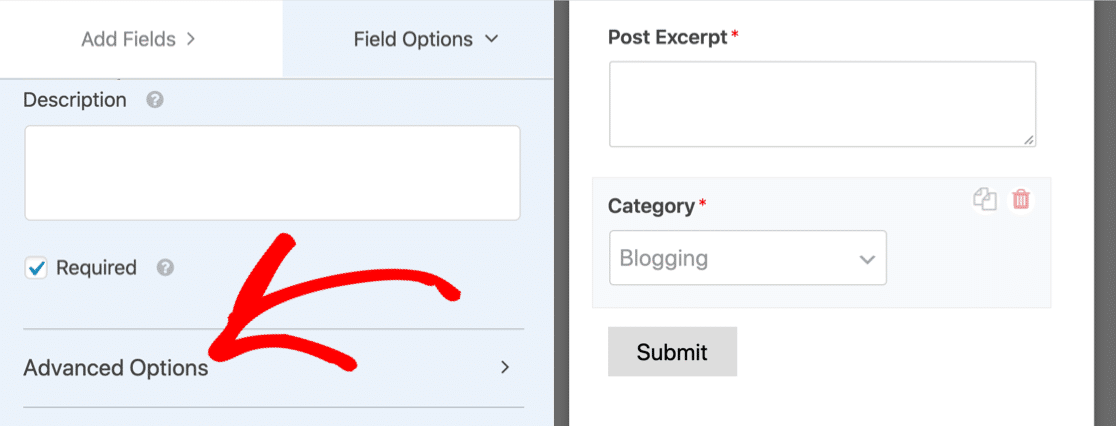
Now let’s scroll down a little further. Click on the Advanced Options menu to expand it. You’ll want to make sure the checkbox labeled Store file in WordPress Media Library is checked.
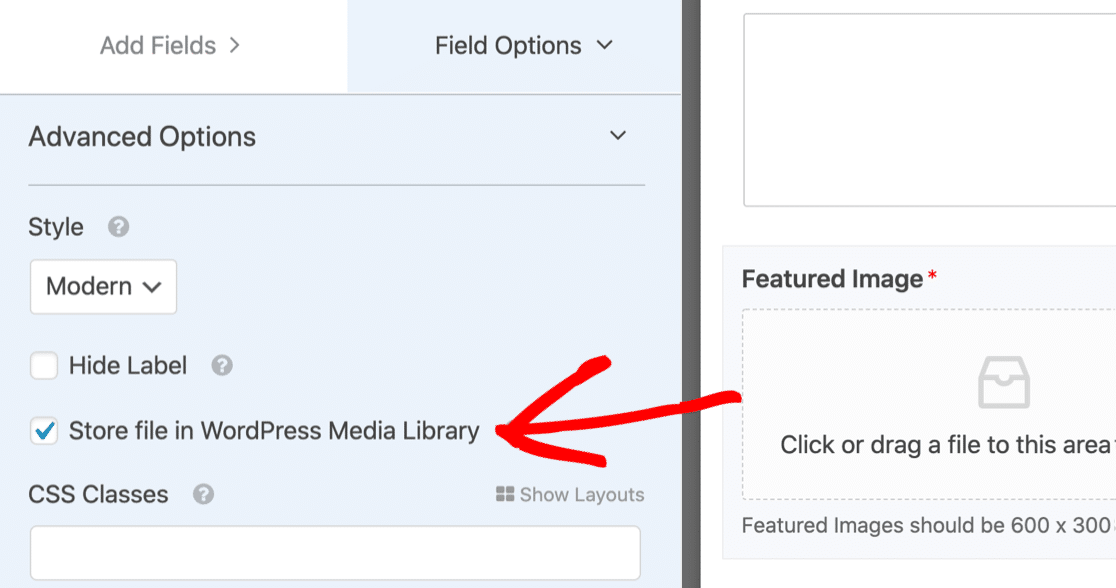
Now you’ll easily be able to find the featured images.
Ready to move on? Let’s look at categories next.
Let Guests Choose a Blog Post Category
The blog post submissions form template automatically pulls in the list of categories on your blog. That makes it super easy for your guest blogger to pick their own categories.
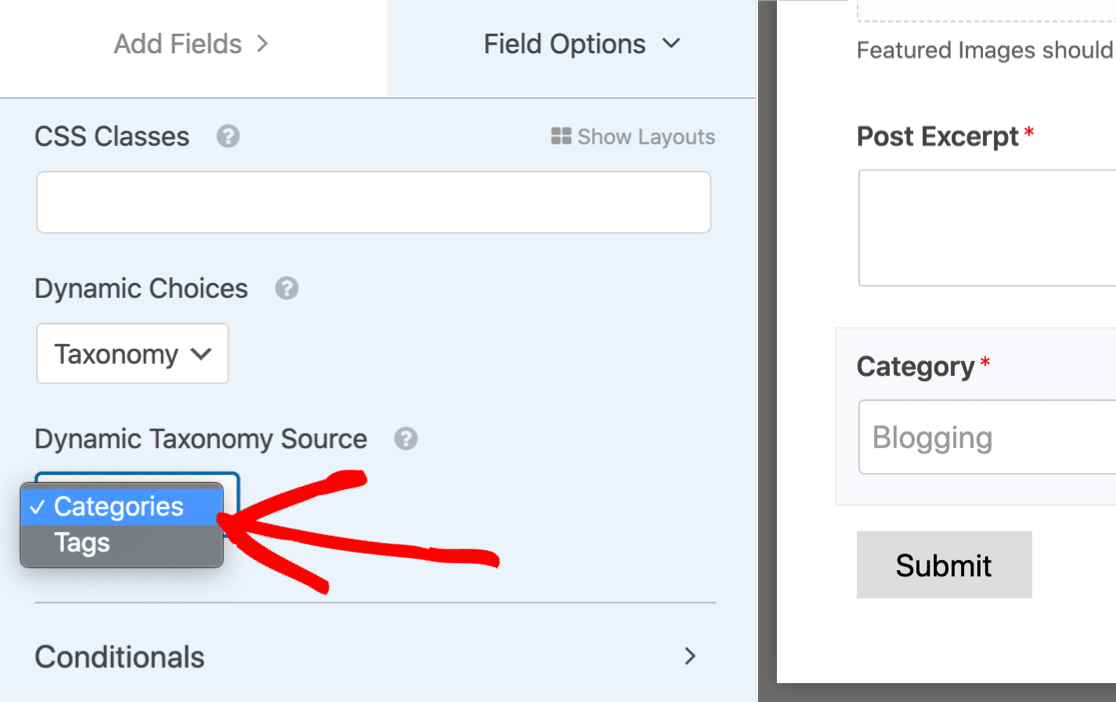
To explore these settings, click the Category field on your form. Then click Advanced Options on the left.
WPForms pulls in a dynamic list of categories. It’s a lot easier than typing them all in, and it means the list of categories on the frontend will always match the categories on your blog.
If you prefer to let users select tags instead of categories, it’s easy to change this in the Dynamic Taxonomy Source dropdown. Just switch it to Tags instead.
Do you want to let your users select multiple categories or tags? It’s easy to do that without changing any plugin settings. Check out this guide to making a multi-select dropdown in WordPress.
OK, now we have our categories set up, let’s move on to the form settings.
Step 3: Check Your Submission Form Settings
Let’s check the basic settings for your post submission form.
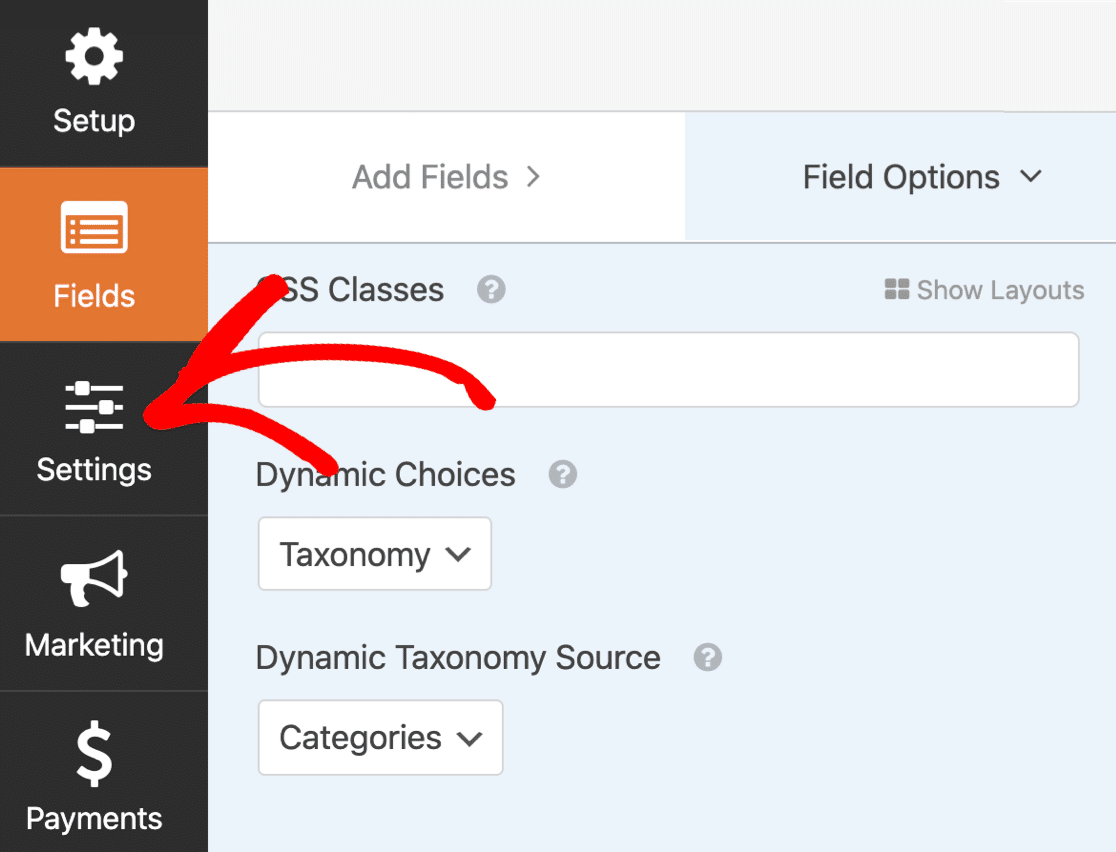
To start, click the Settings icon on the left-hand side of the form builder window. This will open the General settings page.
Here you can configure the general settings for your form:
- Form Name — Change the name of your form here if you’d like.
- Form Description — Give your form a description.
- Submit Button Text — Customize the copy on the submit button. You can use CSS to style the button if you want to.
- Spam Prevention — Stop contact form spam with the anti-spam feature or Google reCAPTCHA. The anti-spam checkbox is automatically enabled on all new forms.
- AJAX Forms — Enable AJAX settings so that the page doesn’t reload when the form is submitted.
- GDPR Enhancements — You can disable the storing of entry information and user details, such as IP addresses and user agents, in an effort to comply with GDPR requirements. Check out our step-by-step instructions on how to add a GDPR agreement field to your form.
If everything looks good, click Save.
Let’s look at notification emails next.
Step 4: Set Up Your Submission Form Notifications
WPForms can send emails each time you get a form submission.
Let’s click Notifications to see what the message looks like.
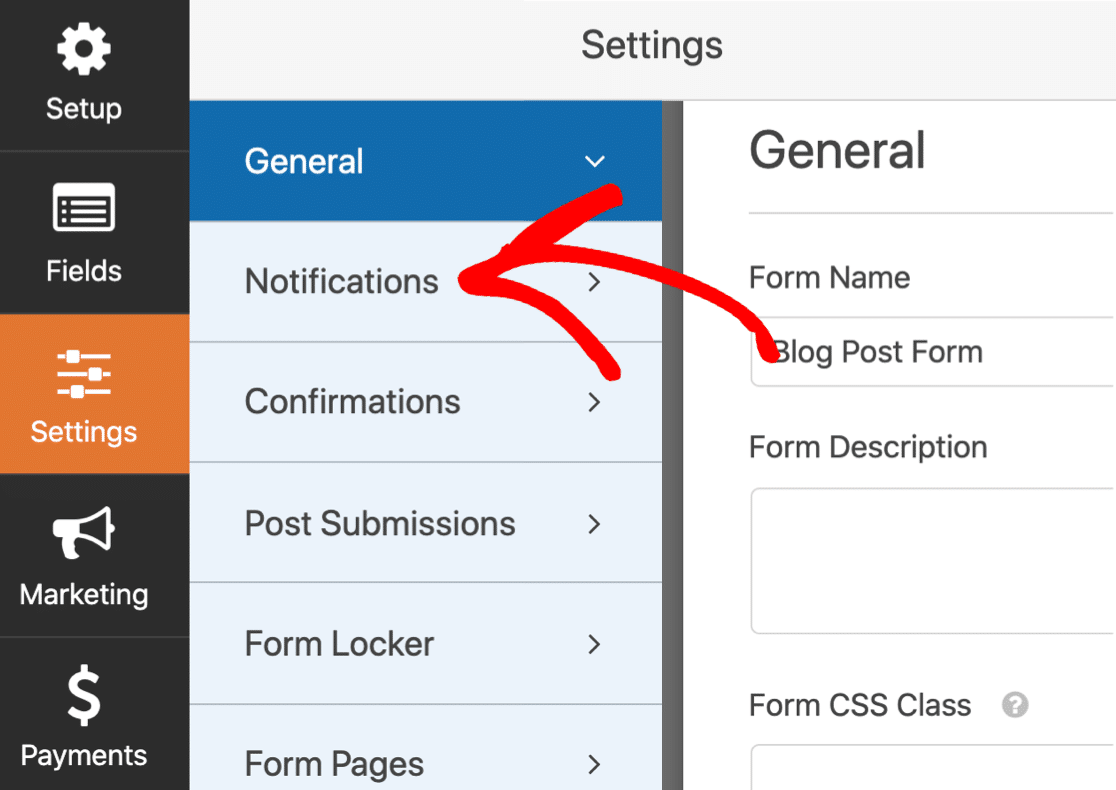
By default, WPForms will create a default email notification that will let you know when you have a new user submitted post.
You can see that it will be sent to the admin email you have set up in WordPress.
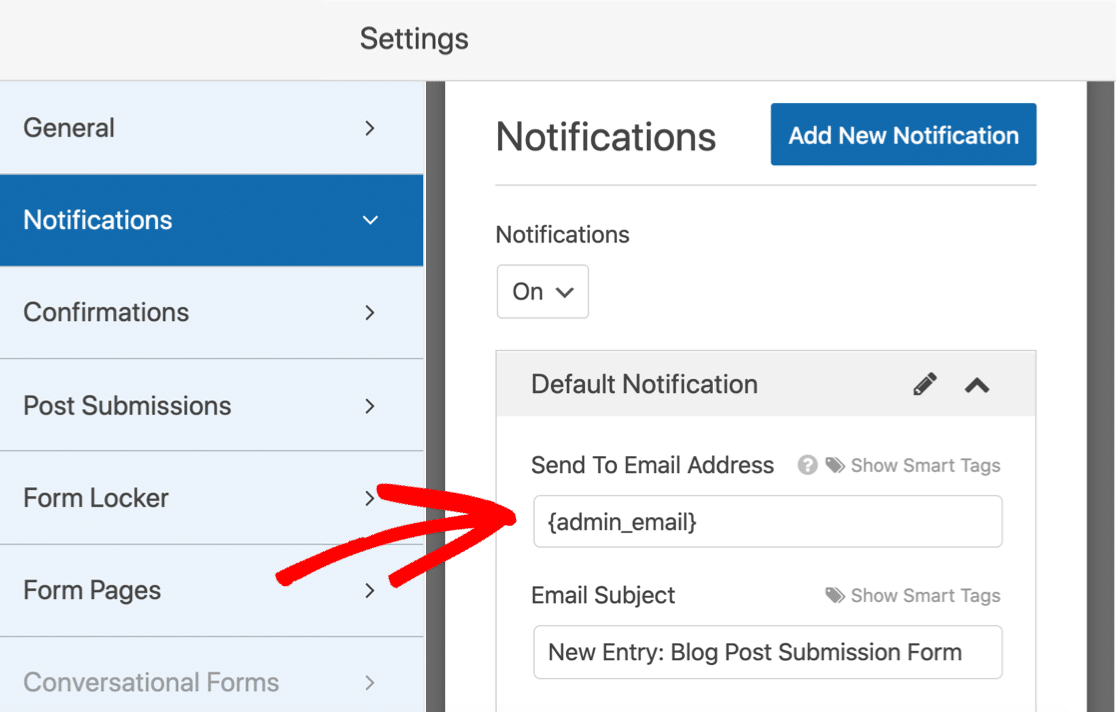
If you want to change the email, you have 2 options:
- Delete the
{admin_email}tag and type in a different email address - Change the admin email address in WordPress.
You could also send a thank you email to the user when they submit their blog post. If you’d like to set that up, check out our documentation on how to set up form notifications in WordPress.
There’s a lot more functionality in the Settings if you want to continue to explore. For example, you can also use the Confirmations section to write a custom message that will be loaded when the form’s submitted.
OK, we’re done here. Click Save before we move on to the important part: mapping your form fields.
Step 5: Map Your Blog Post Fields
Now it’s time to make sure that your form fields are correctly mapped to your post fields.
This will automatically send each field to the right place in your blog post so that you don’t have to copy and paste.
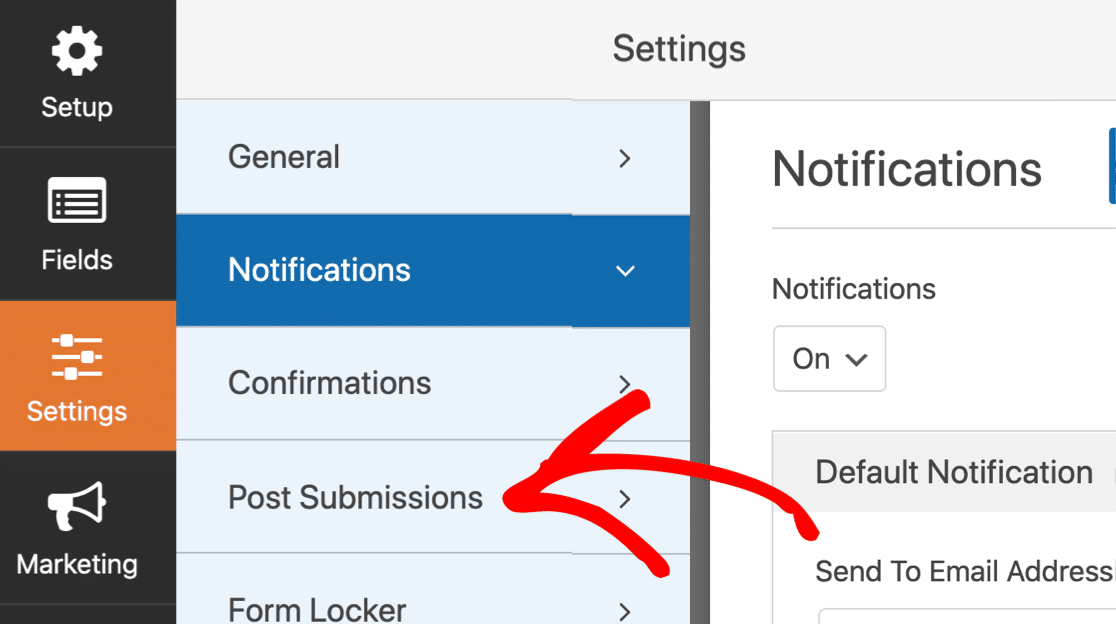
To start, go to Settings » Post Submissions.
The default settings here will suit most blog posts. Let’s look through them one by one:
- Post Submissions – Make sure that this is turned On.
- Post Title – Defaults to the title that the user types in.
- Post Content – The main body of the blog post that your visitor submits.
- Post Excerpt – A short summary of the blog post.
- Post Featured Image – Get featured image uploads from your writers. We’ll show you how to store them in the Media Library.
- Post Type – You can choose whether to add new user submitted posts as blog posts or pages. If you have custom post types on your blog, you can select one of those here too.
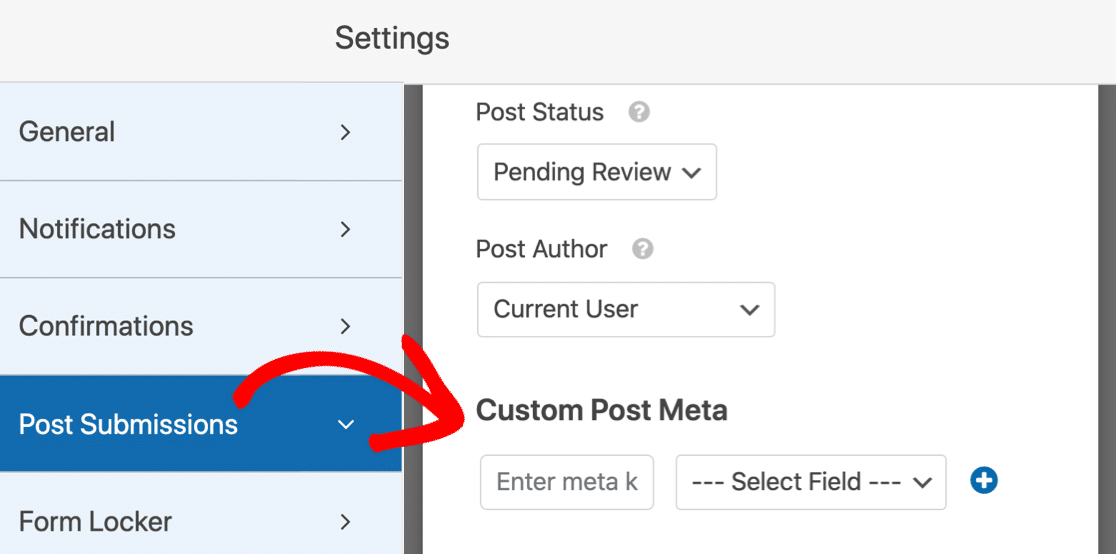
- Post Status – You can choose to publish each post immediately if you want to. Alternatively, you can choose Require Approval so that you can check the post before you publish it.
- Post Author – Choose the author that will be automatically assigned. If you require users to login before accessing the form, the user who submits the form can be assigned as the author.
Let Visitors Fill In Custom Fields
Do you have custom fields that you want your visitor to fill in? It can be time-consuming to paste the content into the fields each time they submit a new blog post.
With WPForms, it’s easy to use custom fields in user submitted blog posts. That way, they can submit the information on the frontend of your site.
You can use custom fields to allow bloggers to post images.
If you’d like to use custom fields on your frontend form, you can use the Custom Post Meta section in the Post Submissions section. Here, you can specify meta keys and use the fields on your form to fill in the metadata.
Custom fields require a little more work in the backend. You’ll also need to check that your WordPress theme supports them. For a full tutorial, jump over to this guide to using custom fields in user submitted posts.
When you’re done, click Save.
That’s it! We’re ready to go live.
Step 6: Publish Your User Submitted Post Form in WordPress
After you’ve created your custom form, you need to add it to your WordPress website.
WPForms makes it easy to add forms to any location on your website, including:
- Posts
- Pages
- Footer widgets
- Sidebar widgets
You can use a shortcode if you want to. But we’ll show you an easier way.
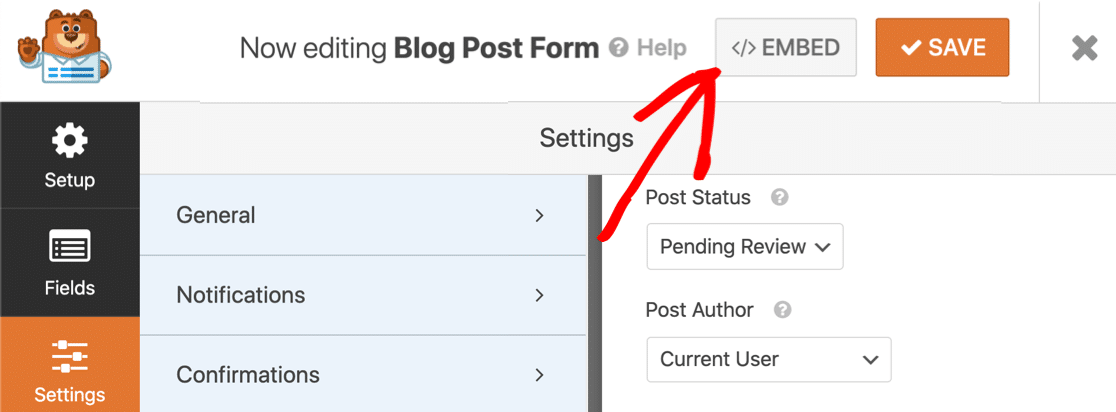
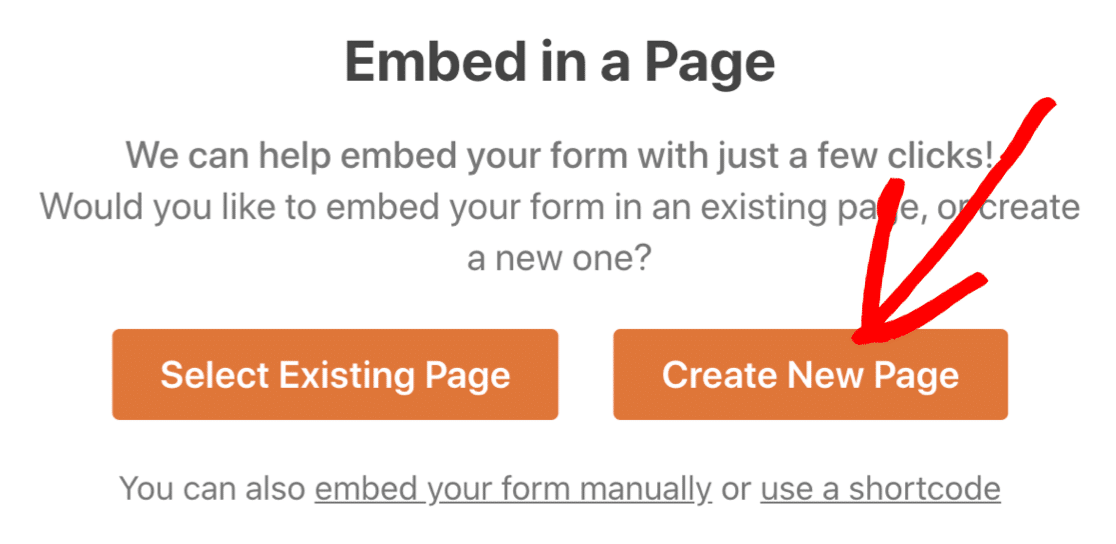
At the top of the form builder, click Embed.
Next, click Create New Page.
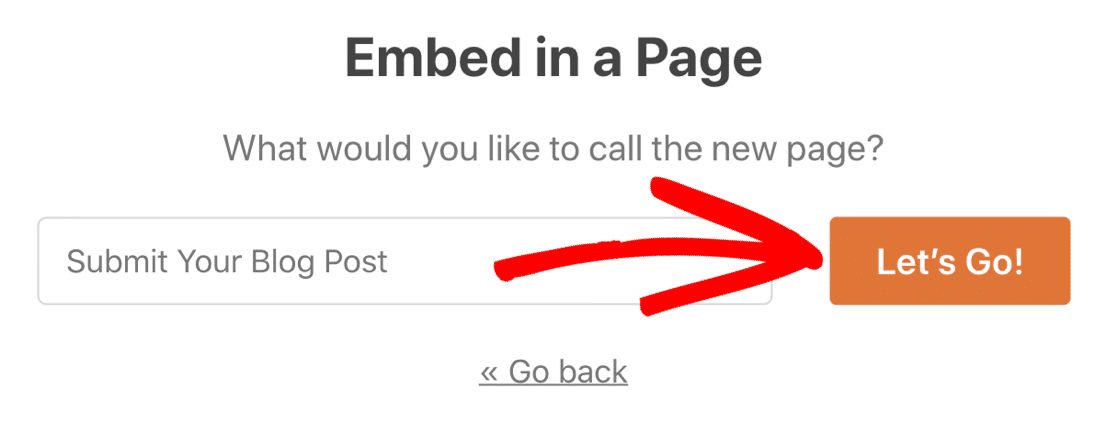
Finally, type in a name for your form and click Let’s Go.
WPForms will automatically create a page and embed your form into it. When you’re happy with the way it looks click the blue Publish button.
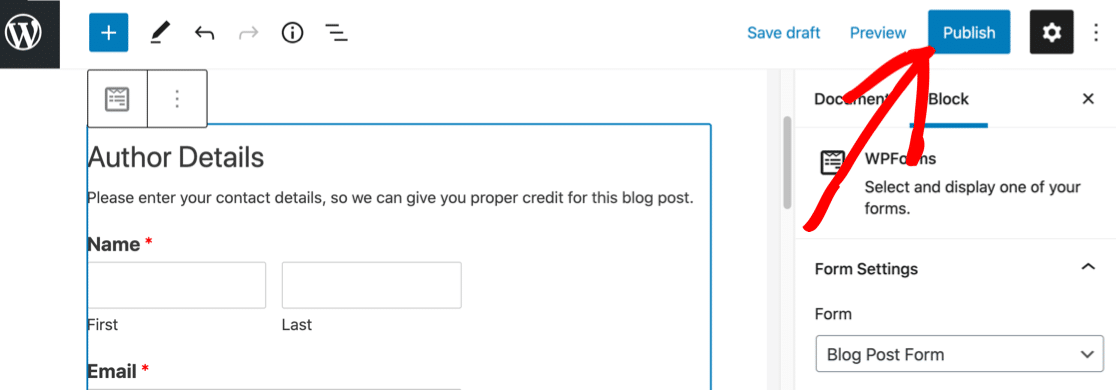
And that’s it!
You’re ready to accept user submitted content on your WordPress website.
That’s it! Now you can start accepting user submitted posts.
If you want to notify your readers each time you publish a new post, you can easily use PushEngage to send a browser notification. Browser push notifications are a great way to keep your audience engaged.
Create Your Guest Post Form Now
Next Step: Set Up Your Multi-Author Blog
Now that you’re ready to accept user submitted content in WordPress, you’ll want to make it easier to manage your authors and posts.
To do that, check out this list of the best plugins to manage multi-author blogs. You can also create a custom registration form for new writers.
Ready to build your form? Get started today with the easiest WordPress form builder plugin. WPForms Pro includes the Post Submissions addon and offers a 14-day money-back guarantee.
If this article helped you out, please follow us on Facebook and Twitter for more free WordPress tutorials and guides.
The post How to Allow User Submitted Posts on Your WordPress Blog (Easily) appeared first on WPForms.
source https://wpforms.com/how-to-allow-users-to-submit-blog-posts-on-your-wordpress-site/
