
Do you want to learn how to create a contest entry form in WordPress? Running a contest on your website is a great way to get people actively engaged with your brand and expand your reach to a wider audience.
So in this article, we’ll show you how to create a WordPress contest entry form with 2 easy methods. And you pick which one works best for you.
Why Run a WordPress Contest on Your Site?
Running a contest on your WordPress website has a lot of benefits:
- Build a stronger following by letting those who know about your brand share with others that your company is running a contest
- Grow your email list and boost your email marketing efforts with the data collected
- Contests are easy to promote and are a great way to drive more traffic to your website
- Contest entries are easy to manage, especially thanks to WPForms’ easy entry management
- This is an inexpensive way for any brand to grab people’s attention, increase conversion rates, and inject a little fun into their website
- Encourage people to get engaged with your brand by requiring them to answer survey questions, take a quiz, or submit image or video content for an entry into the contest
As you can see, there are plenty of reasons why adding a contest form on your website can help you build your following, and your business.
So, let’s see how to create a WordPress contest entry form in 2 different ways:
So let’s check out the 1st way to create a WordPress contest next.
Method 1: Create a Contest Entry Form Using WPForms
It’s super easy to create a contest entry form using WPForms as your WordPress giveaway plugin.
Step 1: Create a Contest Entry Form in WordPress
Using WPForms is the easiest way to create an online contest entry form in WordPress and run a giveaway. WPForms comes with the Form Templates Pack addon that allows you to choose from a huge variety of pre-built templates for every niche and industry, including a contest entry form template.
The first thing you’ll need to do is install and activate the WPForms plugin. For more details, see this step by step guide on how to install a plugin in WordPress.
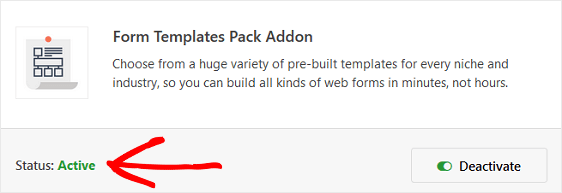
Next, you’ll need to install and activate the Form Templates Pack addon.
To do this, go to WPForms » Addon and find the one labeled Form Templates Pack addon.
Click Install Addon and then Activate.
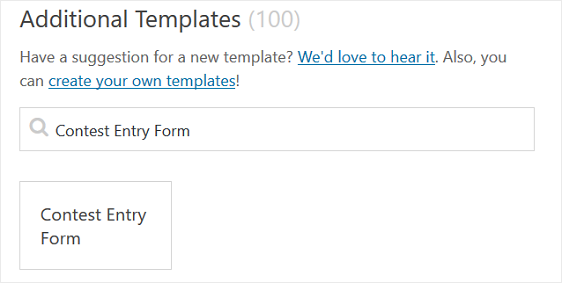
Now you’ll need to create a new form.
To do this, go to WPForms » Add New, and name your form. Then, scroll down to the section labeled Additional Templates and type “Contest Entry Form” into the search bar.
When the pre-built contest entry form template loads, most of the work is already done for you. In fact, you’ll find the following fields in the form:
- Name
- Phone
- Address
- HTML
- Checkboxes
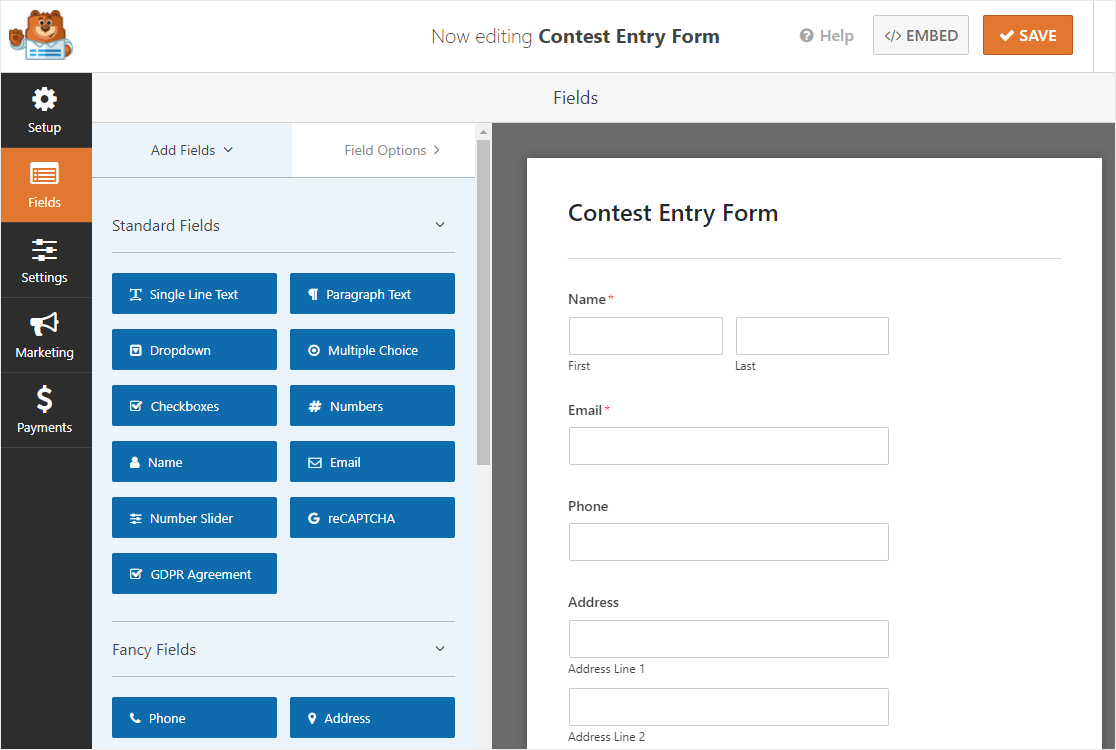
You can add additional fields to your form by dragging them from the left hand panel to the right hand panel.
Then, click on the field to make any changes. You can also click on a form field and drag it to rearrange the order on your contest form.
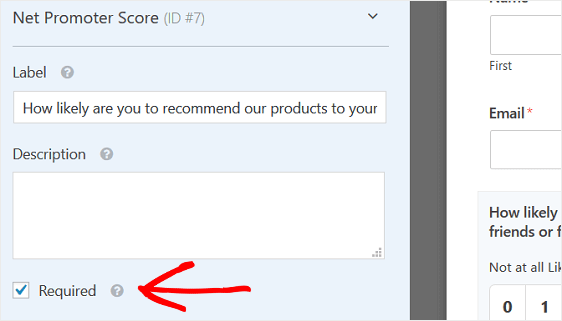
For example, if you want people to fill out survey questions before they can enter your contest, drag the Checkboxes, Multiple Items, Rating, Likert Scale, or Net Promoter Score form fields to the form.
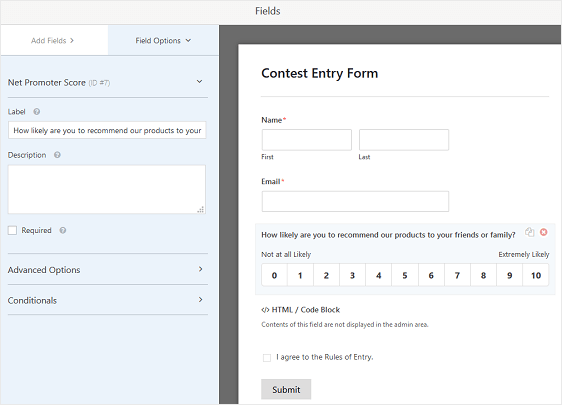
Just make sure to select the Required checkbox so site visitors can’t enter your contest without filling out the survey fields.
For help with enabling survey and poll results, and accessing those results as entries begin to come in, check out this helpful documentation on how to install and use the Surveys and Polls addon.
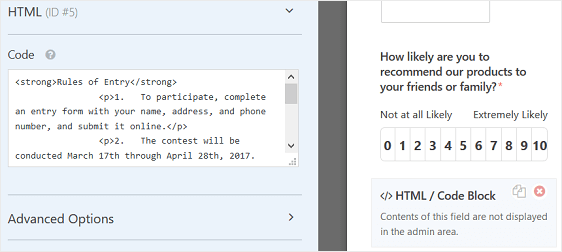
You can also change the Rules of Entry, found in the HTML form field, by clicking on it and changing the rules. Keep in mind, this text will only display once you publish your contest entry form on your website.
When your contest form looks the way you want it to, click Save.
Step 2: Configure Your Contest Entry Form Settings
To start, go to Settings » General.
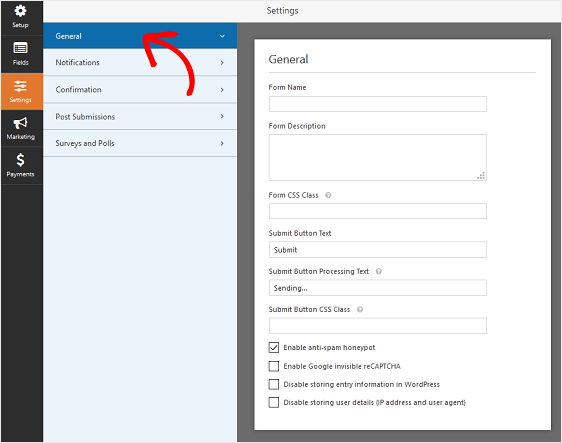
Here you can configure the following:
- Form Name — Change the name of your form here if you’d like.
- Form Description — Give your form a description.
- Submit Button Text — Customize the copy on the submit button.
- Spam Prevention — Stop contact form spam with the anti-spam feature or Google reCAPTCHA. The anti-spam checkbox is automatically enabled on all new forms.
- AJAX Forms — Enable AJAX settings with no page reload.
- GDPR Enhancements — You can disable the storing of entry information and user details, such as IP addresses and user agents, in an effort to comply with GDPR requirements. Check out our step-by-step instructions on how to add a GDPR agreement field to your simple contact form.
Click Save.
Step 3: Configure Your Contest Entry Form’s Notifications
Notifications are a great way to send an email whenever someone submits a contest entry form on your website.
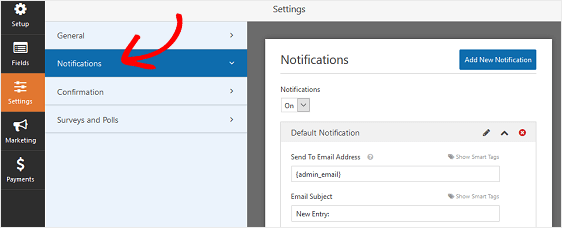
In fact, unless you disable this feature, whenever someone submits a contest form on your site, you’ll get a notification about it.
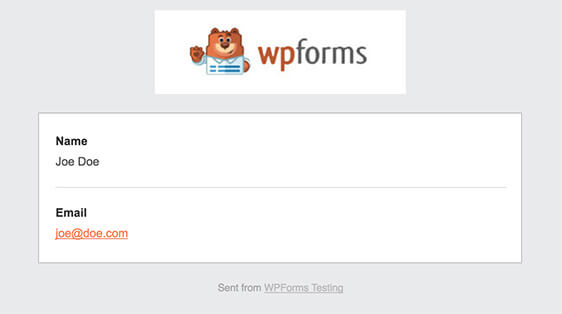
If you use smart tags, you can also send email notifications to the site visitor when they enter your contest, letting them know you received their entry and will be in contact shortly. This assures people their entry has gone through properly.
For help with this step, check out our documentation on how to set up form notifications in WordPress.
You can send out more than one notification when a contest entry form is submitted on your site. For instance, you can send a notification to yourself, the site visitor entering your contest, and the member of your team in charge of organizing the contest.
For help doing this, check out our step by step tutorial on how to send multiple form notifications in WordPress.
Lastly, if you want to keep branding across your emails consistent, you can check out this guide on adding a custom header to your email template.
Step 4: Configure Your WordPress Contest Form’s Confirmations
Form confirmations are messages that display to site visitors once they submit a contest entry form on your website. They let people know that their contest entry has been processed and offer you the chance to let them know what the next steps are.
WPForms has three confirmation types:
- Message. This is the default confirmation type in WPForms. When someone submits a contest form, a simple message confirmation will appear letting them know their entry was processed. Look here for some great success messages to help boost customer happiness.
- Show Page. This confirmation type will take site visitors to a specific web page on your site thanking them for their contest entry and telling them when you’ll be in touch with help. For help doing this, check out our tutorial on redirecting customers to a thank you page. In addition, be sure to check out our article on creating effective Thank You pages for boosting customer loyalty.
- Go to URL (Redirect). This option is used when you want to send site visitors to a different website.
Let’s see how to set up a simple form confirmation in WPForms so you can customize the message site visitors will see when they enter a WordPress contest on your website.
To start, click on the Confirmation tab in the Form Editor under Settings.
Next, select the type of confirmation type you’d like to create. For this example, we’ll select Message.
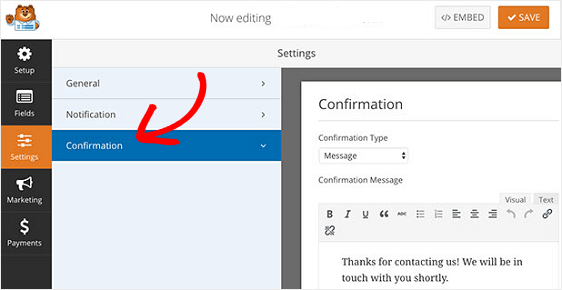
Then, customize the confirmation message to your liking and click Save.
If you want to display different confirmations to site visitors based on their behavior, be sure to read up on how to create conditional form confirmations.
Step 5: Configure WordPress Contest Form Access Controls
WPForms comes with a Form Locker addon that gives website owners a way to configure form permissions and access controls.
To access these settings, go to Settings » Form Locker. Here, you’ll see 4 different settings:
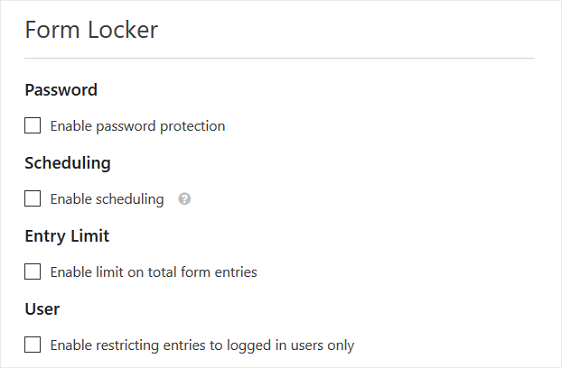
- Enable password protection so only those with the password, such as your subscribers, can enter the contest
- Schedule your contest’s start and end dates
- Limit the number of contest entries you’ll accept
- Allow only those that have logged into your website to submit your contest entry form
Lastly, if you want to make sure people can only enter once, be sure to require unique answers for one or more of the following field types:
- Single Line Text
- Name
- Website / URL
- Password
- Phone
To do this, click on the form field you want unique answers for, scroll down to the Advanced Options section, and click on the Require unique answer checkbox.
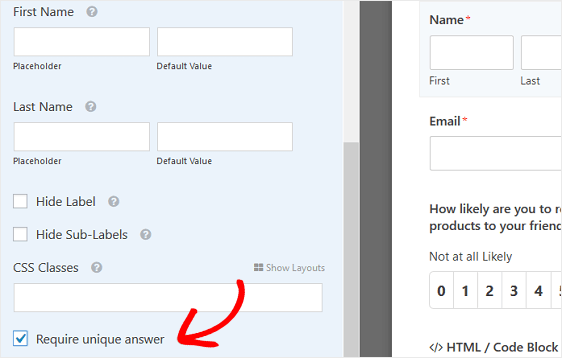
Now, only those with different answers to the form fields you’ve configured will be able to submit an entry to your contest more than once.
Step 6: Add Your WordPress Contest Entry Form to Your Website
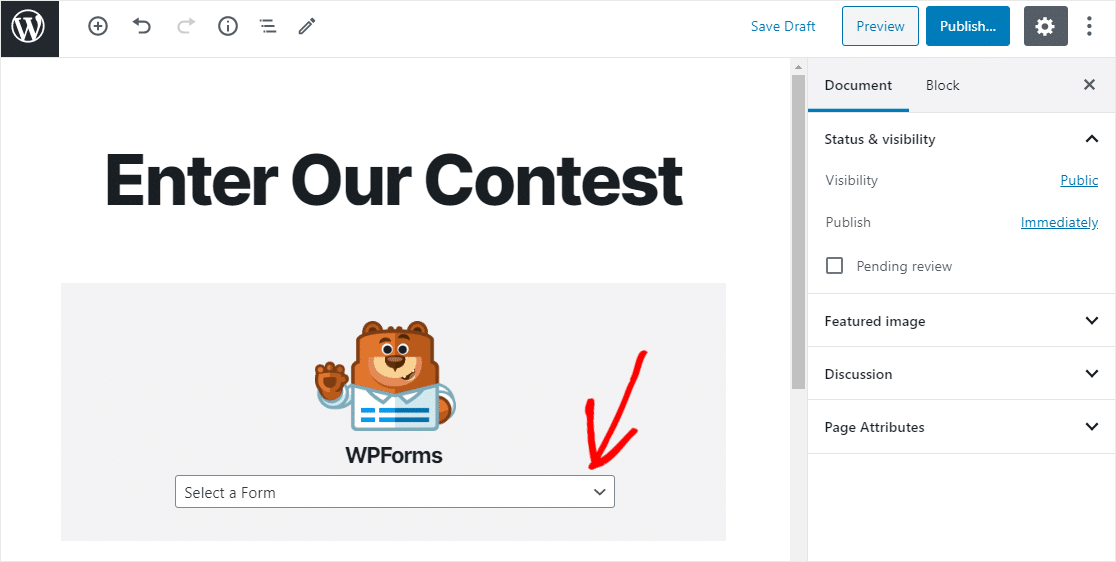
Now that you’ve built your form using the template, create a new page or post in WordPress. After that, click inside the first block (the blank area below your page title) and click on the Add WPForms icon.
Pick the form you want to insert into your page. Then, publish your post or page so your form will appear on your website.
Next, let’s take a look at another way to add a contest entry form to your WordPress site. This time, we’ll use RafflePress.
Method 2: Create a Contest Entry Form Using RafflePress
RafflePress is a giveaway plugin you can use to create a WordPress contest form on your site easily. Here’s how:
Step 1: Install The RafflePress Plugin
RafflePress is one of the best WordPress plugins out there to host a giveaway online. There’s a free version, a powerful premium version, and it has a user-friendly drag and drop builder that makes using either version a breeze.
And if you really want to use the power of giveaways to grow your business online, you’ll want to check out the perks of upgrading to RafflePress Pro. It offers some great features like design options, email marketing and social media integration, and more.

For this tutorial, we’ll show you how to create a WordPress contest form with RafflePress’ free version.
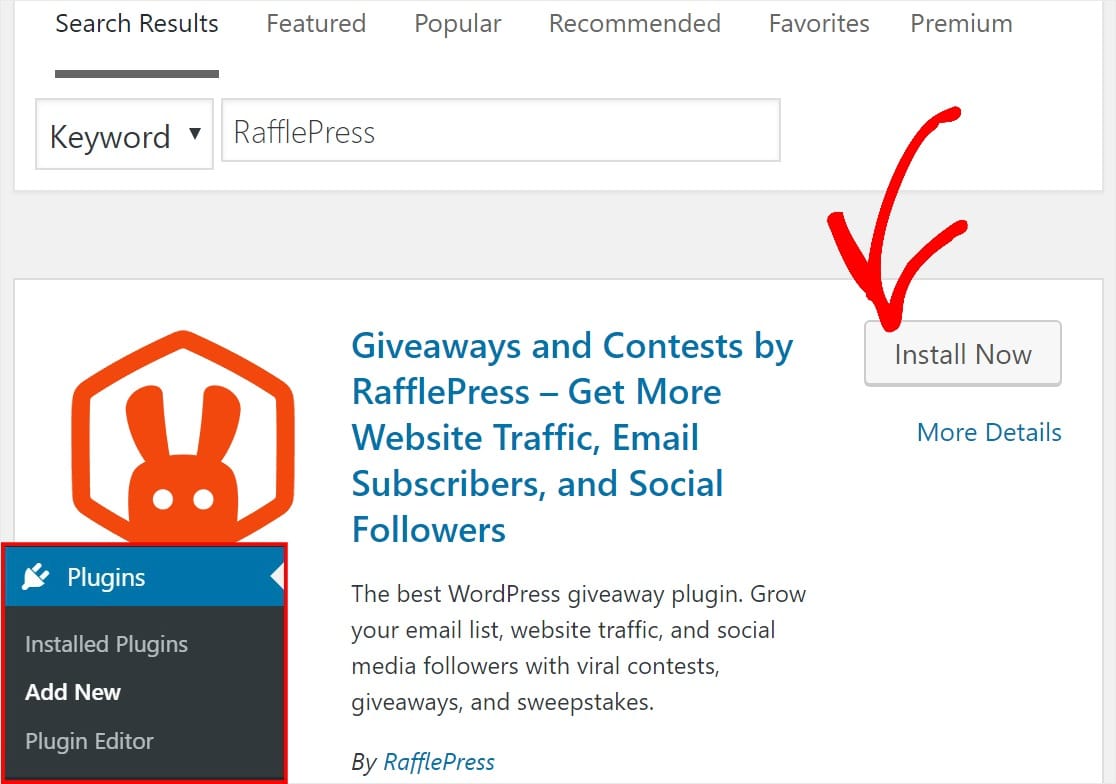
To install the plugin, go to your WordPress dashboard and click on Plugins » Add New.
Type RafflePress in the search bar and click Install Now.
So now that you’ve activated the plugin, you’re ready to create your simple giveaway.
Step 2: Create Your First Giveaway
Scroll down the page and click on the orange Create Your First Giveaway button.

Next, name your giveaway and select the pre-built giveaway template you’d like to use. For this tutorial, we’ll pick a classic giveaway.
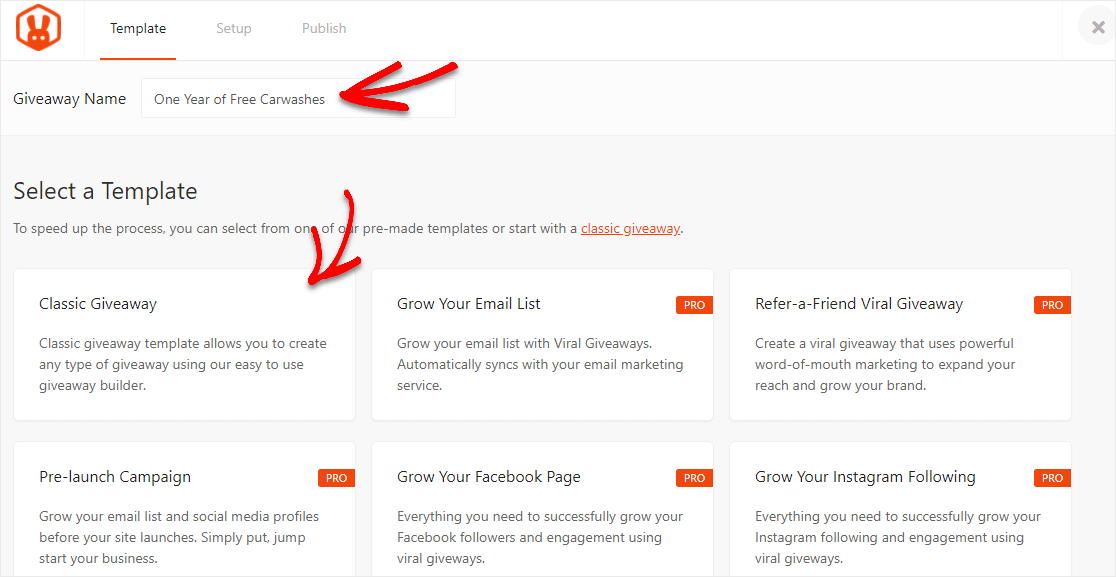
If you’d like to focus on a specific goal as you host a giveaway, the pro version of RafflePress lets you choose from many additional (and highly effective) pre-built giveaway templates like:
- Grow Your Email List
- Pre-launch Campaign
- Grow Your Facebook Page
- Grow Your Instagram Following
- Refer-a-Friend Viral Giveaway
- Grow Your Twitter Following
- Grow Your YouTube Channel
They are all a fantastic way to grow your audience.
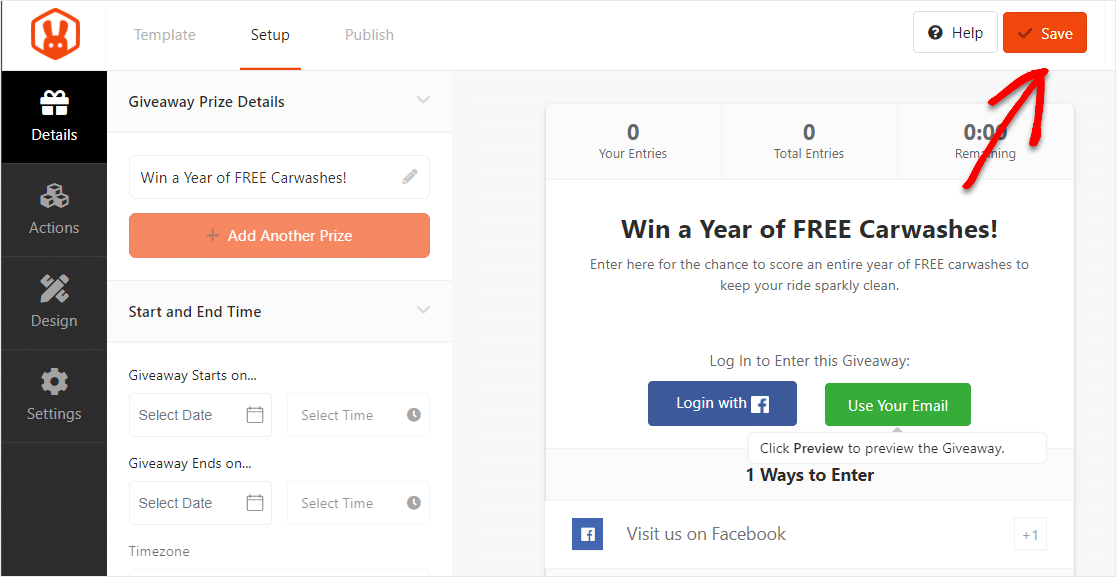
Step 3: Add Details to Your Giveaway
Now that you’ve picked your template, you need to add all the details of your online contest.
First, click on the box with the pencil on the left-hand panel to provide a title and description for your prize. Make sure to read the post on proven contest prize ideas if you need a little help coming up with something to give away!
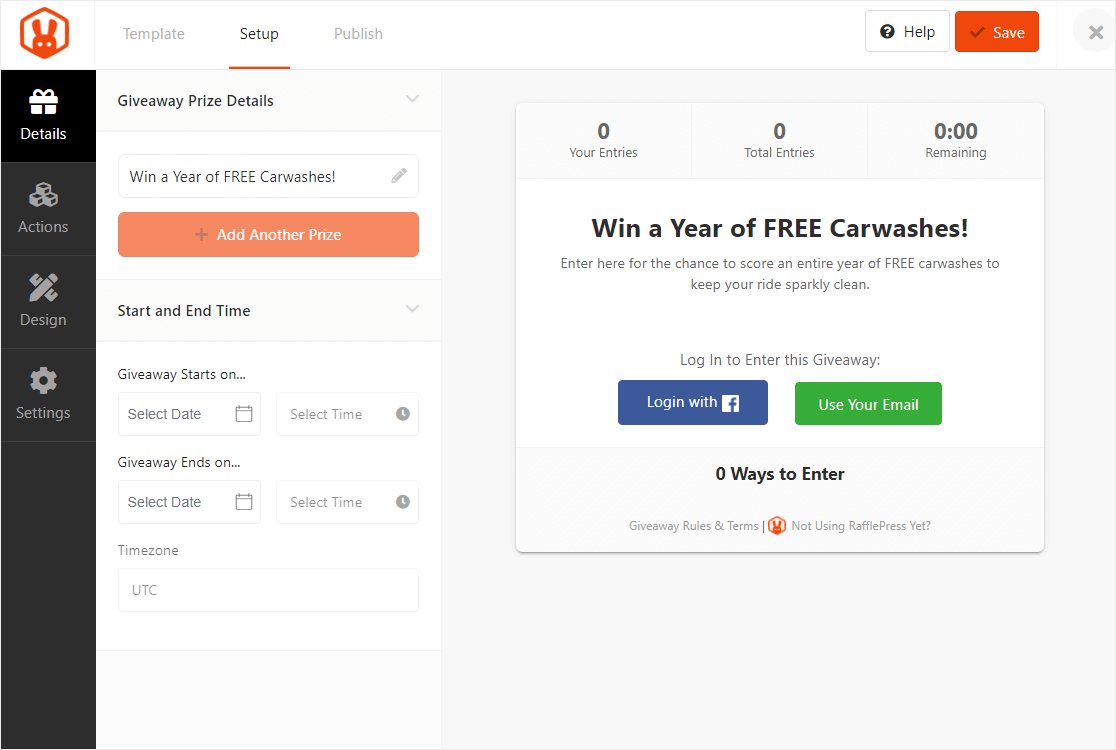
In this Giveaway Prize Details section you can also:
- Add additional prizes by clicking on the +Add Another Prize button
- Set the start and end dates of your contest
- Set your time zone
Step 4: Add Actions & Entry Options to Your Giveaway
RafflePress is wonderful for WordPress contests because it has a ton of actions and entry methods for you to offer your users. So you can totally customize your giveaway to match your goals and your website’s goals.
To add an action and edit its entry options, click on the Actions tab on the left-hand panel.
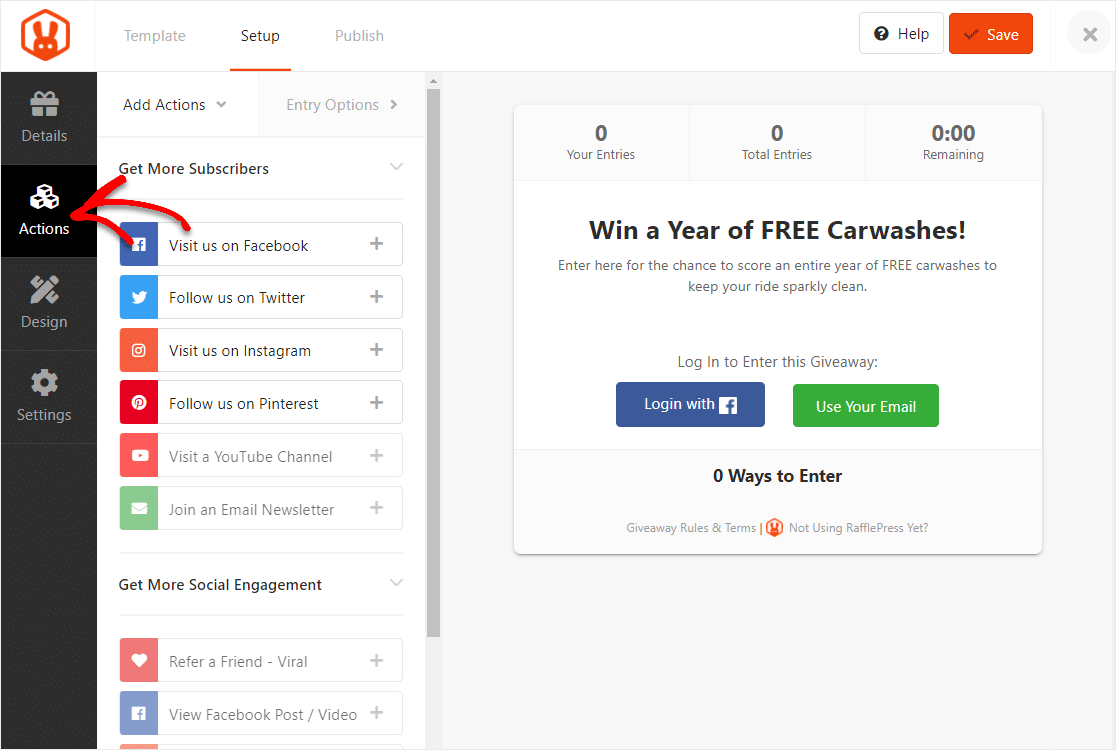
Some possible online growth goals and the suggested entry option actions are to:
- Get more email subscribers — Add the Join an Email Newsletter action (Pro).
- Get more social media followers — Add a Facebook, Twitter, Instagram, Pinterest or YouTube action. An Instagram giveaway is a great way to encourage others to tag a friend right now (Pro).
- Increase social engagement — Add a Refer-a-Friend (Viral Sharing) action or a Watch a Video action (Pro).
- Grow your website traffic — Add a Tweet a Message or Visit a Page action.
- Get user generated content like from a video contest — Add an Invent Your Own action.
There’s a lot of other actions to choose from when you host your giveaway, but those are some solid ideas to get you started. Obviously, the Pro version of the software is going to give you a ton of more options.
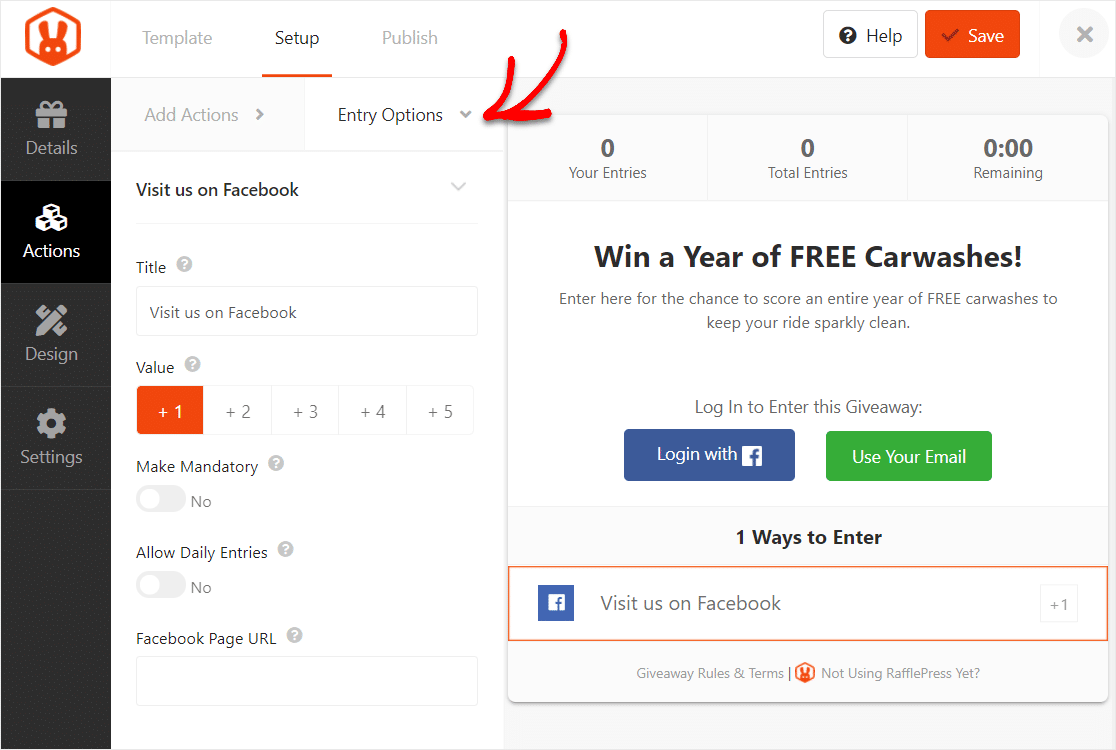
And, each action has entry options that can be customized once you click on the + symbol on that action. You can change the title of the action, choose the value of points someone will earn by completing that action, make the action mandatory for entry, allow daily entries, enter a related URL, and more.
And to make your giveaway look even more slick, you can customize the design to match your brand’s colors on the Design tab on the left-hand side if you have the Pro version.
Step 5: Adjust Your Giveaway Settings
RafflePress gives you lots of options to tweak your giveaway even more in the settings panel.
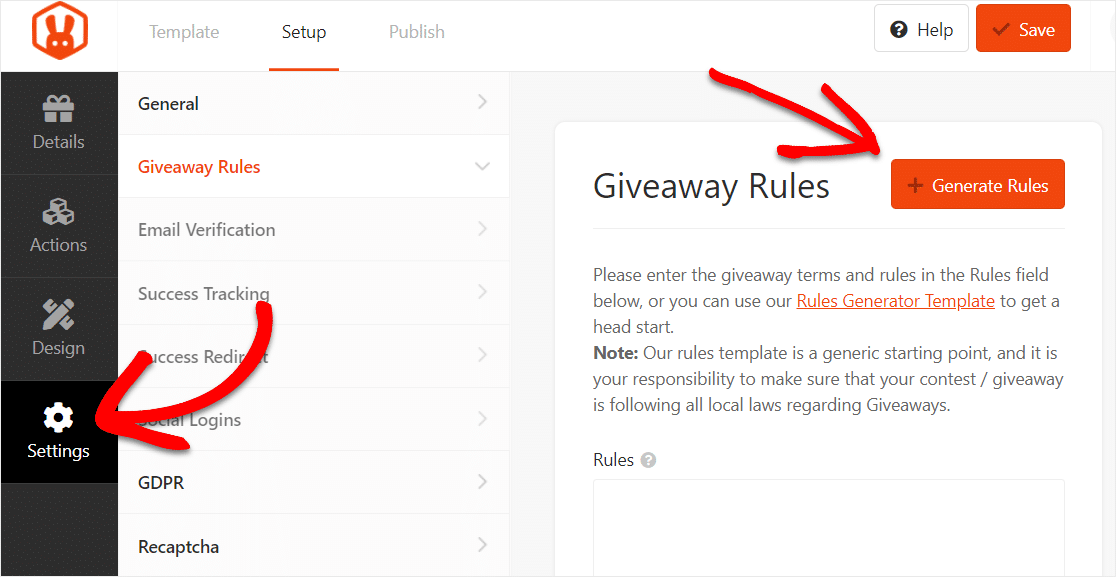
First, enter your contest rules. Lets do that before we adjust any other settings.
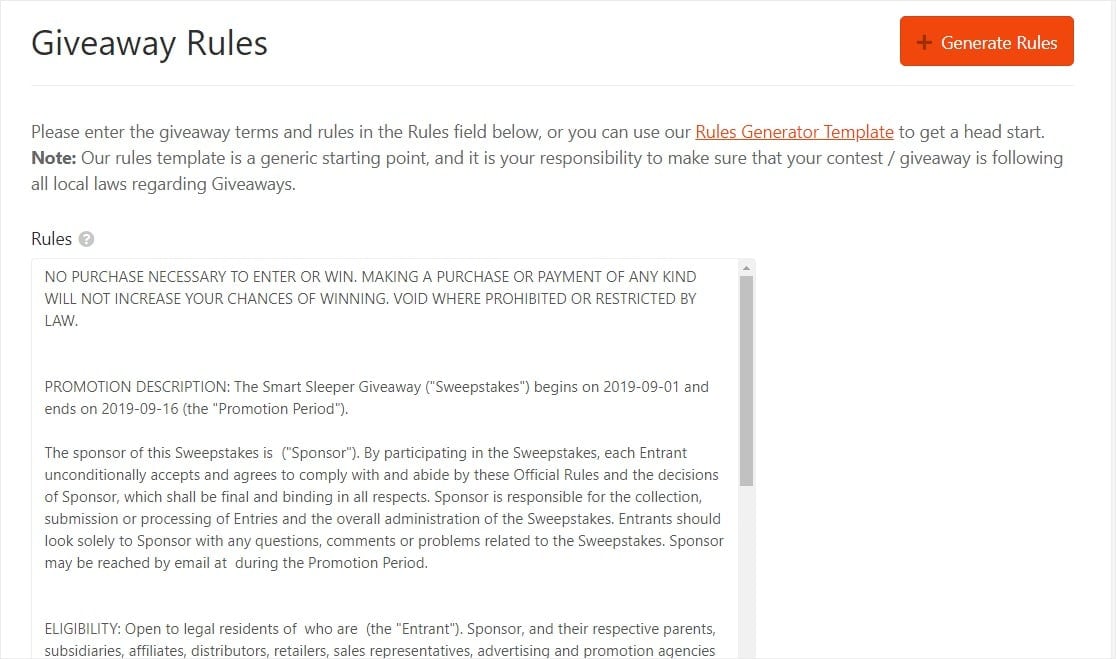
To get started, click on the Settings tab with the gear icon. Then, select Giveaway Rules and click on the orange + Generate Rules button.
Next, enter all the details of your giveaway on the page that popped up and click on the Generate Rules button at the bottom of the generator.

RafflePress will then use the information you entered and generate basic giveaway guidelines and rules.
Also, on this setting page, you can do many other things like:
- Enable email verification
- Success tracking
- Social logins
- Display your giveaway winners
- Success redirection
- and more…
Step 6: Save Your Giveaway
Once the details, actions, design, and settings of your giveaway are customized to your liking, don’t forget to click the Save button in the top right corner.
Step 7: Publish Your Giveaway to Your WordPress Site
The final step is to publish your giveaway on your website. To do this, RafflePress offers 3 options:
- RafflePress WordPress Block – Embed the giveaway in your post or page in the WordPress block editor
- WordPress Shortcode – Use the Classic WordPress editor and embed the giveaway using a shortcode
- Giveaway Landing Page – Build a standalone landing page for your giveaway
In this example, we’re using a WordPress block.
Create a new page or post and then click on the + icon to locate the RafflePress widget.
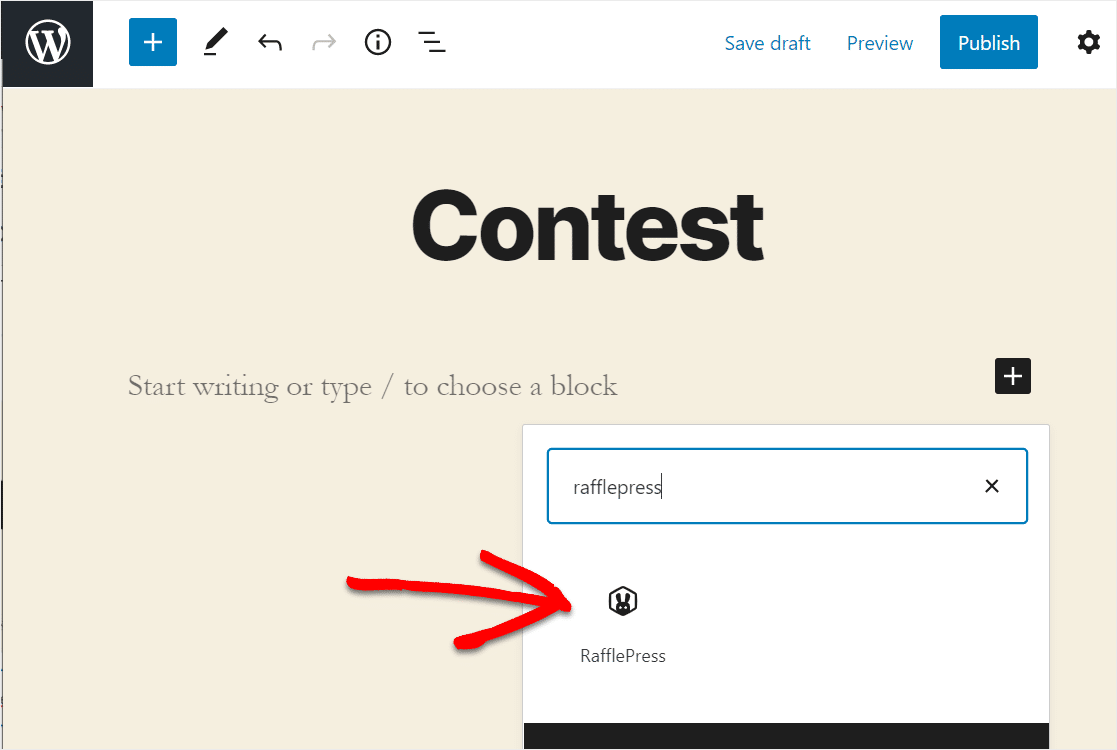
Select the giveaway you want to embed into your WordPress site from the list.
Now click on the Publish button in the top right corner to embed the giveaway onto your site.
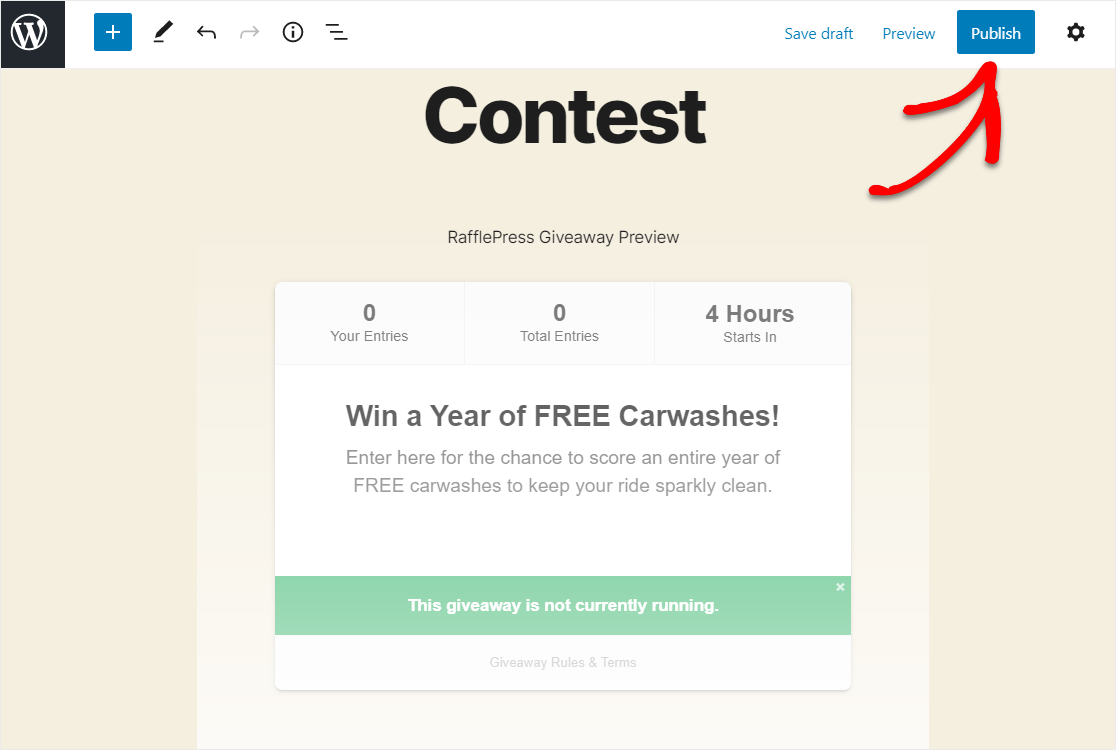
And there you have it. You’ve now created your giveaway in just a few clicks, without knowing any code.

Final Thoughts
And there it is! You now know how to create a contest entry form in WordPress.
Looking for tools that are dedicated to building online contests and simple giveaways? WordPress contest plugins can help you run social media contests, videos contests, and more. Check out our post about creating free giveaways and contests to check out tons of options.
So, what are you waiting for? Get started with the most powerful WordPress forms plugin today.
And don’t forget, if you like this article, then please follow us on Facebook and Twitter.
The post How to Create a WordPress Contest Entry Form (2 Easy Ways) appeared first on WPForms.
source https://wpforms.com/how-to-create-a-contest-entry-form-in-wordpress-step-by-step/

