Do you want to stop spam registrations in WordPress?
Spam accounts can be a security risk for your website. It’s also annoying to have tons of junk accounts cluttering up your database.
In this article, we’ll show you how to stop these spambots from creating user accounts in WordPress.
Create Your User Registration Form Now
Why Do Spammers Register on My Site?
When spammers attack a WordPress site, they’re typically looking to spread even more spam. By creating an account, they potentially have a ‘way in’ to your site.
If there’s a vulnerability in a plugin and you don’t update it, it could be easier for the spammer to exploit that if they can already log in to your dashboard.
Most spambots are just scripts that access example.com/wp-login.php?action=register to create fake accounts. So it’s easy to stop them using the same tools you use to stop contact form spam.
We’ll show you some ways to stop these spambots in their tracks by limiting access to your site and your login page.
How to Eliminate Spam User Registration in WordPress
Let’s look at some easy and fast ways to cut spam user registrations on your site. Use the links below to jump to the section you need:
- Disable User Registrations in WordPress
- Set the Default User Role in WordPress
- Make a Custom User Registration Form
- Turn on Email Activation for New Users
- Turn on Administrator Approval for User Registration
- Add a CAPTCHA Field to Your Registration Form
- Use Geolocation to Reduce Spam User Registrations
- Install a WordPress Security Plugin
- Manually Block Spam IP Addresses
Let’s start with the easiest option.
1. Disable User Registrations in WordPress
Do you need to allow people to register accounts on your WordPress site?
You’ll definitely need to allow user registrations if you’ve started an online store or a membership site.
But if you have a personal blog or a business site, you probably don’t need to allow registration. If you already set up all the logins you need, it makes sense to disable registration completely.
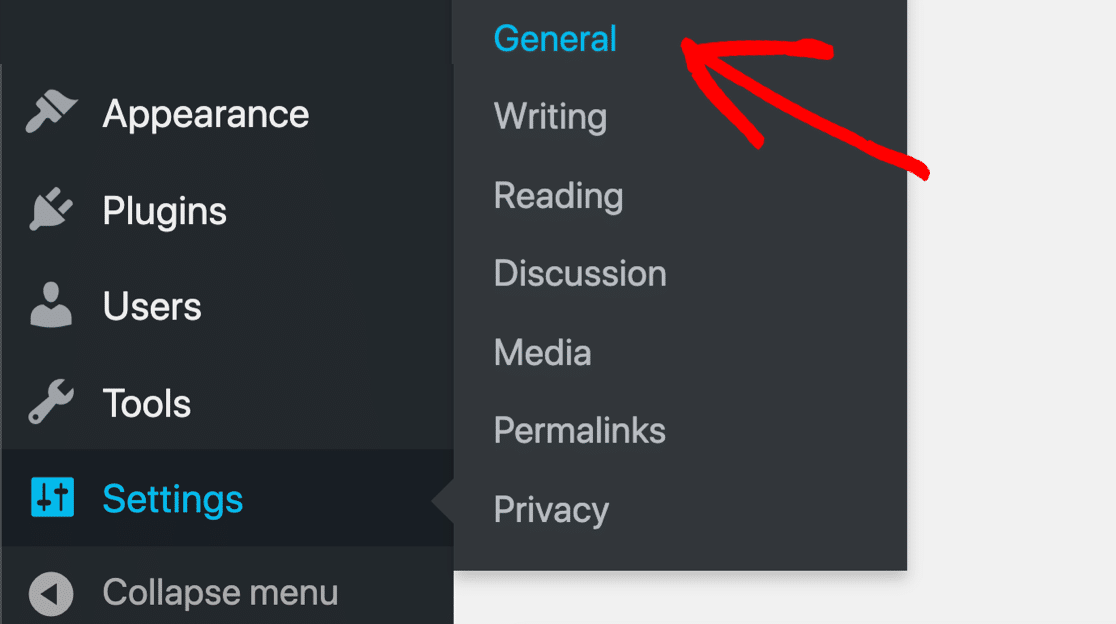
To do that, open up the WordPress dashboard and click Settings » General.
Find the Membership setting and uncheck Anyone Can Register.

And that’s it! It’s the easiest way to make sure that no one can create spam user registrations on your site. But it’s best for blogs that are completely closed to new users.
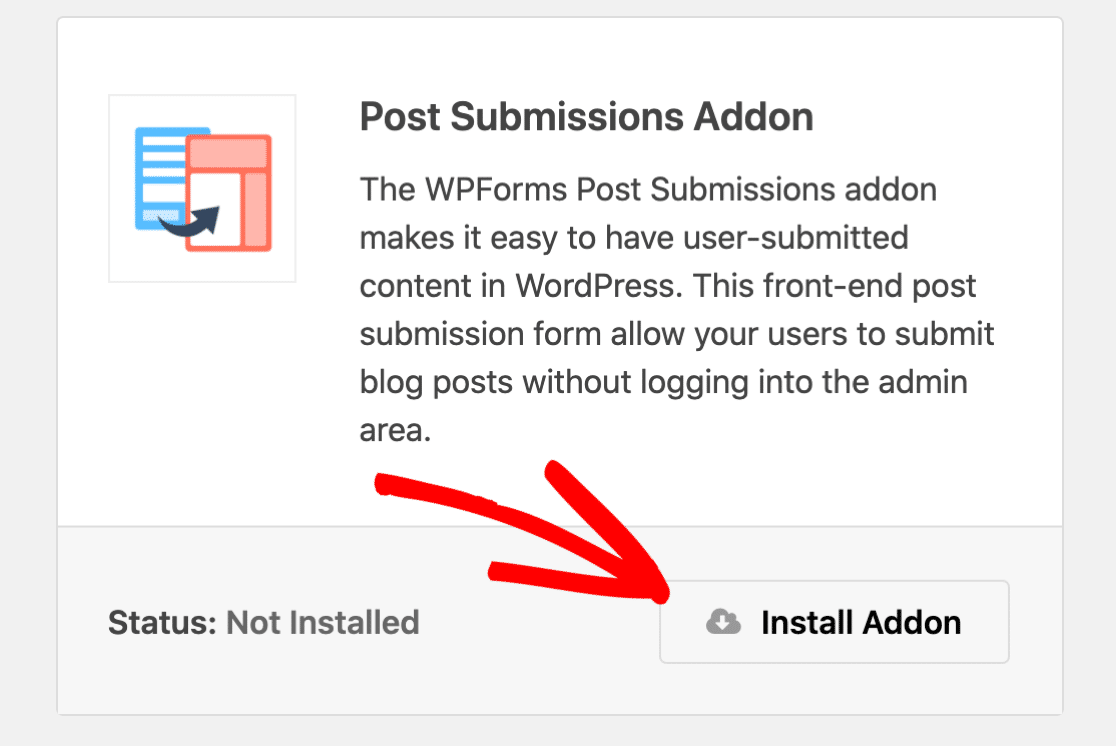
Here’s a tip: if you have a multi-author blog, you could disable user registrations and install the WPForms Post Submissions addon. It lets people contribute guest posts without logging in to your site.
Do you need to leave registration turned on? Let’s look at some more options.
2. Set the Default User Role in WordPress
If you want to leave user registration enabled in WordPress, it’s super important that you never give new members access to your WordPress dashboard.
We always recommend giving new users the Subscriber role. Subscribers have very few permissions in WordPress, so it’s the safest option for new users.
For example, Subscribers can’t access the WordPress Dashboard at all.
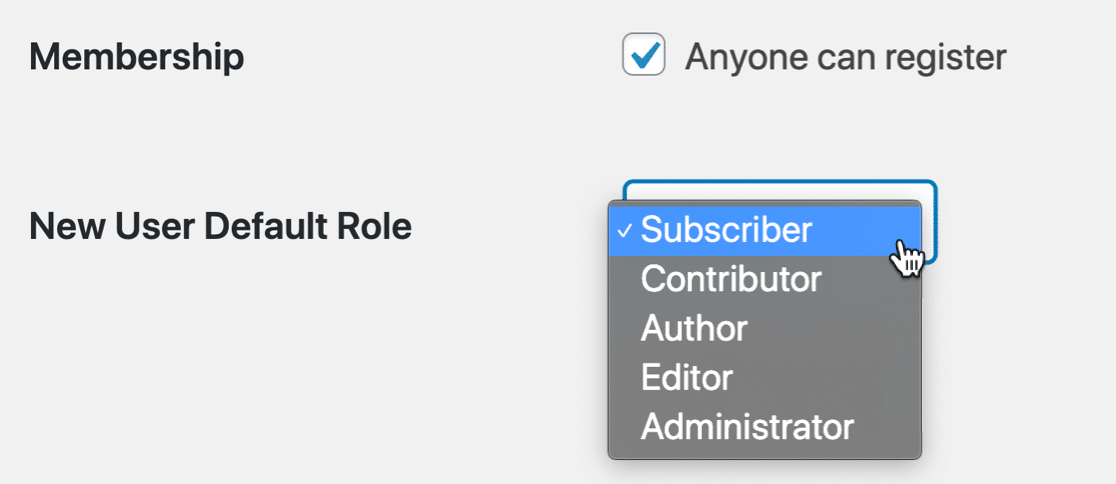
To check which role your site assigns when new users register, open up the WordPress dashboard and click Settings » General.

Now look for the dropdown labeled New User Default Role and change it to Subscriber.
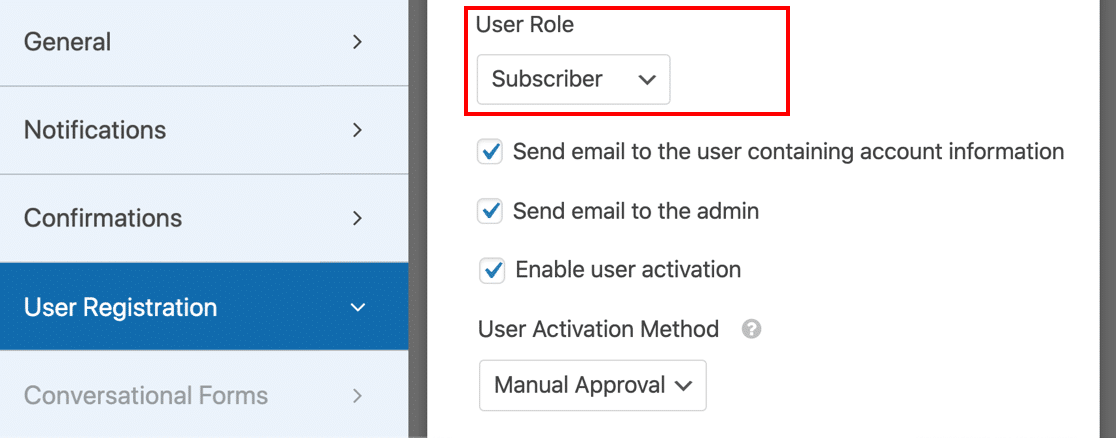
If you’re using a custom user registration form in WPForms, you can control the setting in the User Registration settings panel too.
Not sure how to make your own user registration form? We’ll talk about that next.
3. Make a Custom User Registration Form
The default WordPress user registration form is super basic. If you want more control over account creation, you can make a custom user registration form.
WPForms has a User Registration addon that makes it easy to create your own custom form.
You can install the addon in the Pro version or higher.
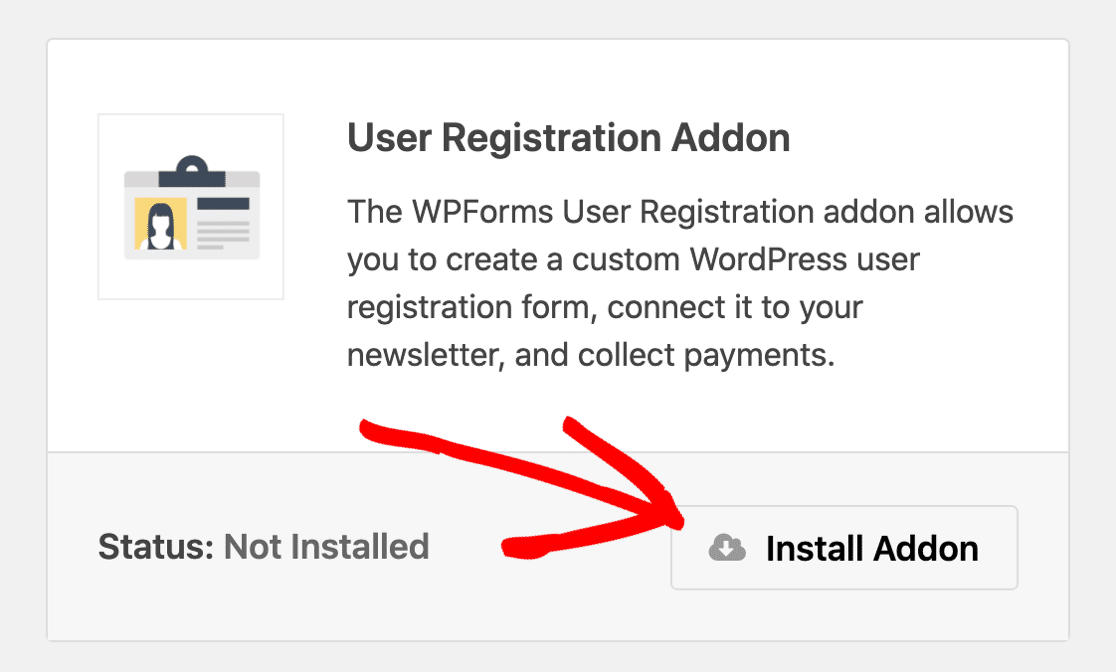
The user registration addon lets you make a much better WordPress registration form. You can add custom user meta fields to get more information about your users when they sign up.
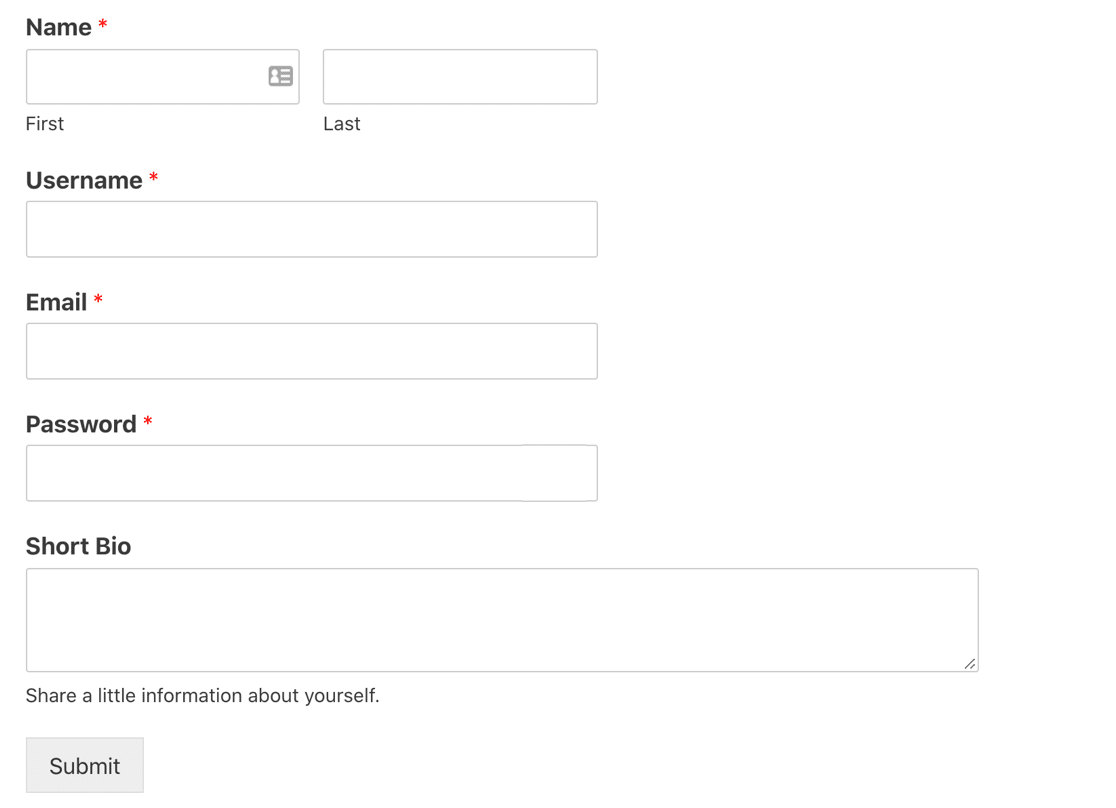
Here’s what the default user registration form template looks like:
When you create a custom registration form, you also benefit from the awesome form security features in WPForms. It adds a secret anti-spam token to every form you create.
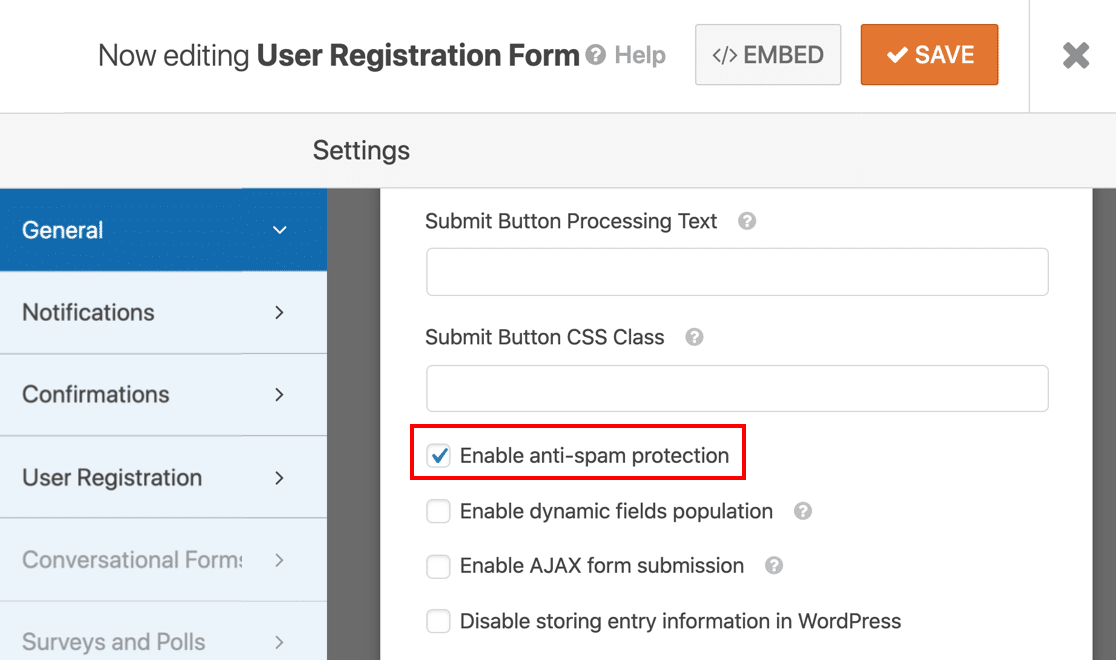
If an automated spambot tries to submit your user registration form, they’ll get stuck. They can’t fill in the ‘secret’ token field so their form submissions won’t send.
Our form token is a super easy way to stop spam bots in their tracks. And it’s a lot more effective than an old-fashioned spam honeypot that many online form builders still use.
The anti-spam token setting is automatically enabled on the user registration form template in WPForms. And if you create a custom user registration form, you’ll also want to check out our easy guide to creating a custom login page in WordPress.
4. Turn on Email Activation for User Registration
If you want to stop spam user registrations in WordPress, you can turn on email activation for new user accounts. This won’t stop bots from spamming your forms, but it does mean they won’t be able to log in until they manually confirm the request.
The WPForms User Registration form can automatically send out a link for every new account that’s created on your WordPress website. Real users can just click the link to complete signup.
To turn on user activation, you’ll want to head to the User Registration settings in WPForms.
Tick Enable user activation and then select User Email in the dropdown.
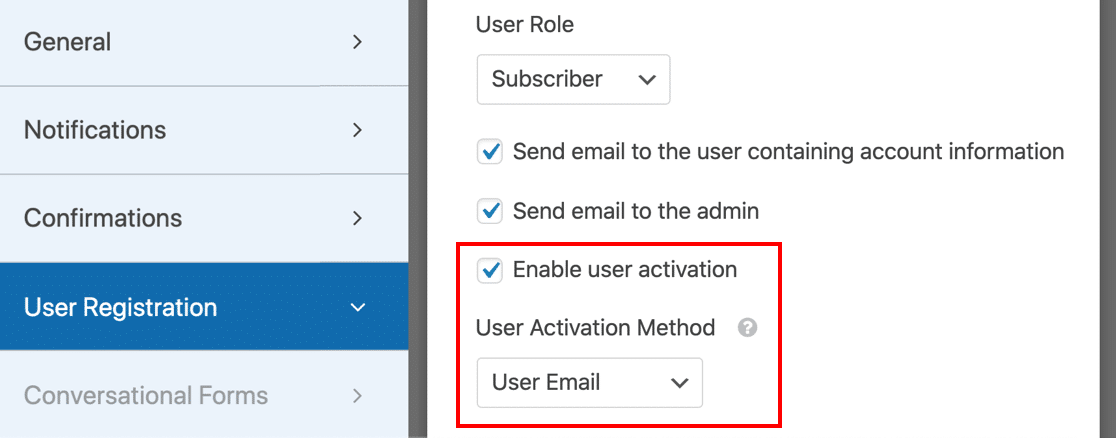
Spam user registrations are typically created by bots. So by adding this extra step, you’ll improve your site security. The new registrant will need to click that confirmation link to complete the account setup process.
5. Turn on Administrator Approval for New User Registration
If you’d like an even more secure method of user registration, you can opt for Manual Approval.
This will prompt the site admin to review each user registration request before the new user can log in to their account. You’ll receive an email notification for each request, and you’ll have the option to approve or deny the new member.
To turn on admin approval, go to Settings » User Registration.
On the right-hand side, scroll down to the User Activation Method and select Manual Approval from the dropdown.
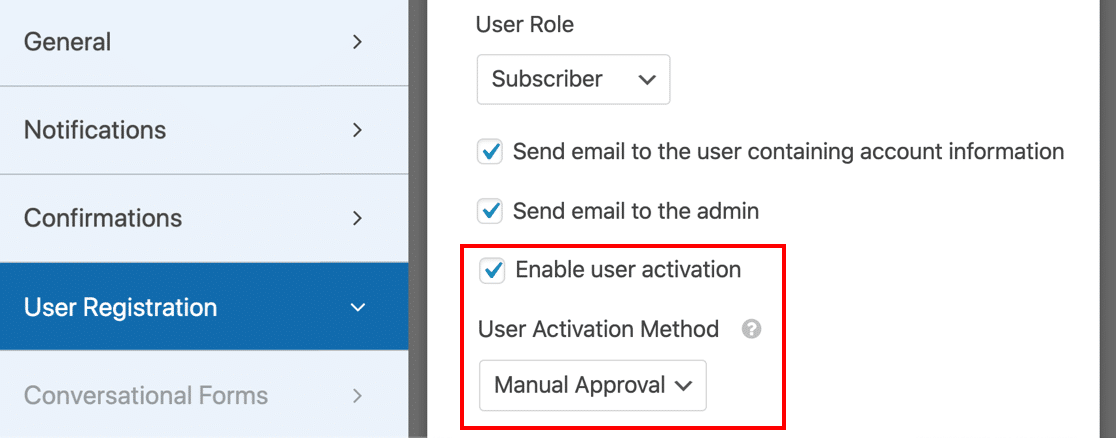
Now you can review every new user that registers on your site to filter out the spammy registrations.
6. Add a CAPTCHA Field to Your User Registration Form
You can also use a CAPTCHA field to stop spam user registrations. This boosts the security of the form token we already turned on.
A CAPTCHA is a challenge or puzzle that the user has to solve to submit a form.
WPForms supports 3 different types of CAPTCHA for your forms:
- Custom CAPTCHA
- Google reCAPTCHA
- hCaptcha
Let’s look at each one in turn.
How to Add Custom CAPTCHA to a User Registration Form
The Custom CAPTCHA field is easy to set up and easy for your visitors to solve. It asks users to solve a simple math problem, or to use custom questions.
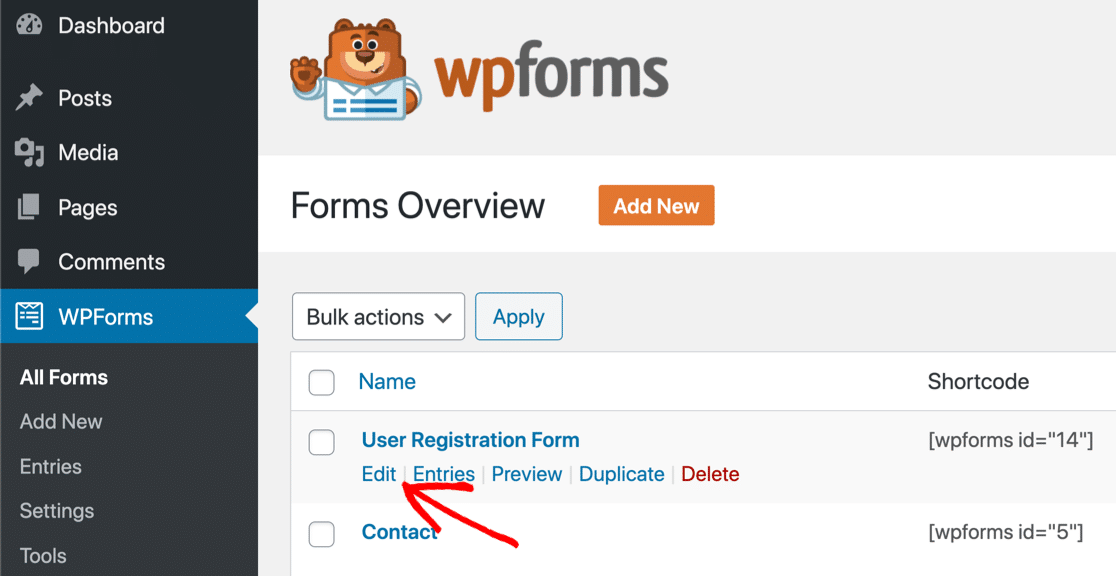
To set this up, you’ll need to activate the Custom CAPTCHA addon for WPForms. The easiest way to do this is to open up your user registration form in the WPForms builder.
Just hover over the form here and click Edit.
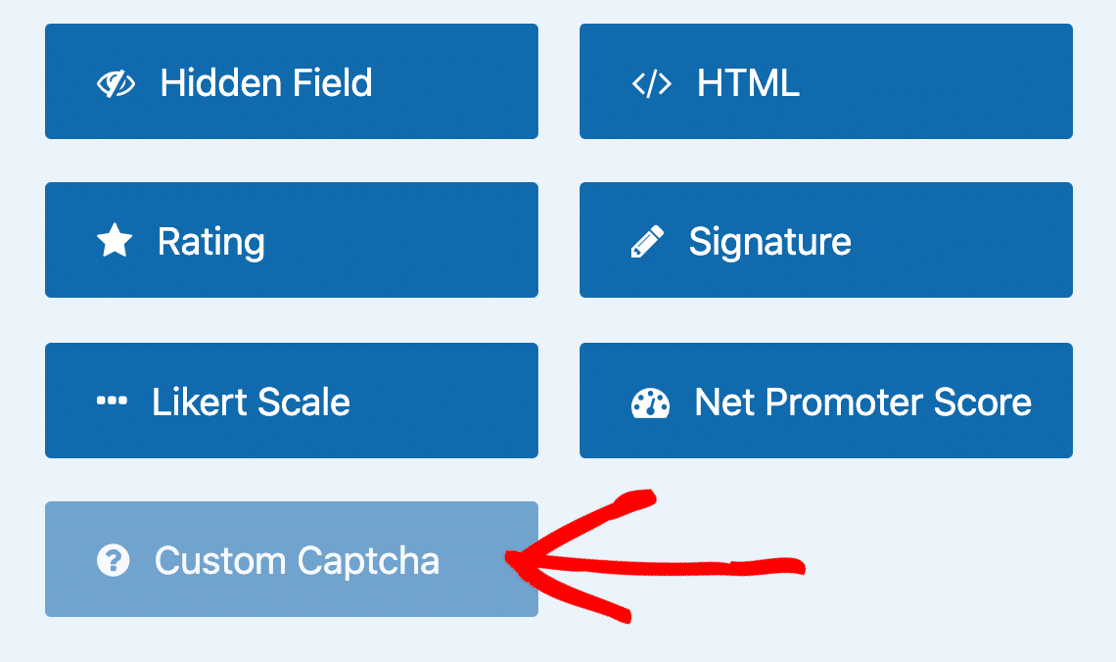
Then click the grayed-out field to enable custom CAPTCHA.
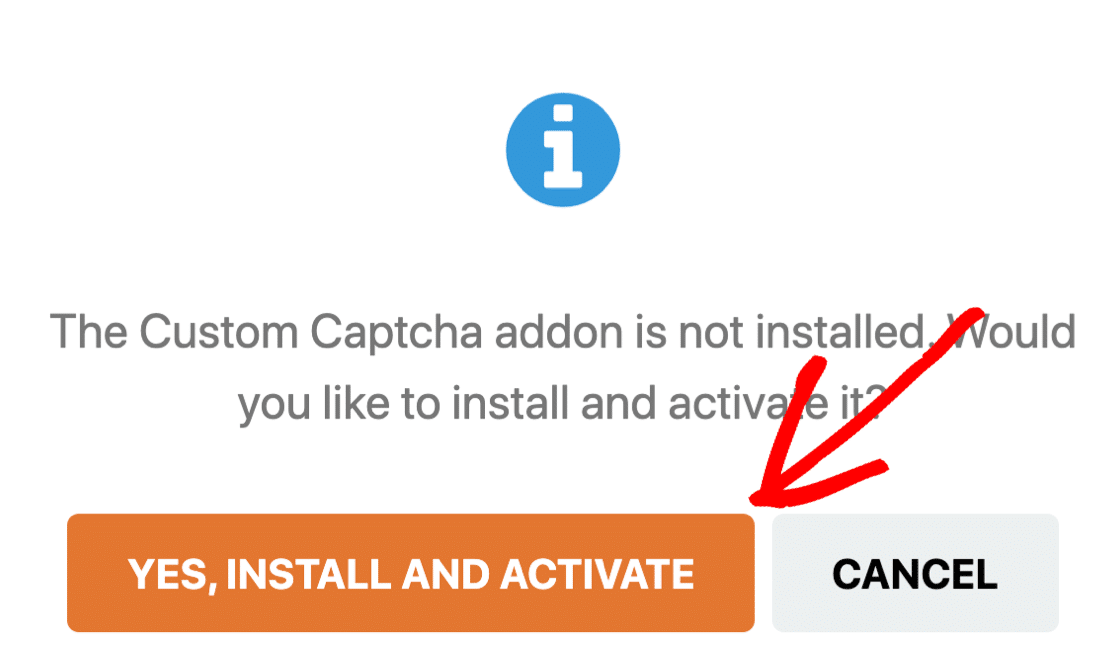
And then click Yes, Install and Activate.
By default, the custom CAPTCHA field will show random math questions to your visitors. If you want to switch that to a question and answer field, you can click on the CAPTCHA field and then use the dropdown to swap.
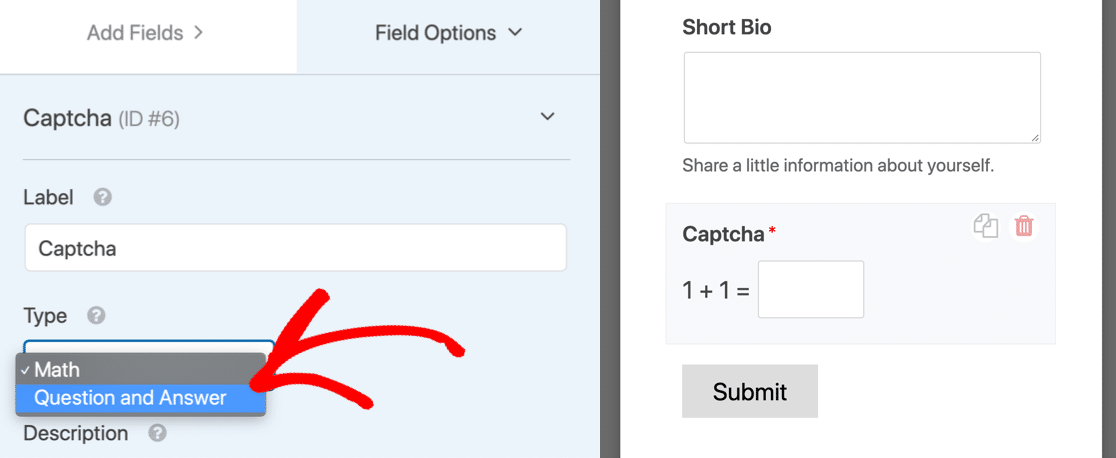
It’s that easy! Now WPForms will ask every new user to complete the CAPTCHA before they can register.
How to Add Google reCAPTCHA to a User Registration Form
WPForms also supports Google reCAPTCHA. You can use this to show your visitors a challenge, or silently detect activity to see if they’re a bot.
The easiest way to activate reCAPTCHA is to save your form and exit the builder. Then you’ll want to open up your WPForms settings in the WordPress dashboard.
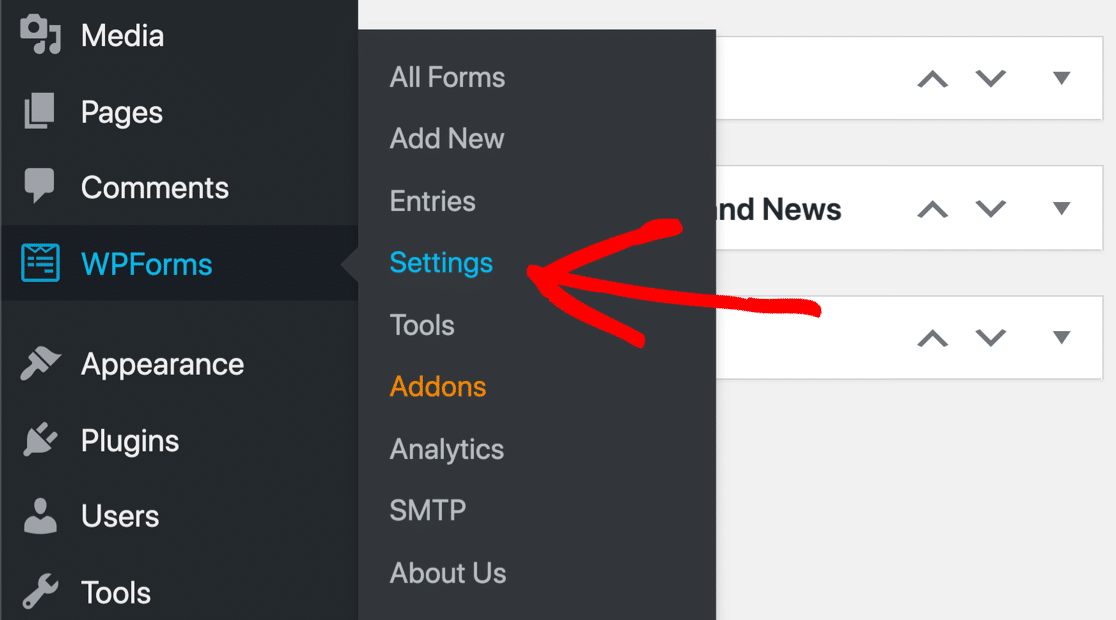
And now click the CAPTCHA tab.

From the icons, select reCAPTCHA.
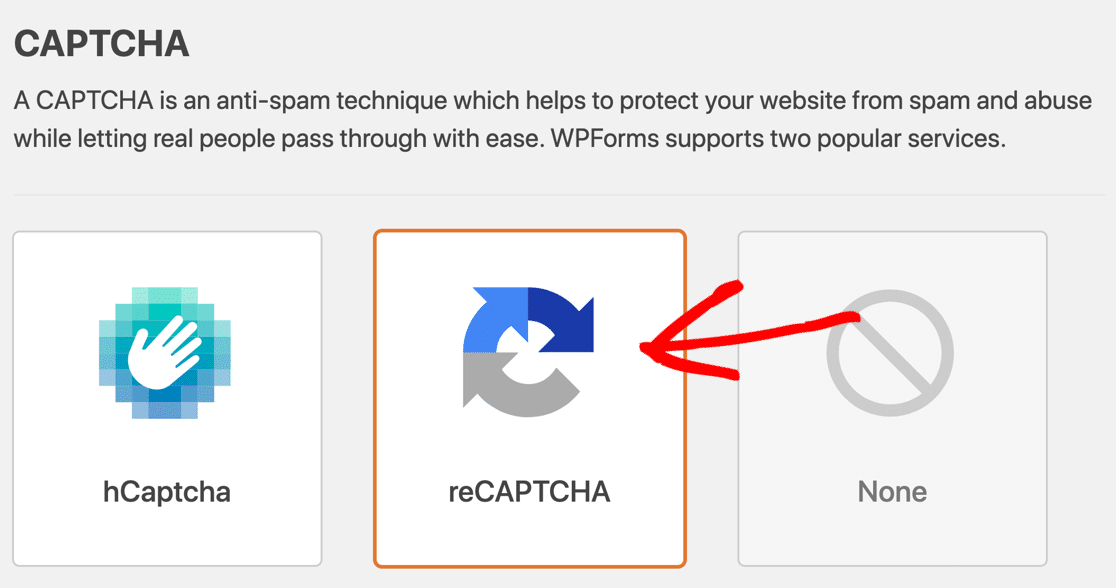
Underneath, you’ll see 3 Google reCAPTCHA options:
- Checkbox reCAPTCHA v2 – Shows a checkbox with the words ‘I am not a robot’ next to it. The user has to check the box to submit the form.
- Invisible reCAPTCHA v2 – Detects user activity to decide if the visitor is human or a spam bot. This setting can help to reduce form abandonment by reducing the amount of work your visitor has to do.
- reCAPTCHA v3 – Recommended for advanced users and AMP pages.
Select the reCAPTCHA method you want to use using the radio buttons.

In a new tab, open up Google’s reCAPTCHA site. Click on the Admin Console button at the top to start setting up your site.
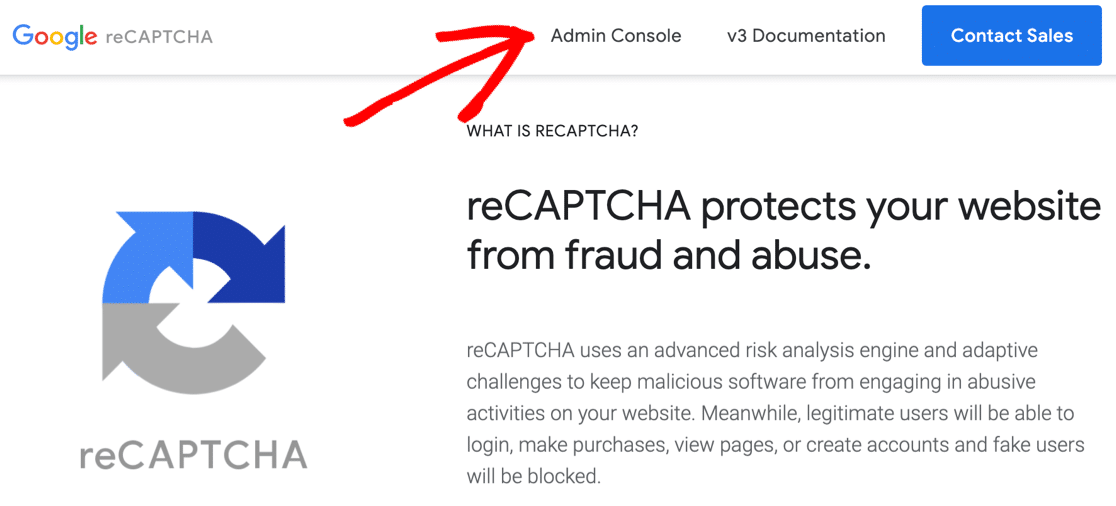
After logging in, type in your domain name at the top of the settings page.
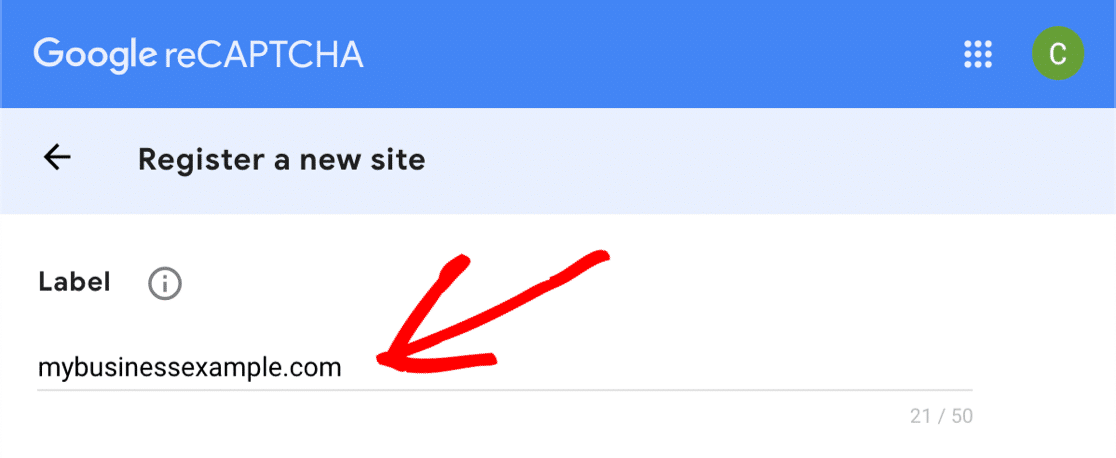
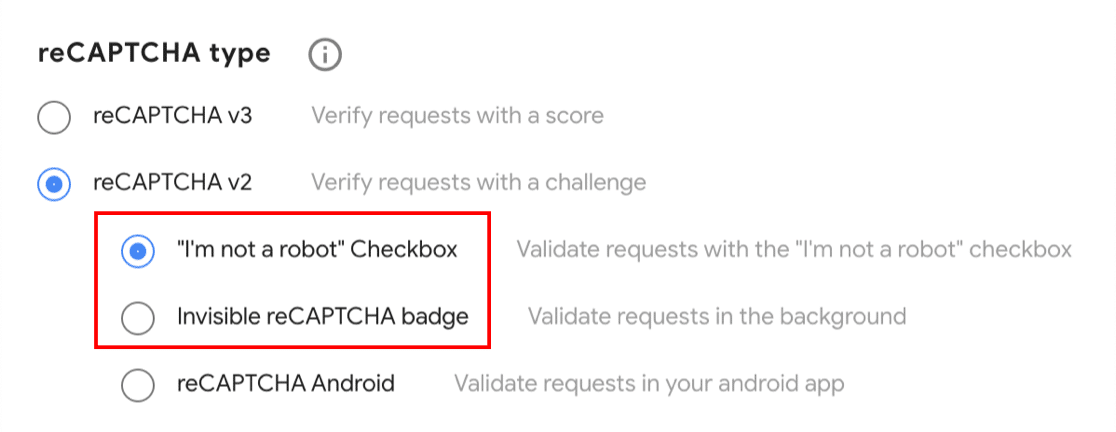
Then, choose the type of reCAPTCHA you want to add to your website. Be sure to check that this matches the setting in WPForms.

If you choose reCAPTCHA v2, you’ll also want to choose which type of v2 you want to use. You can choose the checkbox or the invisible CAPTCHA.
And now add your website domain without the leading https://

When you submit the form, you’ll see 2 keys: a site key and a secret key.
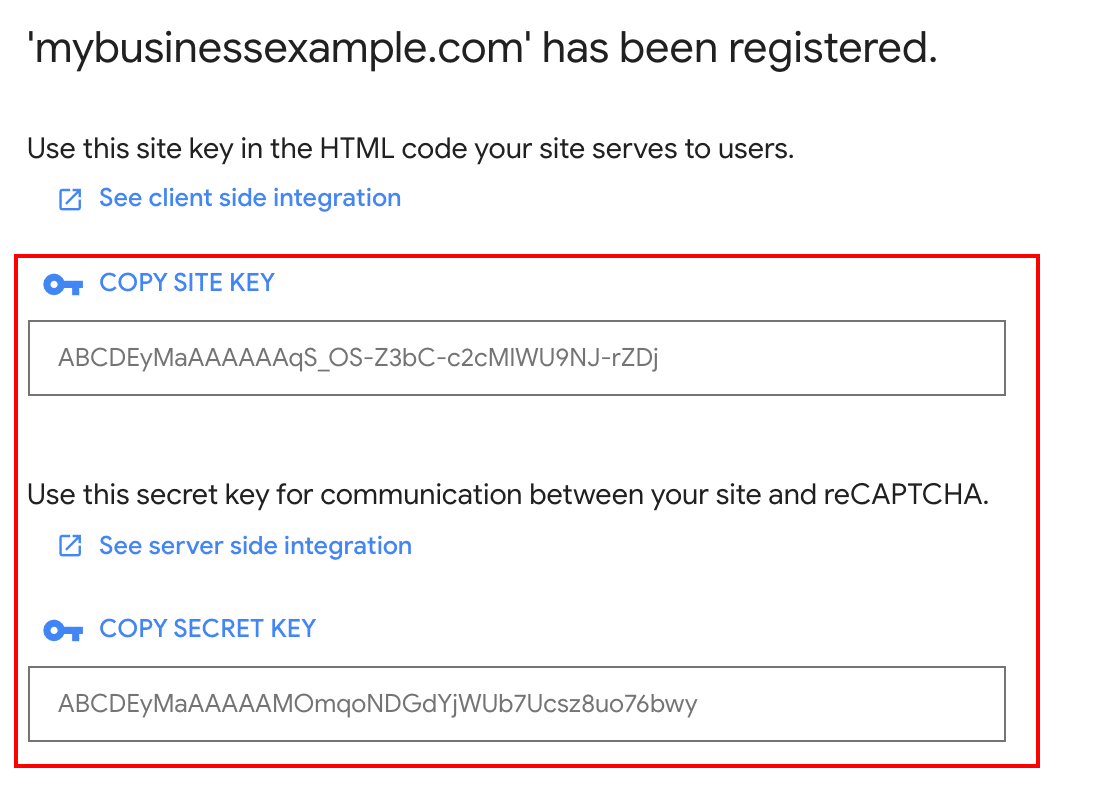
Go back to WPForms and paste the keys into the Site Key and Secret Key fields.

If you want, you can also customize the settings below the keys:
- Fail Message is the message that’ll show up if reCAPTCHA fails.
- No-Conflict Mode is helpful if you have multiple reCAPTCHA plugins. Sometimes this can cause errors, so you can force-disable the other CAPTCHA code here if you need to.
Now you can switch back to the form builder and click the reCAPTCHA field to turn it on for your user registration form.
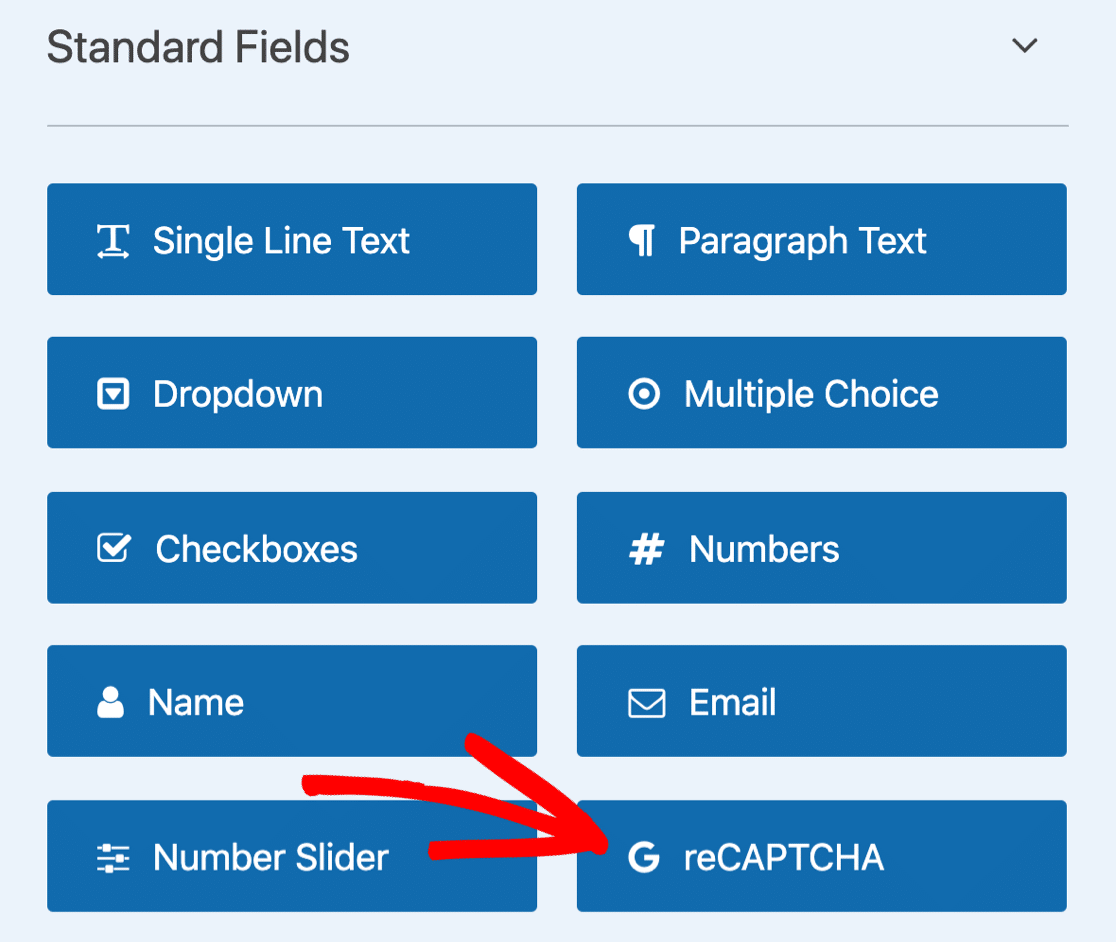
That’s it! Don’t forget to Save your new spam-proof user registration form!
How to Add hCaptcha to a User Registration Form
The 3rd CAPTCHA option in WPForms is hCaptcha, which is a Google reCAPTCHA alternative.
Some users prefer to place an hCaptcha field on their registration form because users aren’t subject to Google’s terms. If you have privacy concerns, this might be a better option for your site.
And you can also make a little money with each hCaptcha that’s solved by your visitors. So it’s a win-win!
Setting up hCaptcha in WPForms is easy. Start by going to WPForms » Settings.

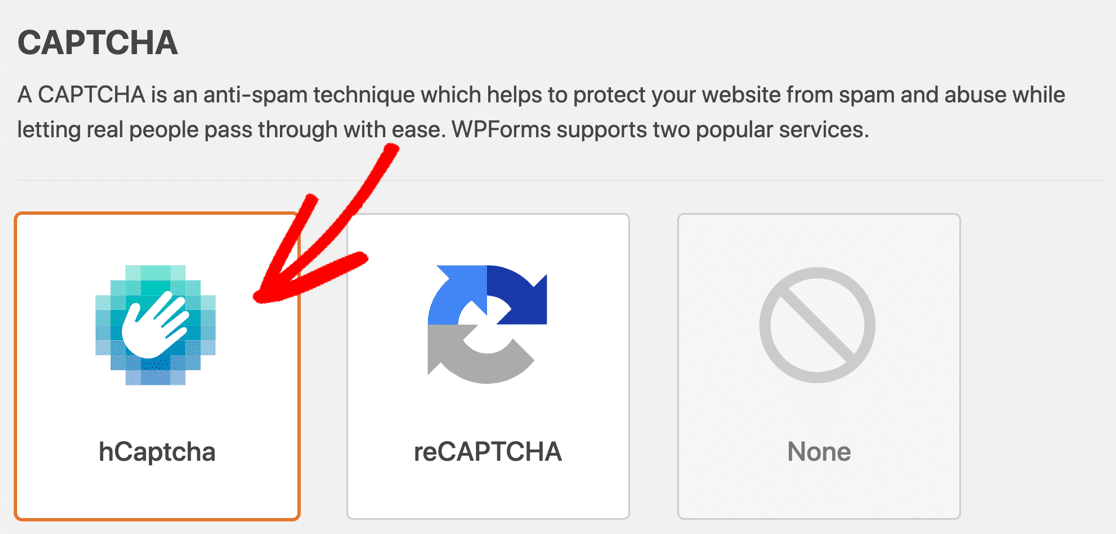
Then, just like the reCAPTCHA setup, you’ll want to click CAPTCHA at the top.

This time, let’s click on the hCaptcha icon to open up the settings.
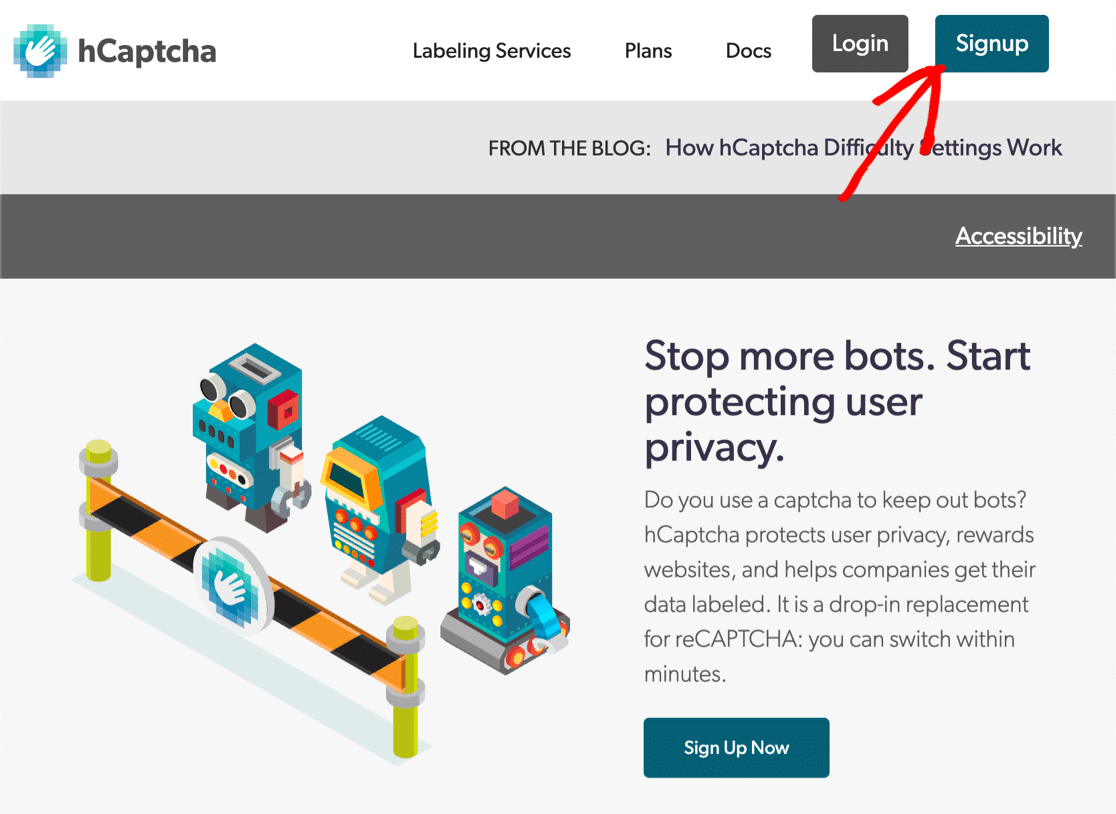
In a new window, head over to the hCaptcha site in a new tab. Then click the Sign Up button to add your website.
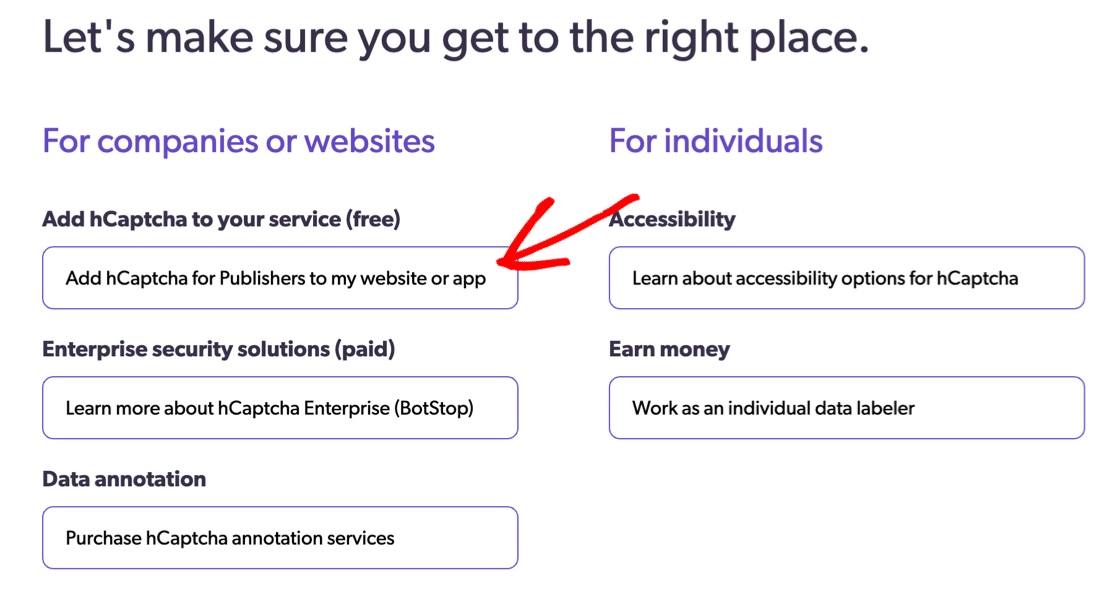
Unless you have advanced needs, or you expect huge amounts of traffic, you’ll want to sign up for the free plan. So let’s click the button on the left under Add hCaptcha to your service (free).
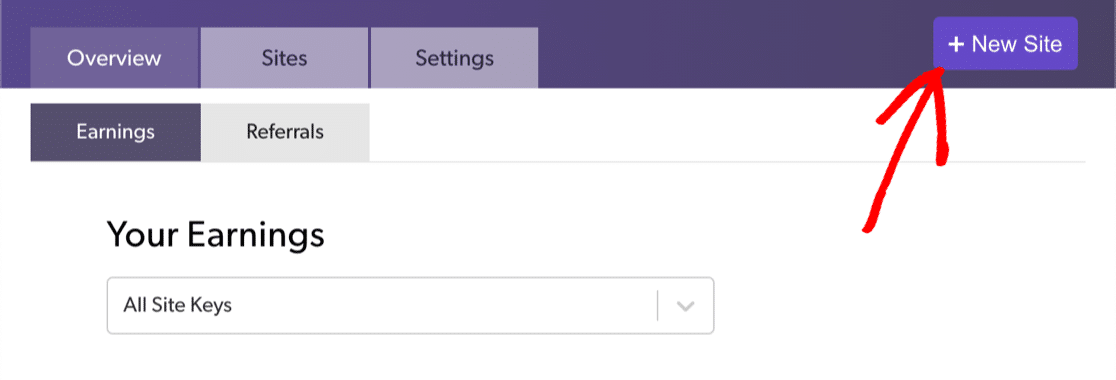
hCaptcha will let you sign in. Once you’re ready, click the purple New Site button at the top left.
Now type in the name of your website so you can easily find it later.

Next, click Add new domain.

Pick the difficulty level you want to use from the options here. If you’re getting a ton of spam, you might want to use Moderate or Difficult to start. These options will almost always show a challenge, and the Difficult mode also shows CAPTCHAs that take a little longer to solve than the Moderate ones.

You can use Filter captchas by audience interests if you want to control the kind of CAPTCHAs visitors see. If you’re not worried about this, just skip this field.

We’re done! Click Save up top.

We’re almost done!
To grab your site key, click Settings at the end of the row. Paste the key into your WPForms settings.

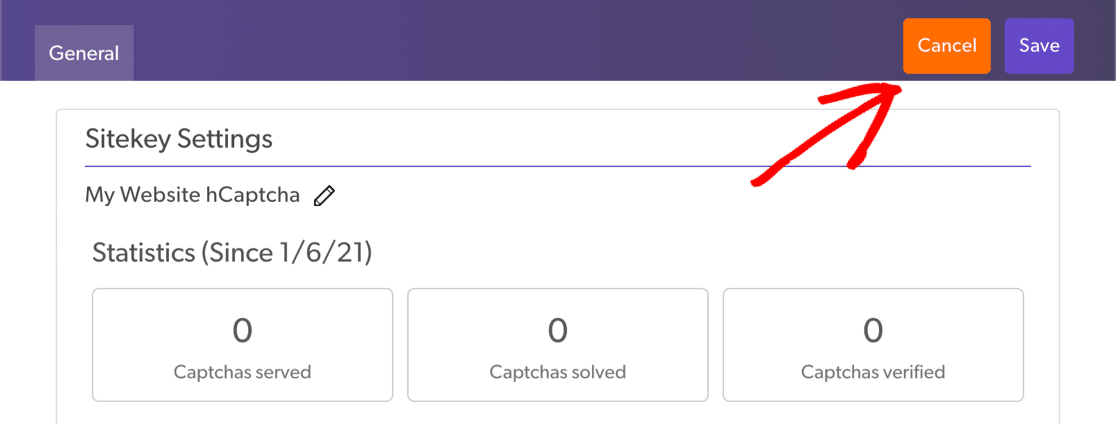
We need to navigate to a different screen for the other key, so let’s click Cancel now.
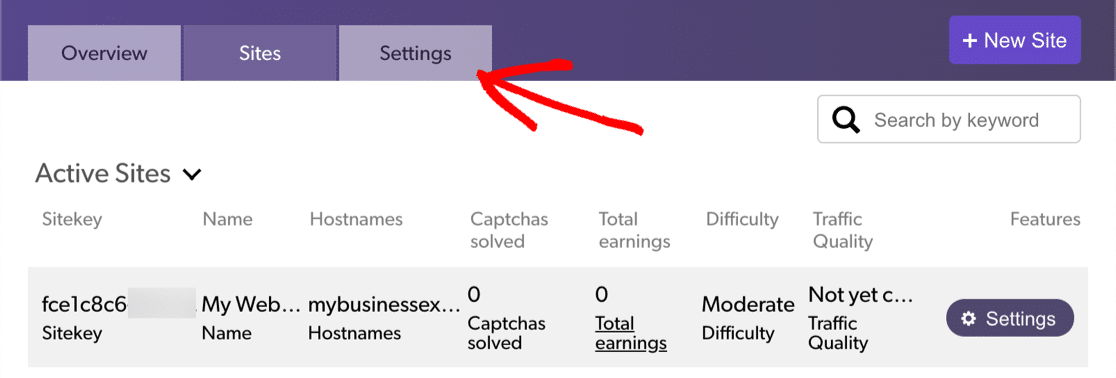
And now click the Settings tab.
Click Copy Secret Key and paste it into WPForms.

Here’s what your hCaptcha settings should look like.
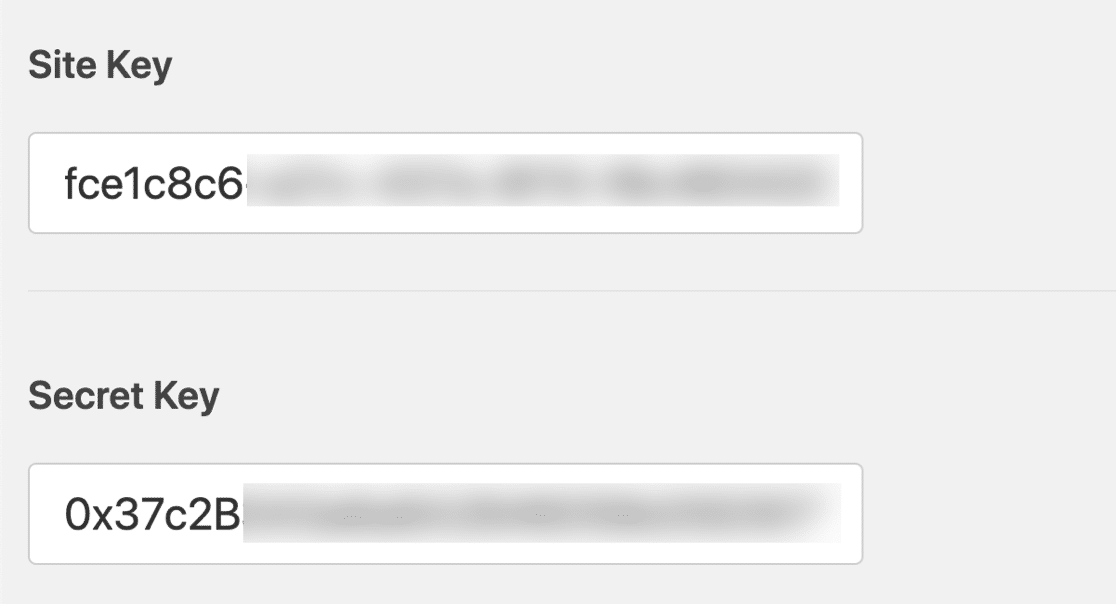
Customize the Fail Message here if you want to. You can ignore No-Conflict Mode since that’s only for use when you’re having difficulty with your hCaptcha.
Click Save.
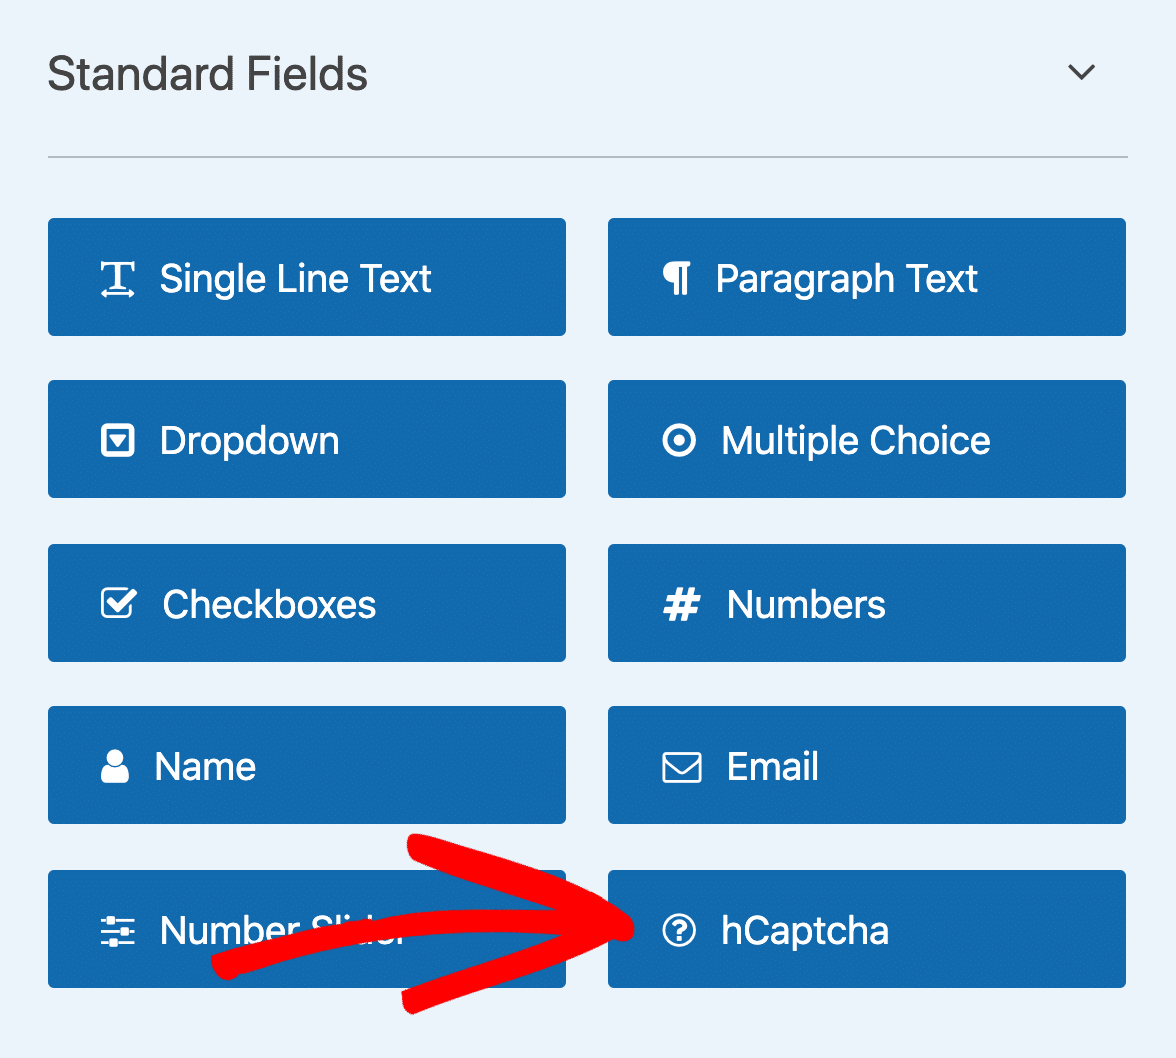
Finally, let’s open up your user registration form again and click hCaptcha to turn it on.
You’re all set! You’re now using hCaptcha to stop spam registrations in WordPress. And you might even earn a few pennies to repay your hard work so far!
7. Use Geolocation to Reduce Spam User Registrations
Geolocation plugins automatically detect the user’s location to control the content they can access in WordPress.
You can use a plugin like this to block access to your WordPress registration page or dashboard.
For example, the CloudGuard plugin lets you limit logins from certain countries with geolocation. You can whitelist your own country and then block every other country from reaching your registration page.
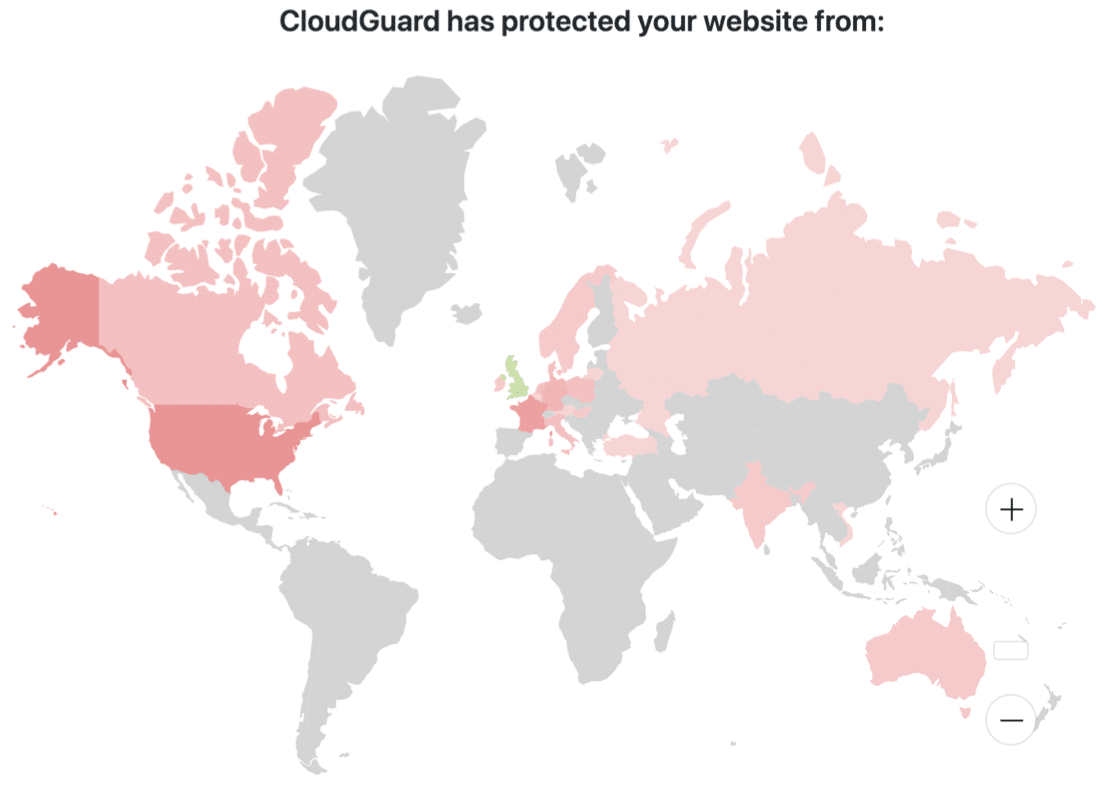
Keep in mind that some users may need to access your site to log in. For example, if you have a WooCommerce store, this solution might not work for you because customers in blocked countries won’t be able to access their accounts.
Check out our guide to the best WordPress geolocation plugins to see some more great recommendations.
8. Install a WordPress Security Plugin
WordPress is pretty secure, but you can harden it further by using a good WordPress security plugin.
Many of these plugins keep track of spammy or malicious IP addresses in their own database, so you can use them for spam prevention as well as security.
When you install the plugin on your site, it checks every visitor’s IP against its database. If it sees a match, it refuses access. That will stop the spammer registering a user account.
Here’s an example of how many spammy visitors the WordFence firewall blocked on our test site:

Some security plugins also let you add a CAPTCHA to the default user registration page. That’s another easy way to stop spammers from creating new accounts on your site.
Learn more in this WPBeginner article on how Sucuri helped block 450,000 WordPress attacks in 3 months.
To check out some options, read our guide to the best WordPress security plugins for website protection.
9. Manually Block Spam IP Addresses
With WPForms, you can use a smart tag to get the IP address of your visitor with every form submission.
Once you know the IP address of a spam registration you can block that address from accessing your site at all.
To track the IP Addresses on any form submission, go to Settings » Notifications.
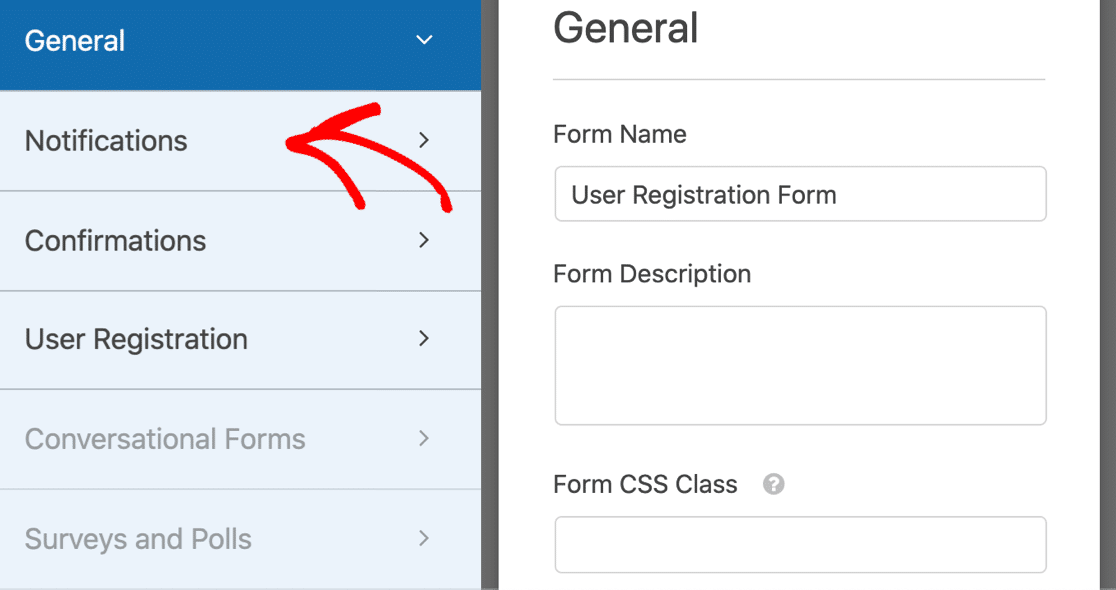
Next to the Message field, click Show Smart Tags and click on User IP Address.
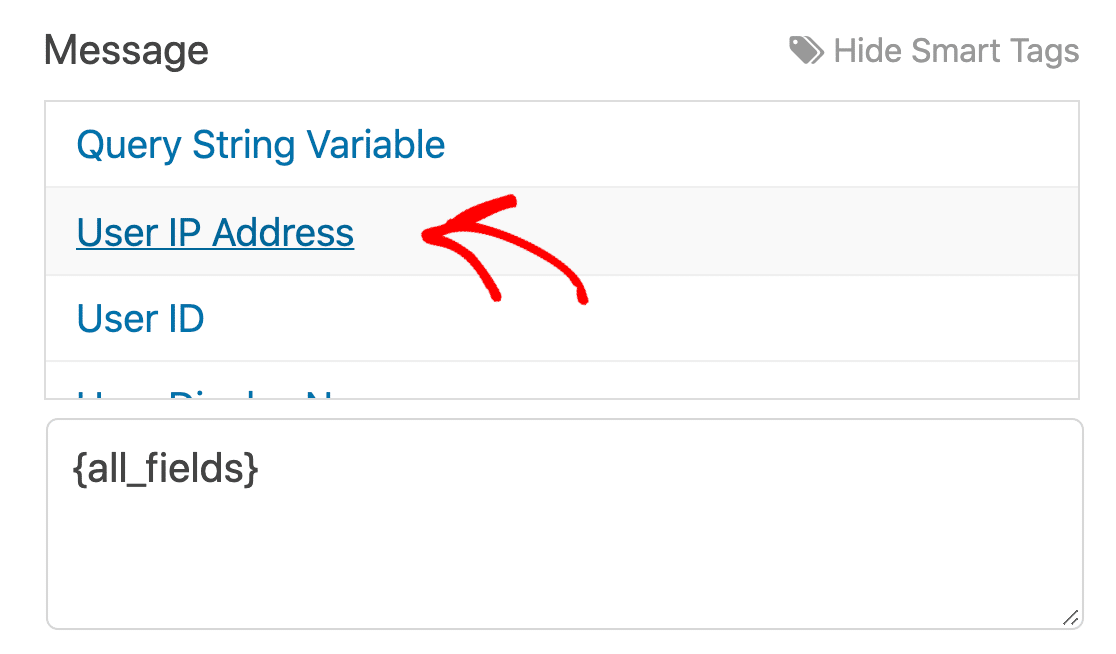
When you receive your next email notification, you’ll see what the user’s IP address is. You can decide whether to approve that user or block their IP so they cant return.
To learn how, check out this tutorial on how to block IP addresses in WordPress.
Create Your User Registration Form Now
Next Step: Check and Update WordPress Plugins
If your WordPress site isn’t regularly maintained, you could open it up to more spam. Scammers typically look for old plugins and out of date versions of WordPress as a way to break in to your site.
It’s important to update your plugins too.
Now’s a great time to check that:
- Your WordPress core files are always updated to the latest version
- All of your plugins and themes are set to auto-update if possible
- You don’t have any cracked or stolen plugins like WPForms Pro nulled.
Ready to build your user registration form? Get started today with the easiest WordPress form builder plugin. WPForms Pro includes the User Registration addon and offers a 14-day money-back guarantee.
If this article helped you out, please follow us on Facebook and Twitter for more free WordPress tutorials and guides.
The post 9 Simple Tricks to Eliminate Spam User Registration (2021) appeared first on WPForms.
source https://wpforms.com/simple-tricks-to-eliminate-spam-user-registration/

