Do you want to easily add MailPoet WordPress subscribers from your forms?
You can easily integrate any form with MailPoet to build your email list.
In this article, we’ll show you how to add a MailPoet subscription checkbox to any form on your WordPress website.
Create Your MailPoet WordPress Form Now
How Do I Use MailPoet in WordPress?
MailPoet is an email marketing service that you can use inside WordPress. It has a drag and drop builder that makes it easy to design custom email newsletters.
If you’ve already used drag and drop landing page builders like SeedProd, you’ll find MailPoet super easy to use.
In MailPoet, you can create different types of emails like:
- Mailshots
- Welcome emails with drip email automation
- Latest post notifications
- Welcome emails
- Abandoned cart emails
- WooCommerce order emails.
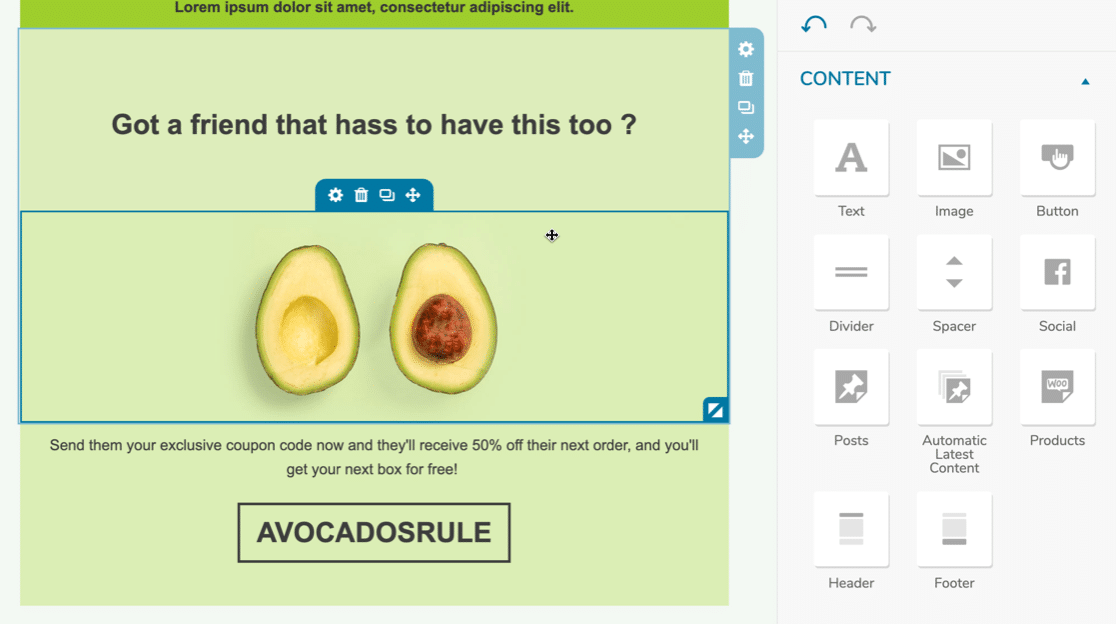
After creating your email template, you’ll just want to tell MailPoet which list or segment you want to send the email to. It keeps track of all of your subscribers in WordPress and shows statistics about your newsletter open rates.
Next, let’s look at how to easily build your MailPoet lists with WPForms.
How to Create a MailPoet WordPress Form
We’re going to show you how to integrate WPForms and MailPoet with the Uncanny Automator plugin. Here’s a quick summary of the steps in the tutorial:
- Install the MailPoet Plugin
- Install the WPForms Plugin
- Make Your MailPoet WordPress Form
- Install the Uncanny Automator Plugin
- Create Your MailPoet WPForms Integration
- Test Your MailPoet WordPress Form
If you already have MailPoet set up, skip directly to step 2.
Step 1: Install the MailPoet Plugin
First, let’s install the MailPoet newsletter plugin on your WordPress site.
To start, open up the Plugins » Add New menu in WordPress.

Search for MailPoet, and be sure to select the MailPoet 3 plugin.
Now click Activate to enable the plugin.
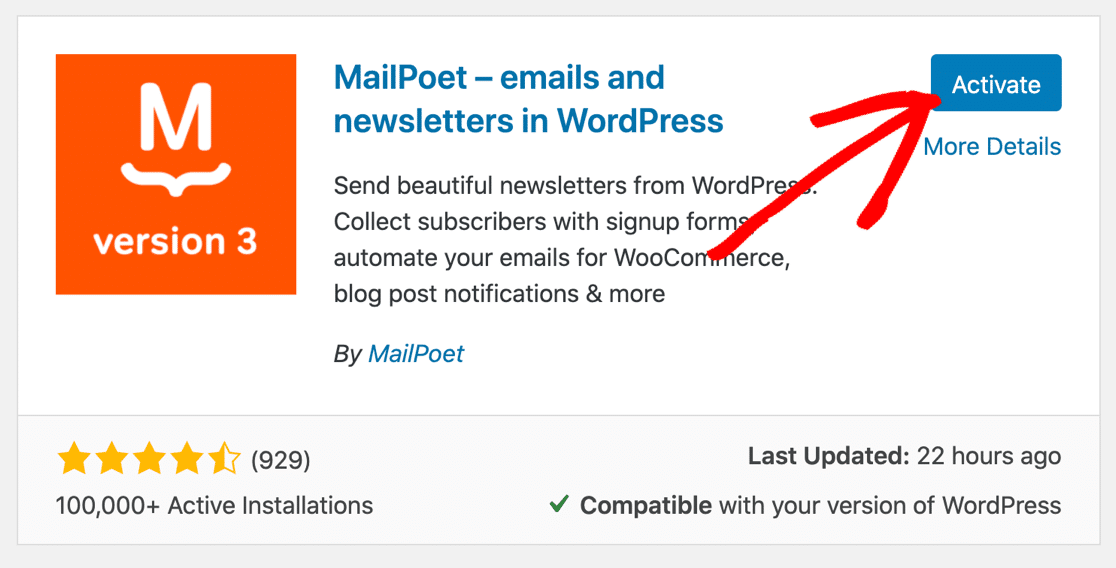
Run through the steps in the setup wizard now. If you have the paid version of MailPoet, enter your license key to download the Pro plugin and install that too.
If you’ve applied to use the MailPoet Sending Service to improve deliverability, you’ll now see this message:
You'll soon be able to send once our team reviews your account. In the meantime, you can send previews to your authorized emails.
While you’re waiting for MailPoet to approve your account, you can continue to set up your MailPoet integration with WPForms.
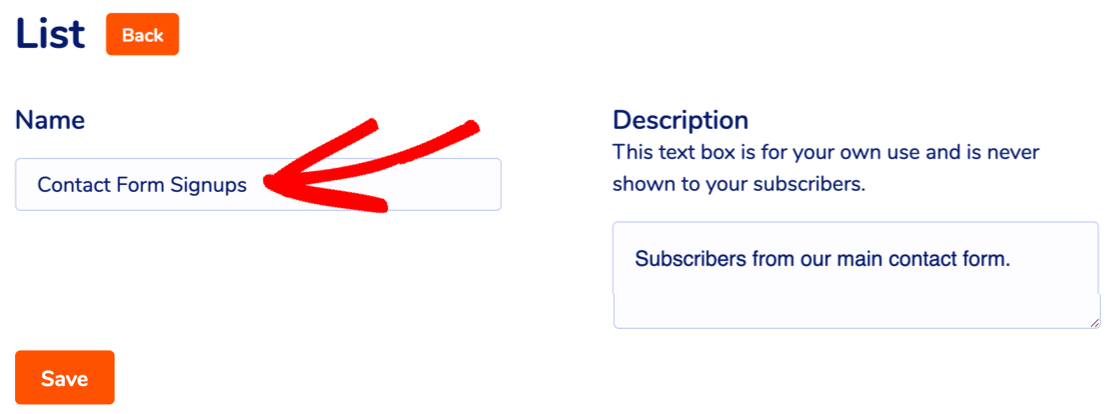
You might also want to create a fresh MailPoet subscriber list for your contact form signups so you can keep them separate from other mailing lists on your site.
To add a new list, go to MailPoet » Lists. Type in a name for your list and click Save.
Great! MailPoet is ready. Now let’s install the form builder plugin.
Step 2: Install the WPForms Plugin
WPForms is the best form builder plugin for WordPress. It lets you create any type of WordPress form using a drag and drop builder.
WPForms has tons more functionality than the default MailPoet form builder. And it has different types of spam protection you can use on any form.
With WPForms Pro, you can:
- Store all of your form entries in the WordPress dashboard
- Create surveys and polls
- Accept payments with Stripe or PayPal
- Track the user’s journey through your site
- Make multi-step forms with progress bars
- And more.
So let’s download and install the WPForms plugin now. Don’t forget to activate the plugin before moving on.
Step 3: Make Your MailPoet WordPress Form
Now we’re going to make a contact form that will sign visitors up to your MailPoet list automatically when it’s submitted.
- If you already have a form set up in WPForms, open it up now and we’ll show you how to tweak it.
- If you’re starting from scratch, check out this guide to creating a simple contact form in WordPress. It takes less than 5 minutes to make a contact form and embed it on your site.
Adding Separate Name Fields in WPForms
By default, WPForms has a First Name and a Last Name field. These 2 fields are combined into a single ‘Name’.
MailPoet stores the First Name and Last Name separately, so let’s tweak the form to match that.
First, drag 2 Single Line Text fields onto your form.
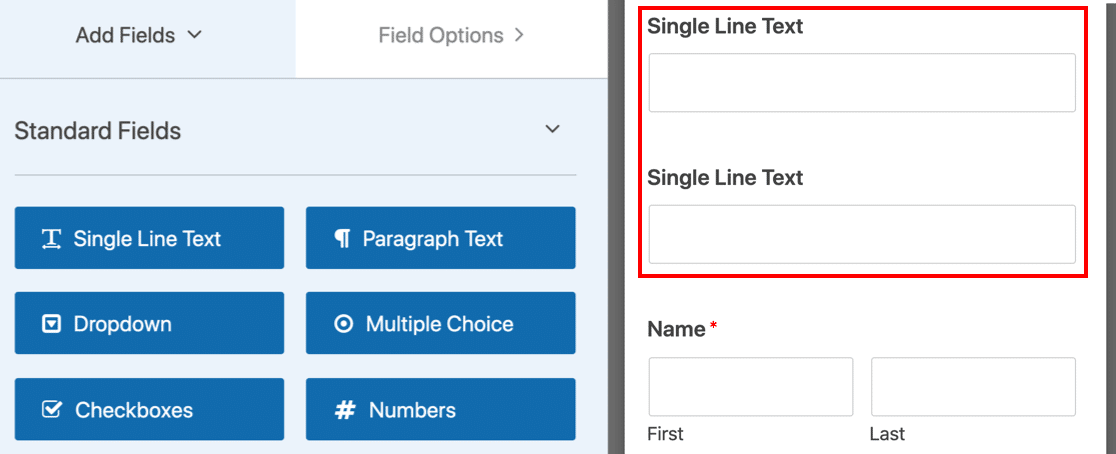
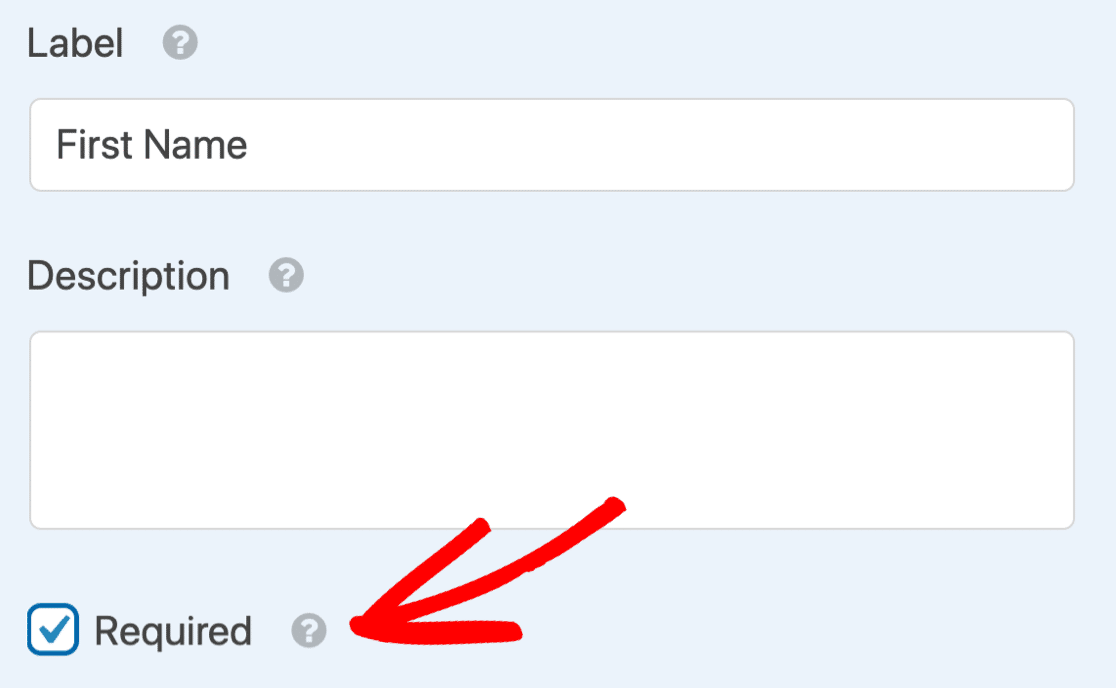
Now rename the first field First Name. You might want to make this a Required field as well. If so, you can click the Required checkbox.
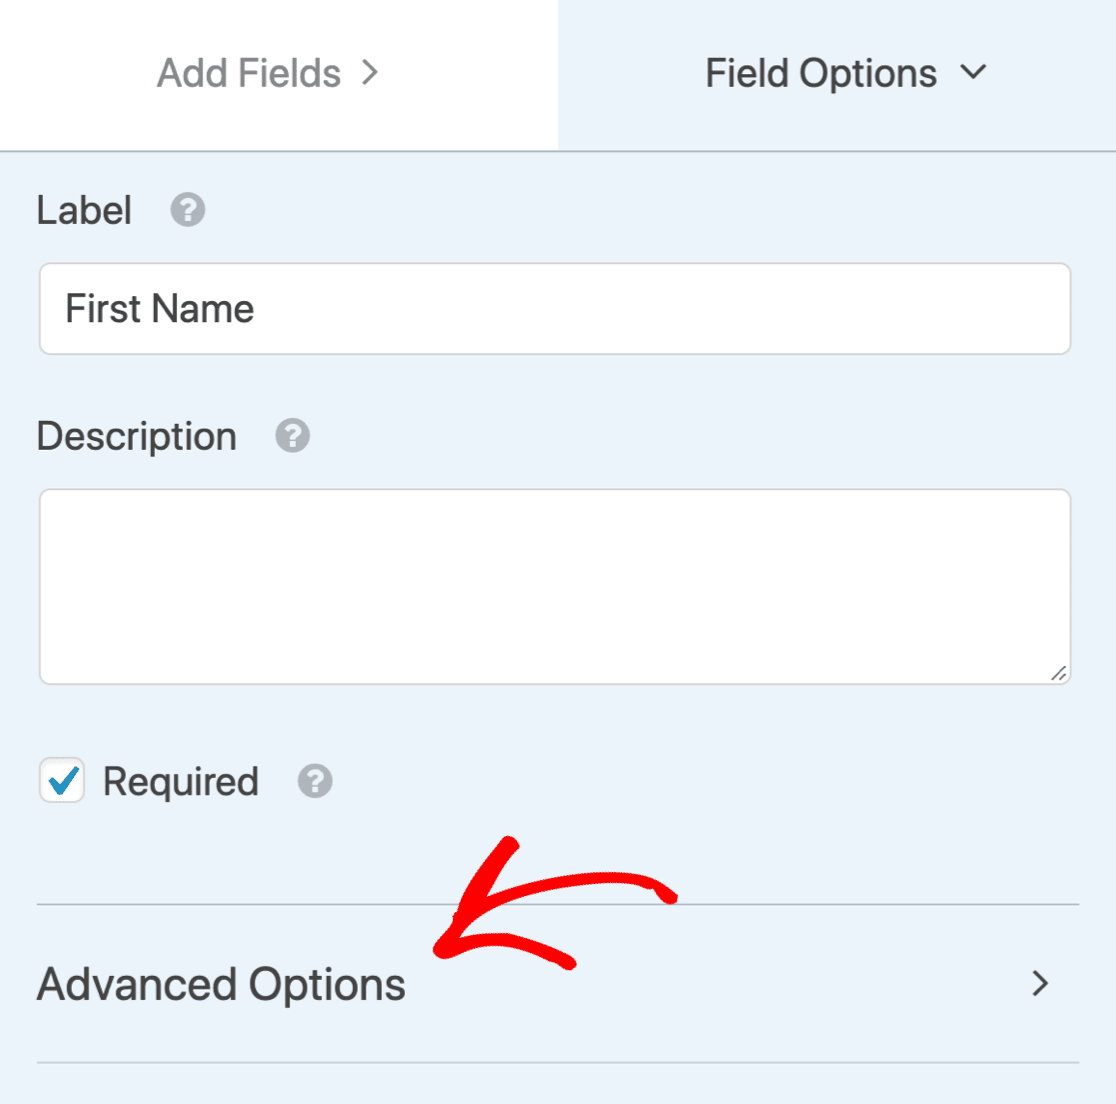
Next, scroll down and expand Advanced Options.
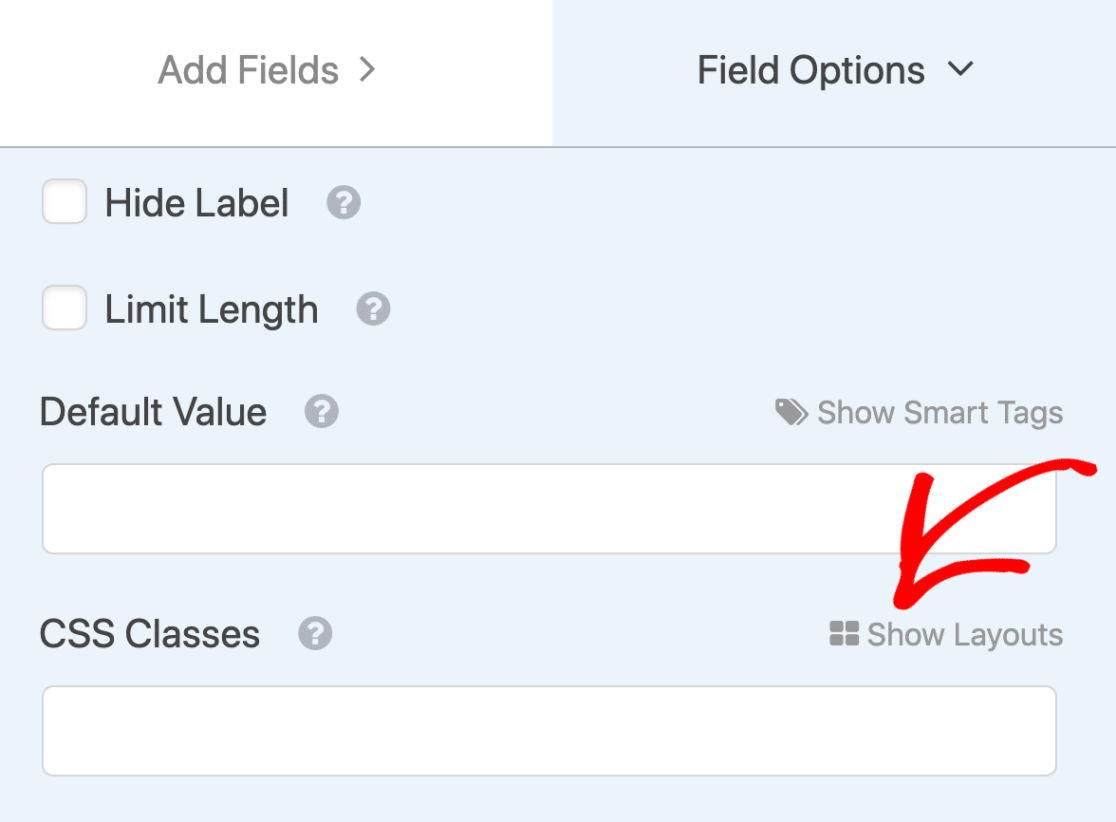
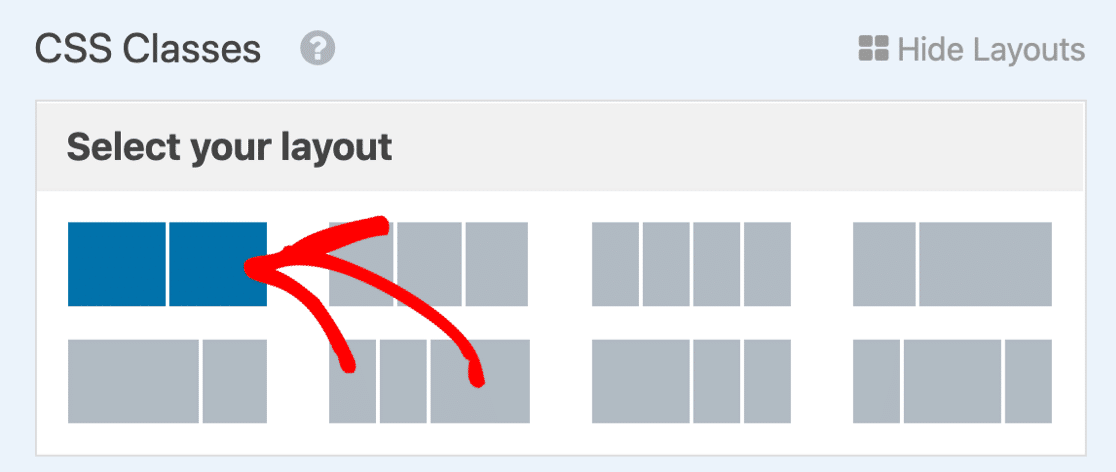
Now scroll down again to CSS Classes. Click Show Layouts here to reveal the layout settings for the First Name field.
We want this field to show up on the left hand side. So let’s select the 2-column layout first:
And then select the left column using the button here.
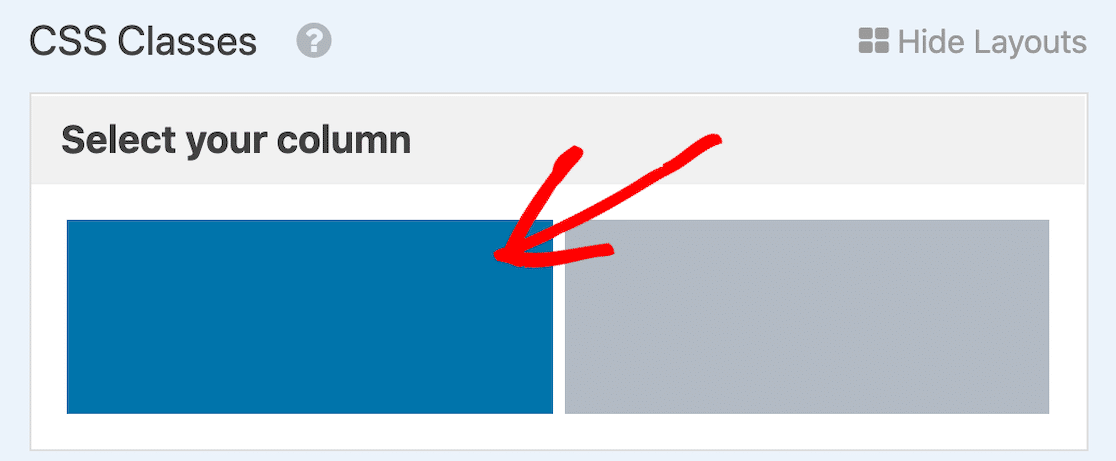
Now repeat the process with the second field. Rename it to Last Name, then expand Advanced Options, and use CSS layouts to position it on the right.
Great! Now we have 2 separate fields for the visitor’s first and last name. Don’t forget to delete the original Name field by hovering over it and clicking on the trash can.
Adding an Optin Field
The GDPR is an important law that protects personal data. Whenever you create a signup form, you should get the person’s explicit consent.
To do that, we can add a MailPoet optin checkbox to your form. If the optin field is not checked, they won’t be added to your MailPoet list.
Start by dragging a checkbox field onto your form. We’re going to add a little text to explain what it’s for.

Make a note of the exact text you use in the Choices field – we’ll need to use it later.
You’ll probably also want to add a GDPR field to your contact form which covers the storage of their data. If you’re not sure if you need this, we recommend that you consult a lawyer for GDPR guidance.
All done here? Click Save.
Checking Your Form Settings
Before we finish up in WPForms, it’s a good idea to check your form Notifications and Confirmations. To start, click Settings on the left hand side of the form builder.
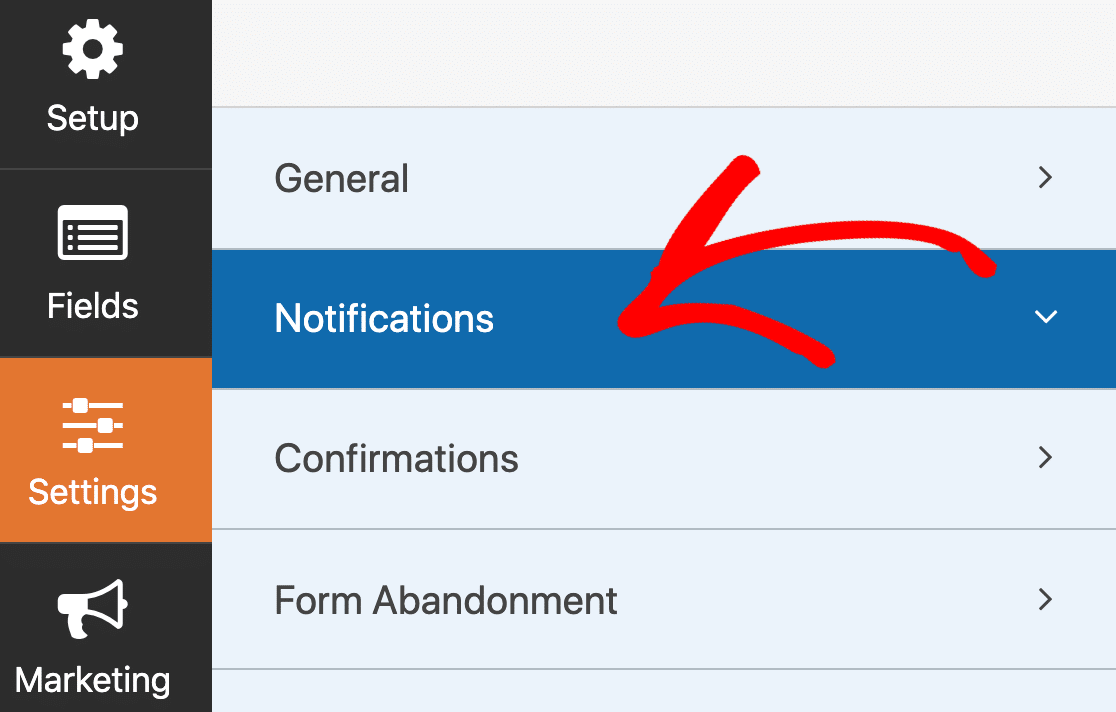
- Notifications are emails that are sent out when the form’s submitted. Since this is a contact form, you’ll want notifications turned on. See this guide if you need help setting up your form notifications.
- The Confirmation is the message that shows on screen after the form’s submitted. Take a look at how to edit the form confirmation message.
When your form settings are set up the way you want them, click Save.
We’re done in WPForms for now, so you can click X to close the form builder and return to the WordPress dashboard.
Step 4: Install the Uncanny Automator Plugin
Uncanny Automator is an awesome WordPress plugin that lets you automate plugins in WordPress. You can use one plugin as a trigger and another to perform an action.

We’re going to make a ‘recipe’ in Uncanny Automator. The trigger will be a form submission in WPForms. If the optin checkbox is selected, Uncanny Automator will automatically add the person to our MailPoet list.
To follow along, you’ll want to grab a copy of Uncanny Automator Pro or higher and install it on your site.
Now we’re ready to connect WPForms to MailPoet.
Step 5: Create Your MailPoet WPForms Integration
In this step, we’ll pull everything together and integrate your contact form with MailPoet.
In your WordPress dashboard, go to Automator » Add New.
In the popup, select Anonymous. This creates a recipe that will work even if the visitor isn’t logged into WordPress.
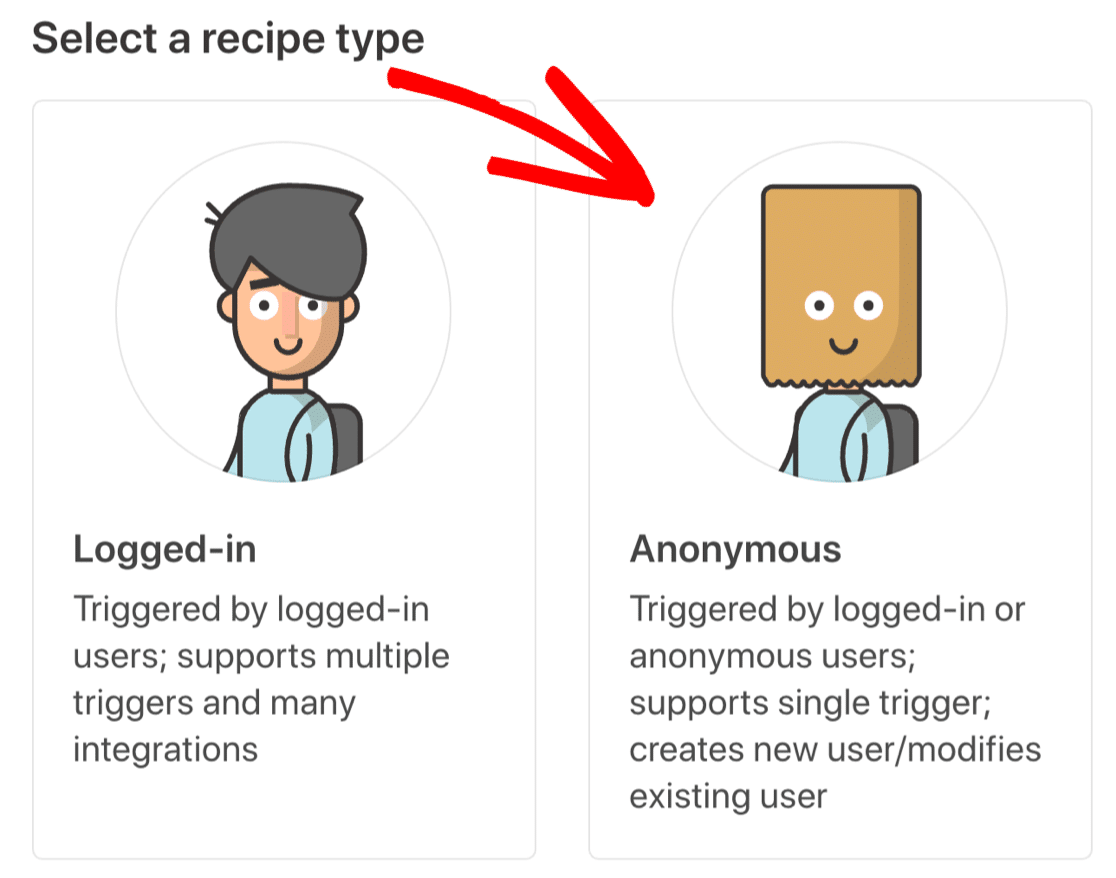
Next, type in a name for your new recipe at the top.

Now we’ll set up our WPForms trigger in Uncanny Automator.
Creating Your WPForms Trigger
We’re going to tell Uncanny Automator to fire the trigger if the user opted in.
First, look to the field labeled Anonymous Trigger and select WPForms.
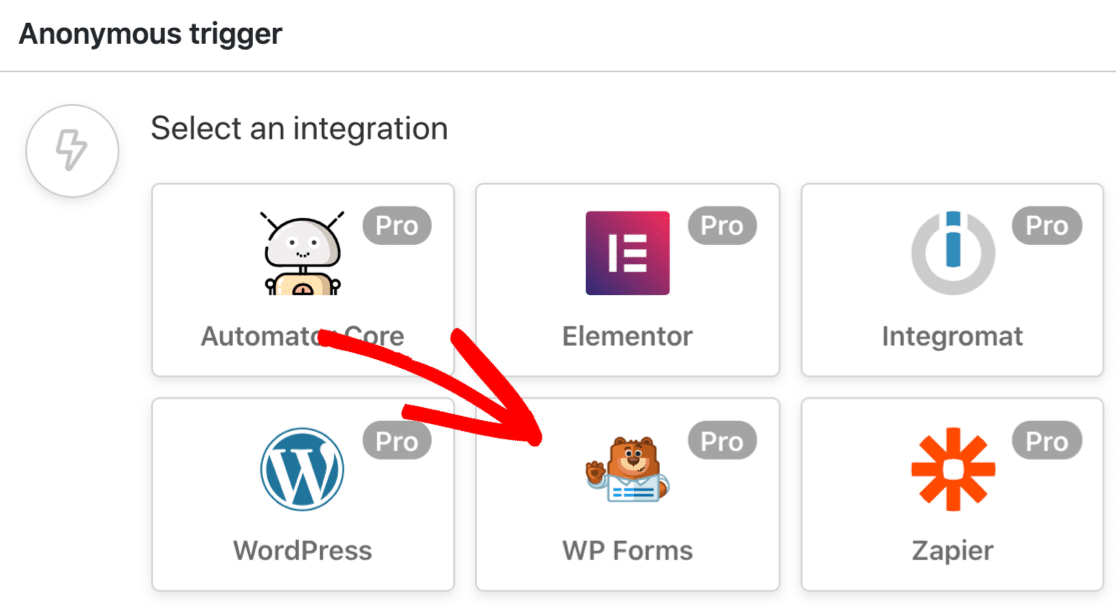
Next, let’s choose the trigger A specific entry in a specific field.
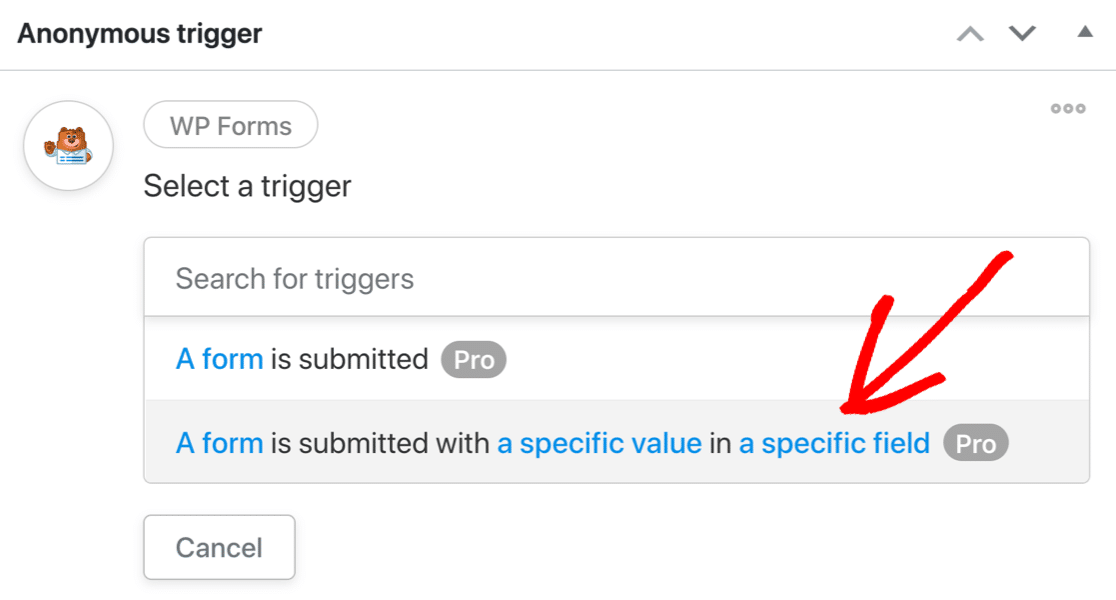
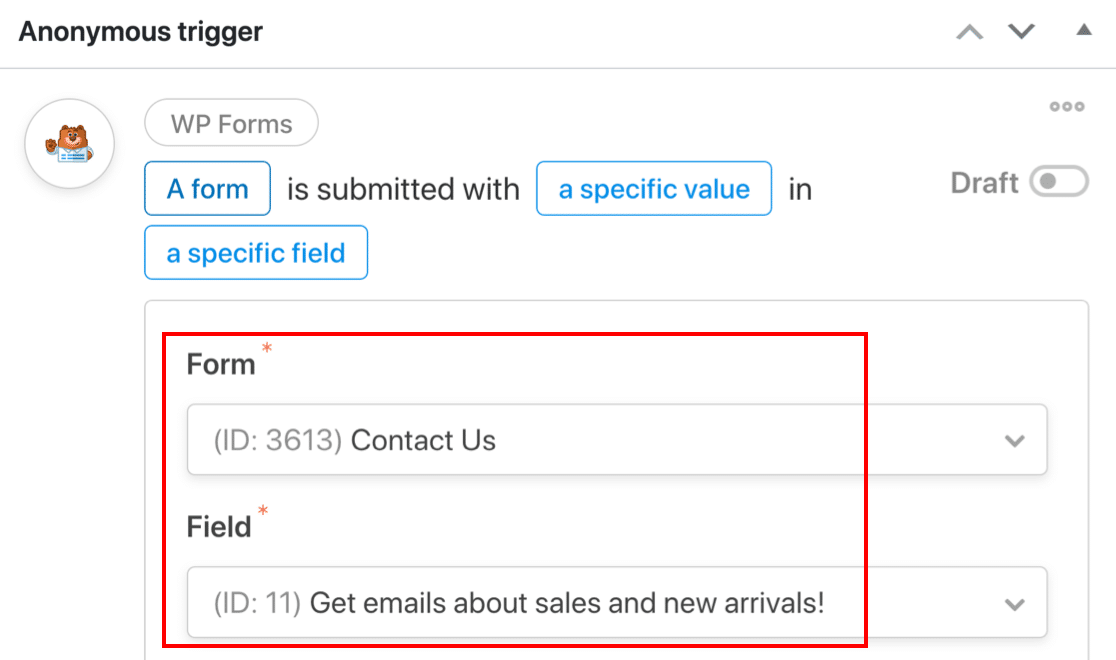
Using the dropdowns, select:
- The form you we created earlier, and
- The optin checkbox field that we added.
In the 3rd field, be sure to type in the exact same text you typed into the Choices field for your dropdown.
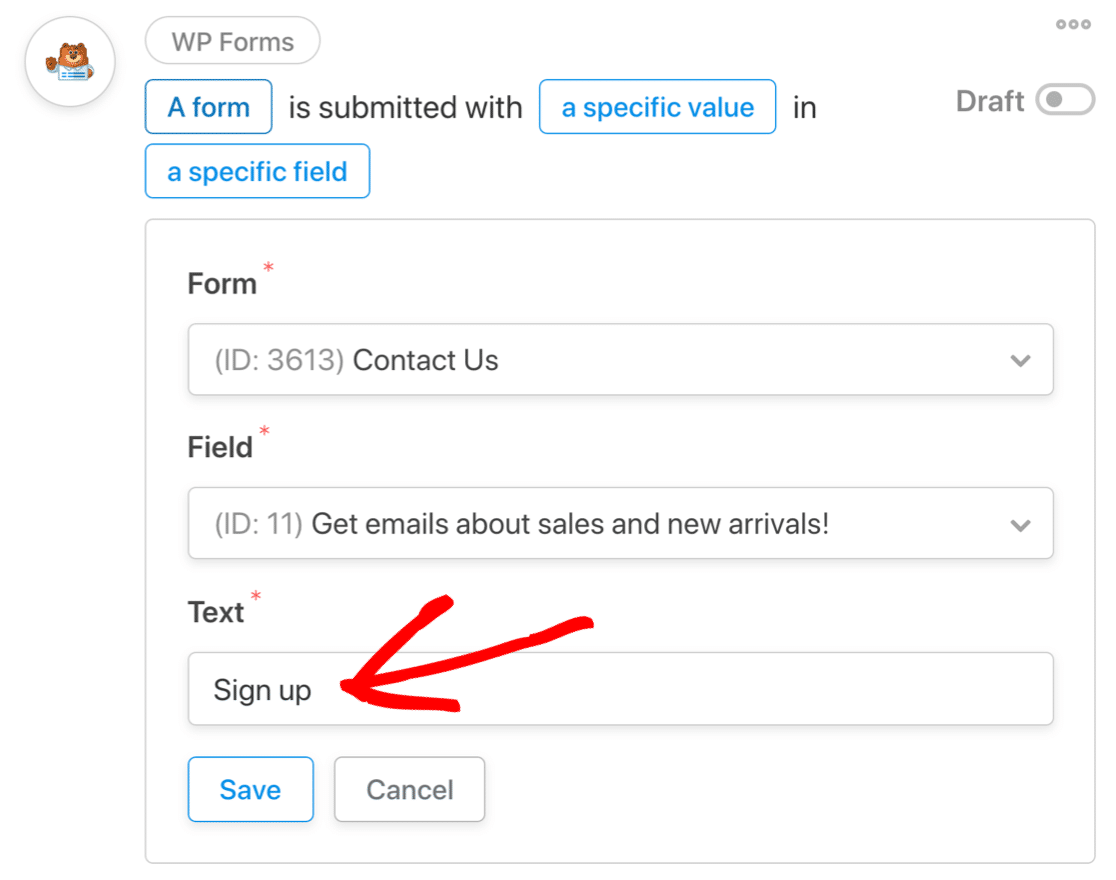
Click Save to save your trigger.
Now let’s move on to the next step.
Creating Your New User in WordPress
As part of the workflow, Uncanny Automator needs to create a new user in WordPress for every new MailPoet subscriber. This will allow the person to log in and change their preferences.
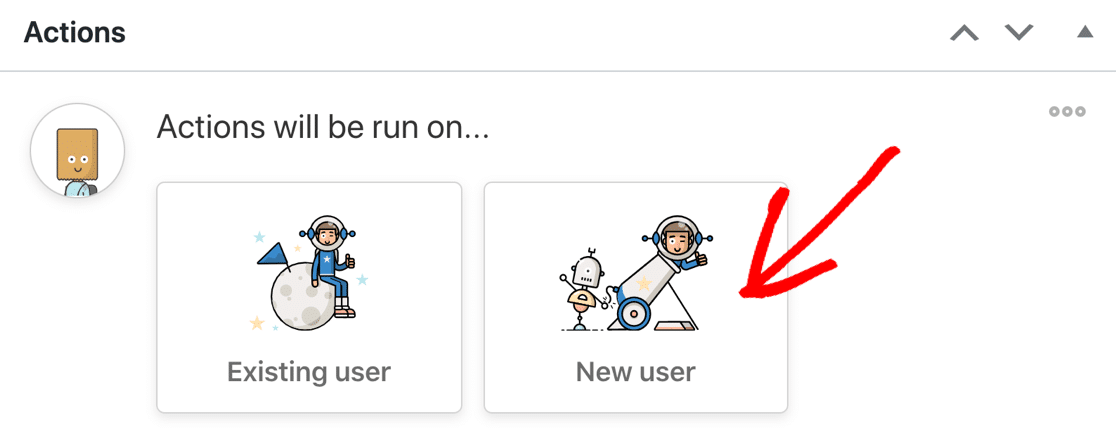
We need to decide whether we’ll run this action on an existing user or a new user. Here’s a little detail to help you decide:
- Existing user will search for a match with an existing WordPress user. If Uncanny Automator doesn’t find a user, it’ll create one. This is the best choice if you usually get inquiries from customers who already have WordPress accounts.
- New user will create a new user, assign them a role, and optionally log them in to WordPress. If the user exists, Uncanny Automator will select their profile instead. This is a good option if you expect most inquiries to come from new visitors.
Choose the option that’s best for your site here. We’ll use New User in this example.
Next, let’s map the fields from WPForms to the WordPress user profile that’ll be created if no existing user is found.
Click the asterisk here to open up the list of available fields.
![]()
Then expand the WPForms section in the list by clicking the small arrow to the right.
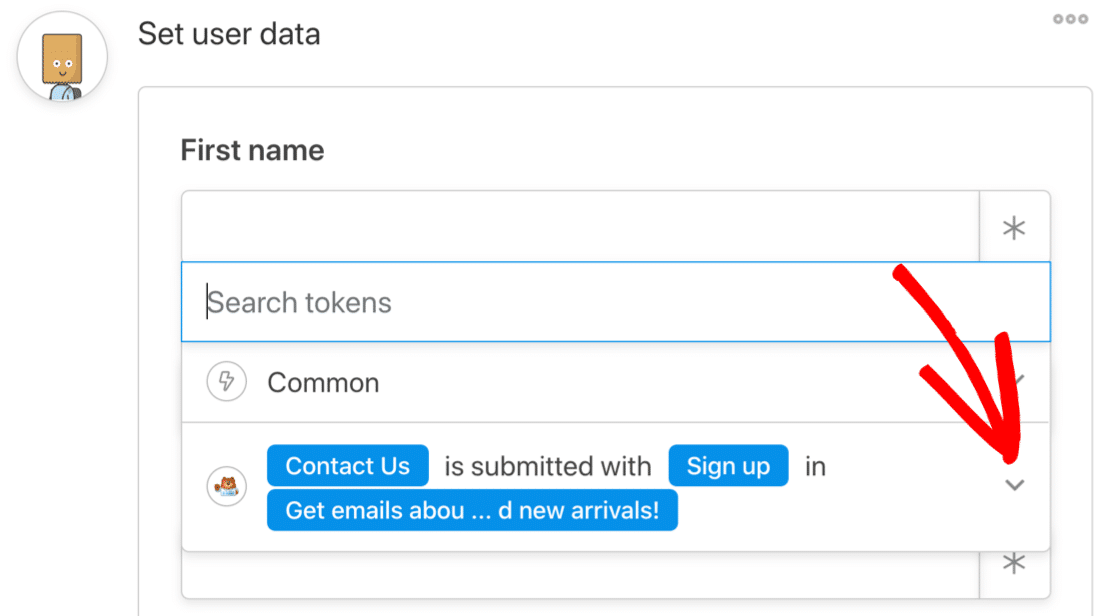
Finally, select the WPForms field that matches the field name in Uncanny Automator.
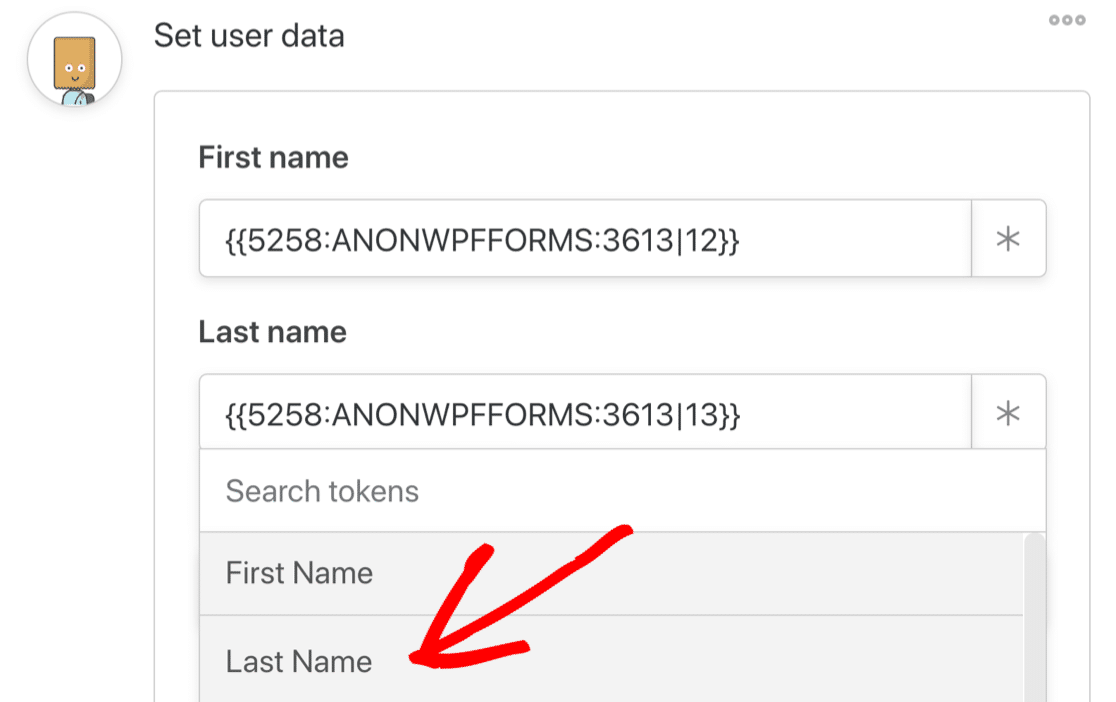
As you work down the list, you’ll want to select the following options as well:
- Username: It’s easiest to use your visitor’s email address in the Username field. That way, all of your users will definitely have unique usernames.
- Role: Choose the role for your new user. We recommend that you choose Subscriber here unless you want to give your new user extra permissions in WordPress.
- Log the user in: You can choose to automatically log in the user when the recipe runs.
- What to do if the user already exists: Be sure to pick Select existing user here. If you don’t, your recipe won’t run for existing users.
Now Save your user setup so far.
Adding MailPoet WordPress Subscribers
The final step is to set up the new user in MailPoet. Underneath your user setup, click the Add Action button.
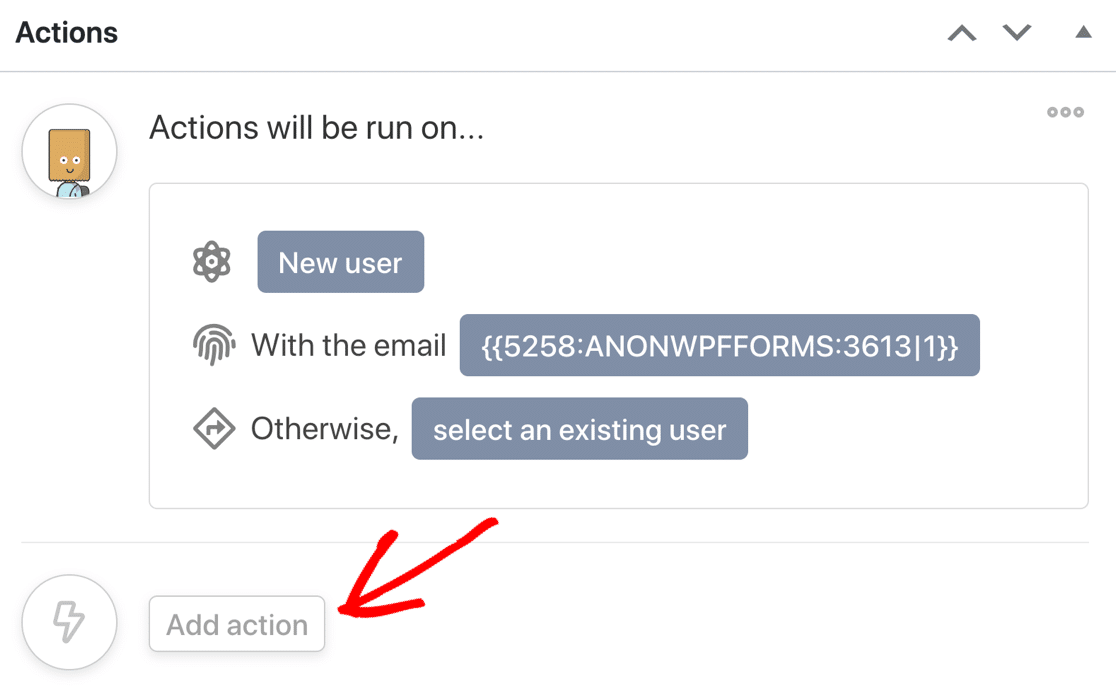
Now select MailPoet from the options.
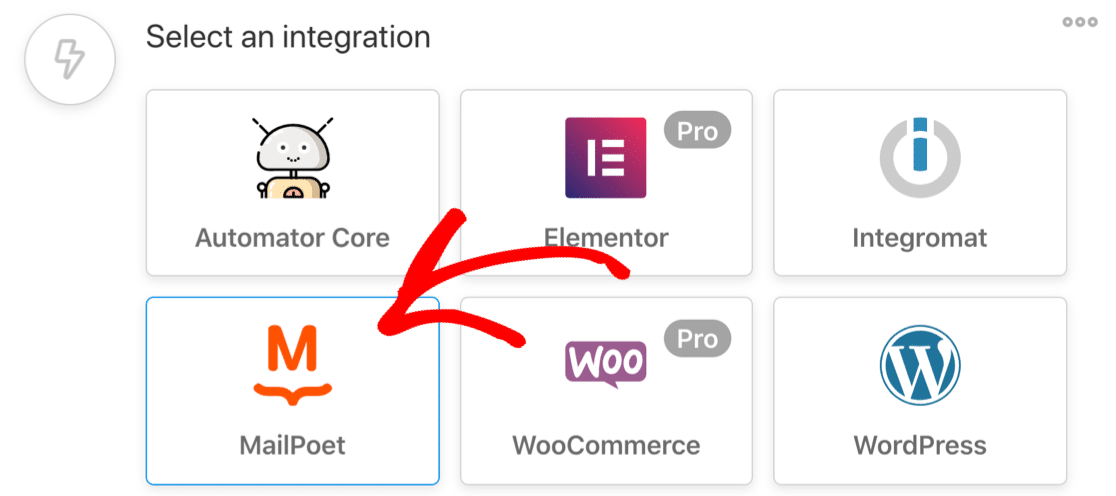
Select the first option in the dropdown, Add a subscriber to a list.

Repeat the process of mapping the form fields over to your MailPoet subscriber record. Select Subscribed to add them to the list, or Unsubscribed if you want to use the form to remove them.
Then click Save.
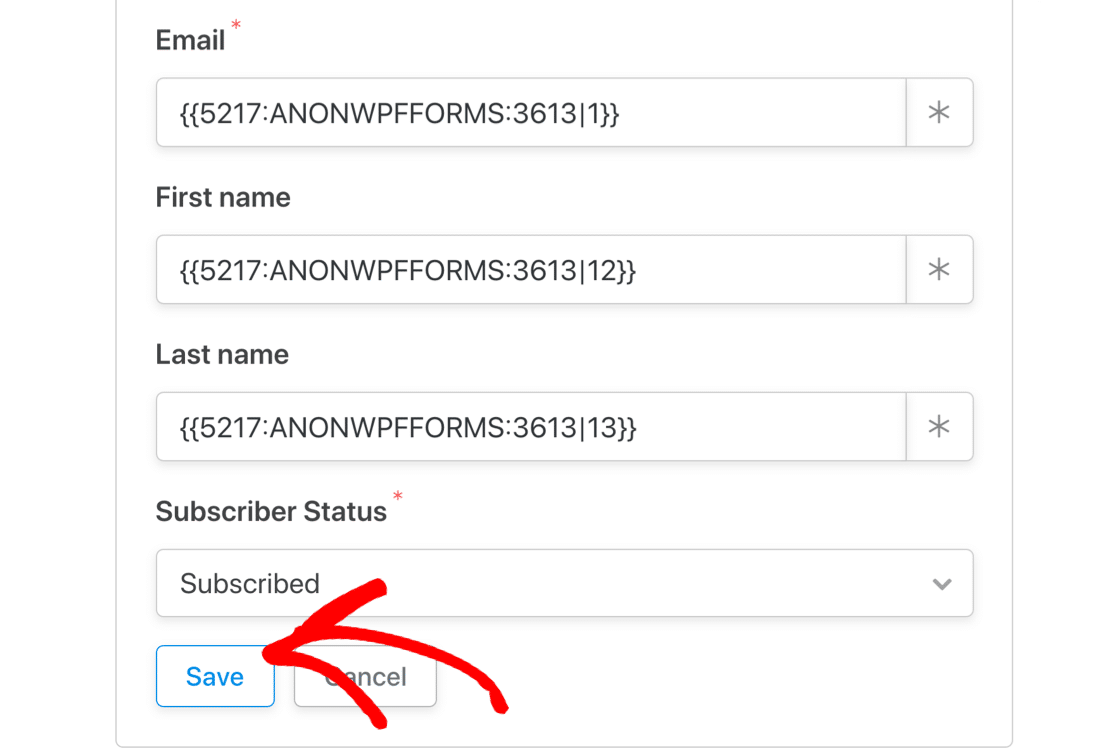
We’re almost done!
Now we just need to select the MailPoet list for the subscriber. Let’s select the new list we created right at the start.
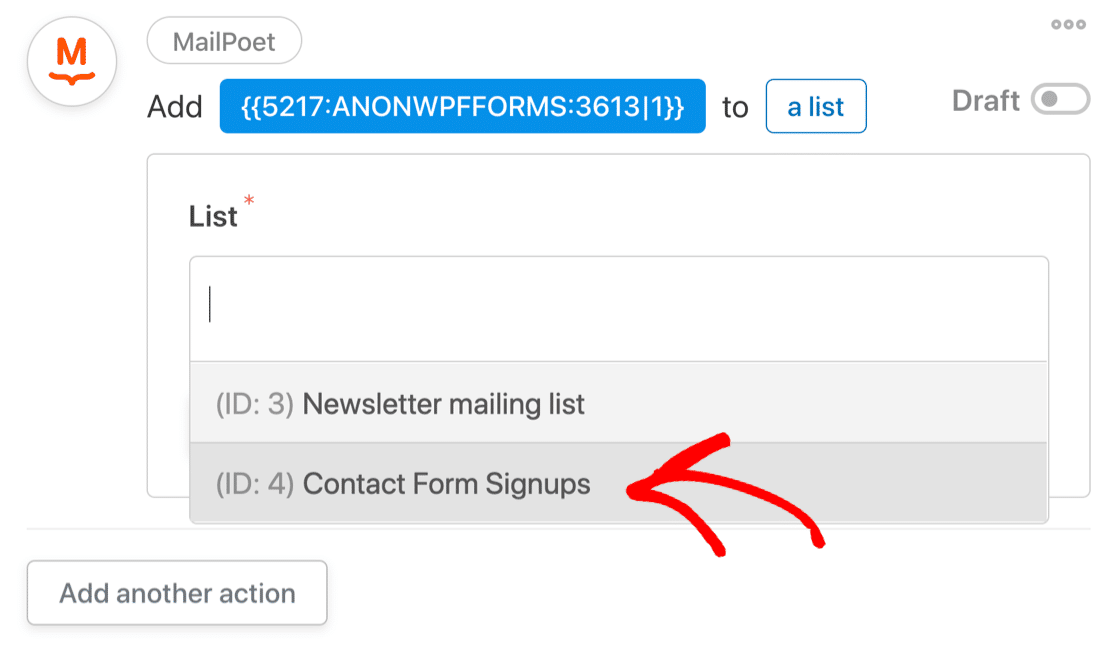
There’s just 1 more thing we need to do. We need to turn on every switch to make sure that the recipe runs.
Scroll back up and make sure that each section of the recipe is now switched to Live.
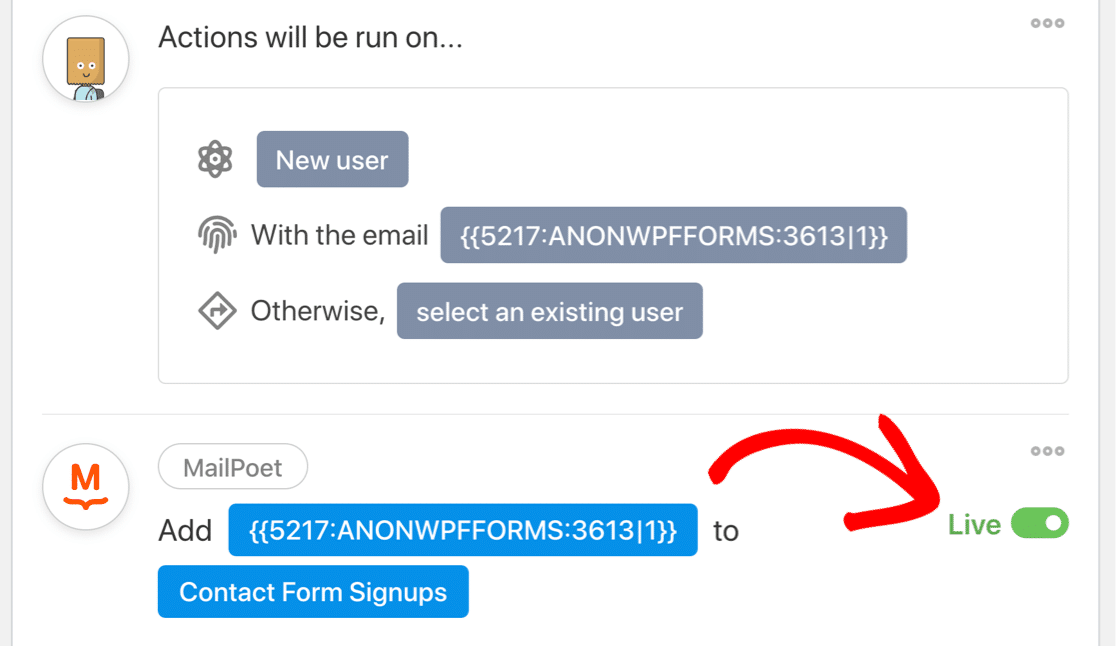
And finally, look to the top right hand side of the page and turn on the main recipe. This should also be switched over to Live.
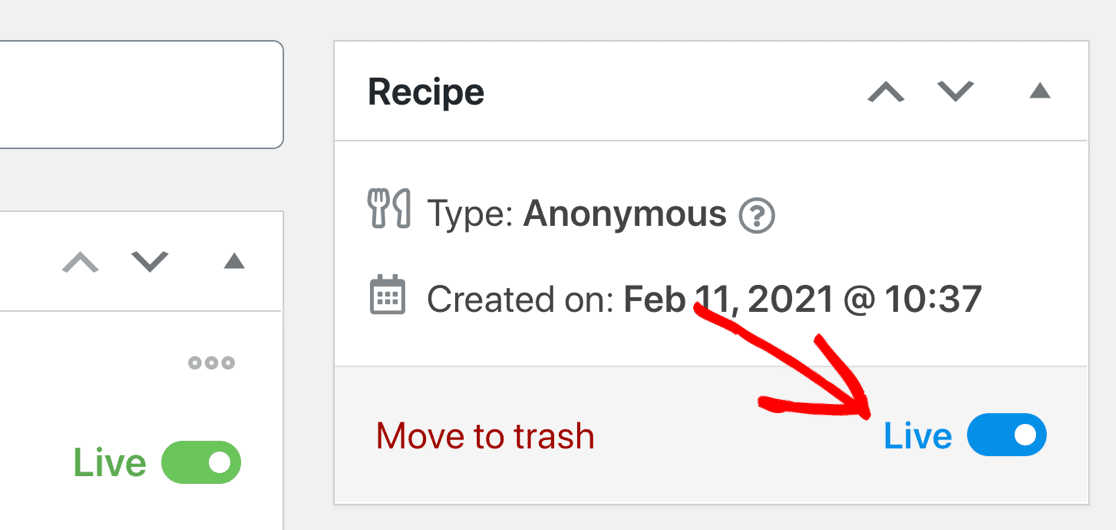
That’s it! Your MailPoet WordPress form is ready to add subscribers to your email list.
Step 6: Test Your MailPoet WordPress Form
It’s always a good idea to test out new integrations, so let’s fill in your contact form now. If everything works as expected, you’ll see a new form submission listed under Unconfirmed.

Now click the link in the activation email to confirm your subscription.
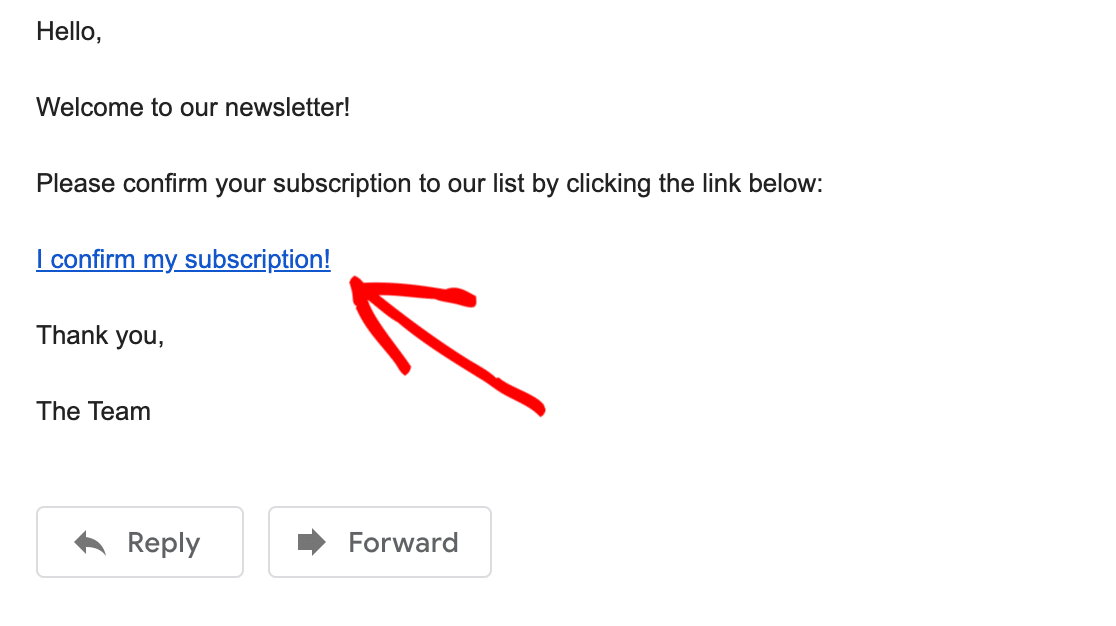
Once you’ve done that, you should see your new subscriber in the Subscribed column for your MailPoet list.
And that’s it! Now every visitor who uses your contact form can optin to your MailPoet list.
Create Your MailPoet WordPress Form Now
Next Step: Create a Blog Post Notification Form
There are tons of different ways you can use WPForms with MailPoet to get more subscribers.
For example, try making a WPForms sign up form with an email address field, then add it to your blog using a sidebar widget. Then connect your form to MailPoet’s Post Notification newsletter in Uncanny Automator.

Now you can automatically update subscribers every time you post new content.
Creating a landing page for your form is a smart idea too. It removes all of the distractions that might otherwise hurt your conversion rate. And it’s easy to make a landing page in WPForms. Check out these landing page form examples to get inspiration.
Ready to build your form? Get started today with the easiest WordPress form builder plugin. WPForms Pro includes 100+ free form templates and offers a 14-day money-back guarantee.
If this article helped you out, please follow us on Facebook and Twitter for more free WordPress tutorials and guides.
The post How to Create a MailPoet WordPress Form (The EASY Way) appeared first on WPForms.
source https://wpforms.com/mailpoet-wordpress-form/

