
Are you looking for a simple way to get Slack notifications from your WordPress forms?
By adding WordPress form entries to your Slack channel, you can ensure that they are easily searchable on Slack, and not a single form entry gets buried in your email inbox.
In this tutorial, we’ll walk you through how to integrate your WordPress forms with Slack.
Create Your WordPress Form Now
How WordPress Slack Notifications Work
Whenever a visitor submits your form, you can set Slack to notify your whole team or only a specific person in your organization. In this way, you can keep your team in a loop about the form entries.
Additionally, instead of sending an immediate notification when a form is being submitted, you can set a reminder so that Slack will send you a message only at the specified time.
This can be a great feature to avoid the distractions of frequent entry notifications on Slack.
How to Get Slack Notifications From WordPress Forms
Let’s see a step by step process of integrating Slack with your WordPress forms.
Here’s a quick rundown of our detailed tutorial:
- Install the WPForms Plugin
- Install the Zapier Addon
- Create a Form With WPForms
- Connect WPForms to Zapier
- Connect Zapier to Slack
- Test Your WordPress Slack Notifications
So, let’s get started!
Step 1: Install the WPForms Plugin
The first thing you need to do is to install and activate the WPForms plugin. Here’s a step by step guide on how to install a WordPress plugin.
You can integrate WPForms with Slack only if you’ve got the WPForms Pro or higher package activated on your WordPress website.

We took this screenshot during a sale. Click here to see if the discount’s still available!
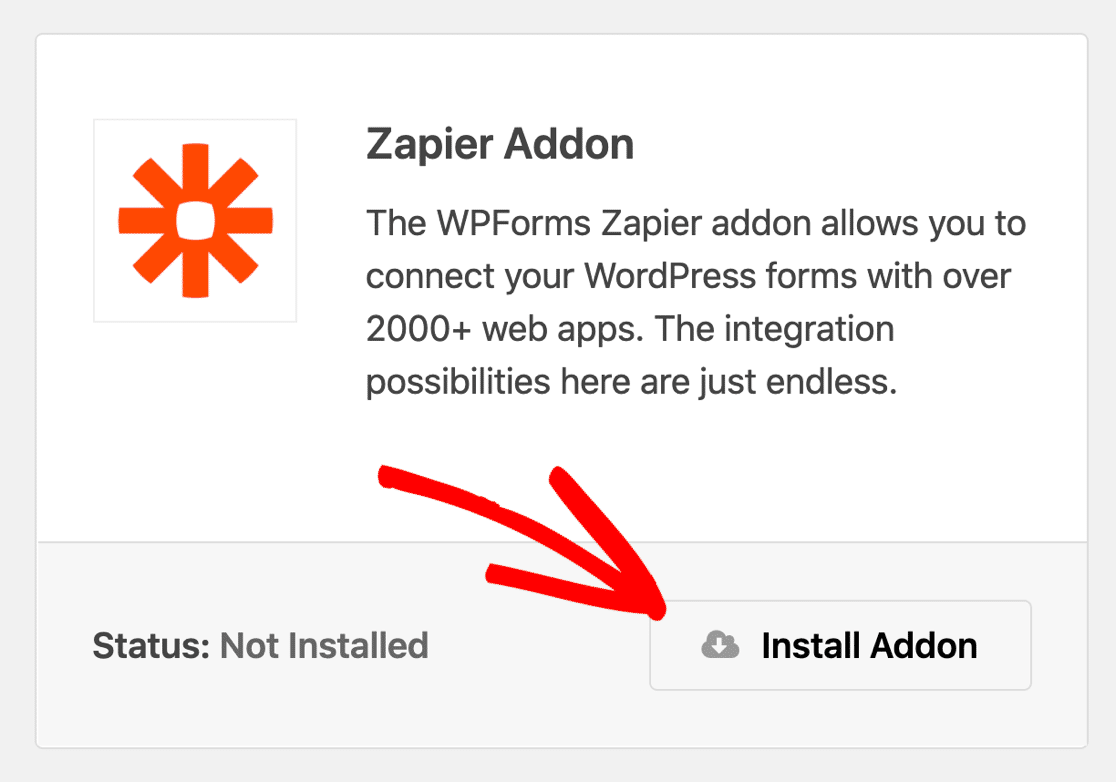
Step 2: Install the Zapier Addon
We’ll be using the Zapier addon to integrate WPForms plugin with your Slack account.
The Zapier addon lets you connect your contact forms to 500+ web apps including Slack so that you can save your time by automating different tasks. You can learn how to connect WPForms with Zapier.
To activate the addon, head over to your WordPress dashboard and click WPForms » Addons.
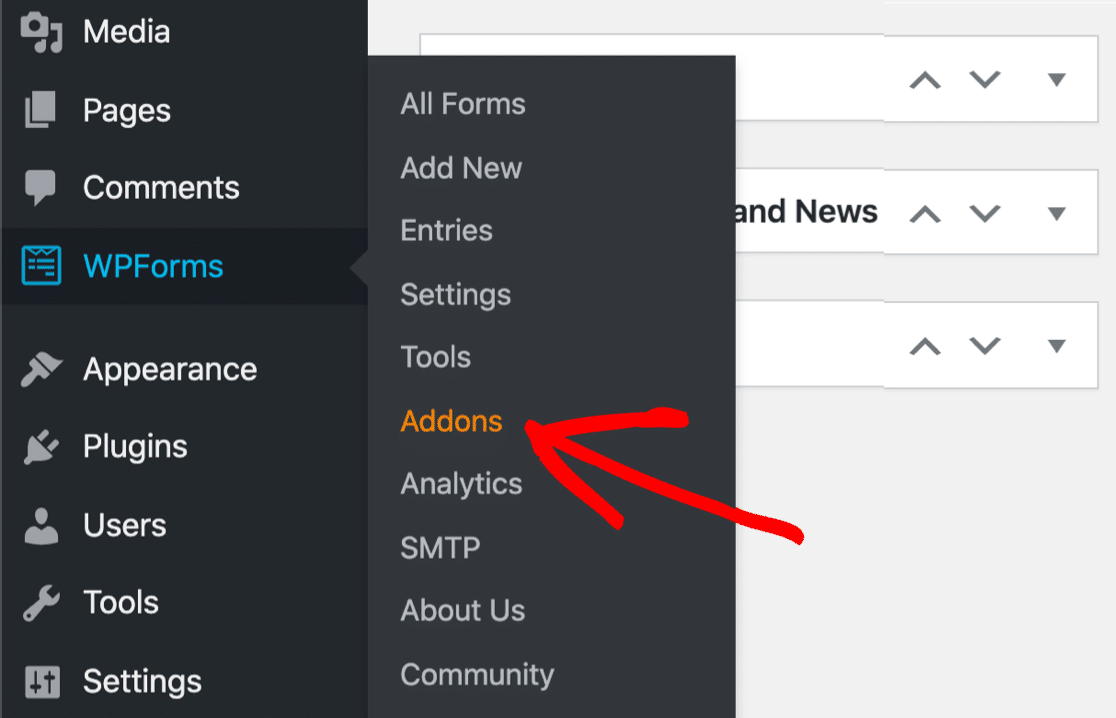
In the search bar, type Zapier and press the Install Addon and Activate button.
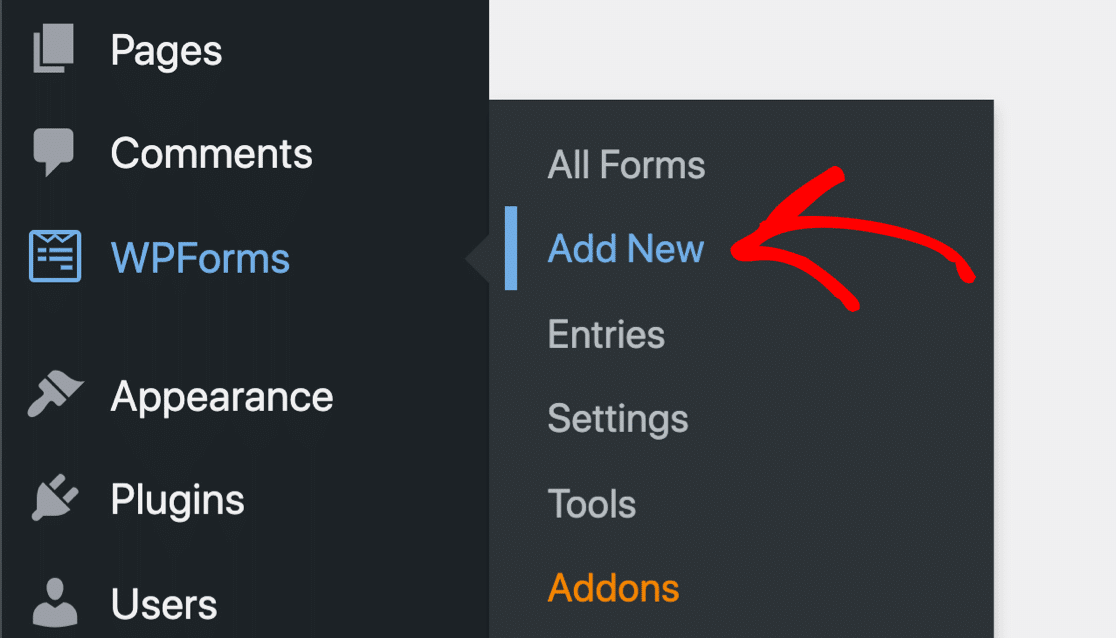
Once you’ve successfully installed the Zapier addon, you’ll need to create a new form with WPForms.
Step 3: Create a Form With WPForms
To create a new form, click WPForms » Add New in your WordPress dashboard.
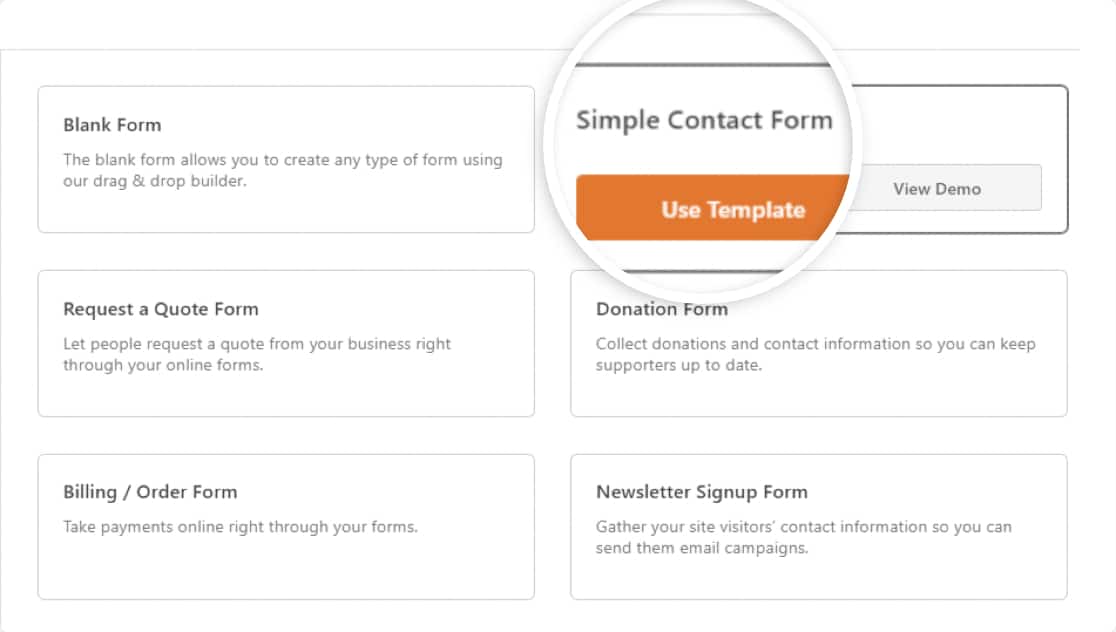
This will open a form setup screen. Here you need to add a name to your form and select the form template you want to use. You can choose any template according to your business needs.
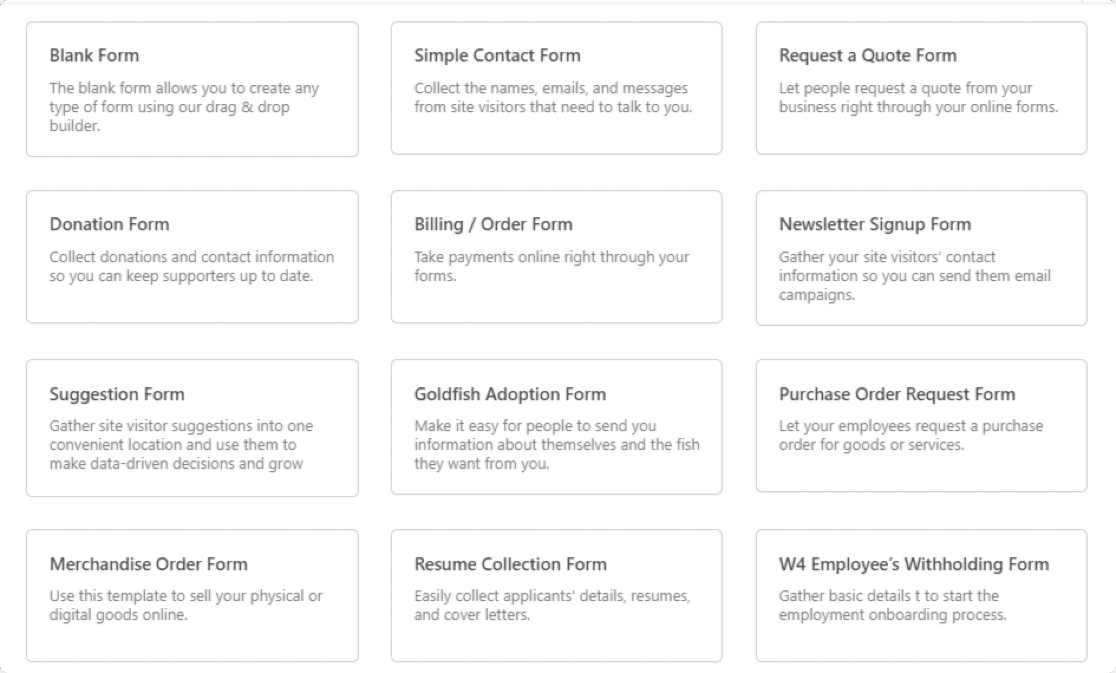
WPForms template library offers 300+ pre-built form templates, including:
- Quote request form template to provide an easy way for your site visitors to request a quote from you.
- Refer-a-friend form template to generate leads.
- Maintenance request form template to let your tenants put in an online request for the maintenance of their apartment.
- And many more.
Here we’ll go with a Simple Contact Form template.
The simple contact form template comes with 4 fields by default:
- Name
- Email address
- Website / URL
- Message
Here’s our form:
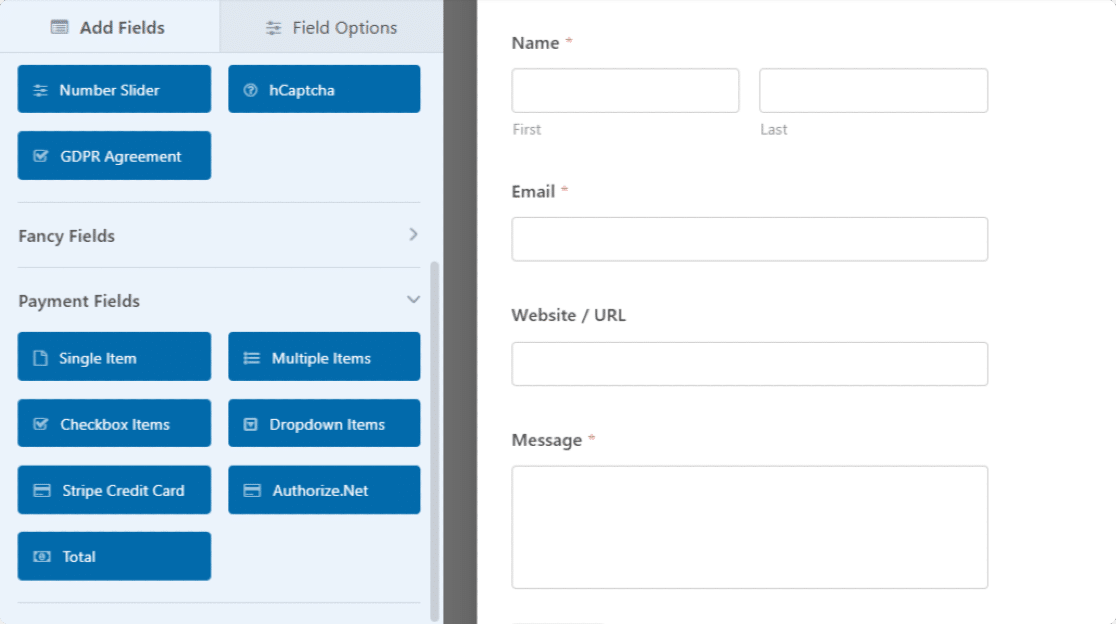
You can add more fields to your form by dragging them from the left-hand side to the right-hand side.
Once you are done with your customizations, you’ll need to connect this form to your Zapier account.
Step 4: Connect WPForms to Zapier
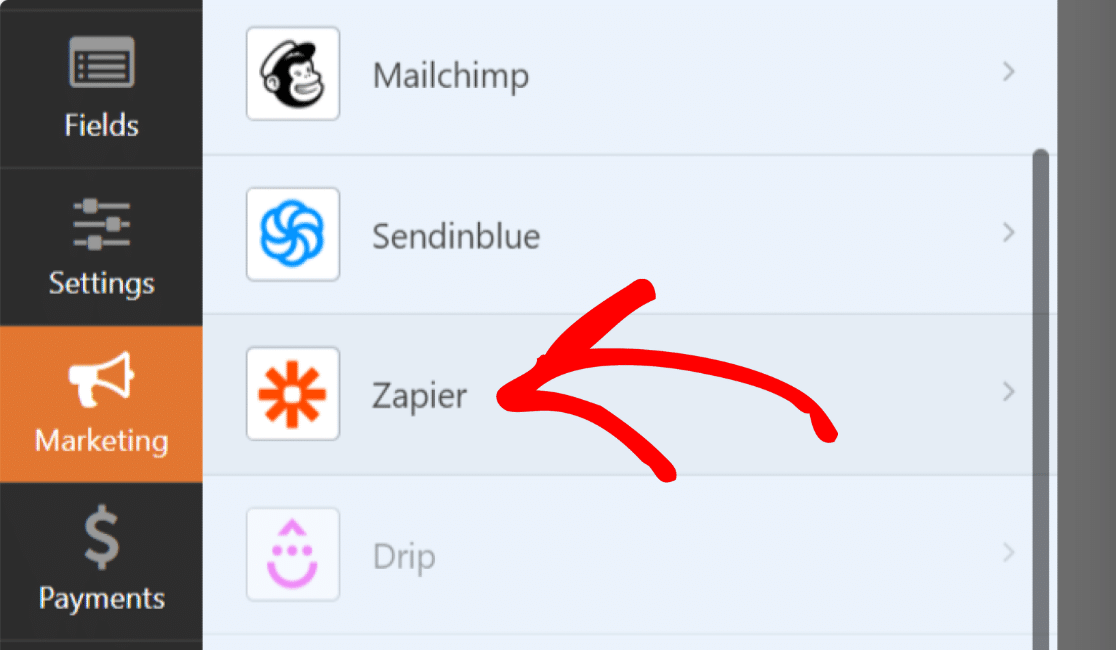
To connect your form to Zapier, in the form editor, go to Marketing » Zapier.
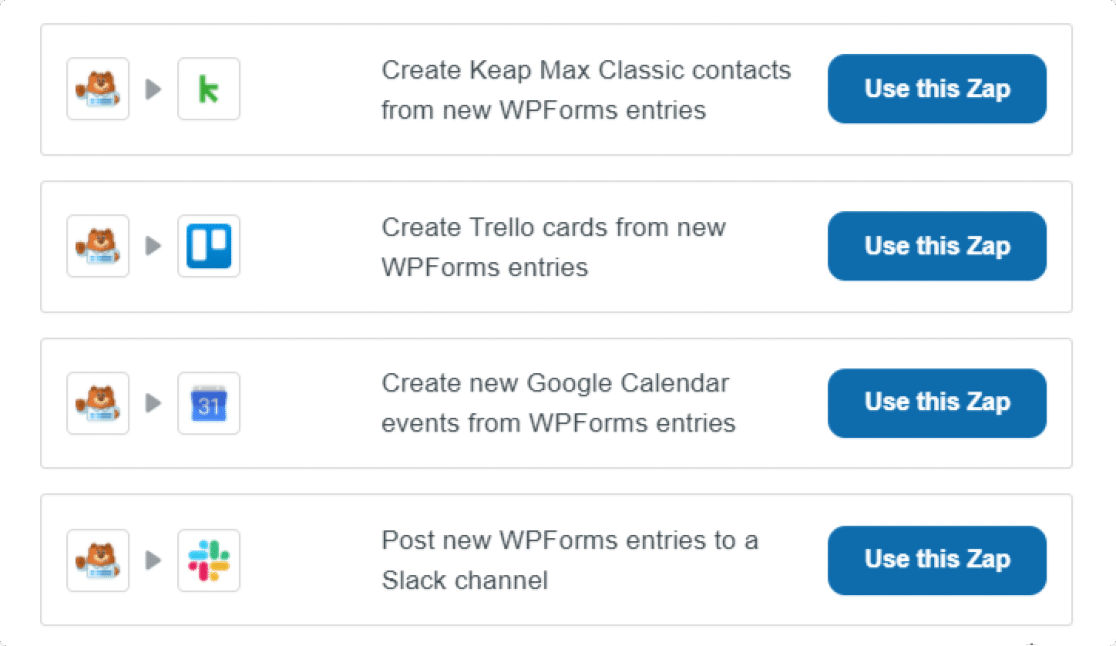
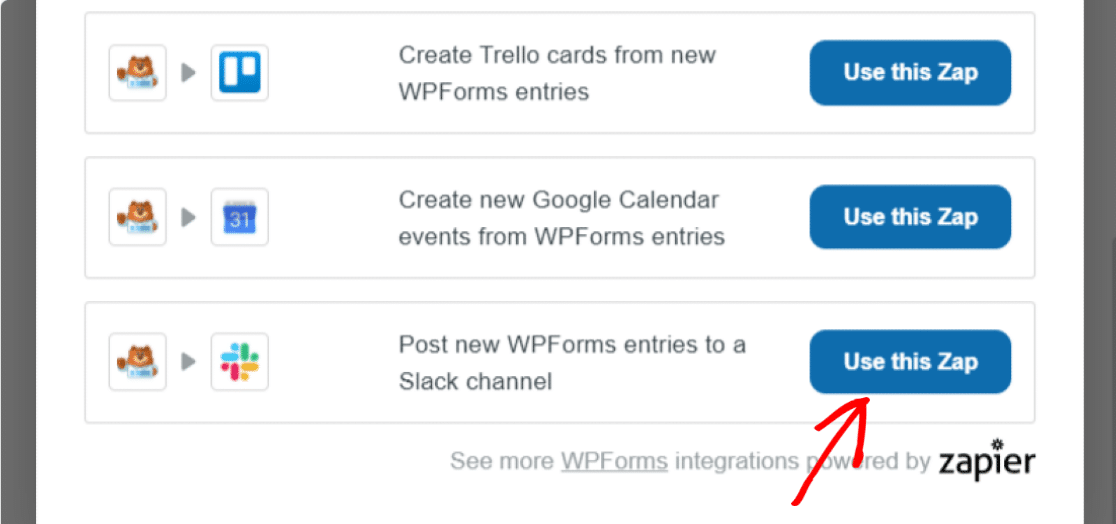
You’ll see some of the popular integration that you can use with WPForms + Zapier.
Scroll down the page till you see an option with a Slack logo and click on the Use this Zap button.
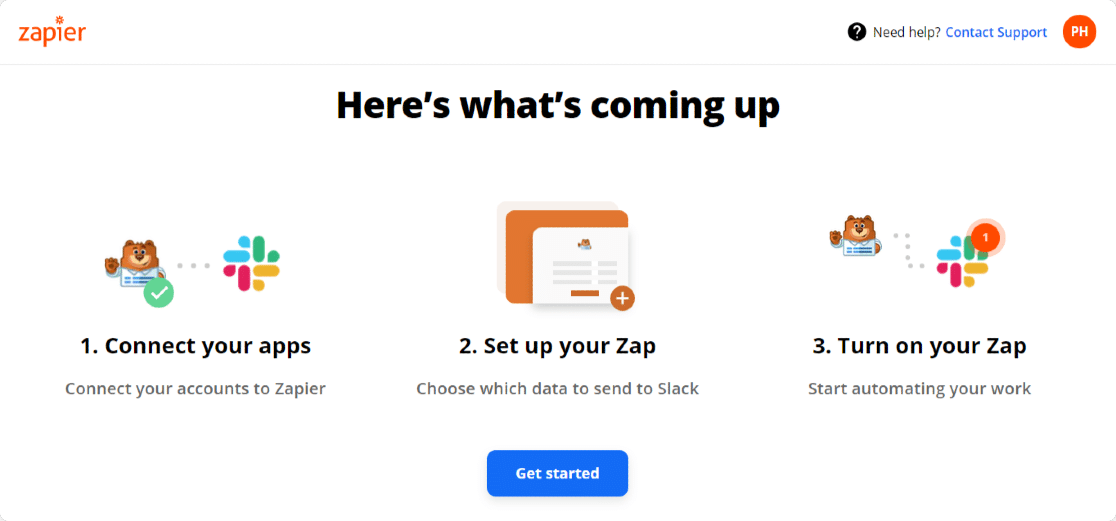
Clicking this will redirect you to your Zapier account. Make sure you’ve already created and logged in to your Zapier account.
Click on the Get Started button.
Now a new page will open where you see options to connect your WPForms account to your Zapier account.
To connect WPForms to Zapier, you’ll need to complete these 5 steps:
- Connect WPForms
- Connect Slack
- Customize Zap
- Test Zap
- Turn on Zap
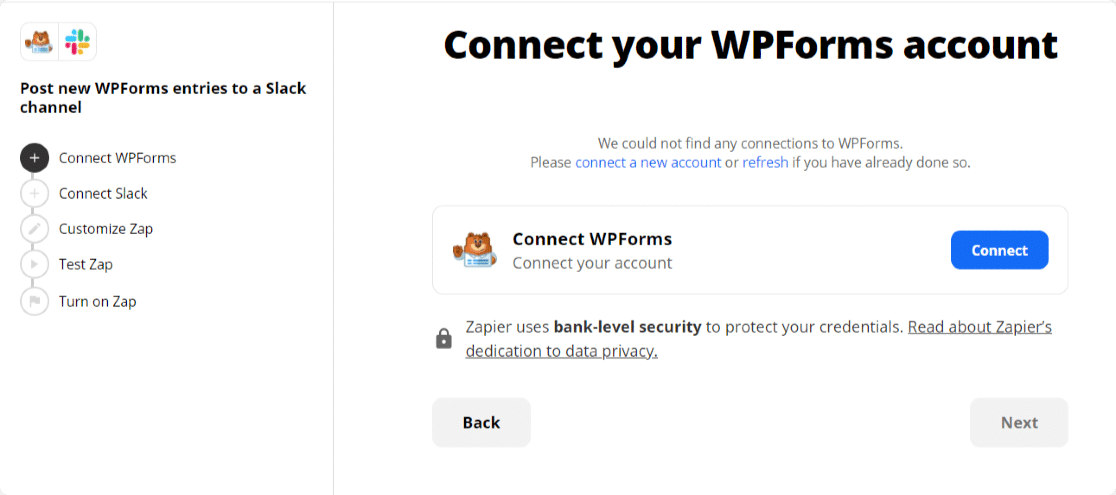
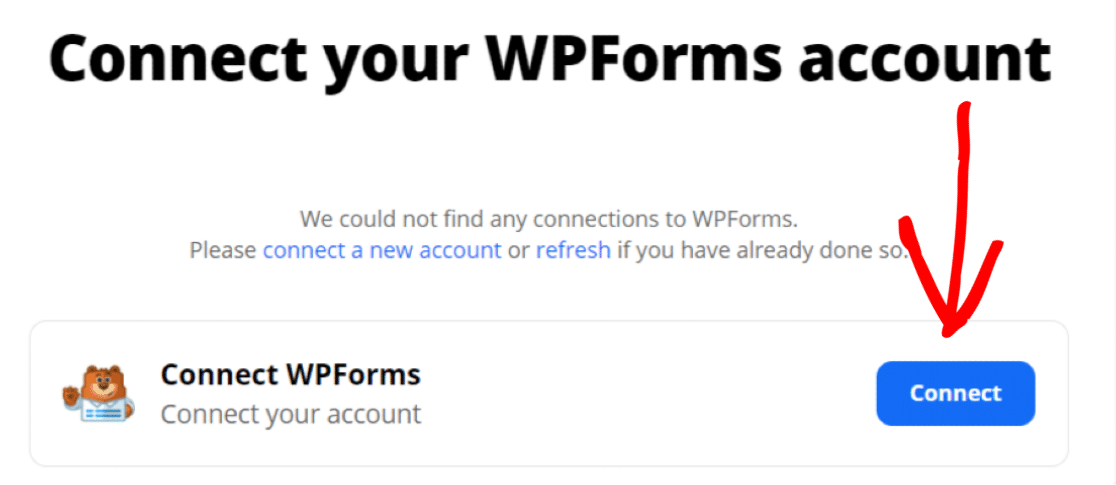
Connect WPForms
First, click on the Connect button.
A new popup window will open asking you to allow Zapier to access your WPForms account. Here you need to add your WPForms API Key and the Website link, which you want to connect to the Zapier.
Add all the required details and click on the Yes, Continue button.
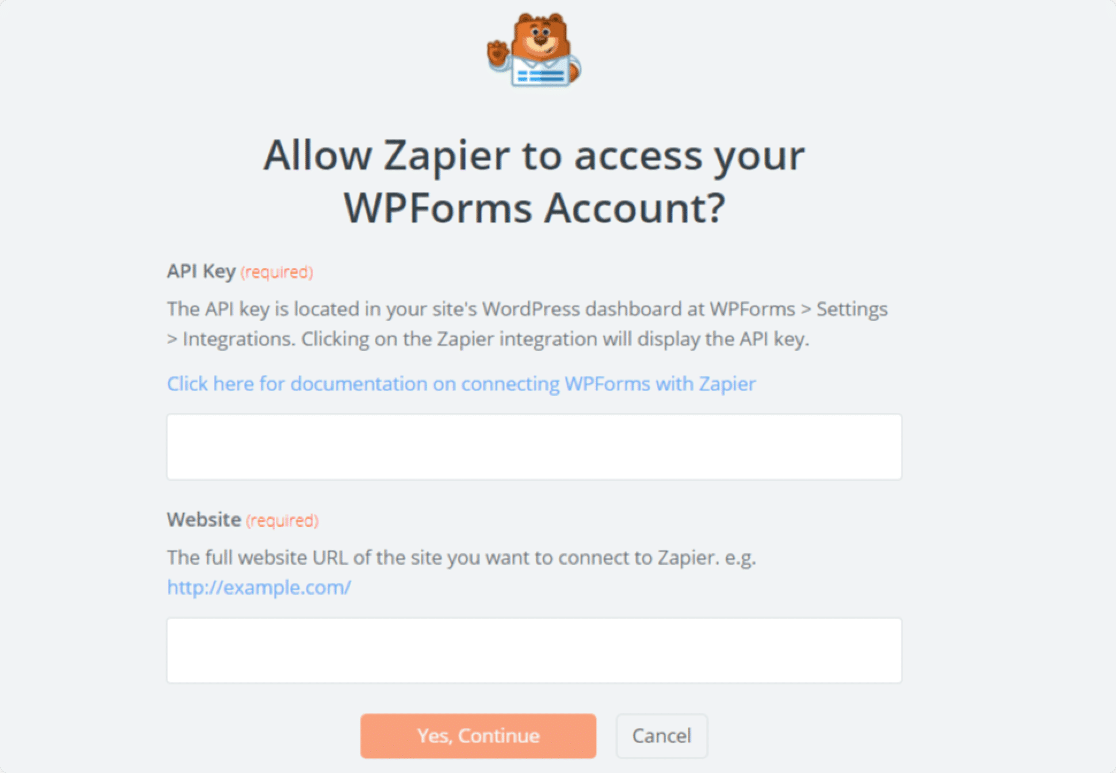
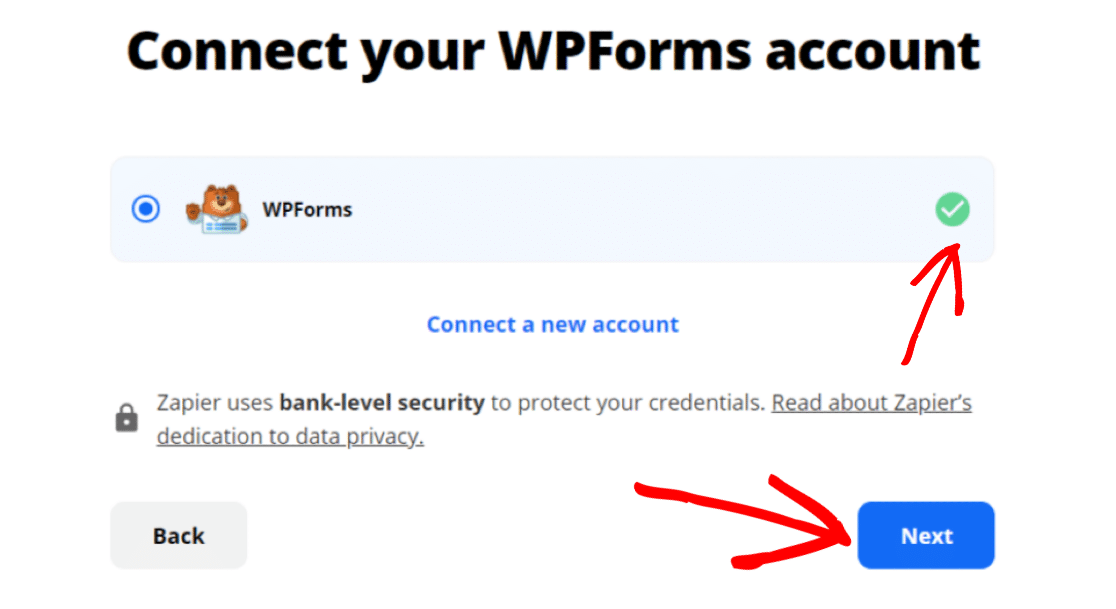
If you’ve added all the details correctly, you’ll see a green right check.
Click on the Next button to proceed with the next step.
Now on the next screen, select the form that you want to integrate with Slack and Zapier.
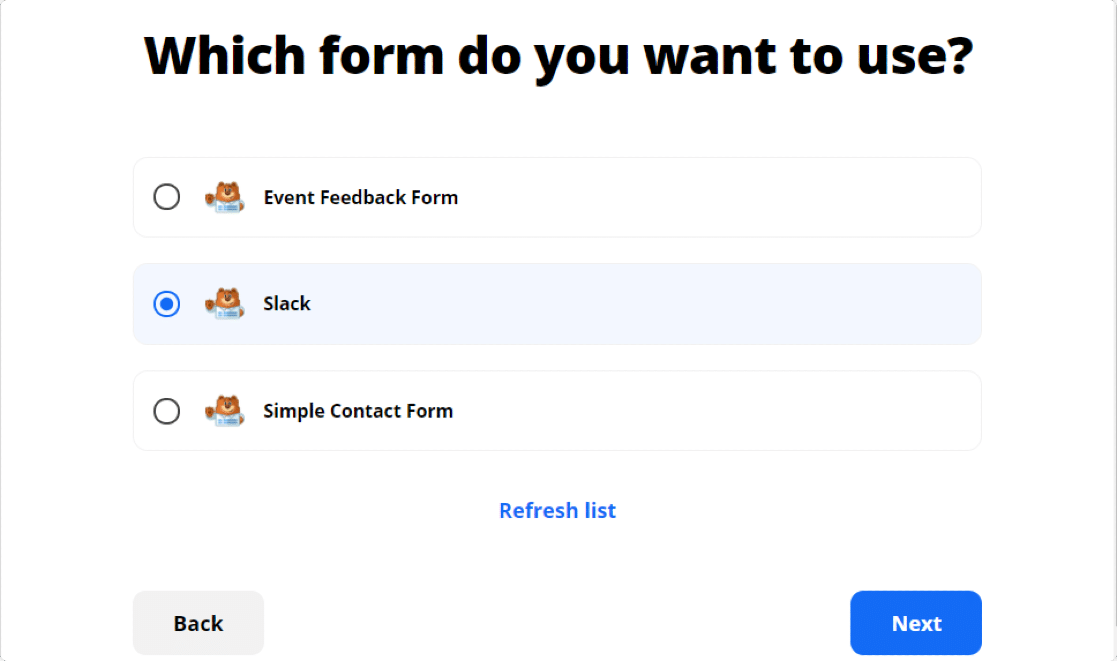
In our example, it’s the Slack form. Once done, click on the Next button.
Step 5: Connect Zapier to Slack
Now that you’ve connected Zapier to WPForms, the next step is to connect your Slack account to Zapier. To do that, first, you need to click on the Connect button.
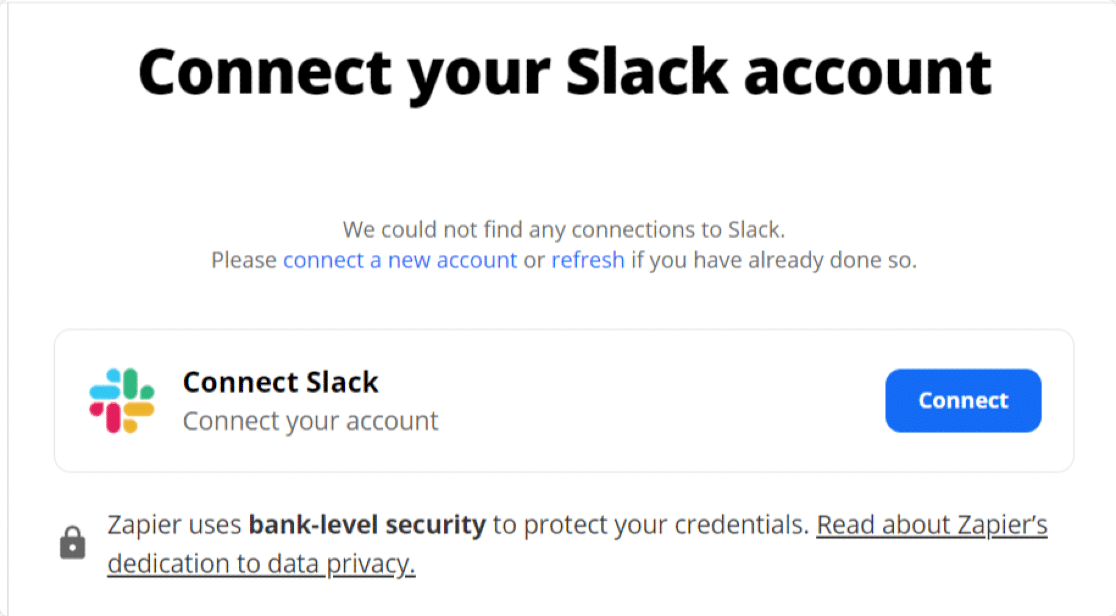
This will open a popup window where you need to allow Zapier to access your Slack account. Click on the Allow button to give access.
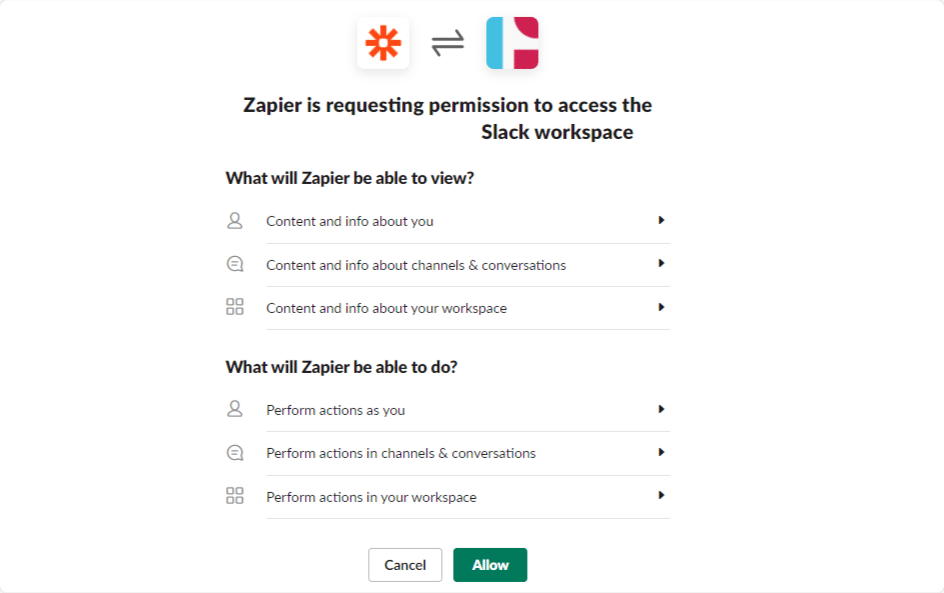
Once you successfully connect the Slack account, proceed to the next step.
Here you’ll see the list of your Slack channels. As we’re looking to send a notification to one of your Slack channels when a form is being submitted on your site, you need to select the channel you want to send your form notifications to.
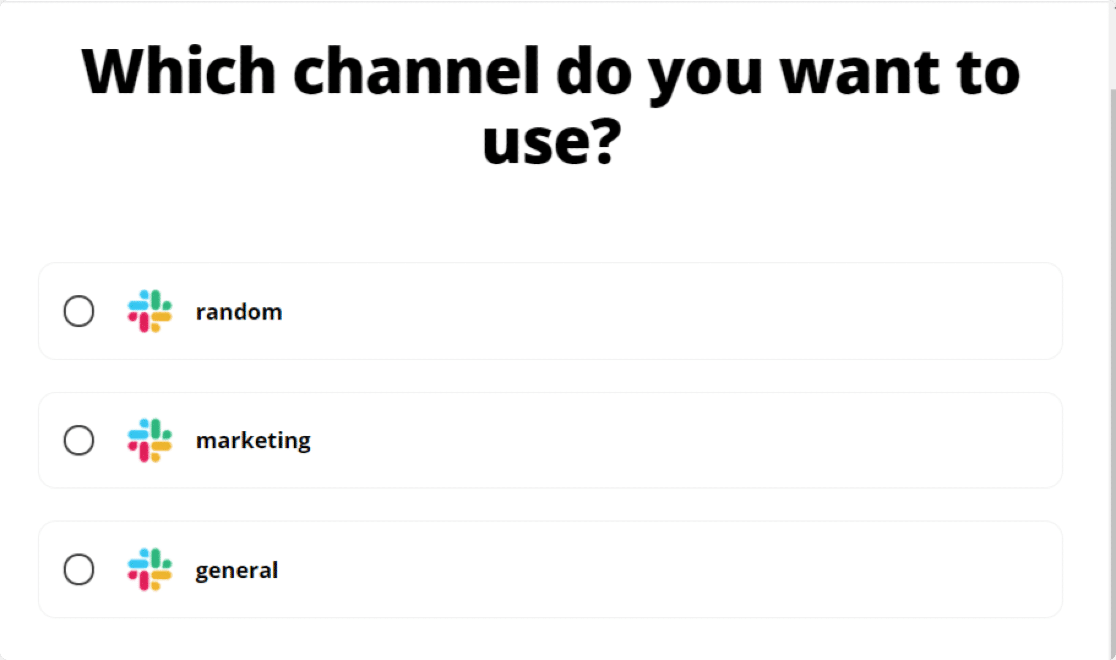
Select the channel and proceed to the next step.
Customize Zap
Here you’ll find multiple options to customize your Zap. You can add a Bot Name, Bot Icon Emoji, and also include a link to your Zap. Choose your options and click Next.
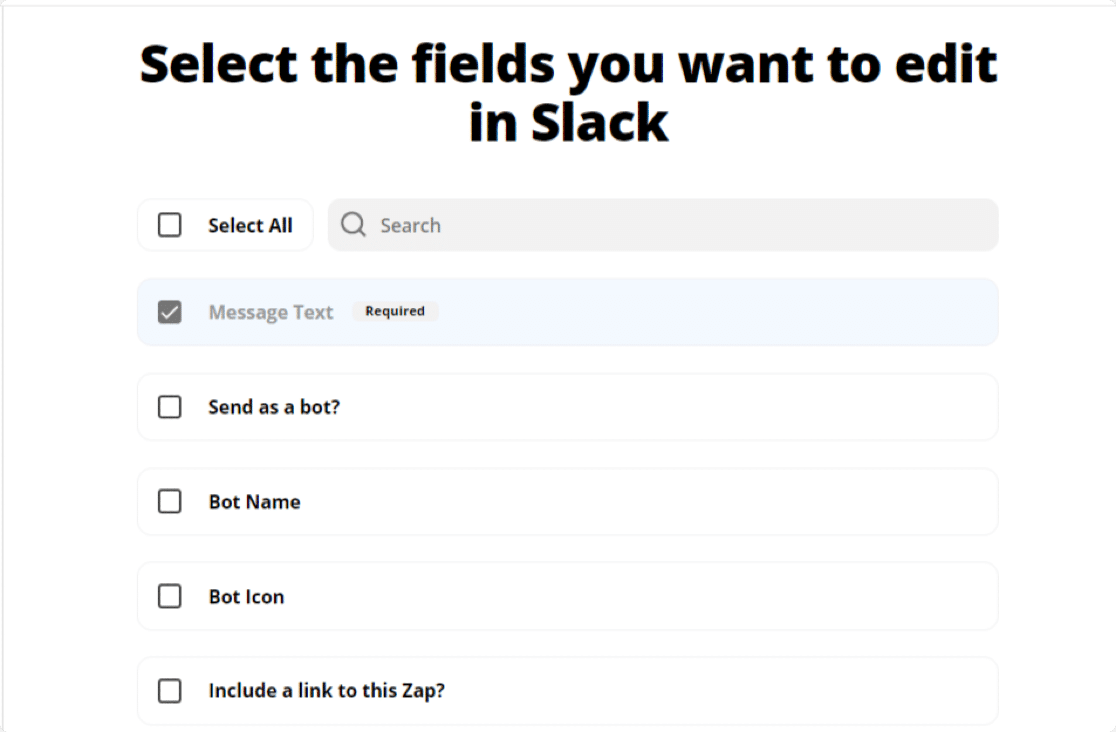
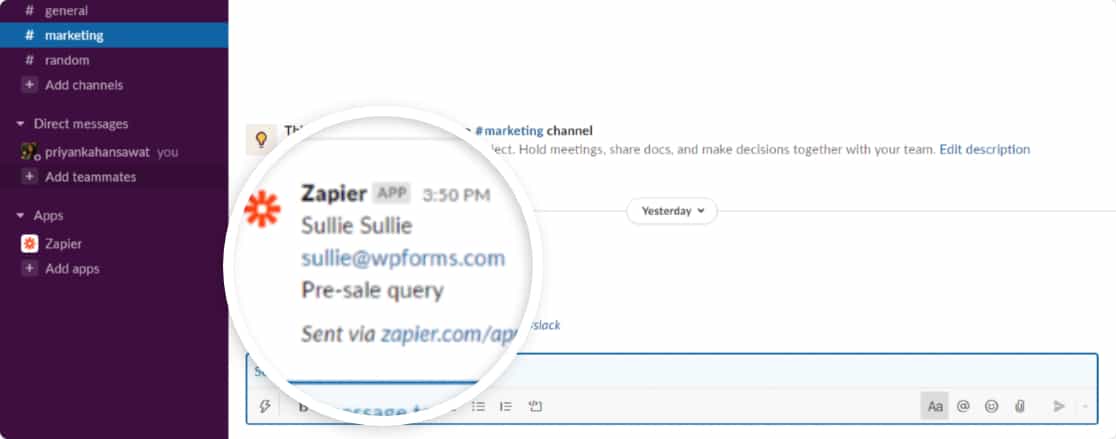
On the next screen, you’ll need to specify the text of the message to send. As we’re looking to send the form entry to Slack, you’ll need to select all of the form fields.

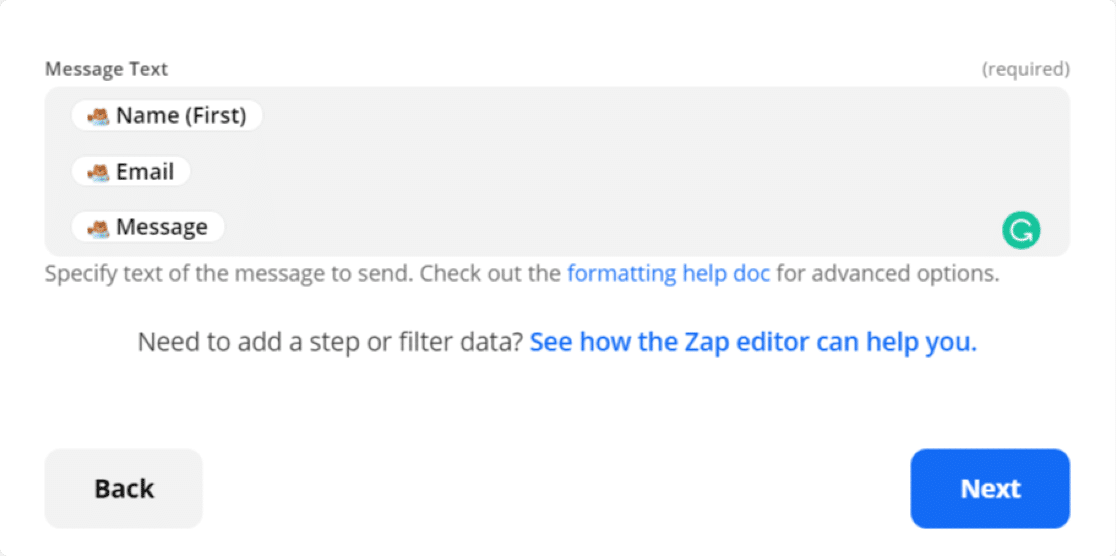
Now, if you prefer, you can customize the Message Text field and make it look the way you want in Slack. For example, take a look at the screenshot below.
Once done, select Next.
Step 6: Test Your WordPress Slack Notifications
All your customizations are done now. Now let’s test your Zap.
Test Zap
You’ll see your Slack channel name and the message text you’ll receive in your Slack channel on the next screen.
Click on the Send Test button.
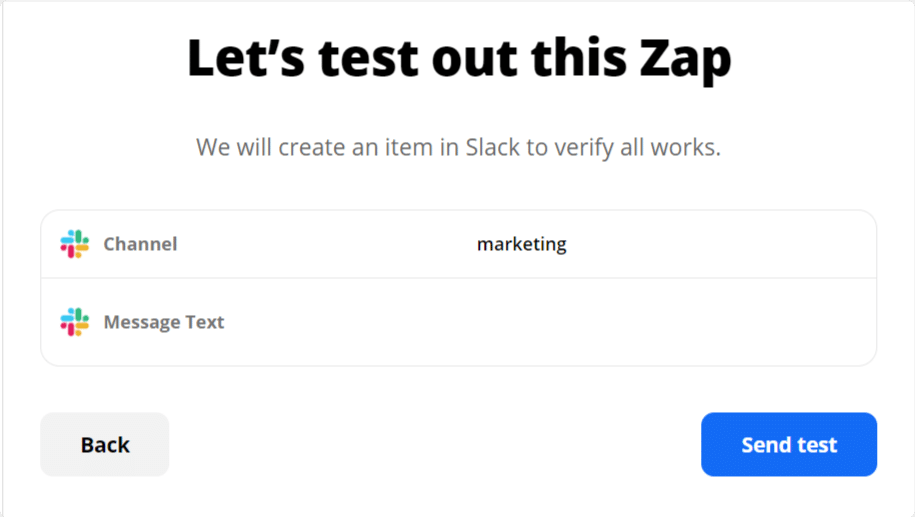
If you’ve configured everything correctly, you’ll receive a test form notification in your Slack Channel.
Turn On Zap
Finally, you’ll need to review your Zap and turn it on, so future form entries will be automatically added to your Slack channel.

Awesome! Now you can receive your form entires’ in your Slack channel easily.
Create Your WordPress Form Now
Next, Create Custom Zoho CRM Forms in WordPress
We hope this guide helped you to automatically create Slack notifications from WordPress forms. Next, you might be interested in learning how to create custom Zoho forms in WordPress.
You might also be interested in learning how to get an SMS notification from your contact form.
What are you waiting for? Get started with the most powerful WordPress forms plugin today.
If you like this article, then please follow us on Facebook and Twitter for more free WordPress tutorials.
The post How to Get Slack Notifications From WordPress Forms appeared first on WPForms.
source https://wpforms.com/how-to-get-slack-notifications-from-your-wordpress-forms/
