Wanted to add a save and continue feature to your surveys?
The save and continue option allows respondents to save their survey form’s progress mid-way and let them finish filling out the form later as per their convenience.
In this article, we’ll show you how to add the save and continue feature to your surveys so that your visitors don’t have to fill out your survey forms in one go.
Can a Survey Be Saved and Finished Later?
Yes, surveys can be saved and finished later using the WPForms form plugin on your website.
WPForms is the easiest form builder plugin for WordPress. And with its easy drag and drop builder, you can create multiple types of online forms, including survey forms on your website.
Speaking of the save and continue functionality, WPForms comes with an awesome Save and Resume addon that helps you to enable the save and continue feature on your survey forms.
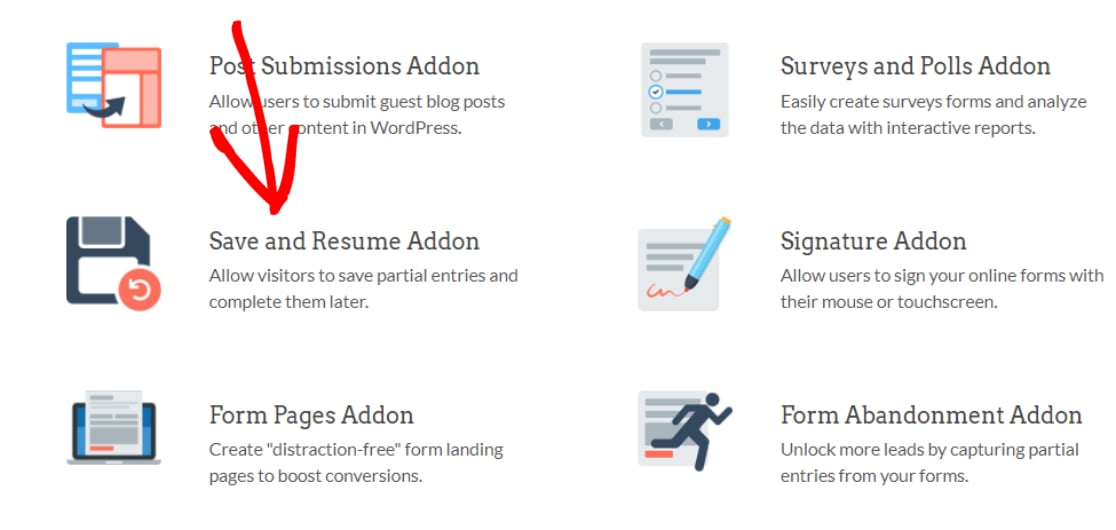
With the Save and Resume addon of WPForms, you can allow your users to save their survey responses without completing or filling the required fields. All that heavy work without touching a single line of code.
How to Add Save and Continue to Your Surveys
Now let’s see the complete process of adding save and continue functionality to your surveys using WPForms.
Here’s a table of contents to help you navigate this post:
- Install the WPForms Plugin
- Install the Save and Resume Addon
- Create a Survey Form in WordPress
- Enable Save and Resume Feature
- Configure Save and Resume Settings
- Add Your Survey Form to Your Website
- Save and Resume Your Survey Form
- View Partial Form Entries
Step 1: Install the WPForms Plugin
The first thing you need to do is install and activate the WPForms plugin.
WordPress plugin installation process is relatively easy; still, if you face any difficulty, you can check out the tutorial on how to install a WordPress plugin.

Once WPForms is installed, you’ll be able to activate the Save and Resume addon.
Note: The Save and Resume addon comes with WPForms Pro. So before proceeding to the next step, make sure you’ve activated the right version of the plugin on your site.
Step 2: Install the Save and Resume Addon
To activate the Save and Resume, head over to your WordPress dashboard and click WPForms » Addons.
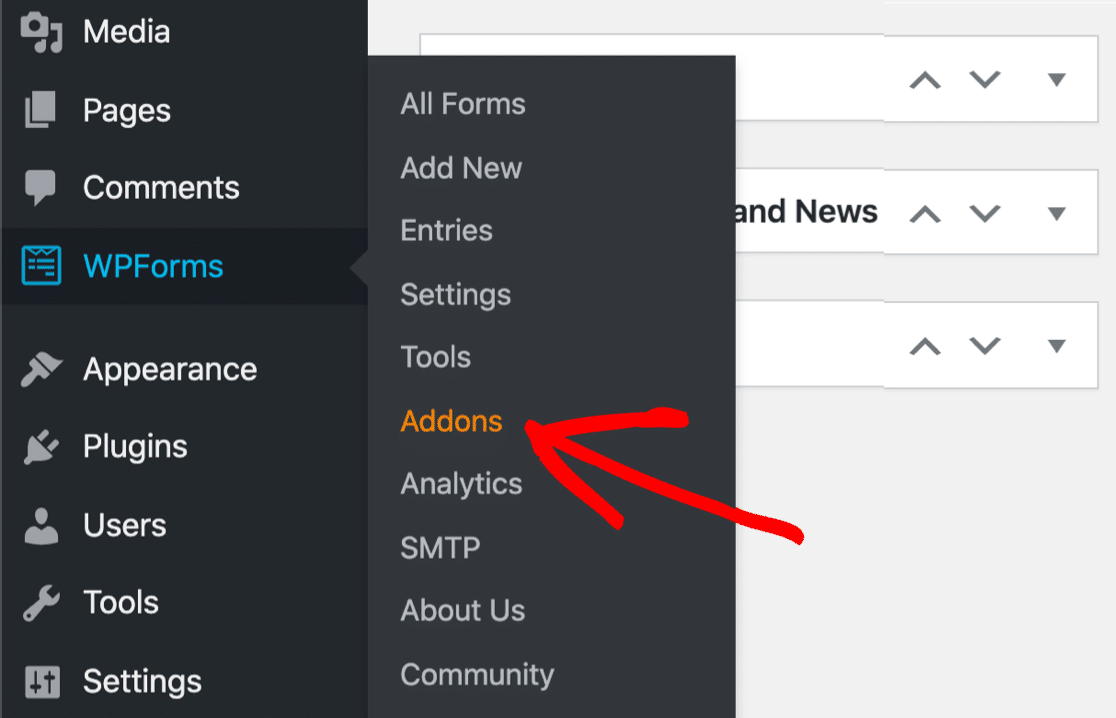
Clicking this will open the addons page of WPForms.
In the search bar, type Save and Resume and press the Install Addon button.
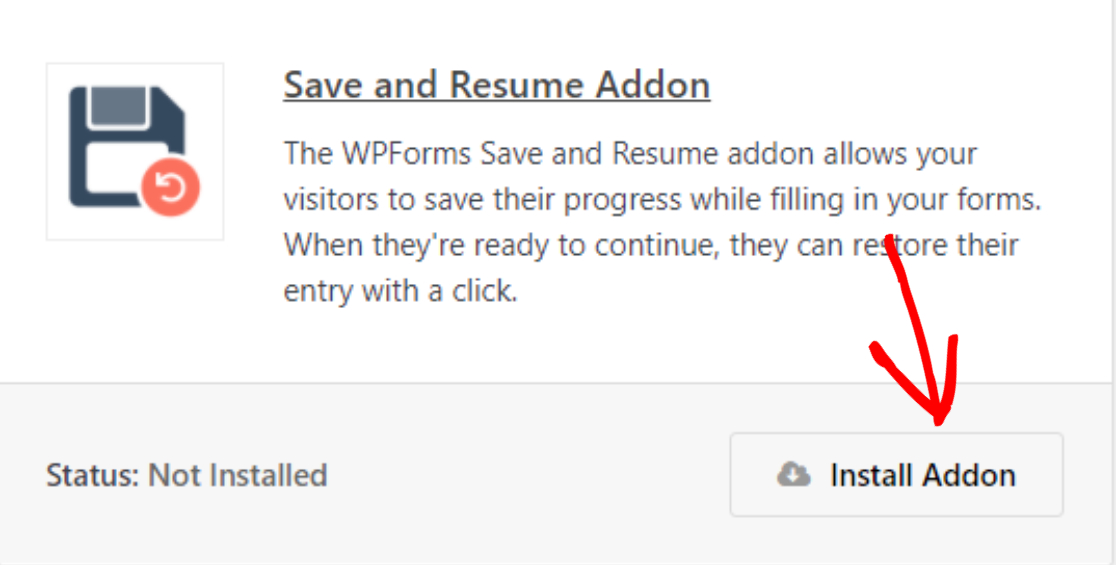
Once you complete the addon installation process, you need to create a new survey form with WPForms.
Step 3: Create a Survey Form in WordPress
If you’ve already created a survey form, you can skip this step and jump to the next step.
For our tutorial, we’re going to use the pre-built survey form template of WPForms. However, if you prefer to create your survey form from scratch, you can do that too.
To start with the pre-built survey form template, go to WPForms » Add New.

This will open the form template library of WPForms. This library consists of 300+ beautiful form templates that make your form building process much easier and simpler.
Now, add a name to your form, and choose the survey form template.
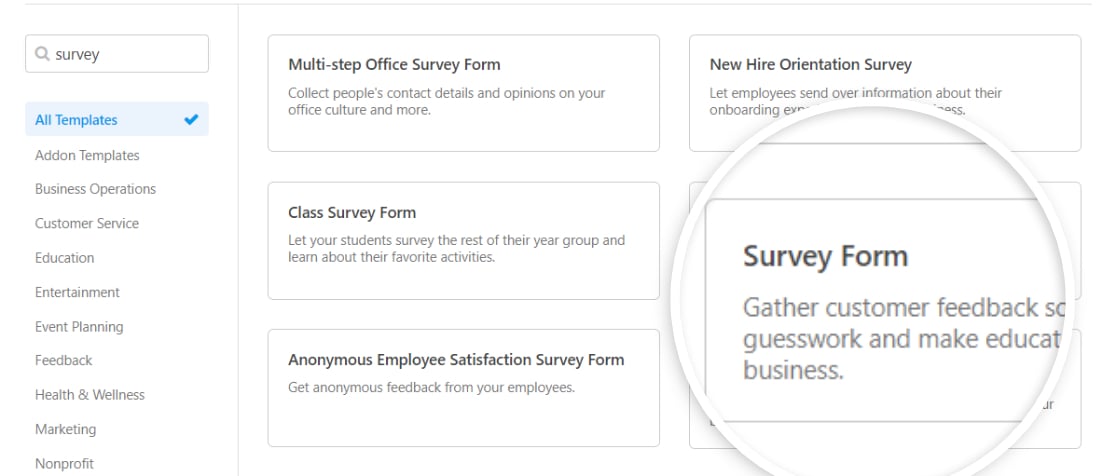
This is your survey form in the form editor:
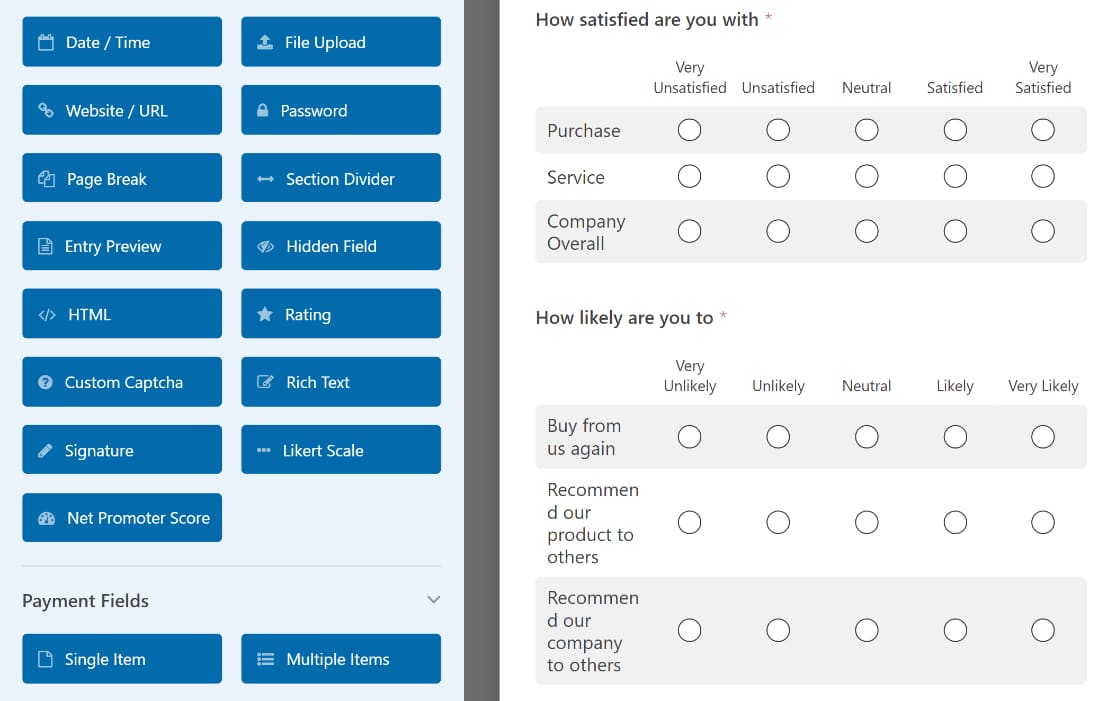
The survey form template of WPForms includes the following form fields:
- Name
- Rating
- Likert Scale (also known as a matrix question)
- Paragraph Text (for written answers)
You can add additional form fields by dragging them from the left-hand panel to the right-hand panel. And click on the field to make any changes.
Step 4: Enable Save and Resume Feature
Now that your survey form is ready, it’s time to enable the Save and Resume feature.
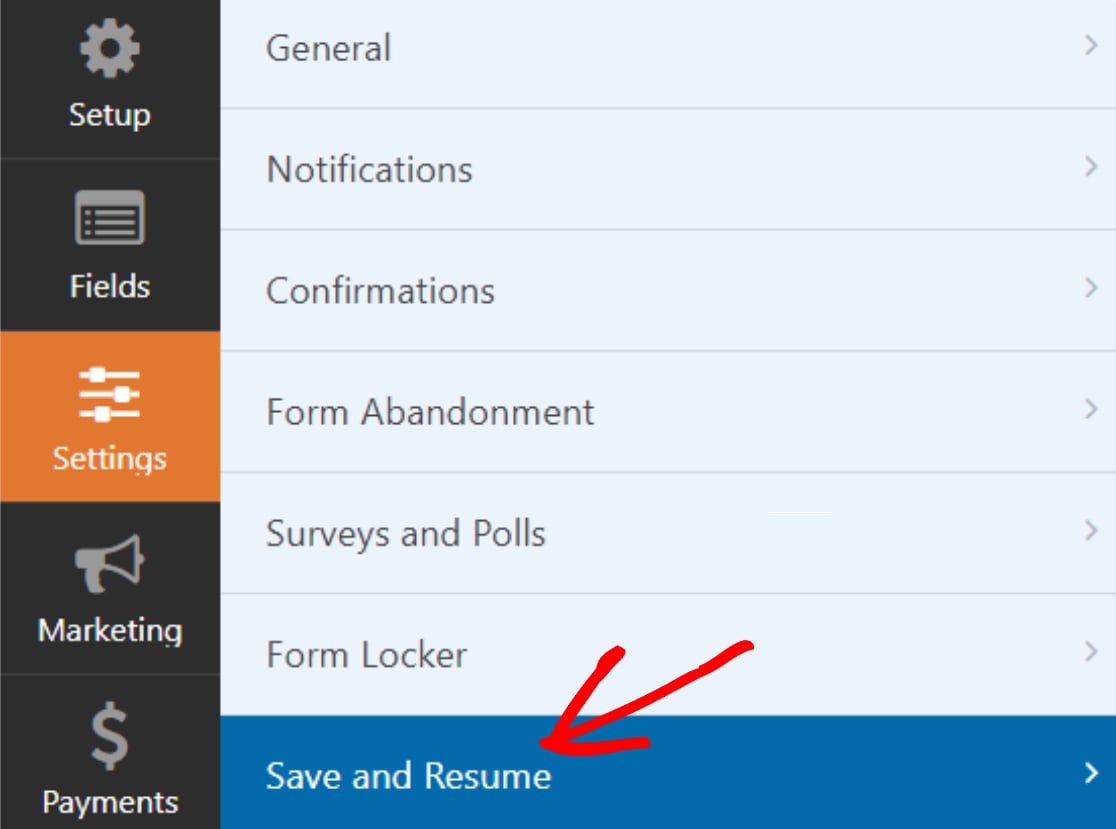
To do that, go to Settings » Save and Resume in the form editor.
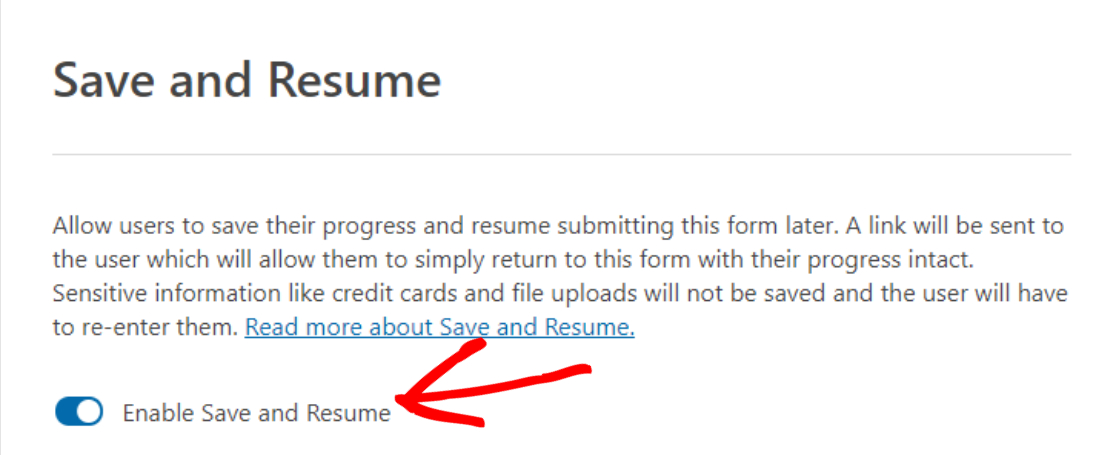
Next, toggle on the Enable Save and Resume feature.
Step 5: Configure Save and Resume Settings
When you enable the feature, new options will appear where you can configure the Save and Resume addon settings.
Let’s see each option briefly:
Customize the Link Text for Save and Resume Button
The first option allows you to customize the link text users will use to save their survey form progress. By default, it includes the “Save and Resume Later text, but you can customize the text as per your preference.

And this is how the link text will appear on your live form.

Display Disclaimer Page
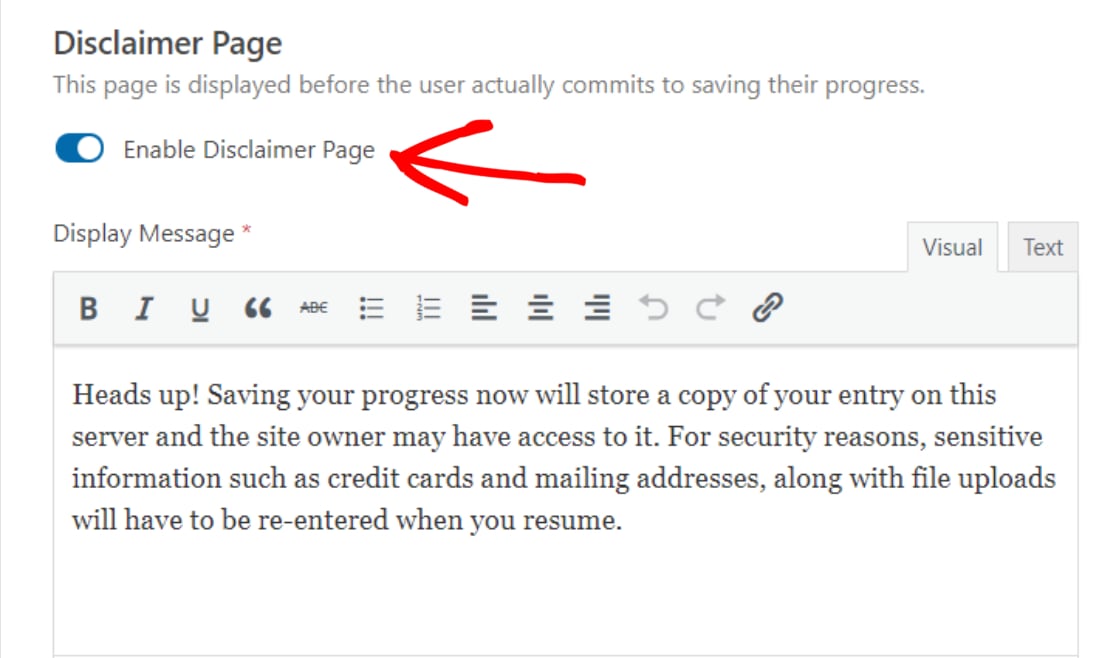
You can also display your own disclaimer message to your users when they click the save and resume link.
To do so, toggle on the Enable Disclaimer Page option.
This will open a window with a pre-written message that your users will see on the front end of your website. You get complete flexibility to customize this message and add your copy of the text.
Customize Confirmation Page
Next, you can display the confirmation message to your users. This message includes the instructions on how to reaccess the form once your users save and resume it for later.
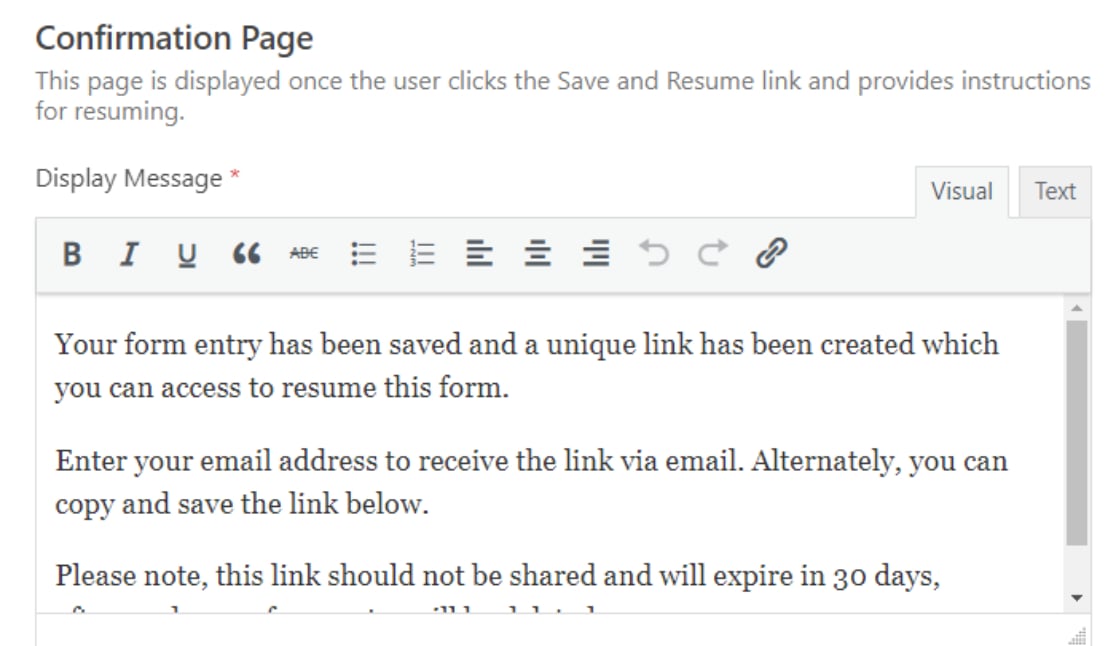
With WPForms, you’ll get 2 options to enable your users to resume the survey form and finish filling it out. You can either:
- show a link to resume the form
- allow the user to resume via email
- or both
Enable Resume Link
Toggling on the Enable Resume Link option will display the continuation link on the confirmation page. Your users can copy, use this link to access their partially saved survey form and finish them.

Enable Email Notification
If you toggle on the Enable Email Notification, you can customize the confirmation message and email notification that your users will see.

While customizing the email notification, make sure to add the {resume_link} Smart Tag in the email notification.
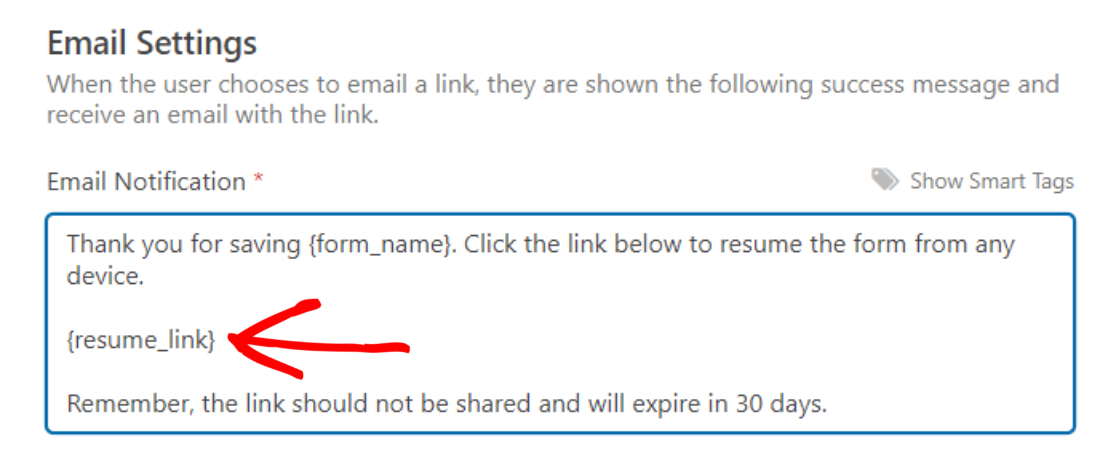
And once you’re done with all the save and resume setting options, don’t forget to click on the Save button.
Step 6: Add Your Survey Form to Your Website
Great! You’ve successfully added the save and continue feature to your survey forms. Now it’s time to add your survey form to your site.
With WPForms, you can add your form in multiple locations, including:
- Pages
- Posts and
- Sidebar Widget
Let’s see how you can add your form to the WordPress page.
WPForms includes a built-in Embed button in the form builder dashboard. Using this button, you can add your form on any website page without switching the tab or closing the form window.
To add your form, click on the Embed button at the top of your page
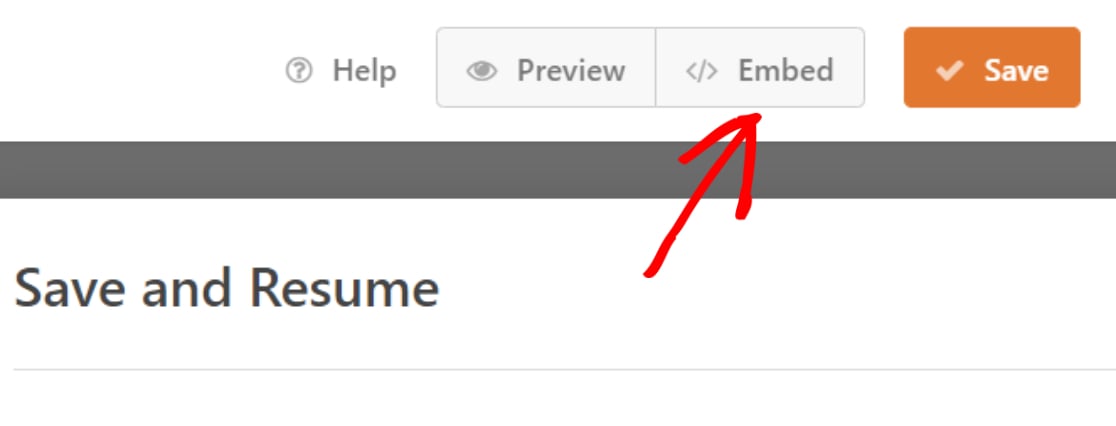
A popup will appear with 2 embedding options. You can either
- add your form to an existing page or
- create a new one.
Let’s click on the Create New Page option.
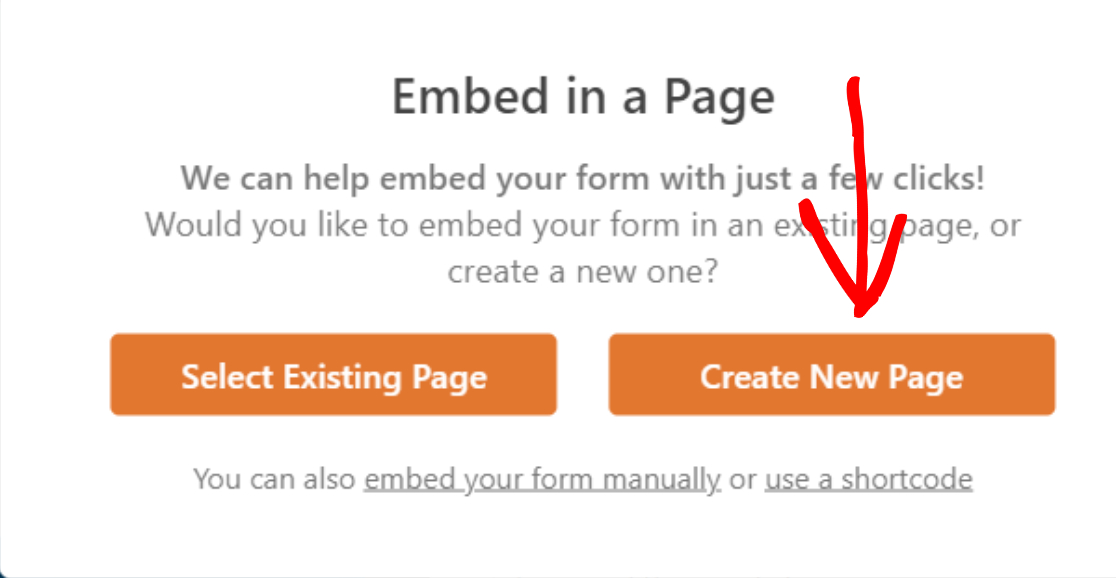
Add your page name and click the Let’s Go button.
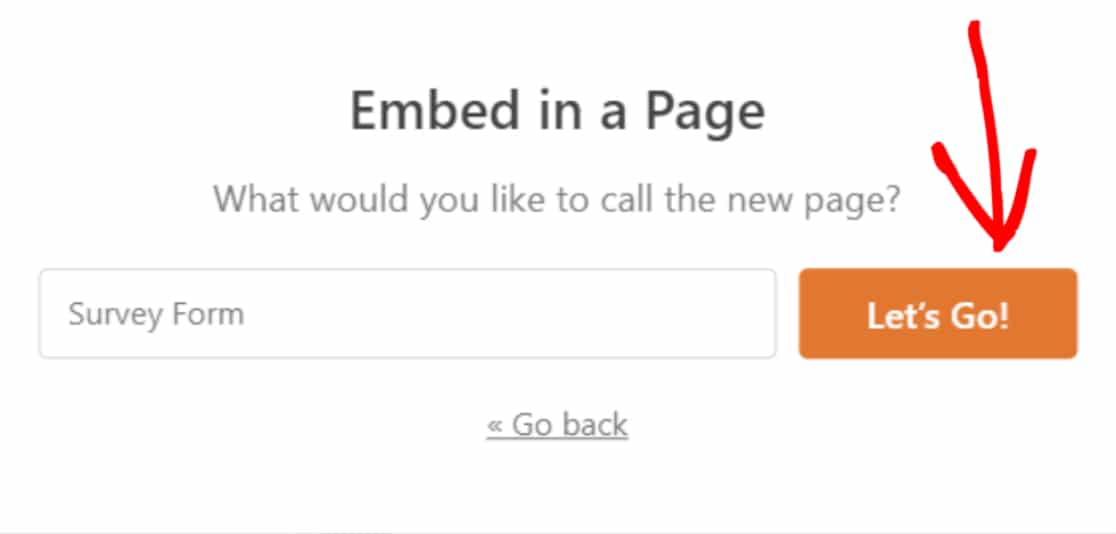
Now WPForms will automatically create a new page and add your form to it.
To publish your page on the live page, click the Publish button.

Now that you’ve added your survey form to your live site. Let’s see how the Save and Resume feature work on the frontend of your site.
Step 7: Save and Resume Your Survey Form
Once you publish the survey form, you will find the save and resume link near the submit button at the bottom of your form.
Your form respondents need to click this link to save the partial entries and continue filling the form later.
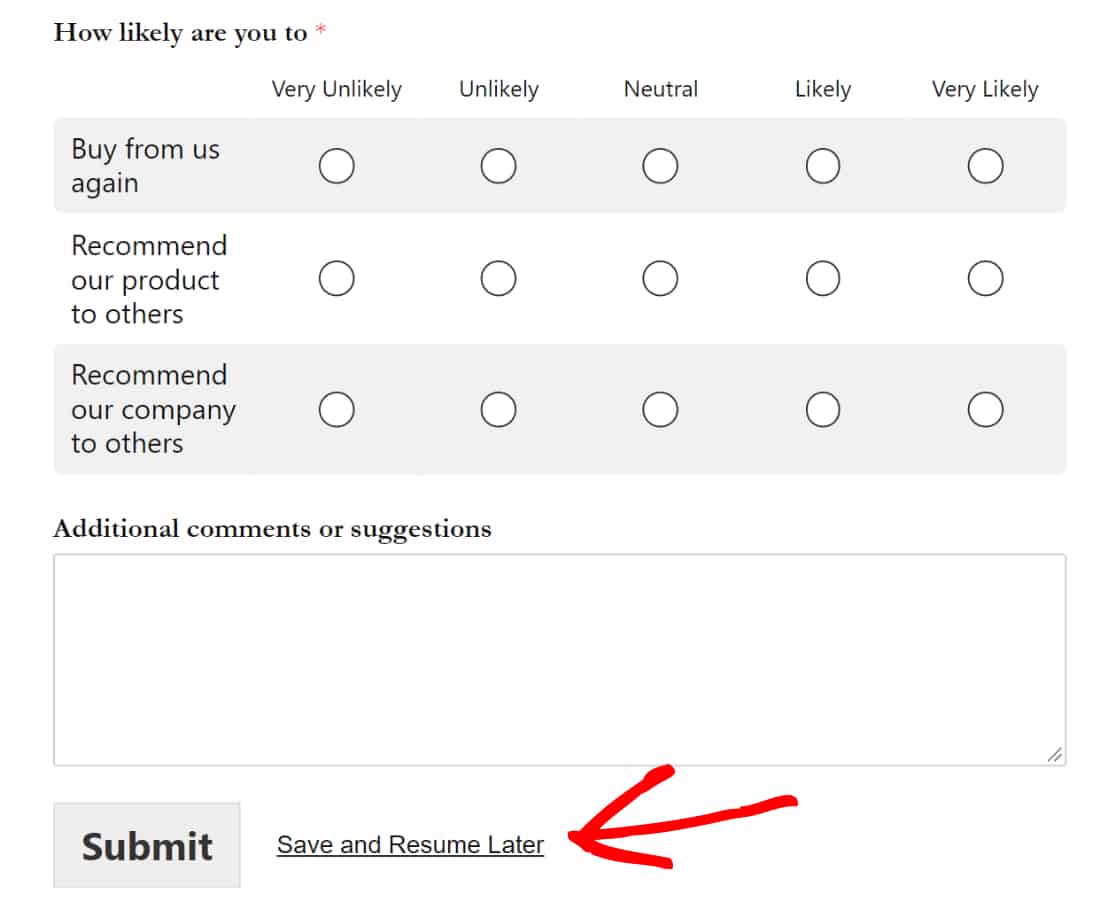
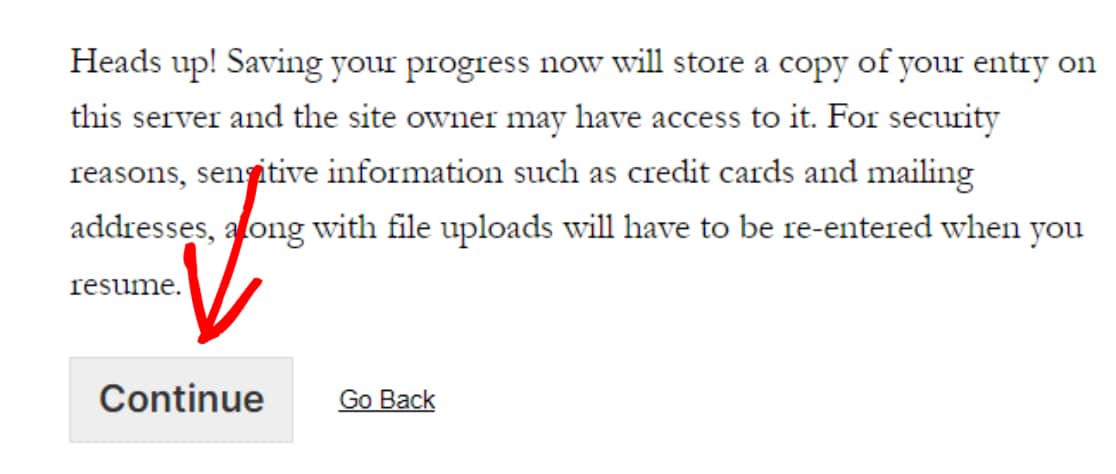
This will display the disclaimer message with 2 options:
- Continue: To save and resume the survey form.
- Go back: To go back to continue filling the survey form.
Click on the Continue button to save your progress.
Next, you’ll see the confirmation message with a resume link. Here again, you’ll see 2 options:
- Copy link: This is the resume link of your survey form. Using this link, you can reaccess your survey form and continue filling it form where you left it previously. Copy and save the link.
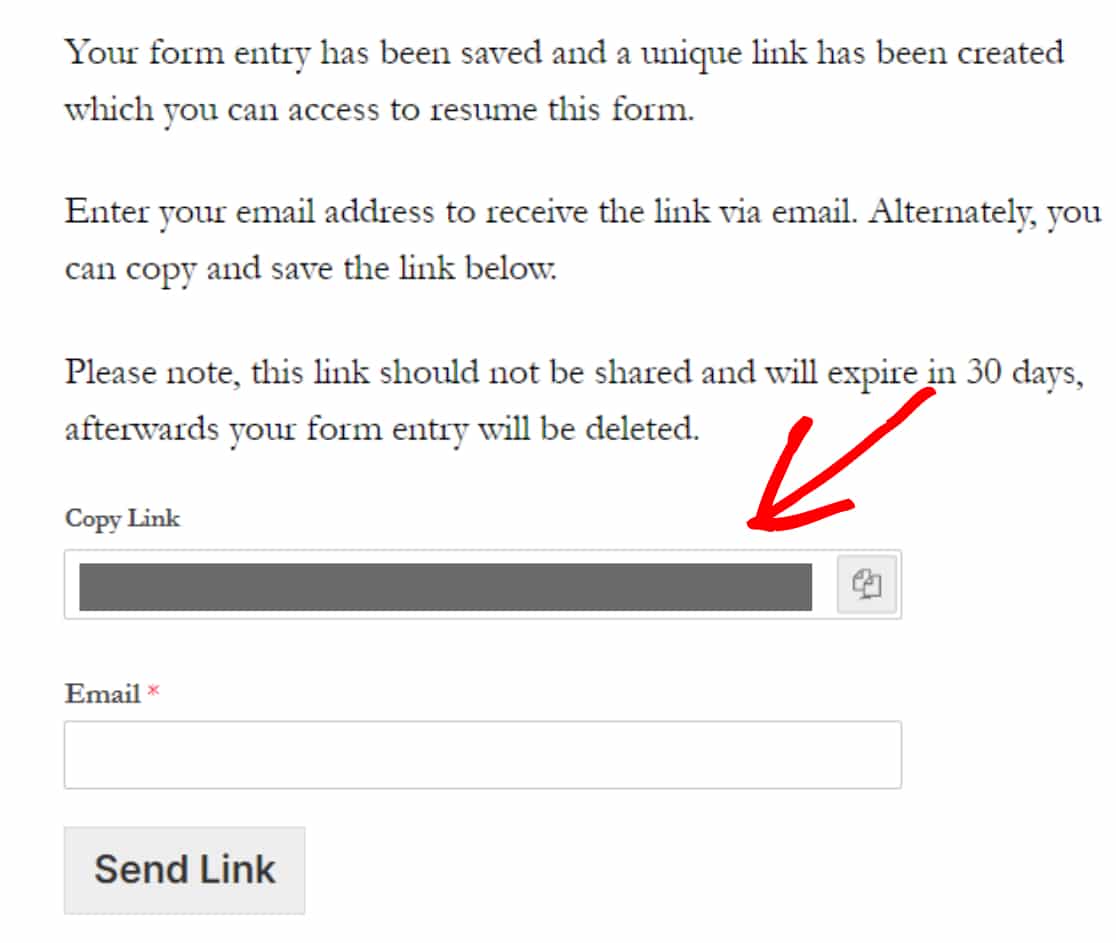
- Email: Here, you need the email address to receive the link via email.
Add the email address and click on the Send link button.
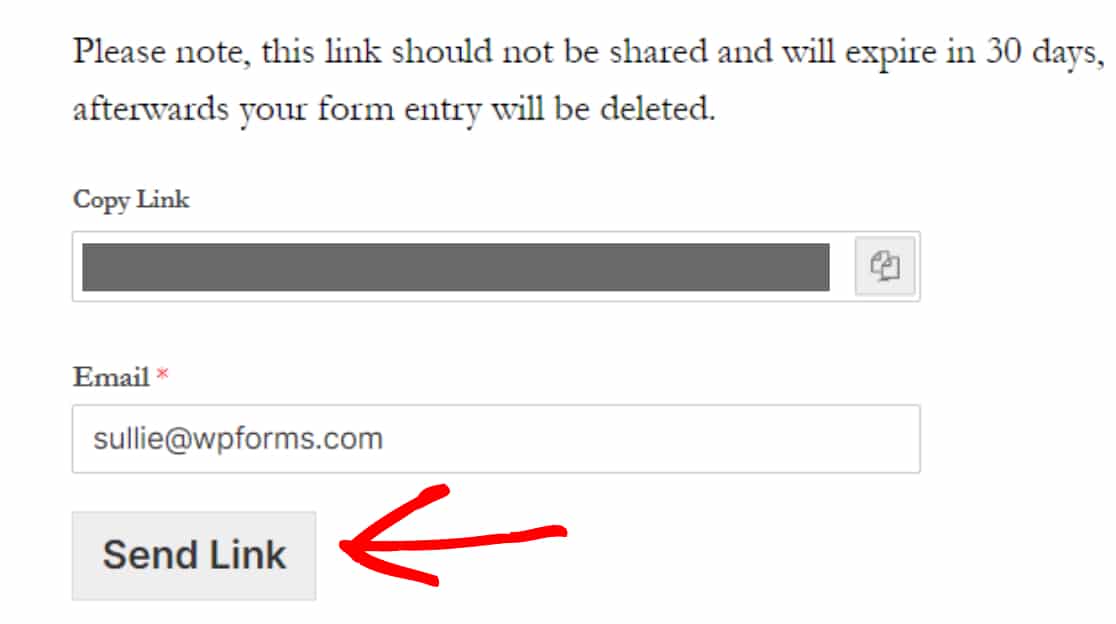
Make sure your form users will complete the survey within 30 days. Because the survey link expired after 30 days and all your form entries will be deleted.
Step 8: View Partial Form Entries
Now let’s see how WPForms stored the partial entries of your survey forms.
To view your users’ partial form entries, go to WPForms » Entries and click on the form’s title.

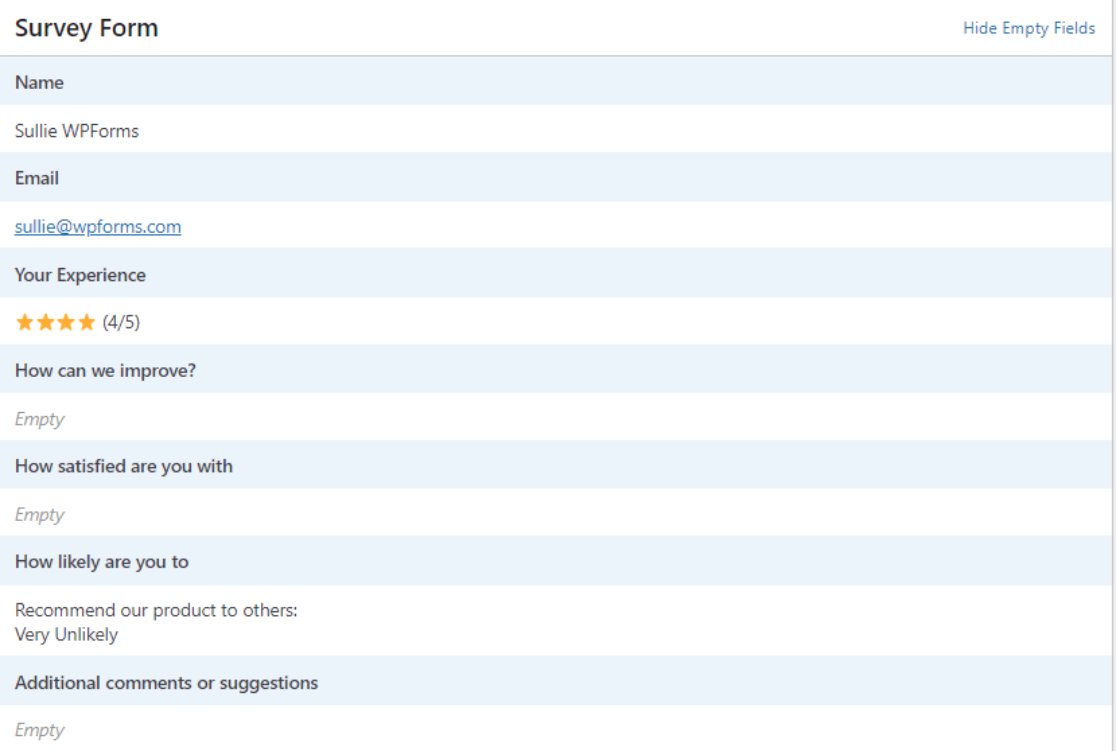
This will open a page with all your single form entries stored, and you can check under the status column; incomplete entries will be labeled as “Partial.”

Next, you can click on the View option to see more details about your user and survey form, such as which survey question is filled and which remains unfilled/empty.

This will open a new window, including all other additional information.
And that’s it! This is how easy it is to add, save and continue to your surveys.
Next, Create Different Type of Surveys to Grow Your Business
We hope this tutorial helps you add the save and continue feature to your survey forms.
Next, you might be interested in checking the different types of surveys you can create to boost your sales.
Also, you check our list of fantastic feedback form questions you can ask on your customer surveys.
So what are you waiting for? Get started with the most powerful WordPress forms plugin today. WPForms Pro comes with powerful integrations and a 14-day money-back guarantee.
And don’t forget to follow us on Twitter and Facebook for more updates from our blog.
The post How to Add Save and Continue to Your Surveys [Step by Step] appeared first on WPForms.
source https://wpforms.com/add-save-continue-to-surveys-2/

