
Do you want to accept payments with Apple Pay on your WordPress site?
Whether you’re an online store with an eCommerce site or a nonprofit accepting donations, setting up WordPress Apple Pay forms is easy to do.
Mobile payments are increasingly common. With so many people using Apple Wallet when they make payments, it’s a no-brainer to include it as a payment option at checkout.
In this post, we’ll look at how you can use Apple Pay for WordPress websites.
Create Your Apple Pay Form Now
How Can You Add Apple Pay to WordPress?
The easiest way to add Apple Pay to your WordPress site is using WPForms with the Stripe addon.
WPForms lets you make stylish forms without ever needing to know how to code. When you add Stripe as your payment gateway, as you’ll see in this post, you can offer Apple Pay as a payment option.
How To Take Apple Pay Payments in WordPress
Now let’s walk through setting up Stripe in your WPForms account step-by-step so you can accept payments through Apple Pay.
Important: The Apple Pay option will only appear in the form for visitors viewing it using Safari from an iOS or macOS device with Apple Pay enabled.
1. Download and Install WPForms

The first thing you need to do on your way to setting up Apple Pay on your WordPress site is to download and install WPForms.
Note that you will need at least a Pro account to use the Stripe payment gateway.
Need some help? Check out this guide on how to install a WordPress plugin.
2. Activate the Stripe Addon
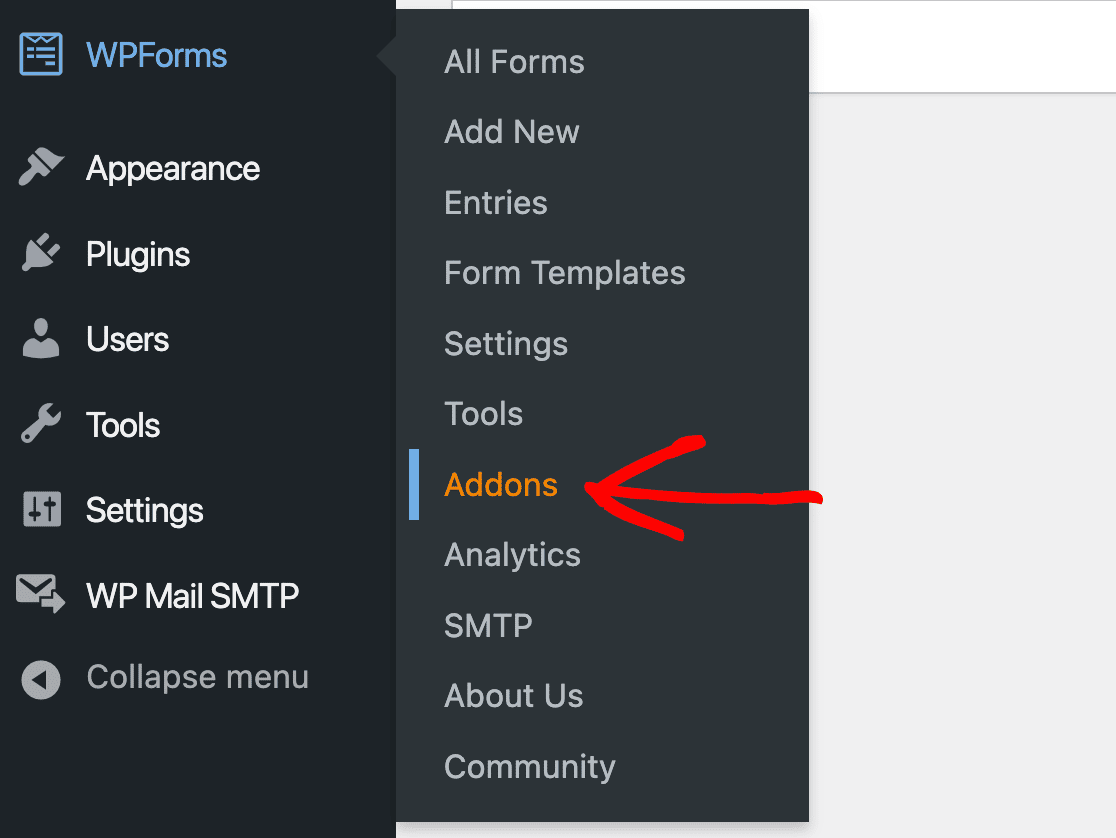
Next, you’ll need to activate the Stripe addon in your WPForms account. You can access this from your WordPress dashboard by clicking on WPForms » Addons.
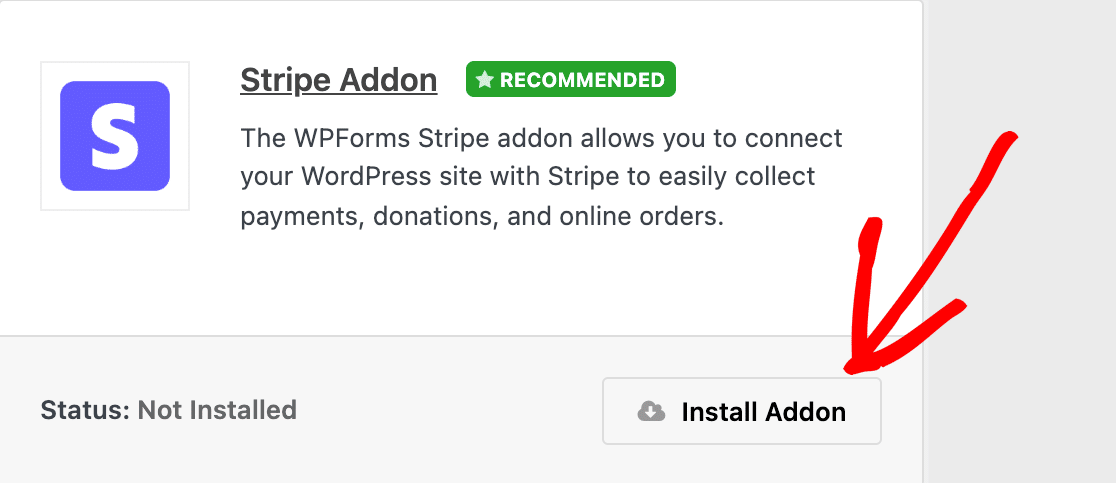
Next, you’ll see a screen containing all of the addons available to you based on your account level. The Stripe addon requires either a Pro or Elite account.
Scroll down until you locate the plugin, then install it.
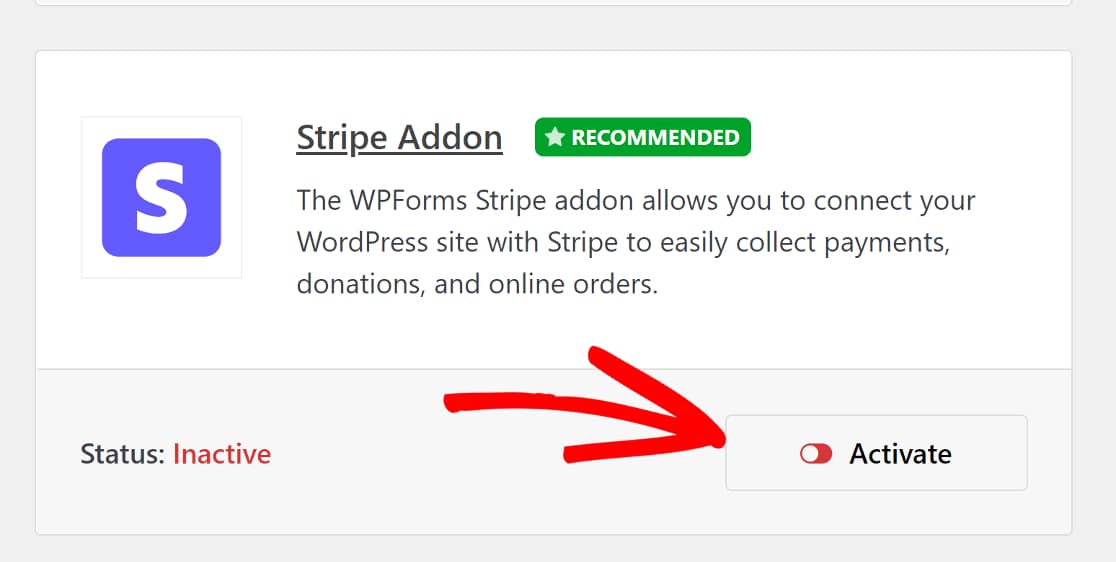
When you install the addon, it should automatically activate.
If you’ve previously installed and deactivated the addon, however, you will need to activate it to continue.
3. Connect Stripe in the Payments Settings
After you’ve installed the Stripe addon in WPForms, you need to connect it to your account.
To do this, you can click on WPForms » Settings from your WordPress dashboard.

That will take you to your WPForms account settings. You’ll see several tabs across the top. Select the Payments tab.

The first option you’ll see is the one to set your currency. Choose the currency you want to receive for your payments. For example, if you’re a U.S.-based business, you want to select USD.

Next, because you’ve installed the Stripe addon, you should see where to connect it in your payment settings.
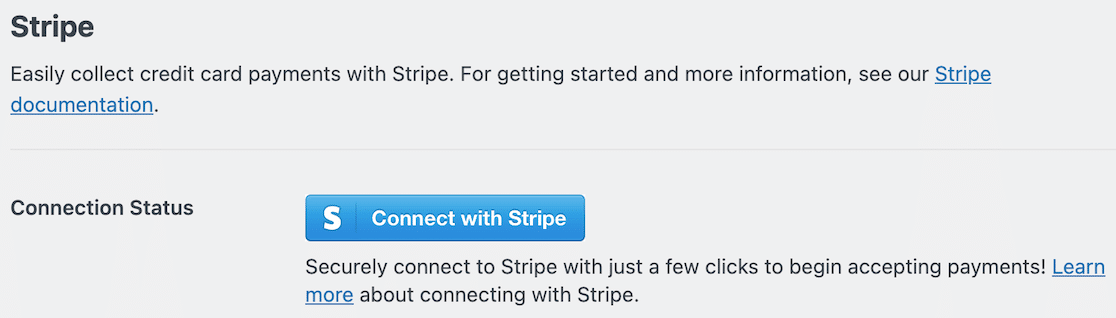
When you click Connect With Stripe, you’ll be prompted to enter your login information and other details needed to connect your Stripe account to WPForms. This is what will allow you to receive payments to your bank account.
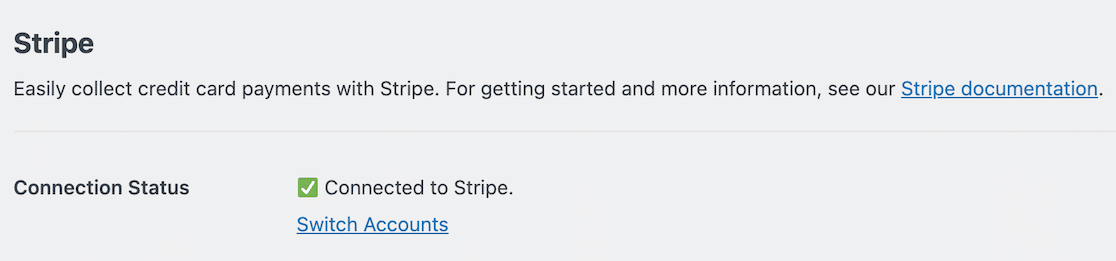
When your account is connected, the blue button will become a confirmation.
4. Select Payment Element
Scrolling down through the Stripe settings after your account is connected, you’ll see a setting called Credit Card Field Mode. The 2 options available are Card Element and Payment Element.
To enable Apple Pay, you need to select Payment Element.

Payment Element lets you accept over 25 payment methods with this single integration, including Apple Pay.
5. Create Your Form
Now that you’ve set Stripe up with your WPForms account, you can begin creating your form.
To get started, you can either click on WPForms » Add New, or simply click the Add New button at the top of your WPForms dashboard.

After that, you can name your form and decide whether you’re choosing one of our fully customizable templates or if you’re going to start from scratch with a blank form.
After that, you’re ready to drag and drop elements into place in the form builder.
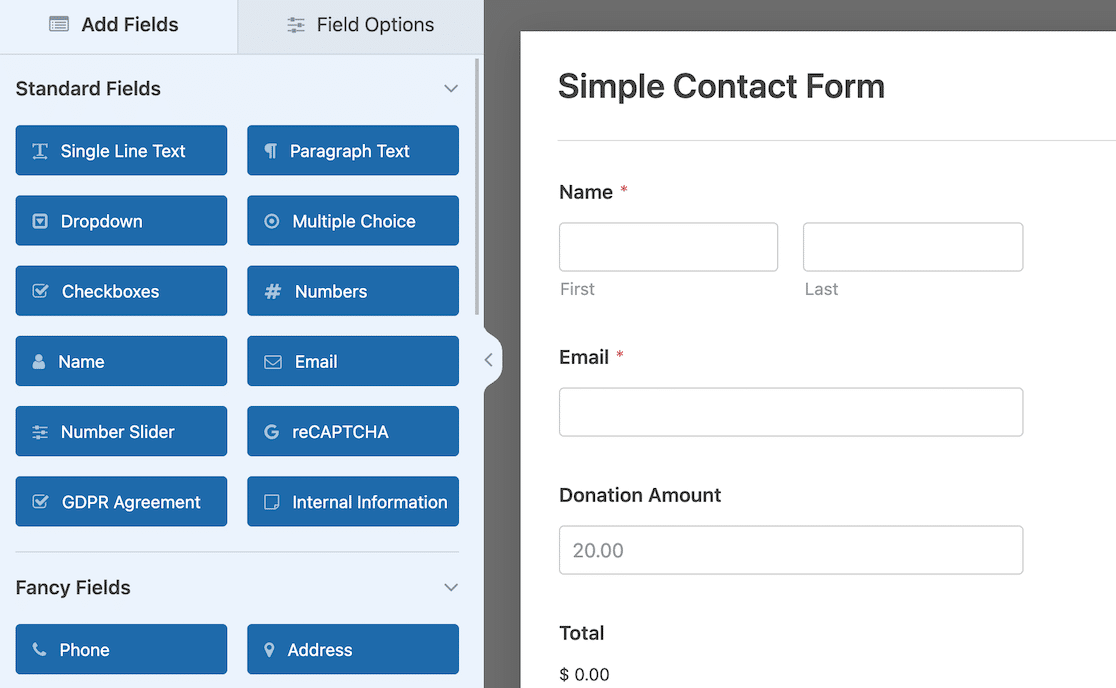
Don’t forget your payment fields! Whether you add specific items with a fixed price or let donors define the amount, you have to have something for the credit card field in the next step.
6. Add a Stripe Field
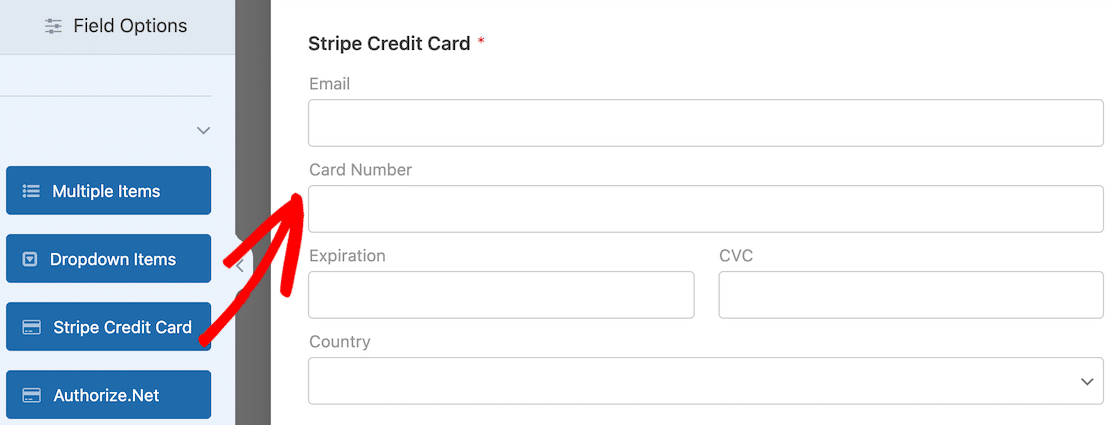
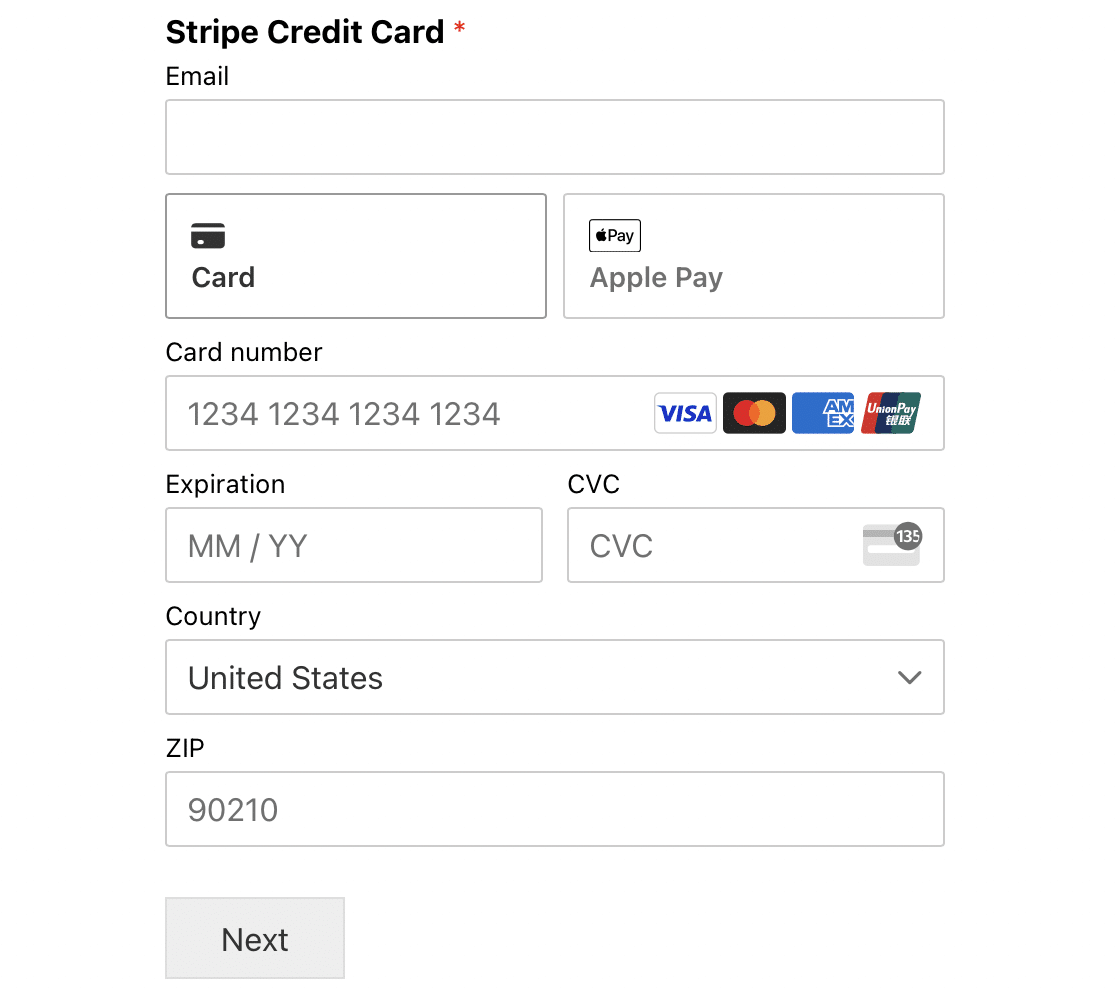
When your payment form is set up, the last thing to add is the Stripe checkout. In the form field options, scroll the whole way down until you see the payment fields. From there, select Stripe Credit Card.
For this next part to work, and to get an Apple Pay option for your customers, you must have completed all of the previous steps. Take a quick look to be sure. If you’re all set, move on to enabling Stripe payments.
7. Enable Stripe Payments
After you’ve added a Stripe field to your form, you have to enable payments. This is a very simple but important step.
With your form open, click on the Payments option on the left side.
Note that this is different from the payment options you set earlier. This setting is specific to this form.
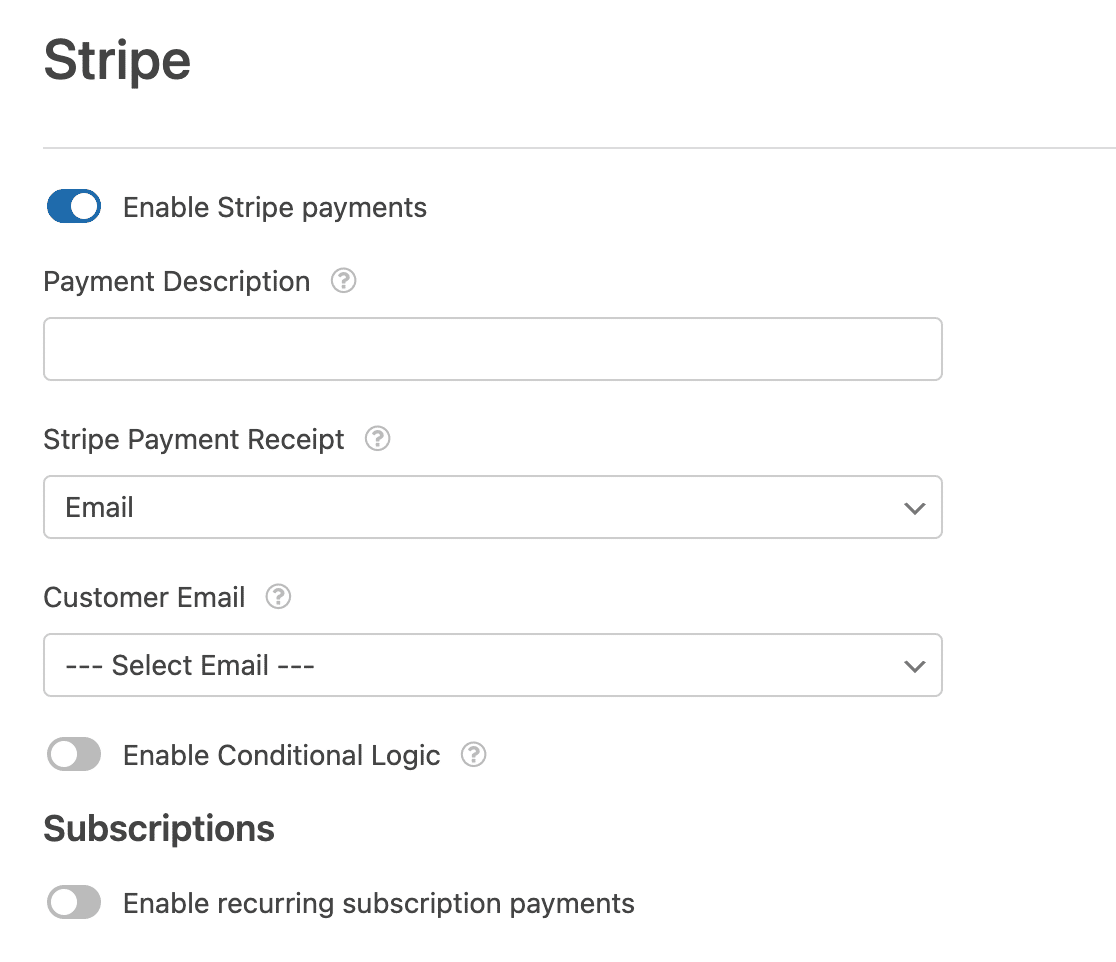
Click on Stripe and then use the toggle switch to enable Stripe payments.
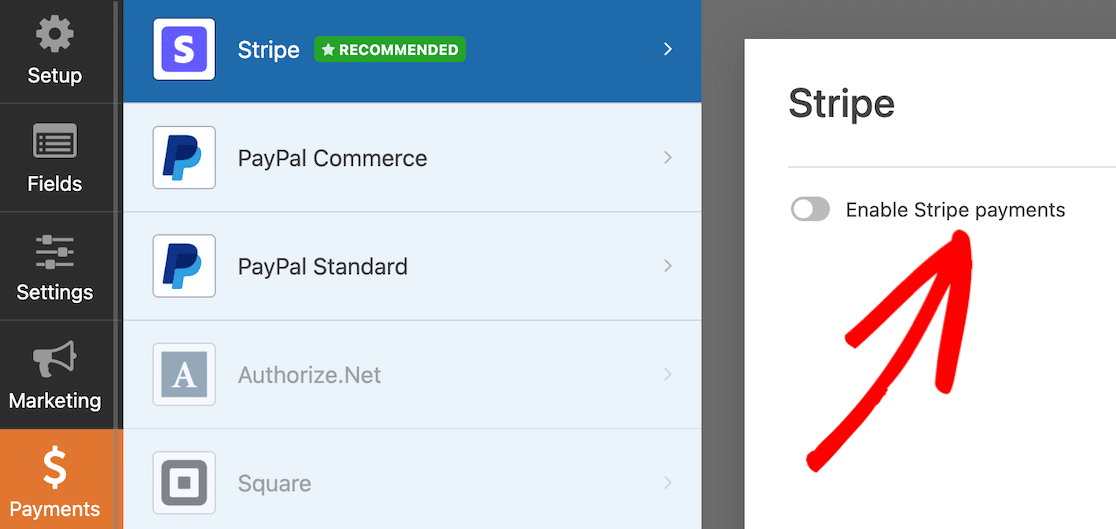
When you do that, you’ll see some more options appear. These options are for payment receipt and customer email, and you can map form fields for those.
8. Embed the Form on Your Site
When your form is finished and you’re ready to start collecting payments, it’s time to embed it on your site.
The easiest way to do this is by using the Embed button in the top right corner of the form builder.

There are a few other ways you can embed forms, as well. This guide on embedding a form on your WordPress site will show you how.
9. Publish Your Form
After you’ve embedded your form on the page or post where you want it to appear and you’ve ensured all the page content is complete, it’s time to publish. Voila! Your form is complete.
Something to keep in mind once your form is live is that you might not see the Apple Pay option. If that happens, don’t panic!
Apple Pay will only appear if you view the form on a device with Apple Pay enabled. This means you might not see Apple Pay on a Windows computer. But if you use Apple Wallet on your iPhone or other iOS device and have a card saved to use with Apple Pay, you should see it there.
This is true of all the payment methods available with Stripe when customers are using digital wallets.
Next, Put Your Forms to Work With a Side Hustle
Now that you have Stripe connected to your WPForms account and you can accept Apple Pay payments, you can also start earning some extra income. Find out how you can start a side hustle with WPForms.
Or, if you’re using your forms to collect donations, learn more about how you can start a fundraiser.
Create Your Apple Pay Form Now
Ready to build your form? Get started today with the easiest WordPress form builder plugin. WPForms Pro includes lots of free templates and offers a 14-day money-back guarantee.
If this article helped you out, please follow us on Facebook and Twitter for more free WordPress tutorials and guides.
The post How To Take Apple Pay Payments in WordPress appeared first on WPForms.source https://wpforms.com/how-to-take-apple-pay-payments-in-wordpress/

