Do you want to learn to style contact forms in WordPress?
Matching your contact form style to your WordPress site theme used to involve CSS knowledge and was understandably intimidating. That’s no longer the case with WPForms’ form styling options.
In this post, we’ll show you the easiest, fastest way to change your WordPress contact form style.
Create Your WordPress Form Now
How Do I Customize a Contact Form in WordPress?
The best and easiest way to customize a contact form in WordPress is to use a form builder plugin with easy form styling options, like WPForms.
You don’t need to know CSS or have any technical knowledge to create and style a beautiful form in WPForms. All it takes is a few clicks. The same style can be applied to any form on your site, so matching styles is a breeze.
How To Style Contact Forms in WordPress
Now that you know WPForms is the best and easiest way to style contact forms in WordPress, let’s break it down step by step.
1. Install & Activate WPForms
To get started, make sure you have WPForms installed and activated on your WordPress website.
Need some help with this step? Check out this guide for beginners on how to install a WordPress plugin.
The next step depends on which version of WPForms you’re running.
For new users installing WPForms 1.8.1 and later, modern markup will be enabled by default. Skip to step 3.
If you previously installed WPForms prior to the 1.8.1 release, you’ll need to enable modern markup. Continue to step 2 to see how.
2. Enable Modern Markup
If you had at least one form on your website before updating to WPForms 1.8.1, you must enable modern markup.
To do that, navigate to the General tab in the WPForms settings menu.
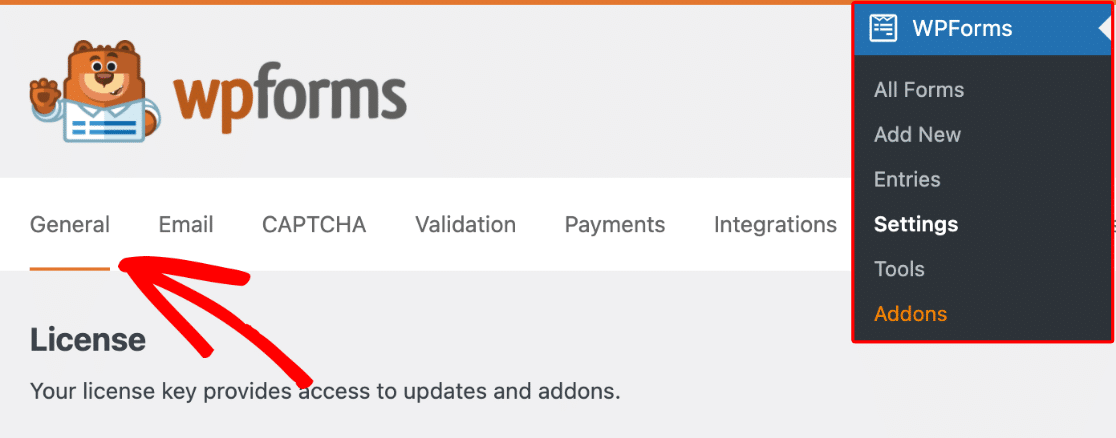
On that page, check the box to Use Modern Markup.

Don’t forget to save your settings once you’ve completed this step.
3. Create Your Form
Now it’s time to create your form! Click on the Add New button from your forms overview to get started.

There are hundreds of form templates you can use or customize. You can also create your form completely from scratch if you like.
Once you make your selection, you can build or customize your form in the user-friendly WPForms drag-and-drop builder.
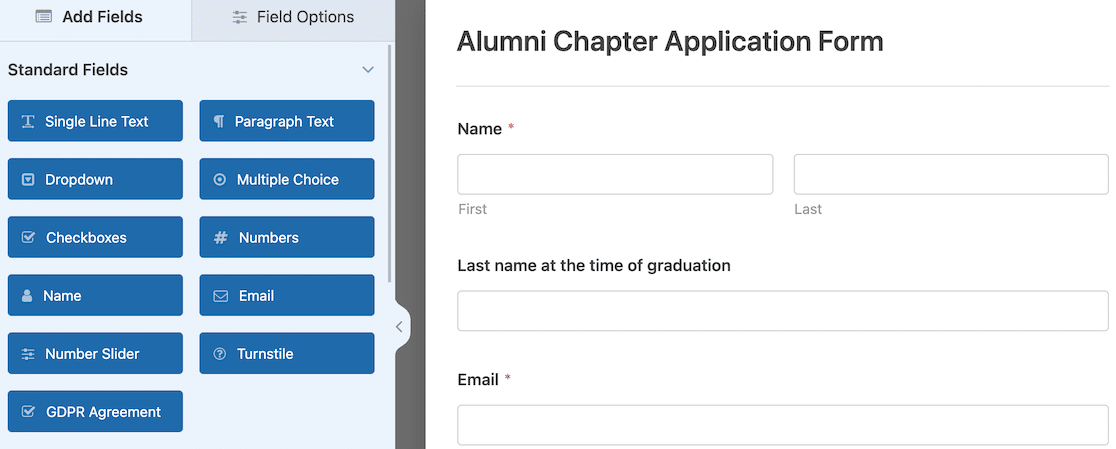
Need a little guidance? No sweat. We have a doc to teach you how to create your first form.
4. Embed Your Form
When you’re finished creating your form, it’s time to embed it on your site. You have to complete this step to access the form styling options.
The easiest way to embed your form is to click the Embed button at the top of the form builder.

A modal popup window will open, asking you to select the page where you want to embed the form. You can select an existing page or create a new one.
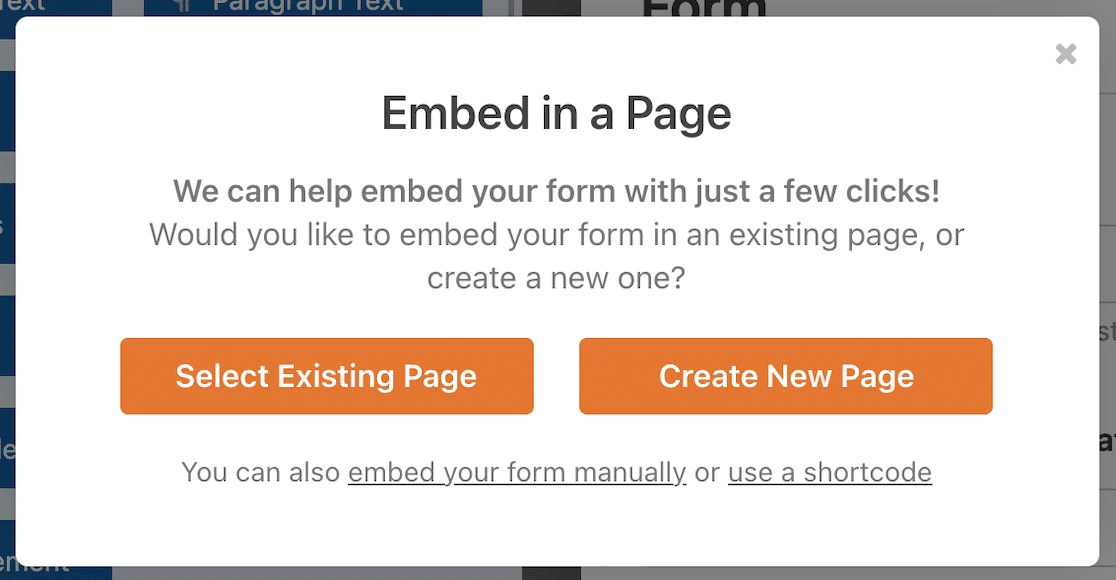
If you click the Select Existing Page button, you’ll get a dropdown where you can select from your existing pages.
If you select Create a New Page, you’ll have the opportunity to name your new page.

You can also embed your form using a widget or shortcode.
Click on the Let’s Go! button and the draft page will open with your embedded form in place.
5. Style Your Form
Now it’s time for the fun part: styling your form! Click on the form in the block editor, and settings for that block will open in the sidebar on the right. These are your form styling options.
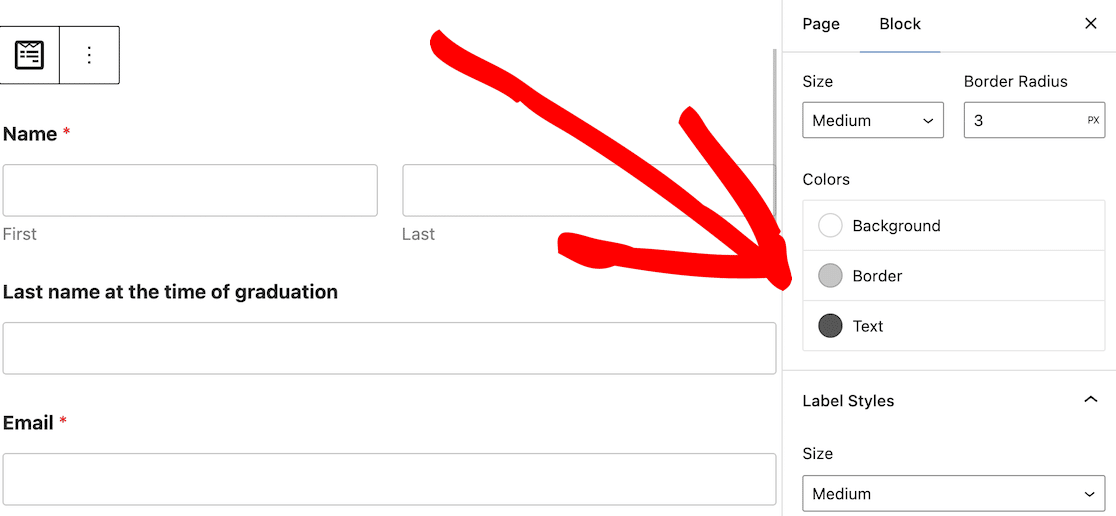
There are 3 main form elements that you can style: field styles, label styles, and button styles.

Let’s look at what each one does and how you can adjust the form style.
Field Styles
Field Styles is where you adjust input field size, border radius, and colors. If you want to make your form match others elsewhere on your site, this is where the look begins to take shape.
This is what the default style settings will look like.
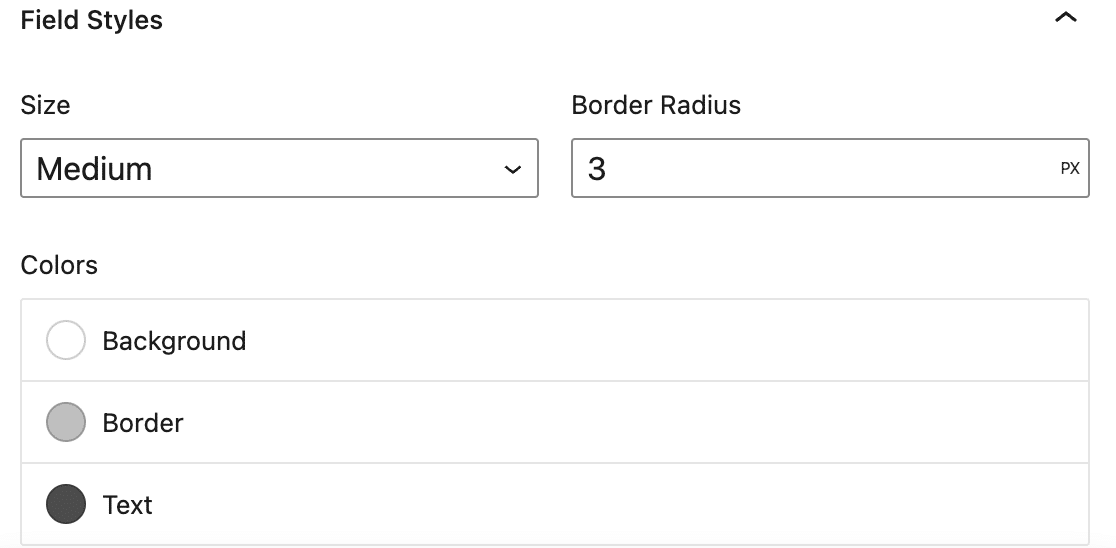
Changes are easy to make. The dropdown will let you change the field size if you want a smaller or larger field than the default.
The border radius lets you control how rounded your field edges are. The higher the number, the more rounded your field borders will be.
The colors let you decide if you want a different background, border, or text color.
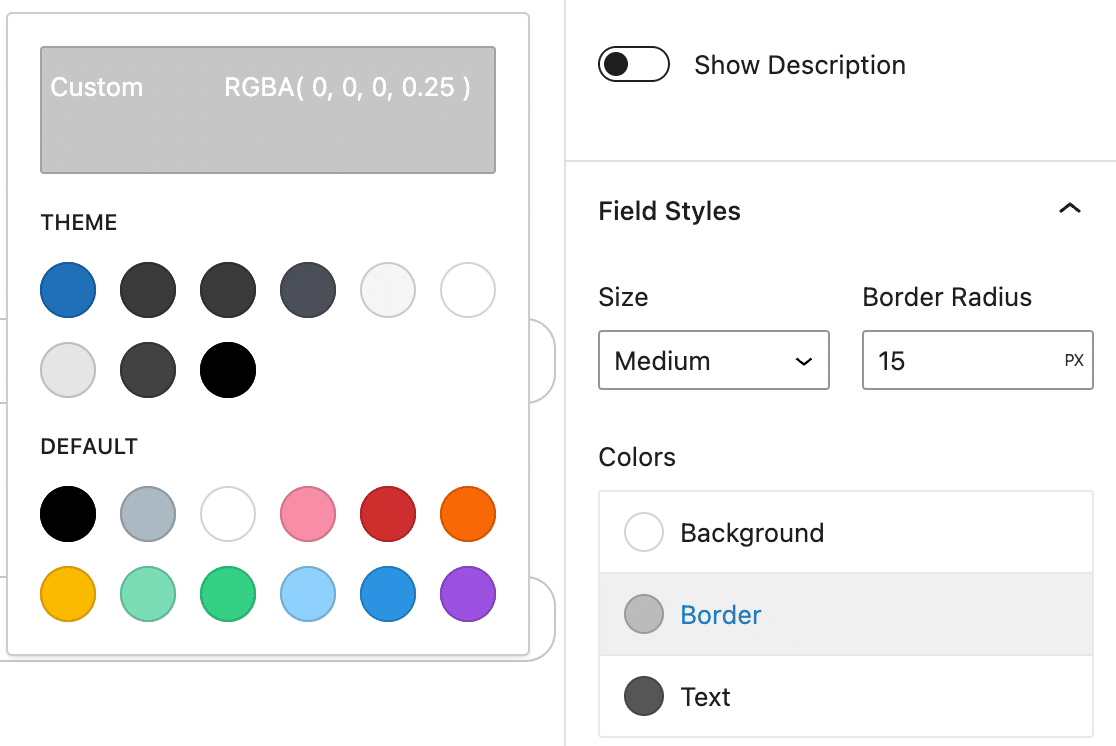
If you want to make sure the form blends seamlessly with your WordPress theme colors, you can choose from those options. The colors you see there will depend on the theme you’re using.
There are also default colors you can select.
The custom color at the top lets you highly customize your form field colors. You can use the color picker, enter a hex code, and adjust the opacity.
This is how we updated our field border color.
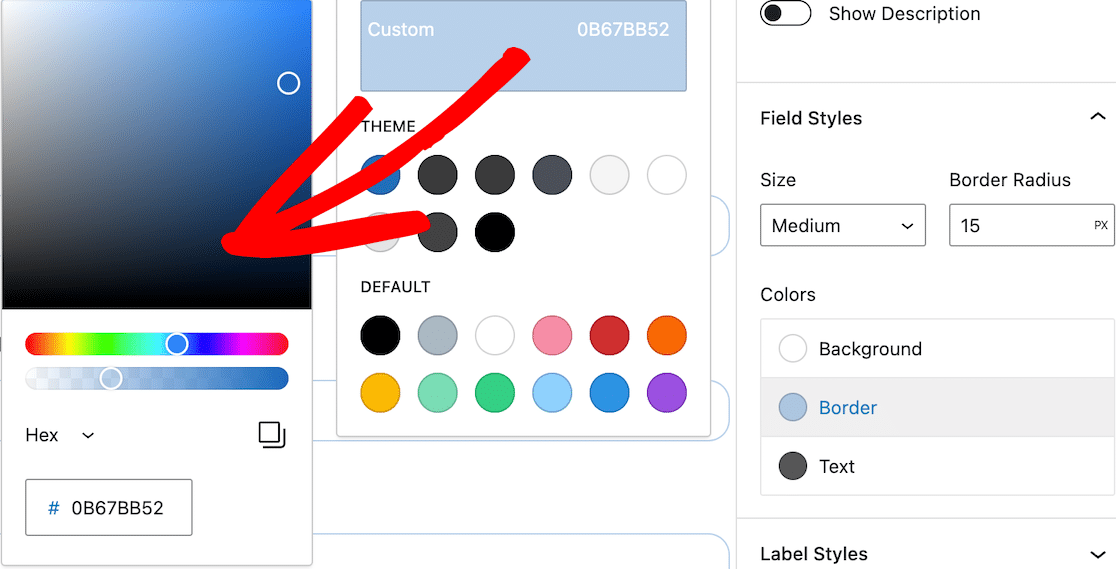
Once you’ve made your updates, you should see those changes immediately reflected on the form in the block editor. Then it’s time to move on to editing Label Styles.
Label Styles
Labels are the text that appears above a form field. For example, Name or Email Address. Adjust the label styles to control the size and color of labels on your form and create a consistent look across your site.
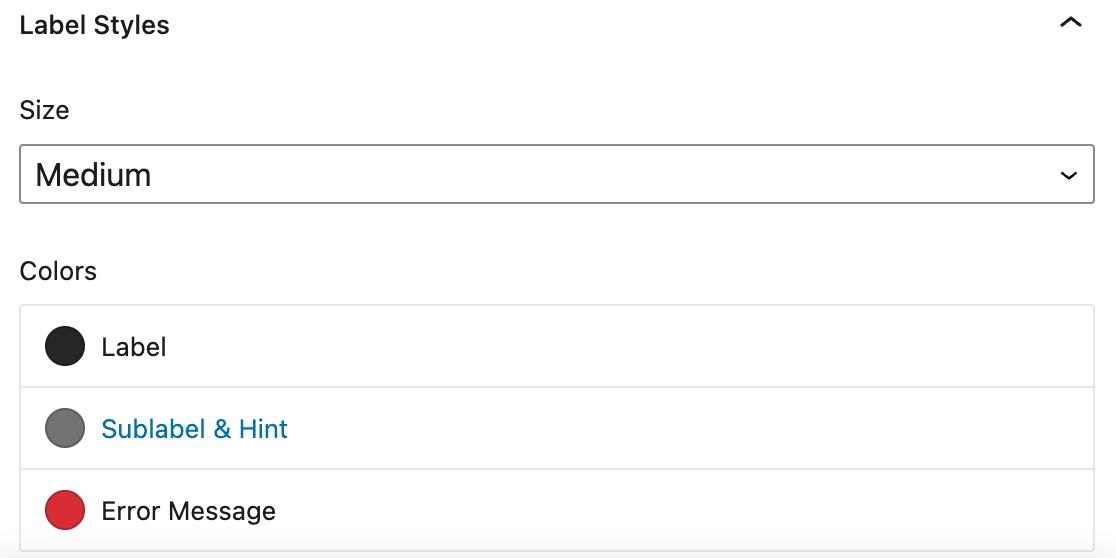
Adjust the label size to change the size of the text. In addition to changing the label color, you can change the sublabel and hint color. This text appears below the field to prompt specific information.
The error message color is for messages that appear if there’s a problem with the form submission, such as missing information. The same color is used for the asterisk to denote a required field.
Note that placeholder text remains light gray by default.
As you did in the form fields section, you can use default colors, theme colors, or use the color selector to choose a custom color for your label styles.
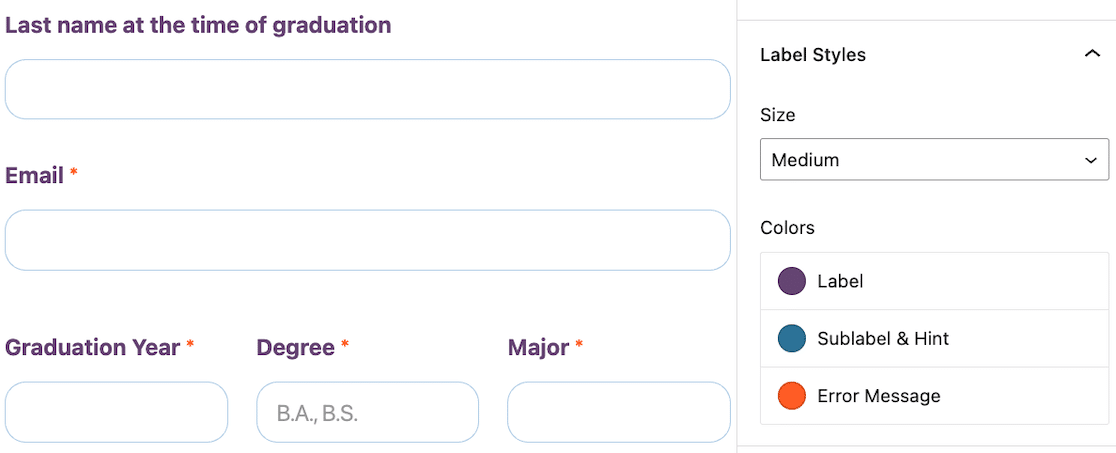
Here are the updates we made to our example form.
Button Styles
Edit button styles to change the size, border radius, and color. This allows you to make sure your buttons always stand out and match the other buttons on your site.
Here’s what the default style settings look like.
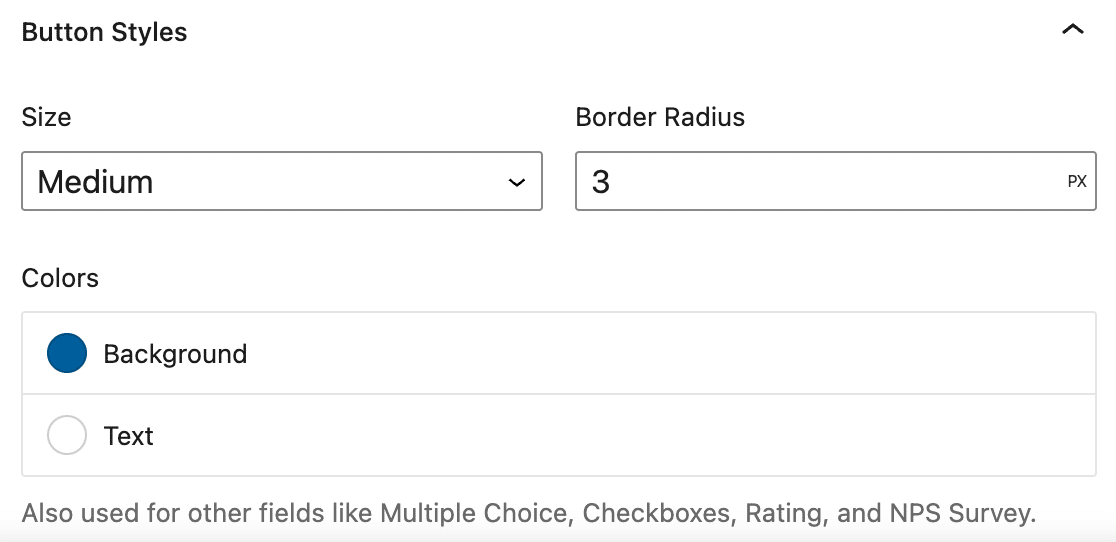
Note that your button color choices will be used on other form fields like multiple choice questions, checkboxes, and NPS surveys.
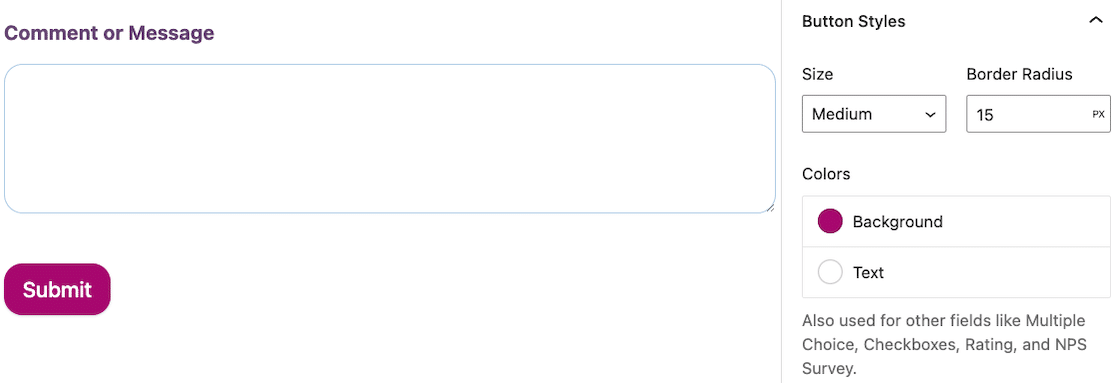
We adjusted our submit button to have rounder edges to match our fields, and we updated the background color.
Now, you could be done here. At this point, your form is styled.
But there’s one more form styles feature we want to show you.
Advanced
Below the field, label, and button styles, there’s another section for Advanced. Don’t let the name fool you; it’s still easy to manage!
Open it and you’ll see a lot of custom code.
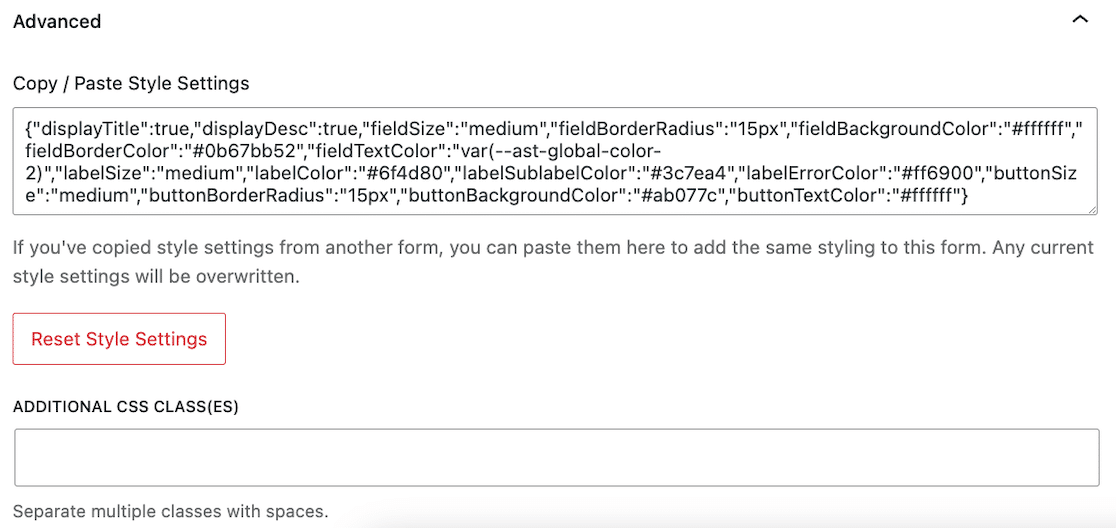
As you style your form, your custom CSS code is automatically generated. If you want to use this exact same form style on every form on your site, you can copy this code and paste it into the form style advanced settings in each one. Within seconds, your forms match.
If you want to reset your form styles back to default, you can click the Reset Style Settings button.
And if, after all of that simple form styling, you still want to make some additional customizations to your style sheet, there’s still a field for Additional CSS Class(es).
And that is truly it! You’ve styled your form and it was super easy, right?
Don’t forget to save and test it before you publish it!
Next, Connect Your WordPress Forms to ChatGPT
Curious about how you can automate your workflow when it comes to forms? Find out how to connect ChatGPT to your WordPress forms and streamline replies with AI.
Looking for a way to make your forms more appealing? Check out our tips on creating interactive forms that grab users’ attention.
Create Your WordPress Form Now
Ready to build your form? Get started today with the easiest WordPress form builder plugin. WPForms Pro includes lots of free templates and offers a 14-day money-back guarantee.
If this article helped you out, please follow us on Facebook and Twitter for more free WordPress tutorials and guides.
The post How To Style Contact Forms in WordPress appeared first on WPForms.source https://wpforms.com/how-to-style-contact-forms-in-wordpress/

