
Are you looking for affordable ways to accept credit card payments online?
Whether you’re an eCommerce store or offer a service, it’s important for small business owners to support credit card payments in order to make sales online.
However, many credit card payment options can be costly with high payment processing fees for small businesses.
In this post, we’ll discuss low-cost credit card and debit card payment solutions and how you can integrate your website with one.
Are There Truly Free Credit Card Payment Processors?
No, credit card payments are never 100% free. Credit card networks and banks always charge a fee to process payments. If you do come across a “free” credit card payment solution, it’s unlikely to meet quality and security standards, and you run the risk of damaging customer experience if you opt for such services.
That said, you can minimize your costs by choosing a high-quality but low-cost credit card processor like Stripe.
You can build payment forms with the free WPForms license and integrate it with Stripe, paying only a small fee per credit card transaction.
Now that we have more clarity about credit card payment services and their associated fees, let’s consider how you can pick the right credit card payment gateway for your online store, eCommerce platform, or even a basic website.
How to Choose an Online Payment Processor
There are several factors to consider before you choose a credit card payment gateway for your online business.
- Security and reliability: It’s vital to ensure that the payment gateway you’re selecting uses the best security practices. The top payment gateways use robust security features like encryption, fraud detection, and authentication to protect businesses as well as customers, massively reducing the risk of chargebacks.
- Fees and costs: All processors and issuing banks charge fees for processed transactions. However, these fees don’t have to be costly. Processors that charge monthly fees may not be ideal for small businesses. But there are good options offering affordable pay as you go pricing without additional costs like merchant account fees.
- Integration and compatibility: Make sure that the payment gateway is supported by your website platform. Plus, it should have an easy setup process and integrate seamlessly. Otherwise, you’ll likely lose valuable time with a complicated setup and encounter technical difficulties later.
- Additional payment options: Customers are likely to convert more when they see a preferred payment option. This is why it’s helpful to use a payment gateway that supports multiple payment methods and credit card networks like Visa, MasterCard, Discover, American Express, Google Pay, Apple Pay, and more.
- Checkout experience: The checkout interface should be user-friendly and responsive. A poorly designed interface and lead to abandonment and limit your sales potential. Top-quality payment processors take great measures to maintain a strong user experience.
There aren’t many credit card payment processors that meet all of these requirements. But we’re going to recommend one that does.
How to Set Up a Low-Cost Online Payment Gateway For Your Site
Among the available payment processors, we strongly recommend Stripe as the most affordable payment service provider for small businesses.
Plus, Stripe easily integrates with WordPress. But you’ll need a form plugin that supports Stripe in order to build payment forms and take credit card payments.
WPForms Lite is the ideal form builder for this job. That’s because it’s a free WordPress plugin and comes with a native Stripe integration.
Here’s how you can accept payments with Stripe on your WordPress site.
Step 1: Install WPForms
WPForms is the most user-friendly WordPress form builder plugin with a rating of 4.9 out of 5.0 stars.
Although WPForms Lite is a free plugin, there’s always a credit card processing fee associated with all services. The good news is that this integration only charges a nominal 3% fee per transaction + Stripe fees. Plus, additional fees will disappear if you upgrade to WPForms Pro.
To install WPForms Lite, open your WordPress dashboard and go to Plugins » Add New.

Search for WPForms in the search bar and then click on the Install Now button next to WPForms.
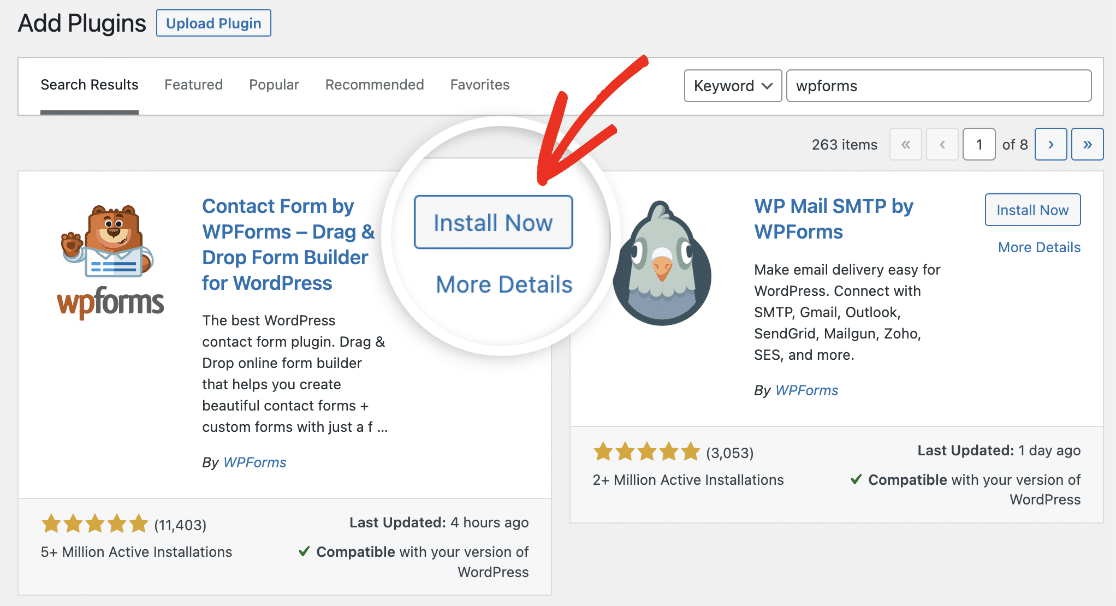
It will only take a few seconds for the installation to complete. After the plugin is installed, click on the Activate button.
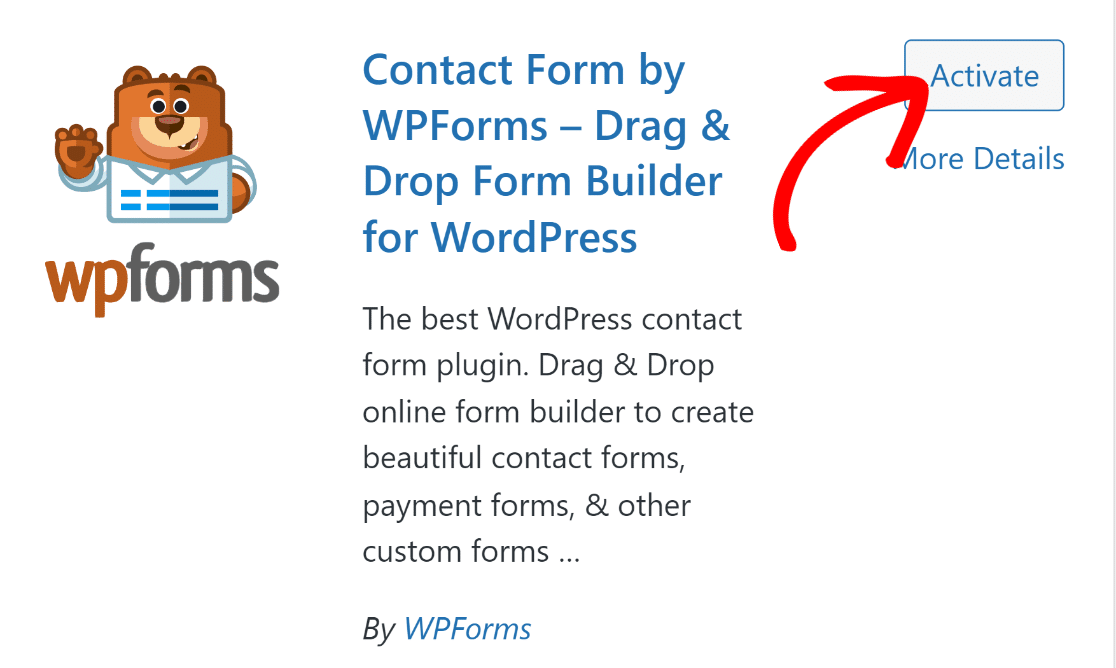
Great! WPForms Lite is now ready on your site.
Step 2: Connect WPForms with Stripe
After WPForms is installed on your site, it’s time to integrate it with Stripe.
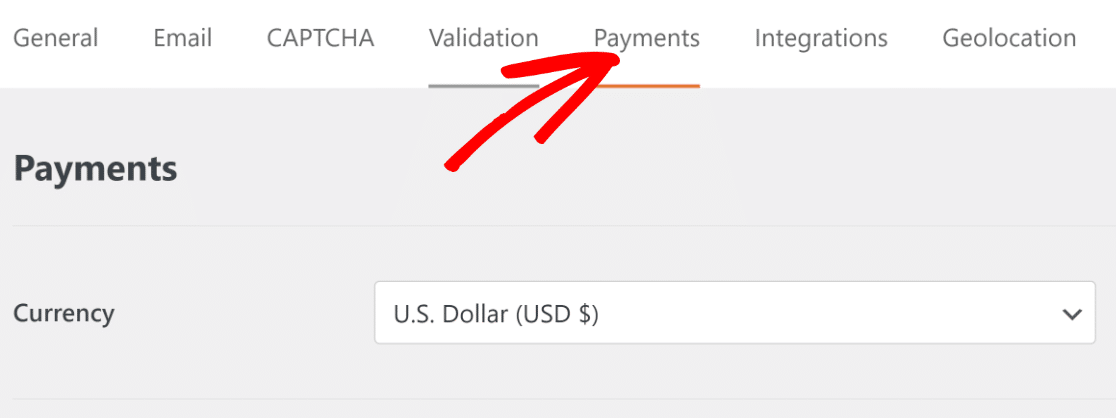
Open the sidebar admin menu in WordPress and click on WPForms » Settings.

Once inside settings, go to the Payments tab in the horizontal navigation bar.
Scroll down and click on the blue Connect with Stripe button.
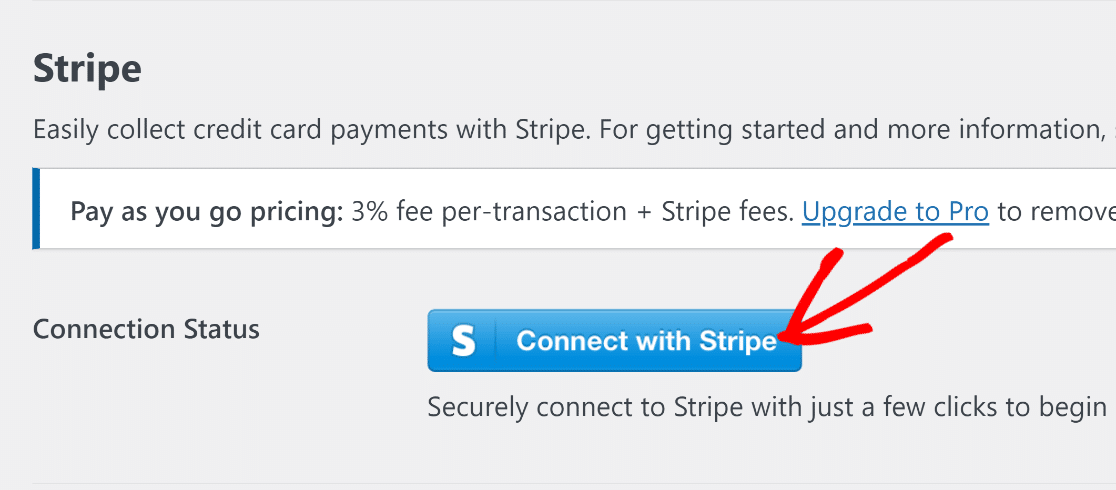
This will take you to the Stripe login page. Simply enter your login credentials to connect Stripe with WPForms.
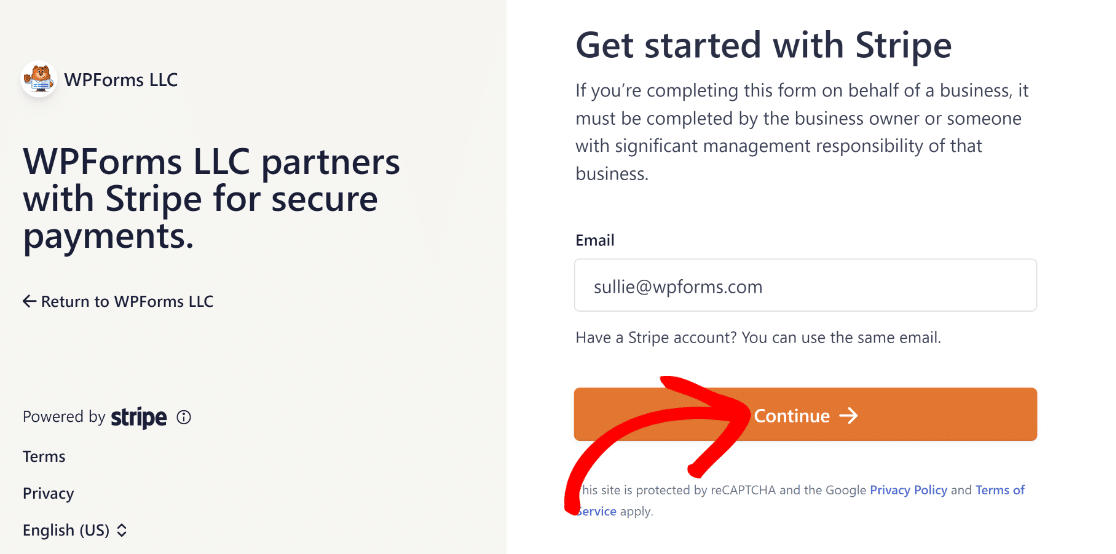
If you don’t yet have Stripe, you can also create a new account from this page.
Once you’ve connected your Stripe account with WordPress, Return to the Payments settings in WPForms, The Stripe Connection status should confirm that you’re now successfully connected.
It’s a good idea to use your Stripe connection in Test mode first to ensure the integration works as intended. You can use the checkbox to enable Test Mode.
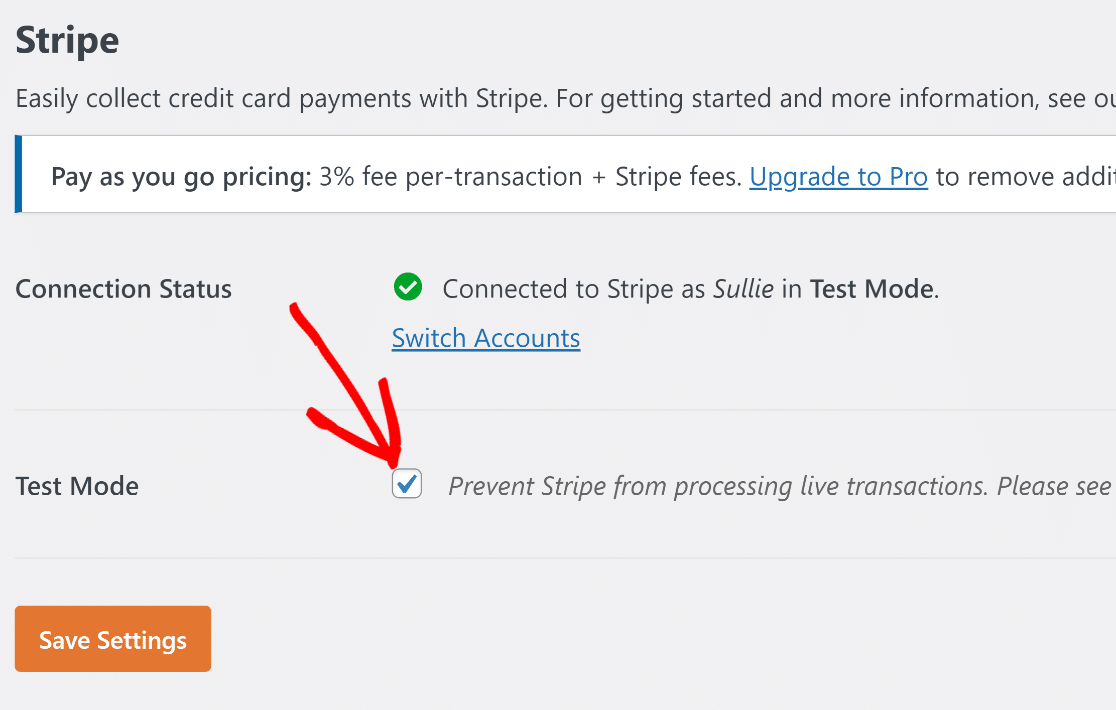
When you’re done here, go ahead and press Save Settings.
Great! Now it’s time to create a payment form where customers can place orders and pay you with credit cards directly via the form.
Step 3: Choose the Stripe Payment Form Template
Creating payment forms with WPForms is incredibly easy. Simply open your WordPress dashboard and navigate to WPForms » Add New.
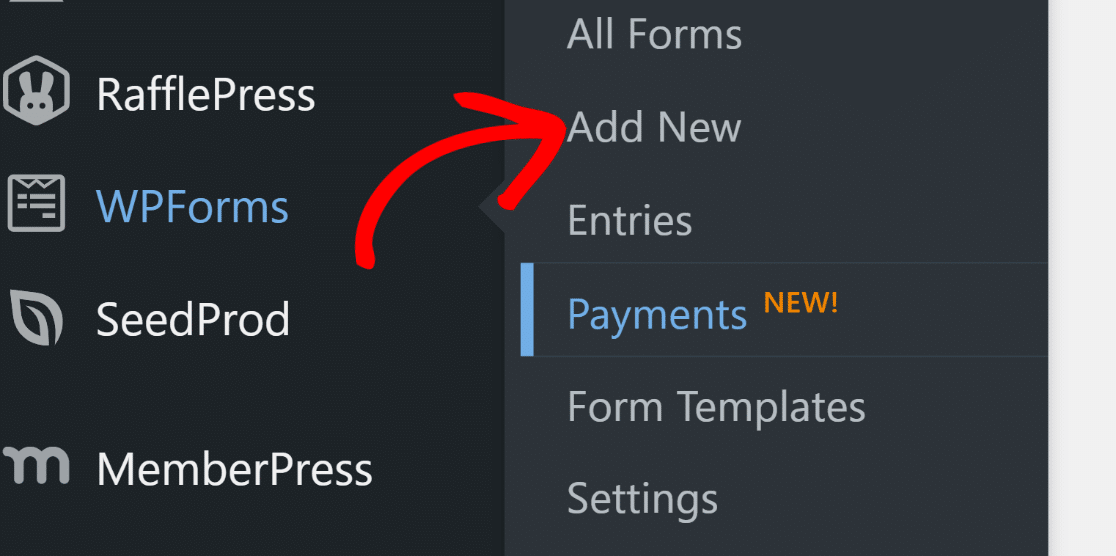
This will take you to the form builder screen. Enter a name for your form and select a form template. the Stripe Payment Form template would be ideal here, so we’re going to choose that.
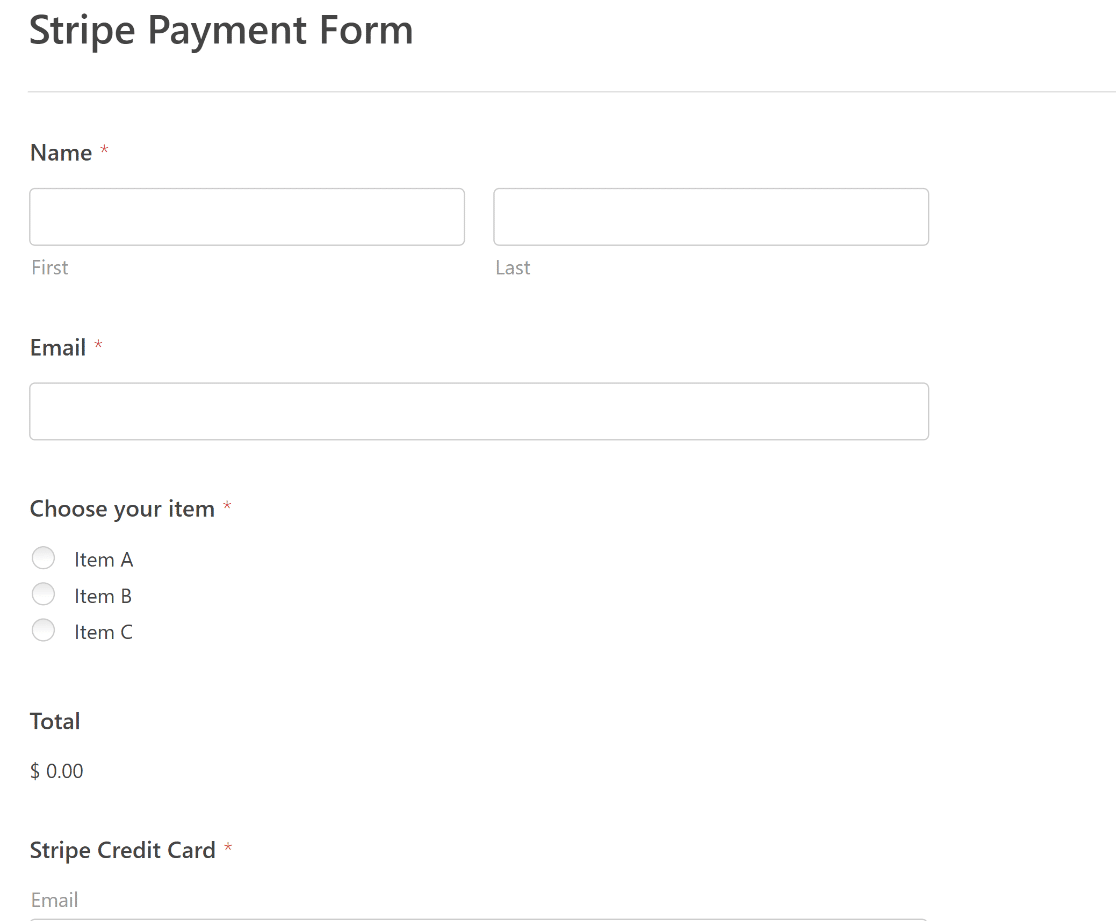
Once your template loads, you can customize the form by adding fields and changing their settings.
For the purposes of this tutorial, this form has all the fields we need, so we’ll use it as-is. In the next step, we’ll configure the Stripe settings for this form.
Step 4: Configure Stripe Settings
You’ve already added the Stripe credit card field to your form. But you’ll still need to enable Stripe payments in the payment settings before you can take credit card payments.
This is easy to do. From the form builder screen, go to Payments » Stripe.
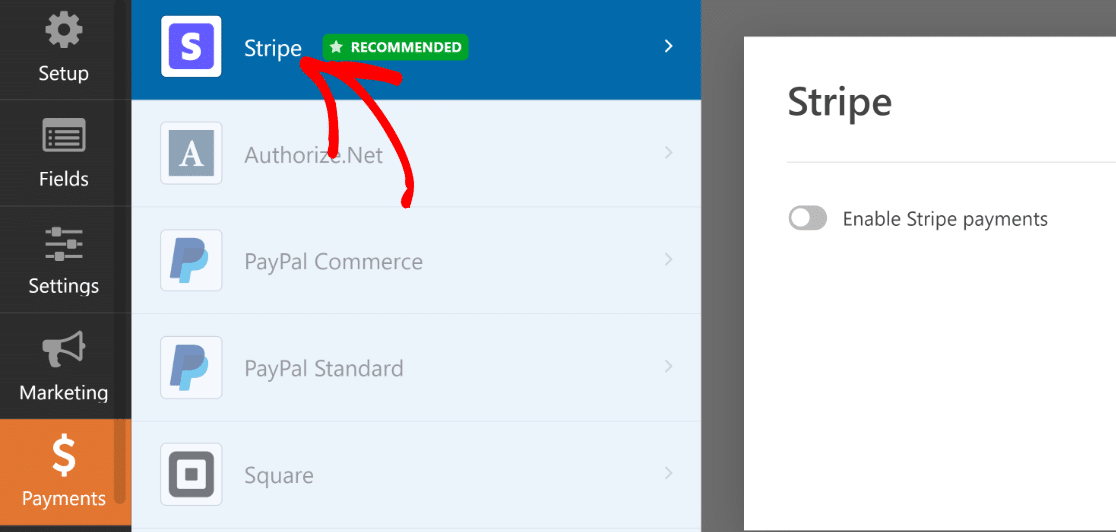
You’ll find a toggle button here to Enable Stripe Payments. Click on it to reveal optional settings.
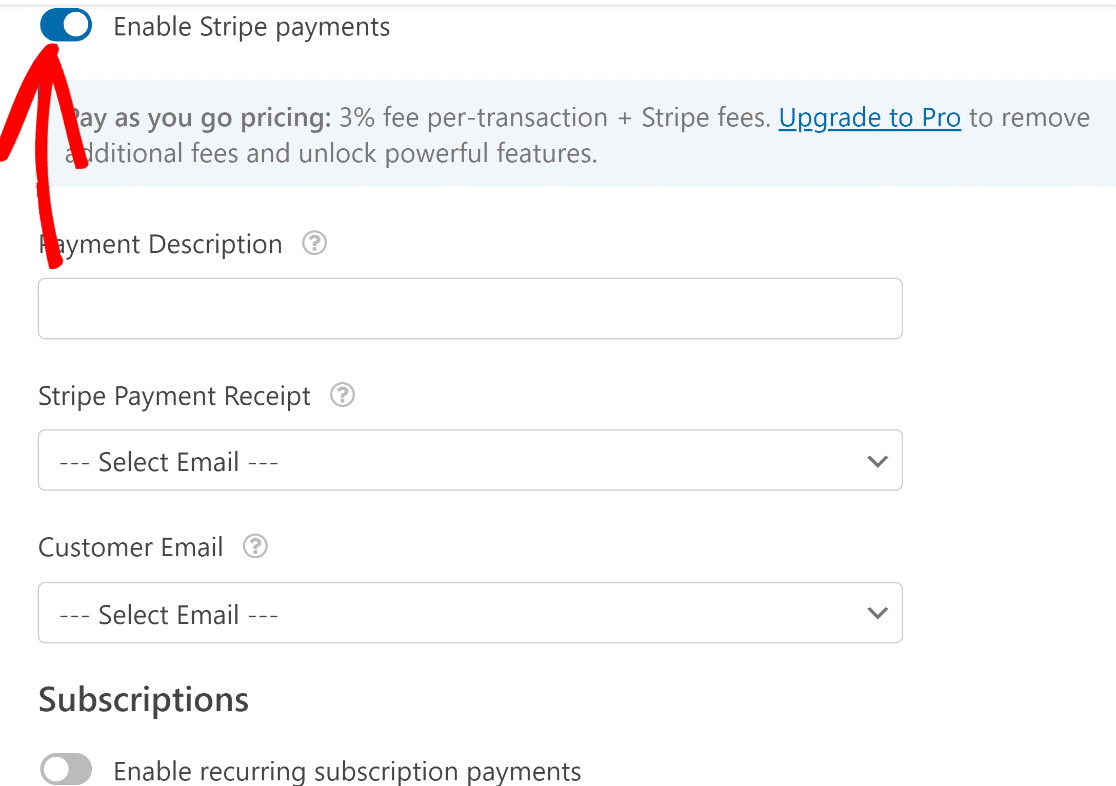
Since the settings are optional, you can leave the fields blank. But if you want, you can:
- Enter a payment description
- Select the customer email field to send a receipt from Stripe on form submission
- Select the customer email field to add to your Stripe account for record-keeping
These optional settings apply to one-time payments only, which is the default mode in Stripe.
But the great thing is that Stripe also supports recurring subscription payments, so customers won’t have to enter their card information every time to stay subscribed.
It’s a hugely helpful feature for signing your customers up for a subscription plan or a recurring donation. Just turn on the Enable Recurring Subscription Payments toggle button.
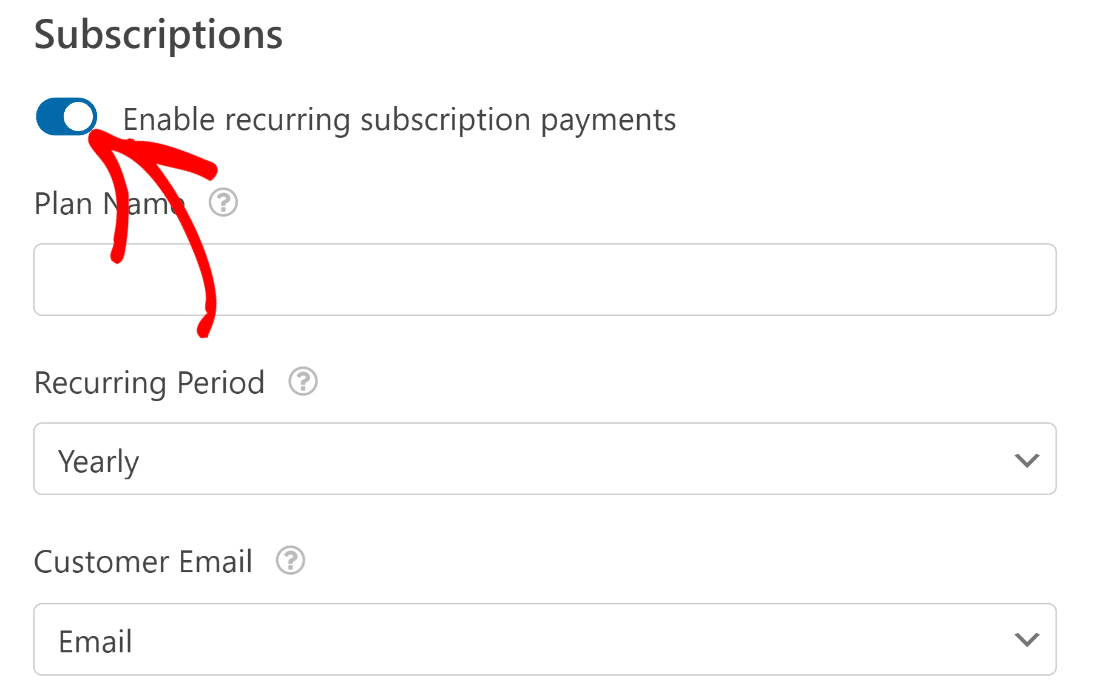
When you enable subscriptions, you’ll see additional options appear underneath. Use these options to define your subscription plan name, set the recurring period, and select the customer email field.
With the Pro license, you can even set up conditional logic to display both one-time and recurring payments in the same form, depending on user choices.
Once you’re done with the settings, press Save at the top of the form builder.

Excellent. We’re close to wrapping this up!
Step 5: Edit Notifications and Confirmations
Setting up fields is one component of building your forms. Another important component is setting up messages and notifications to display after your user submits a form.
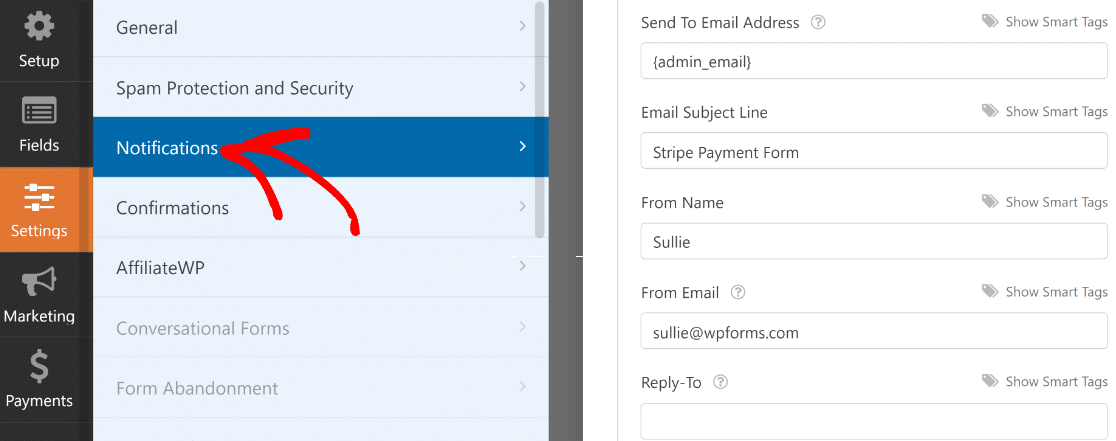
WPForms sends a notification to your default admin email by default with details of each entry. You can change the subject and message of the notification as well as the recipient from the Settings » Notifications menu.
Next, click on Confirmations. You can display a success message immediately after form submission or redirect to a separate Thank You page if you want.

After setting up your confirmations, press Save at the top. We’re almost finished now.
Step 6: Publish Your Form to Accept Credit Card Payments
Now that we’ve put together a payment form, it’s time to publish it.
You can quickly publish any form using WPForms’ embed wizard. Simply click on the Embed button at the top to begin this process.

At this point, you’ll see a modal asking where you’d like to embed your form. For this tutorial, we’ll embed the form in a new page by selecting Create New Page.

Type in a name for your page, and then press Let’s Go.

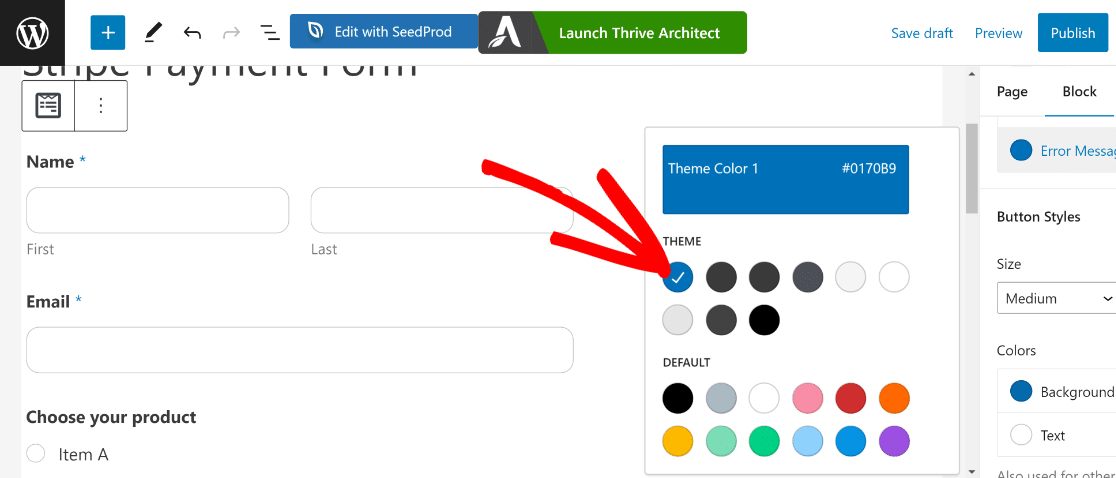
.You’ll now find the WordPress editor open, containing your payment form within. Here, you can use form styles by clicking on the form to open additional block options on the sidebar.
Use these options to change the appearance of your form and make it more visually appealing.
When you’re happy with how your form looks, go ahead and press Publish.

Depending on your theme and styling, your form would look something like this from the frontend:
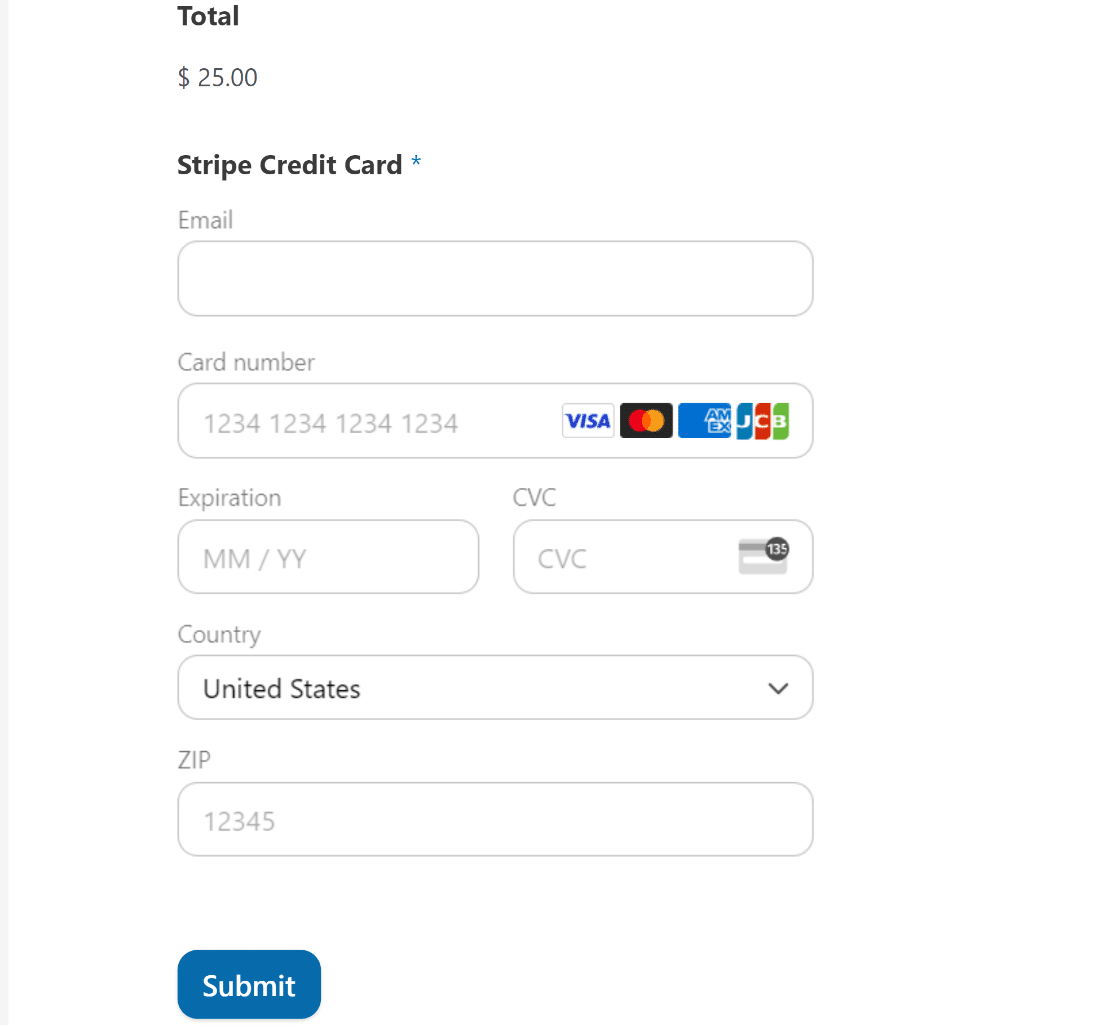
If you’re using the Test Mode in Stripe, you can go ahead and make test payments to make sure everything is working as intended.
You can go back to the Payments tab in WPForms main settings to switch between Live Mode and Test Mode of Stripe payments.
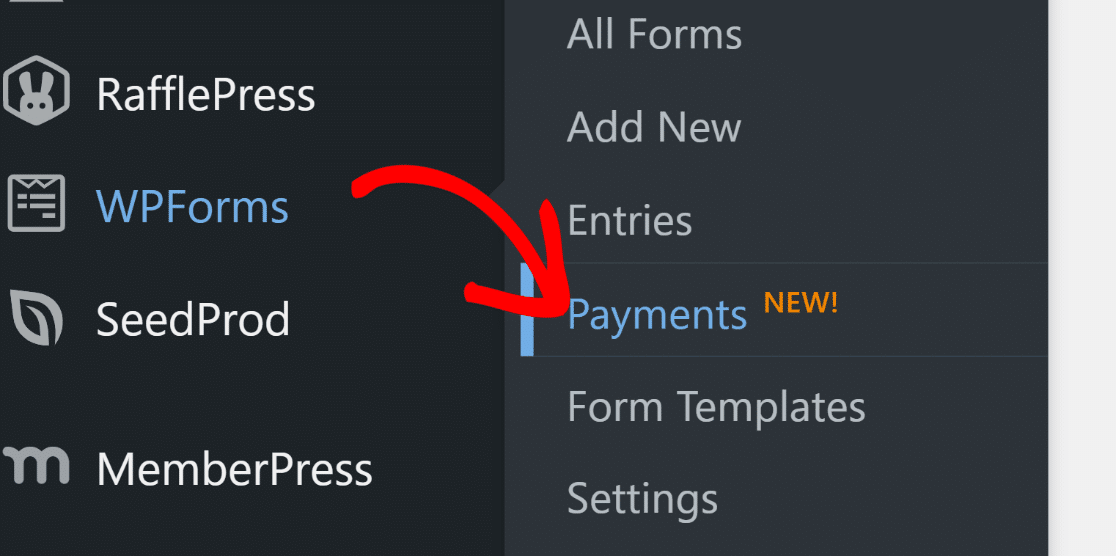
Step 7: Track Your Online Payments
Once you start making sales with Stripe on your website, you can view your entire sales history and trends within the WordPress dashboard.
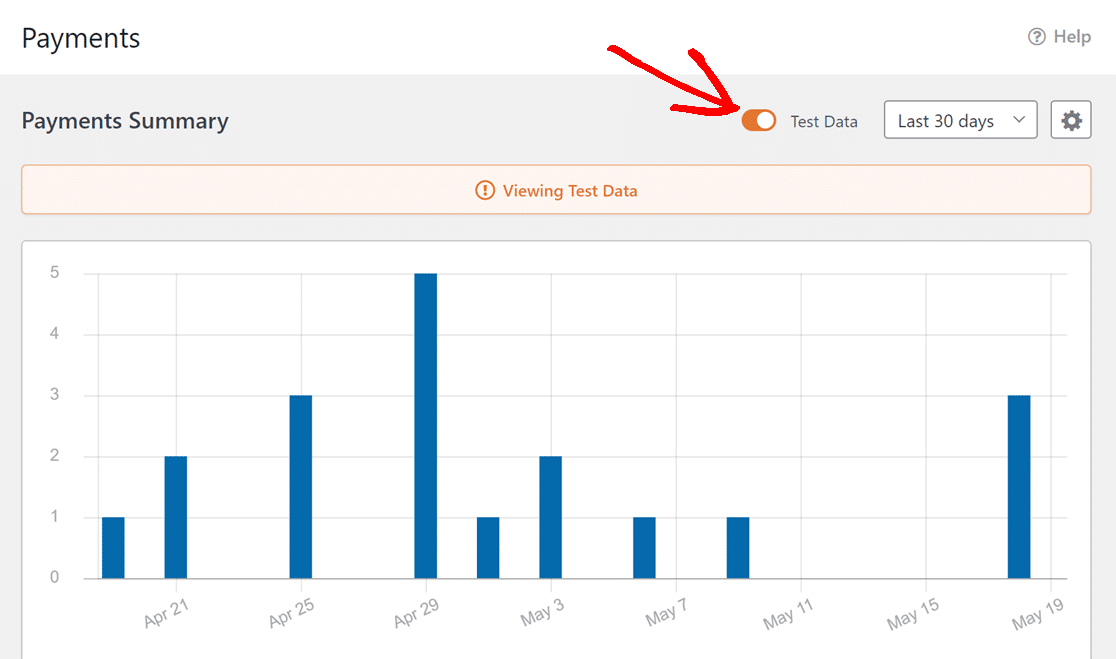
This payments summary is accessible via WPForms » Payments.
With this payment summary, you can get a visual overview of your sales performance over time.
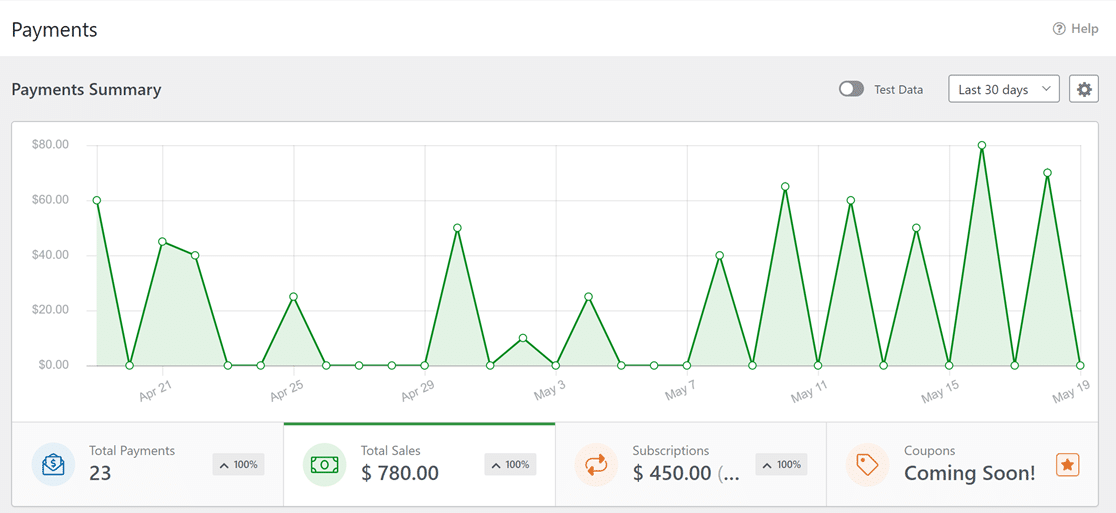
It’s a massively helpful tool for monitoring your subscriptions, total payments, and sales value in dollars.
If you haven’t started accepting live payments yet, you can just view the test payment data by toggling on the test button.
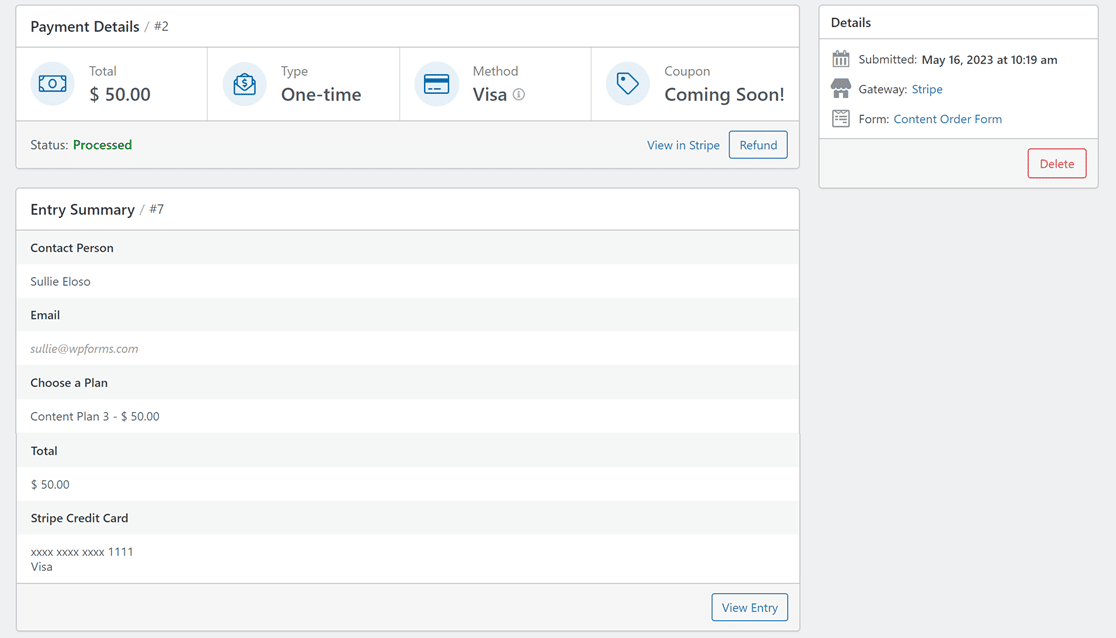
You can also see an overview of your payments in the table under the chart.
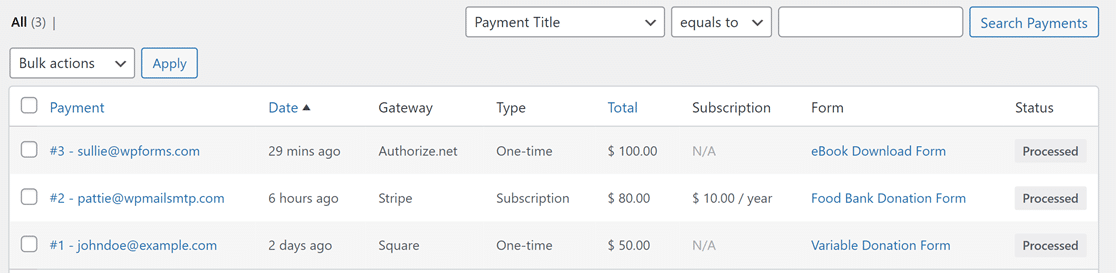
If you click a specific entry here, you can see further payment details and entry data as filled out by that individual user.
And that wraps it up.
You’re now ready to start accepting credit card payments online. Even though there’s no completely free online solution, using WPForms Lite with the Stripe integration is the most affordable payment solution for small businesses.
FAQs
Still wondering about the best ways to accept online credit card payments at the lowest costs? Here are a few questions we’re commonly asked related to that.
Should I Use ACH Payments to Save Costs?
ACH payments are different from credit card transactions. An ACH payment occurs when there’s a direct transfer of money from one bank to another.
The advantage of ACH is that it incurs lower transaction fees compared to credit card payments. In fact, some money transfer apps like Venmo use ACH to send money for free.
While ACH attracts new businesses because of its low costs, it’s also one of the least reliable methods of payment.
Typically, an ACH payment can take 4 or more work days for a transfer to complete. As such, there’s a much larger risk of failed payments and disputes if you rely on ACH for your business.
For this reason, we recommend using Stripe with the free version of WPForms. This way, you enjoy low transaction fees without compromising on user experience or the reliability of your checkout system.
Stripe payments are instant and secure, minimizing the risk of processing delays and disputes.
Do I need a Merchant Account to Process Online Payments?
You don’t need a separate merchant account with payment service providers like Stripe and PayPal. This is because these services function much like a merchant account and even add much more flexibility than a traditional merchant services account.
Next, Leverage These Cart Abandonment Email Examples
Cart abandonment is a problem that every business faces. While you can’t fight abandonment, you can remarket to abandoning customers and persuade them to make finishing making that purchase. Check out these cart abandonment email examples and use these to get your lost customers back.
Also, are you wondering how Everest Forms compares with WPForms? Learn about these plugins in our detailed Everest Forms vs WPForms guide.
Create Your WordPress Form Now
Ready to build your form? Get started today with the easiest WordPress form builder plugin. WPForms Pro includes lots of free templates and offers a 14-day money-back guarantee.
If this article helped you out, please follow us on Facebook and Twitter for more free WordPress tutorials and guides.
The post How to Accept Credit Card Payments Online for Free appeared first on WPForms.source https://wpforms.com/how-to-accept-credit-card-payments-online-for-free/
