
Are you looking to create a request a quote form for your WordPress site?
A quote request form is a handy tool that allows customers to contact you and get an accurate quote for the services they require from you.
Fortunately, it’s very easy to get started with the perfect quote request form.
In this article, we’ll show you how to create a request a quote form in WordPress.
Create Request a Quote Form Now
What Is a Request a Quote Form?
A request a quote form allows leads to specify their service/product requirements and get accurate pricing information from you.
For example, if you offer home decor services, then your quote will depend on the extent of the job required by your client.
When your service has variable pricing, it’s usually a good idea to use a request quote form, so both parties (client and business) know what’s expected of them.
The best part of a request a quote form is that it’s very effective for collecting leads. With every request for a quote that you receive, you’ll also have a new lead that you can convert to grow your business!
How to Create a Request a Quote Form in WordPress
We put together a video tutorial so you can follow along with this guide.
If you’d prefer to read the instructions, here’s a step-by-step guide on creating a WordPress request a quote form.
First, we’ll show you a standard request a quote form that only collects the requests from the visitor but won’t automatically suggest any quote unless you reach out to them.
But if you want your form to be able to calculate a rough estimate based on user selections, you can also display a quote within the form. We’ll also you how to do this in an optional step at the end.
Step 1: Install WPForms
The first thing you’ll need to do is install and activate the WPForms plugin. WPForms is a powerful and easy-to-use form builder for WordPress that allows you to create all kinds of forms without needing to write any complex code.
We recommend getting the WPForms Pro license because it comes with tons of extra features, templates, and addons to help you run your business more efficiently.
For more details, follow this step-by-step guide on how to install a plugin in WordPress.
Step 2: Create a Request a Quote Form
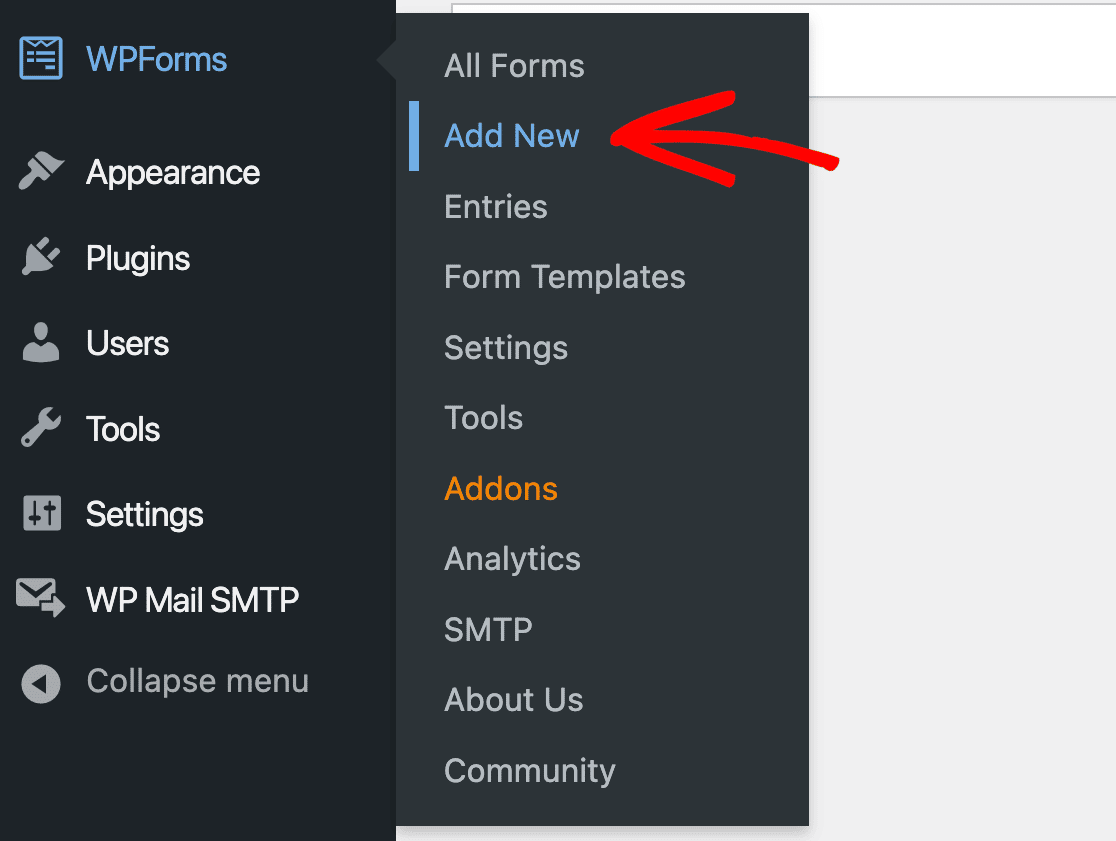
After WPForms is activated on your site, visit your WordPress admin area and navigate to WPForms » Add New to create a new form.
On the setup screen, you can name your form and choose a template. Luckily, WPForms has over 500 form templates, including a ready-to-use Request a Quote Form template which is perfect for our purposes.
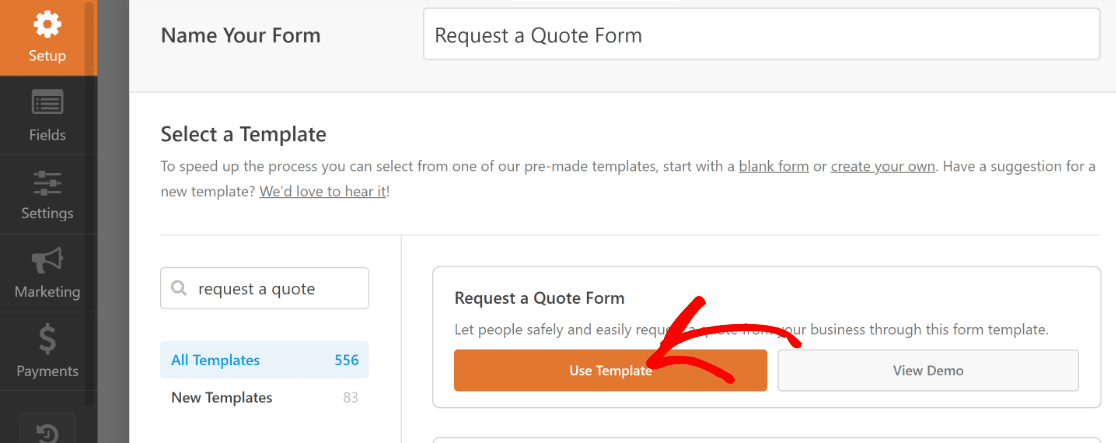
WPForms will create a request a quote form.
In the next step, we’ll customize this form template to be a good fit for a typical landscaping business.
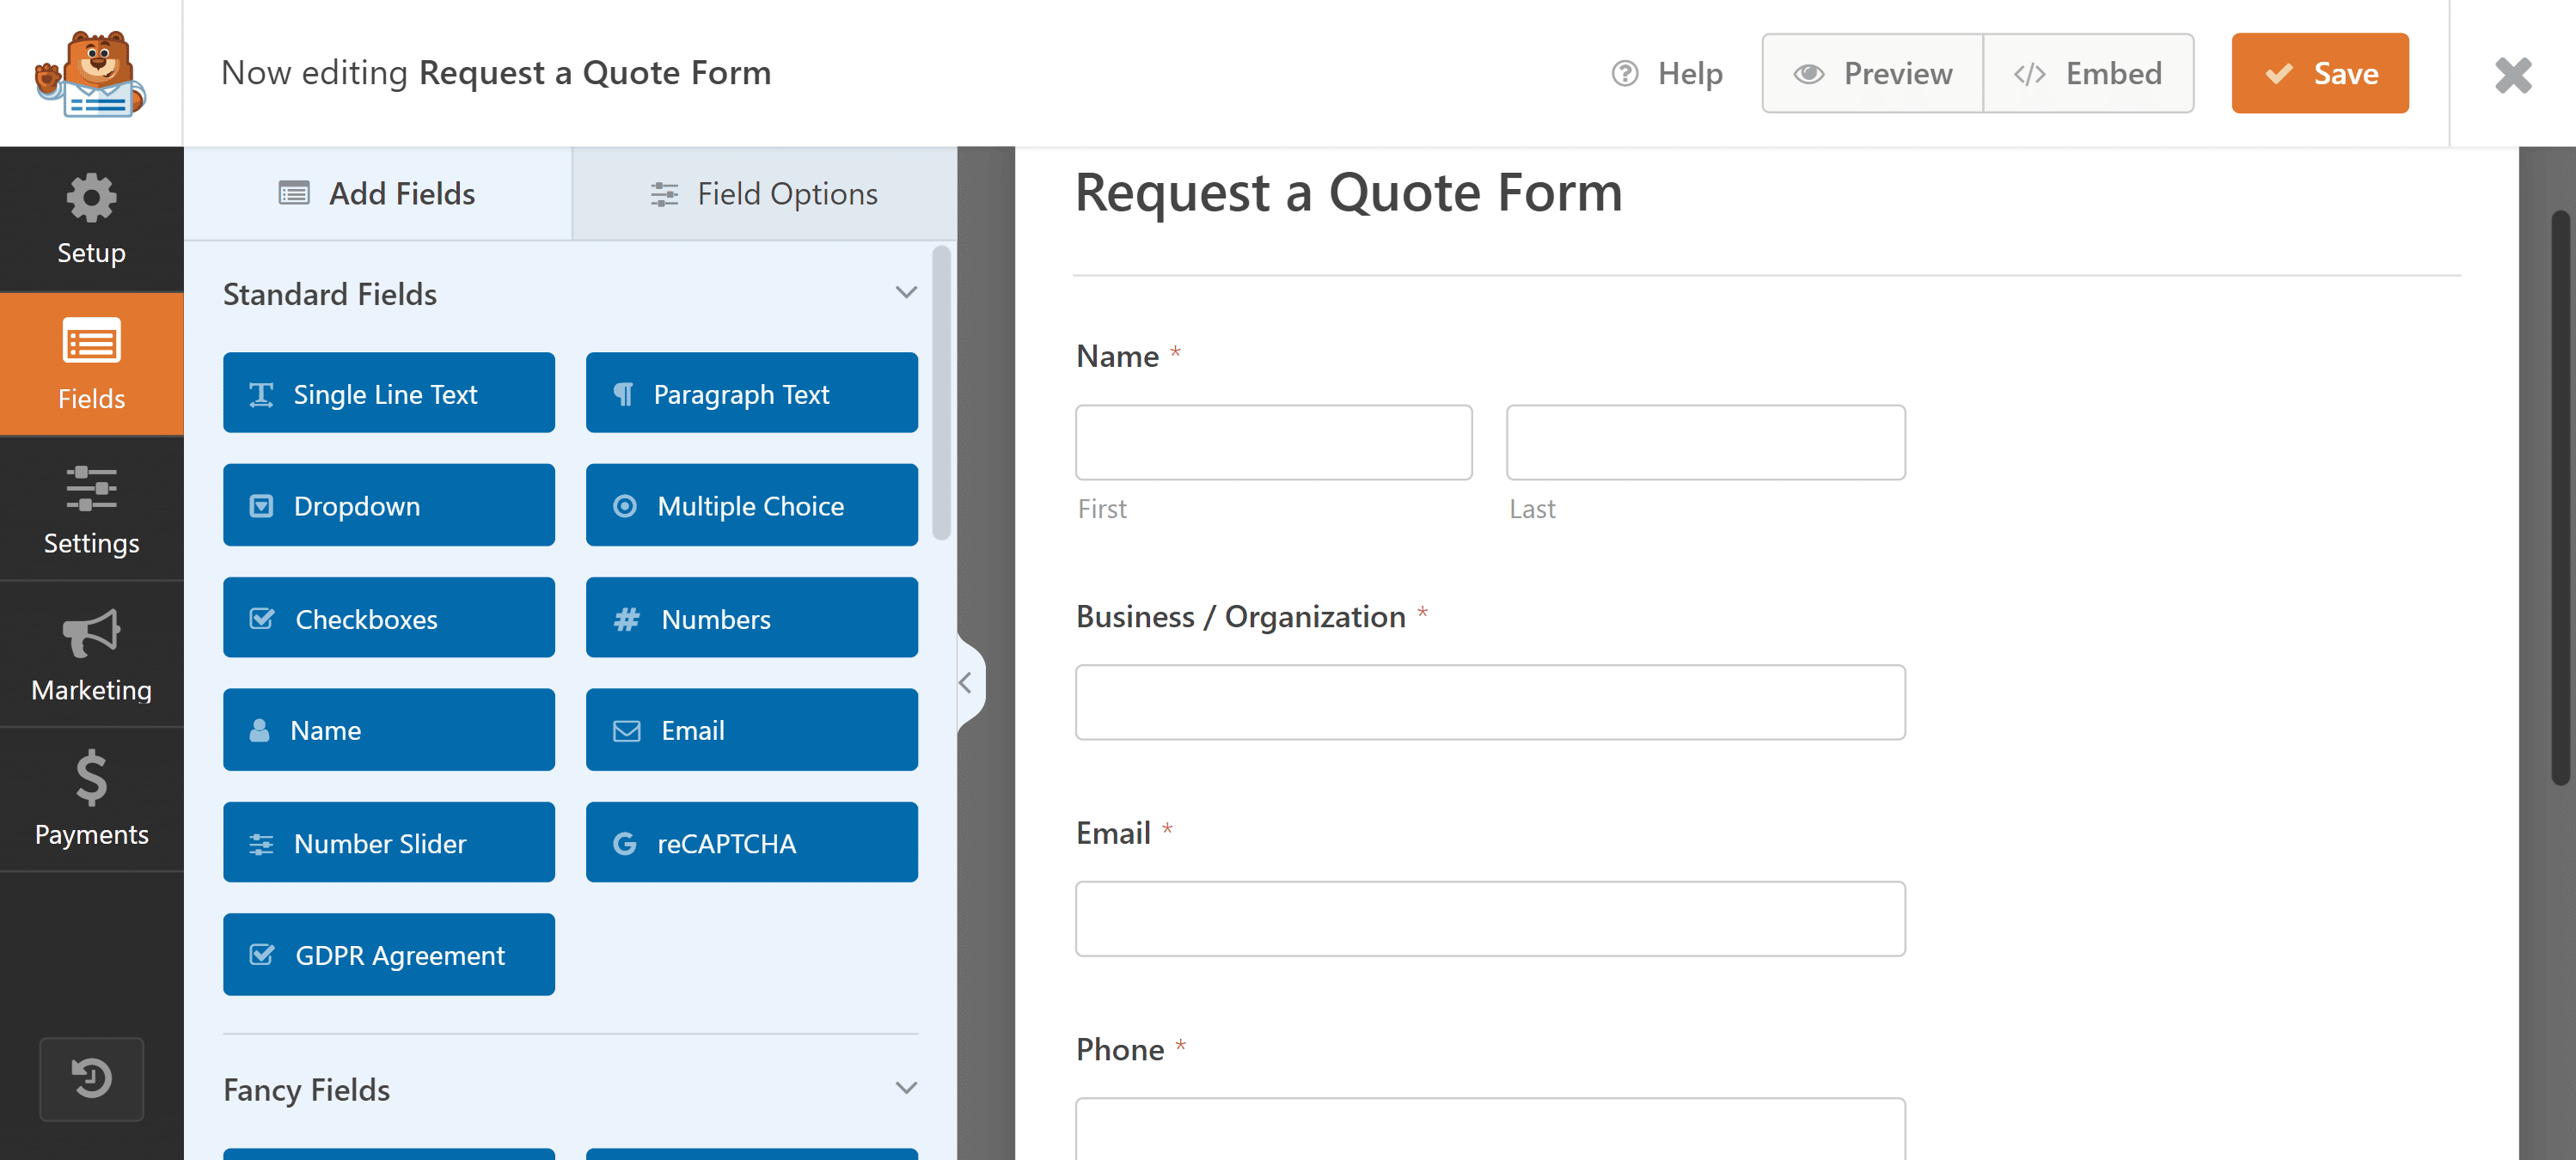
Step 3: Customize Your Quote Request Form
Assuming that we’re building this form for a landscaping business, we’ll add a Checkboxes field for services like mowing, mulching, and lawn treatment.
In the WPForms form builder, look under Add Fields on the left-hand pane and drag and drop the Checkboxes field to any area of your form on the right.

To edit your choices, click on the Checkboxes field on the right to open its Field Options.
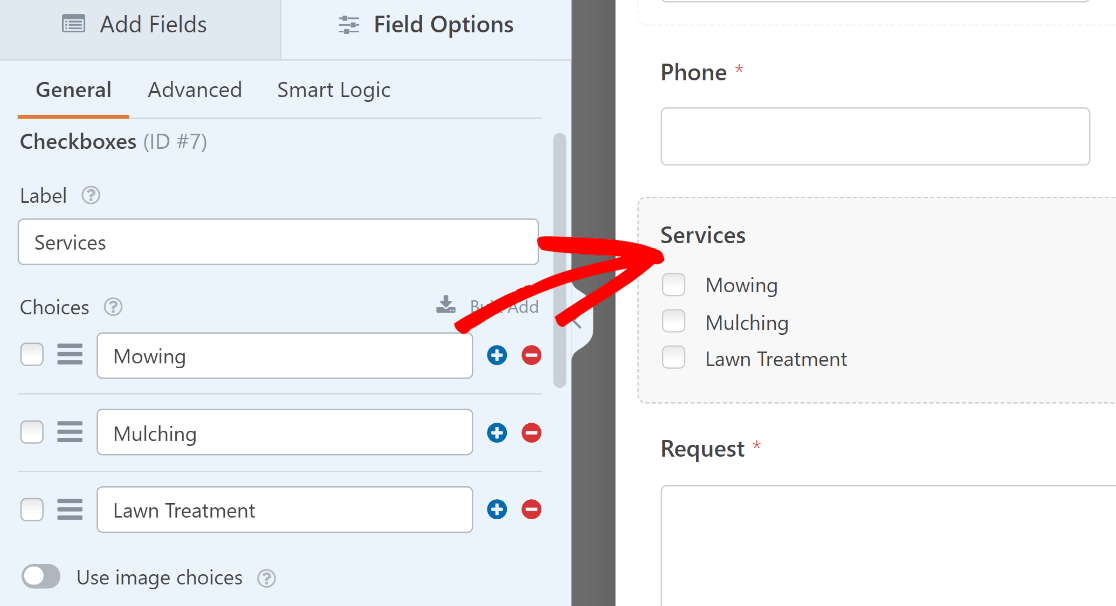
You can easily label your field and add different service options using the Checkboxes Field Options.
If you want to add image choices next to your service options, check out our tutorial on how to add image choices to WPForms
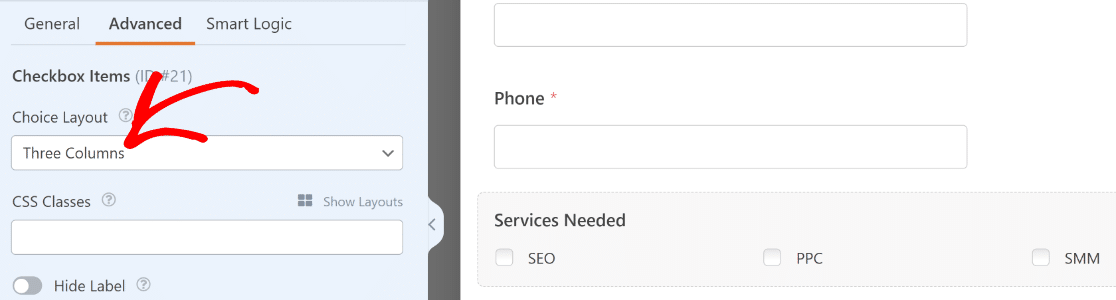
If you have a lot of service options for people to pick from, and want to split your checkboxes into several columns, go to Advanced Options and pick your Choice Layout to be 1, 2, 3, or inline columns.
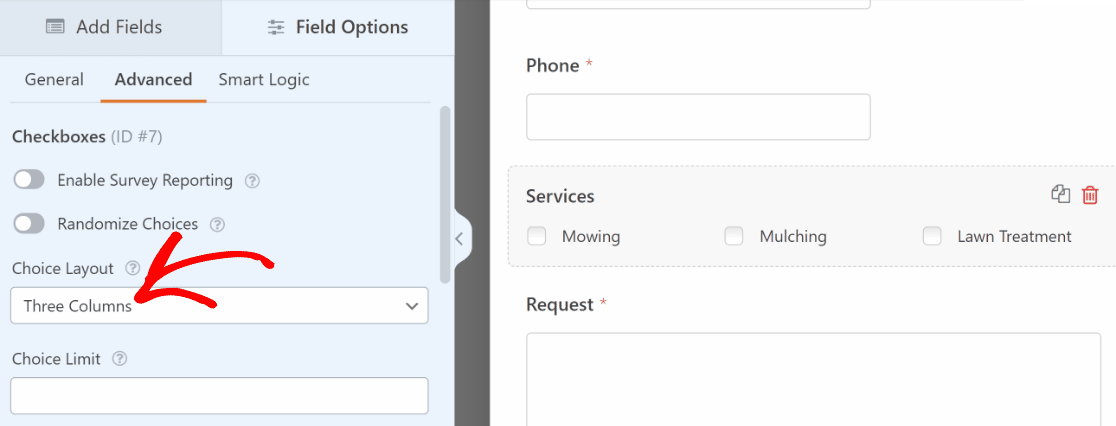
This will make your form more concise and prevent form fatigue when customers are filling it out.
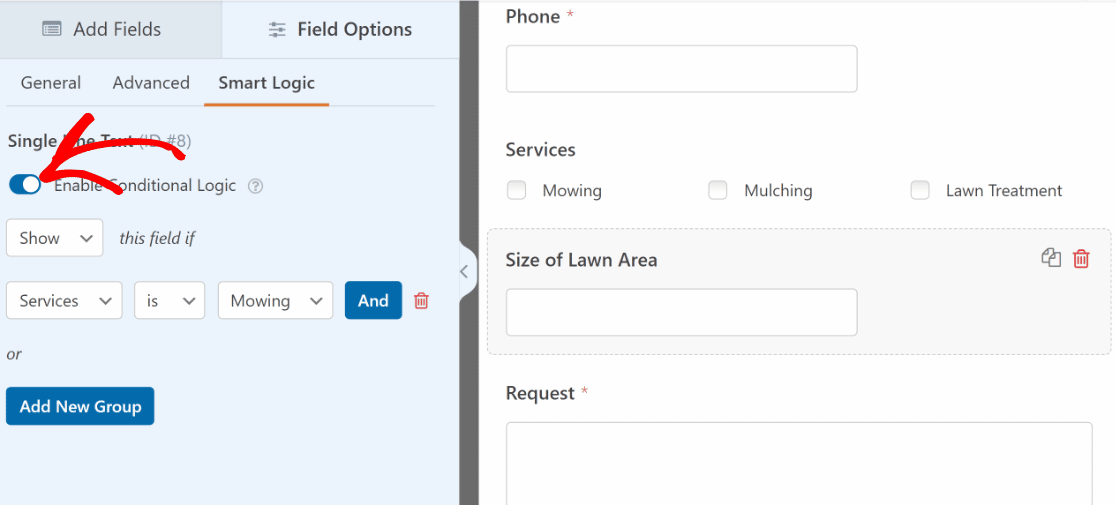
For our landscaping example, you’ll need to know the size of the lawn area in order to provide the best quote for some of the services you provide.
We can use conditional logic to show a new field for collecting size of the lawn information when a user selects “Mowing” as their service choice.
To do this, we’ll first insert a Single Line Text form field into our form. We’ll label this field “Size of Lawn Area.” You can change the label based on your specific services.
Next, click on the Size of Lawn Area field to open Field Options. Click the Enable conditional logic toggle button and use the options under it to set up rules for when this field should be displayed.
OK, that’s all the customization we needed for this one. When you’re happy with how your form looks, make sure to Save your changes.
If you’d like to calculate a quote and display an estimate in the same form, see this optional step.
Step 4: Publish the Request a Quote Form
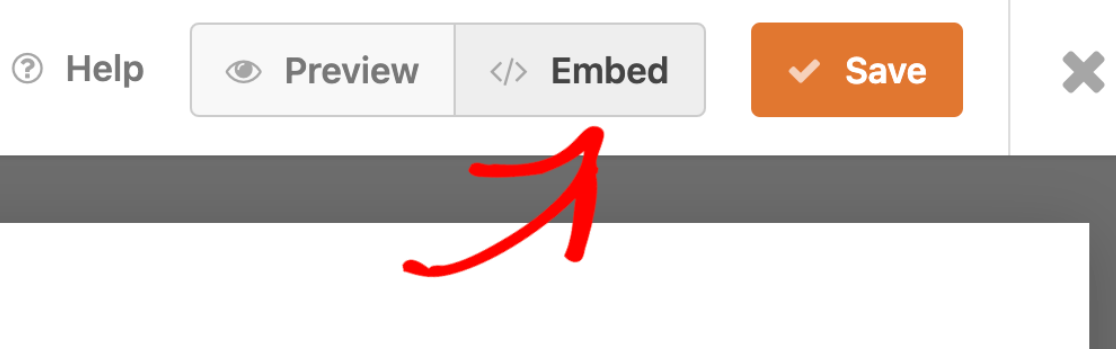
Embedding your form with WPForms is easy, as you can use the embed wizard to add your form to any post, page, and sidebar widgets of your WordPress site.
When you’re ready to embed, click on the Embed button at the top of the form builder.
After that, WPForms will ask if you want to embed your form on an existing page or a new one. In this example, we’ll embed the form on a new page, though both methods are almost identical.
Click on Create New Page to proceed.

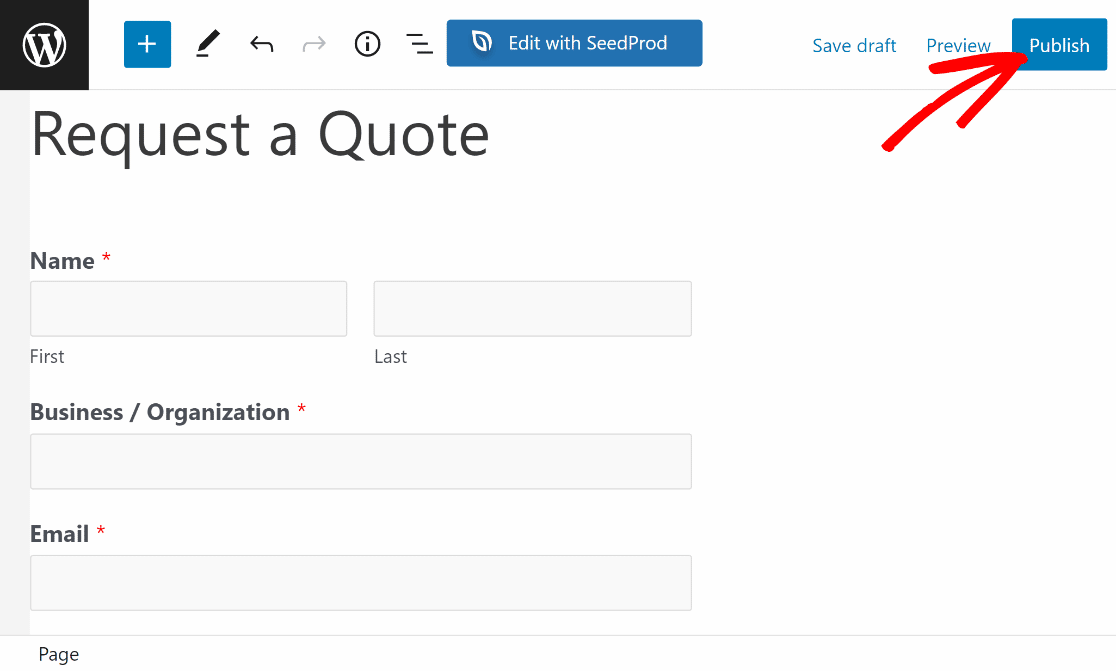
Once you’ve done that, you’ll be taken to the WordPress page editor with your new form already added to it.
If you’re satisfied with how everything looks, click on the Publish button to take your form live.
Excellent! The form is now ready.

Perfect. With this form, you can receive requests for a quote and get back to your visitors after carefully considering their service requirements.
Want your form to calculate and show an estimated quote immediately? WPForms can also handle that easily, as we show in the next optional step.
Bonus: Calculate and Display a Quote 🧮️
WPForms includes powerful calculation capabilities that you can access with the Calculations addon available in Pro and above licenses.
First, you’ll need to install and activate the Calculations addon. Once you’ve done that, you can go back to the form builder to customize the request a quote form template with a few calculation fields.
We’ll consider a hypothetical digital marketing agency to demonstrate how you can calculate a quote inside the form. But you’re free to replicate the same process for any kind of business with a few modifications as necessary.
So, our hypothetical agency offers 3 different services for a selected service duration. The final quote depends on the exact type of service and duration requested.
To create such a form, we’ll be using a couple of Payment Fields and a Hidden Field.
Add Calculation Fields
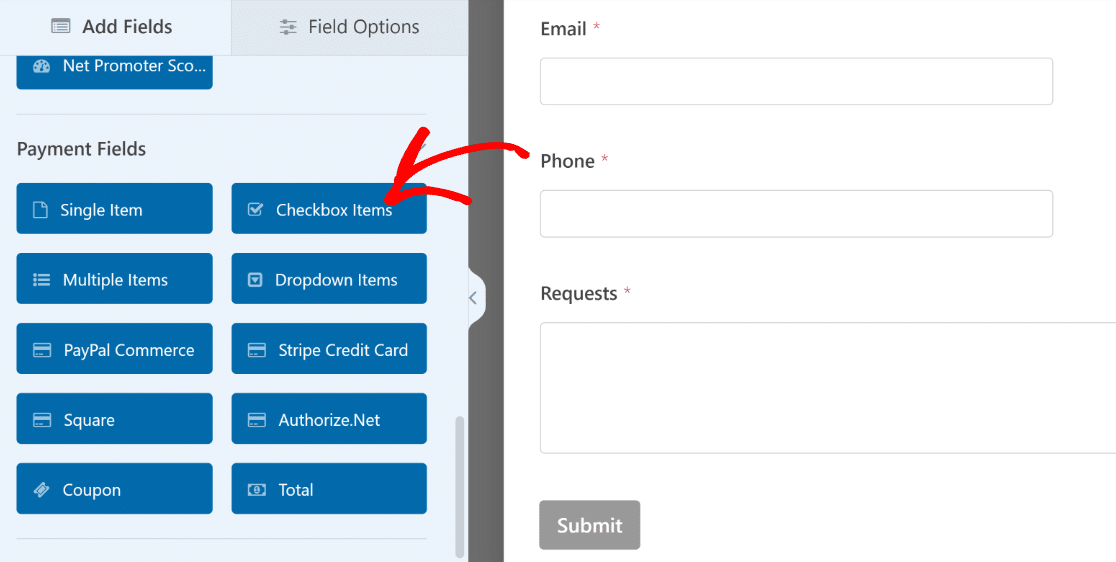
Start by loading the request a quote form template. Then, add the Checkbox Items field.
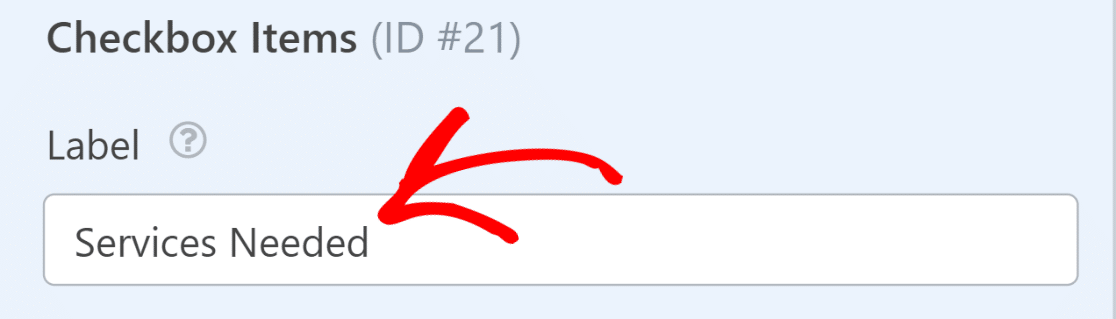
Click on the field after adding it to your form to open the Field Options menu on the left.

Let’s rename the field to “Services Needed”.
Next, add the service options along with the base price you want to set for each service next to it.
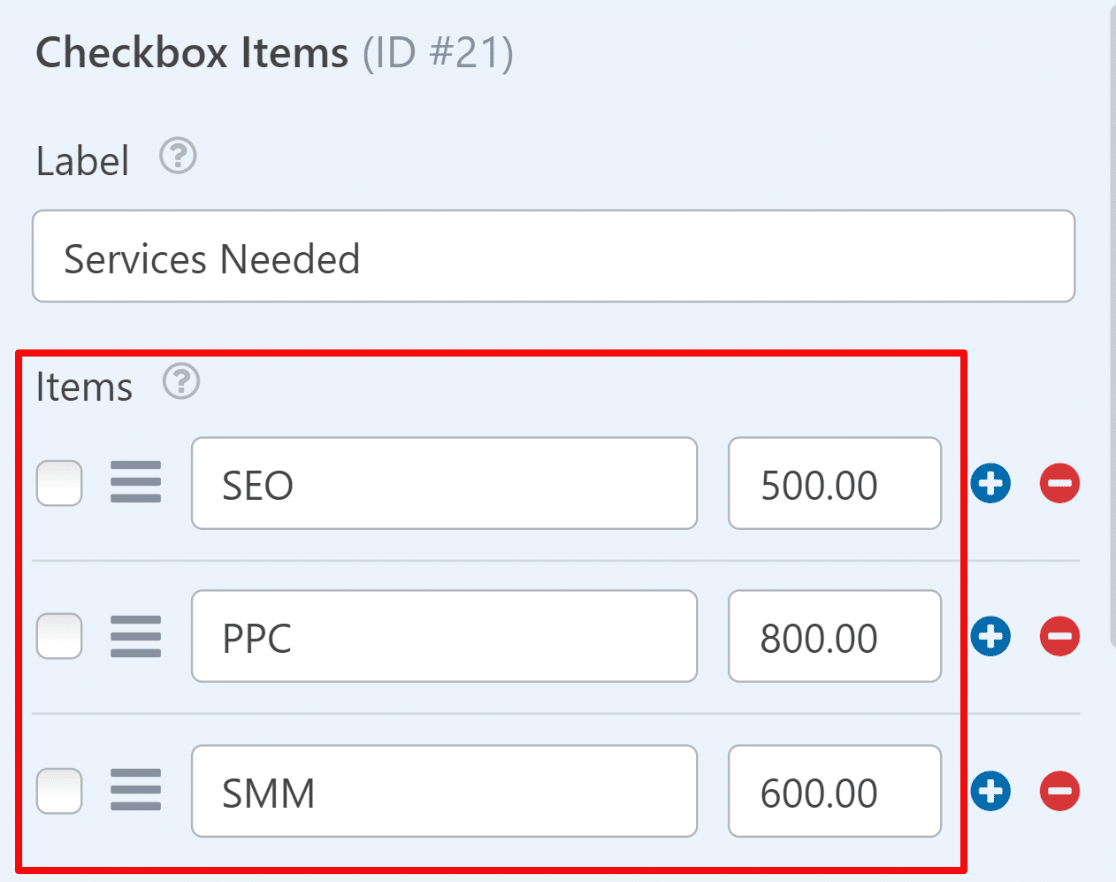
If you want, you can also change the layout of the Checkbox Items by going to the Advanced tab and selecting your desired arrangement in the Choice Layout dropdown menu.
After that, click on the Add Fields tab and drag and drop the Multiple Items field onto your form.
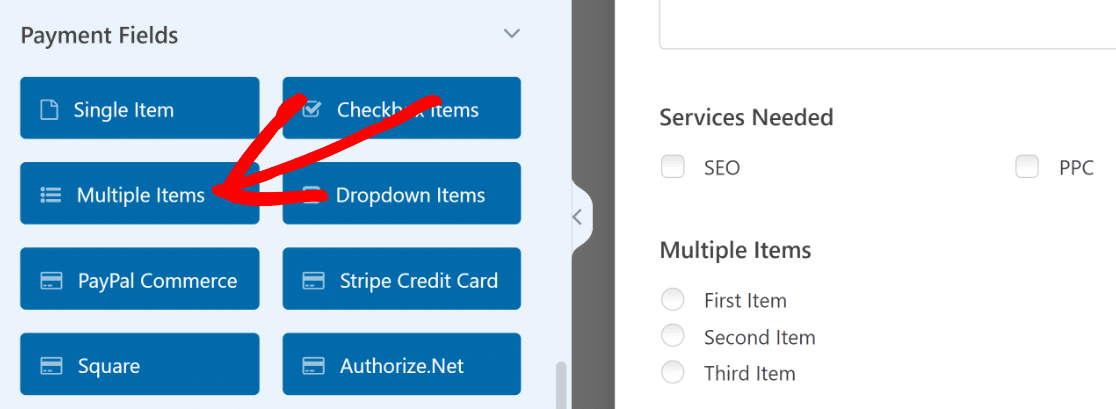
We’ll use the Multiple Items field to let people select a service duration for their requested service. Now, we’ll access the Field Options of the Multiple Items field to change its label and add different service durations.
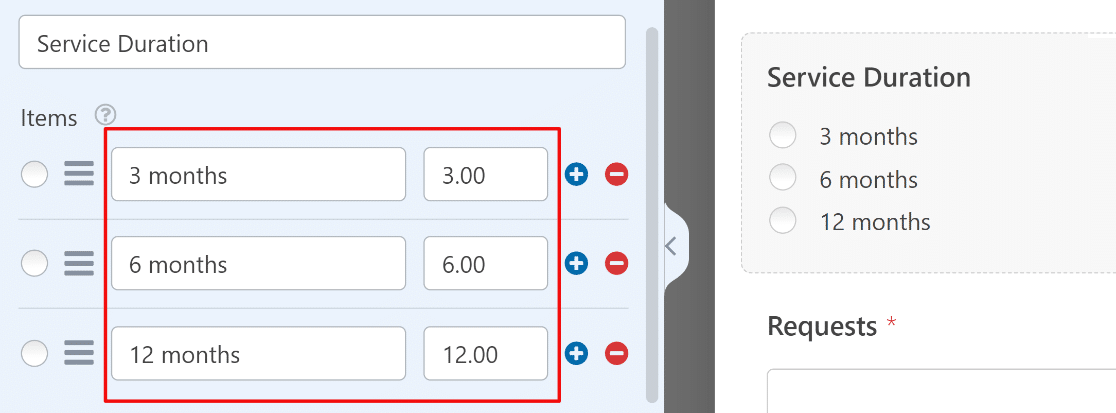
Note that we’ve given a value to each service duration matching the number of months, which we’ll be using as a multiplication factor to calculate the final quote.
For instance, if a visitor wants SEO services for 3 months, the base price of the SEO service will be multiplied by 3 to calculate the quote, and so on.
In the next step, we’ll be using WPForms’ calculation capabilities to work up some magic to display an estimated quote. 🧙♂️
Create Formula for Calculating a Quote
We’ll add a Hidden Field in the form and use it to perform some calculations behind the scenes.
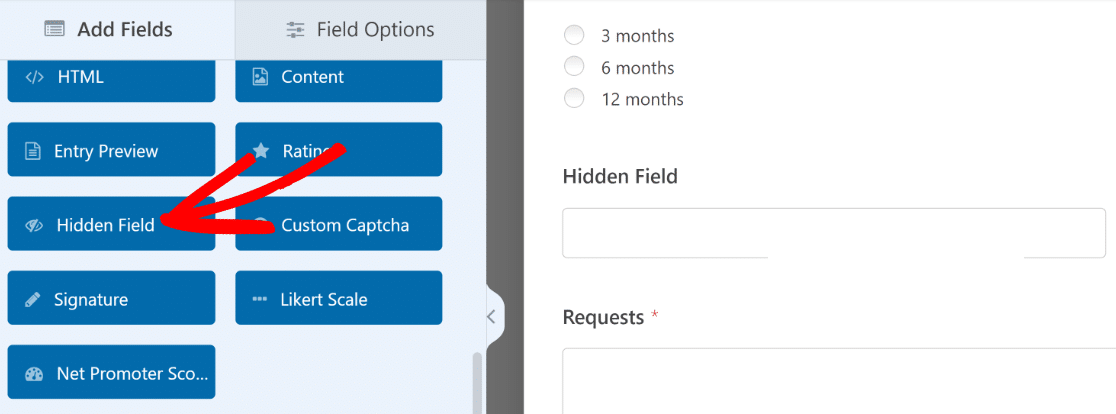
After adding the Hidden Field, click to open its Field Options and then go to the Advanced tab.
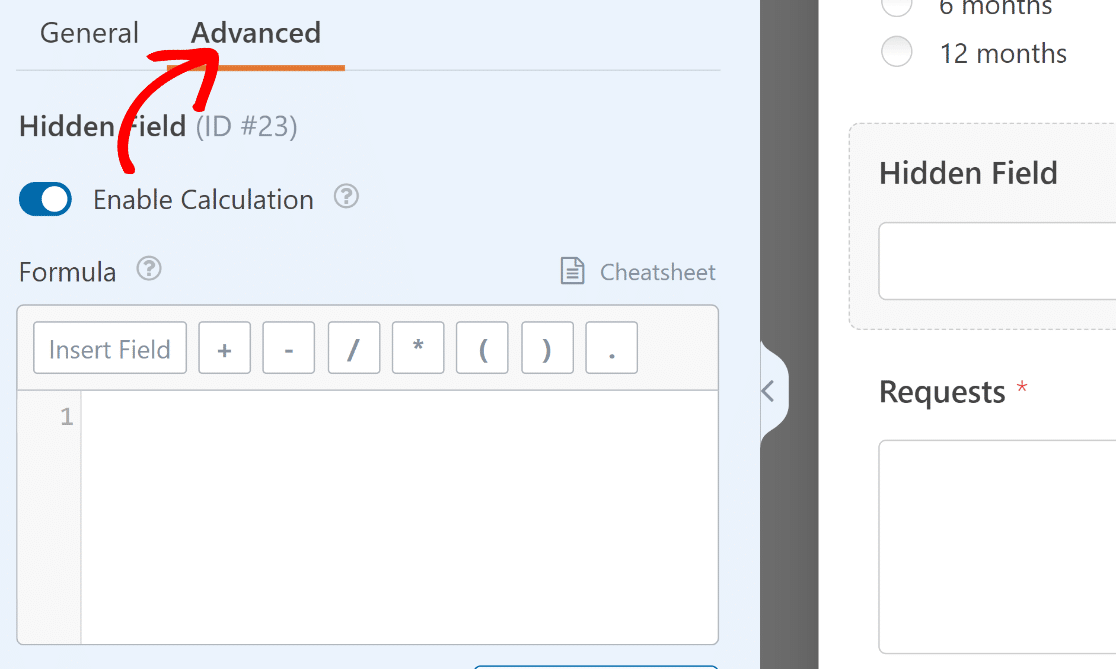
Now, click on the Enable Calculation toggle button.
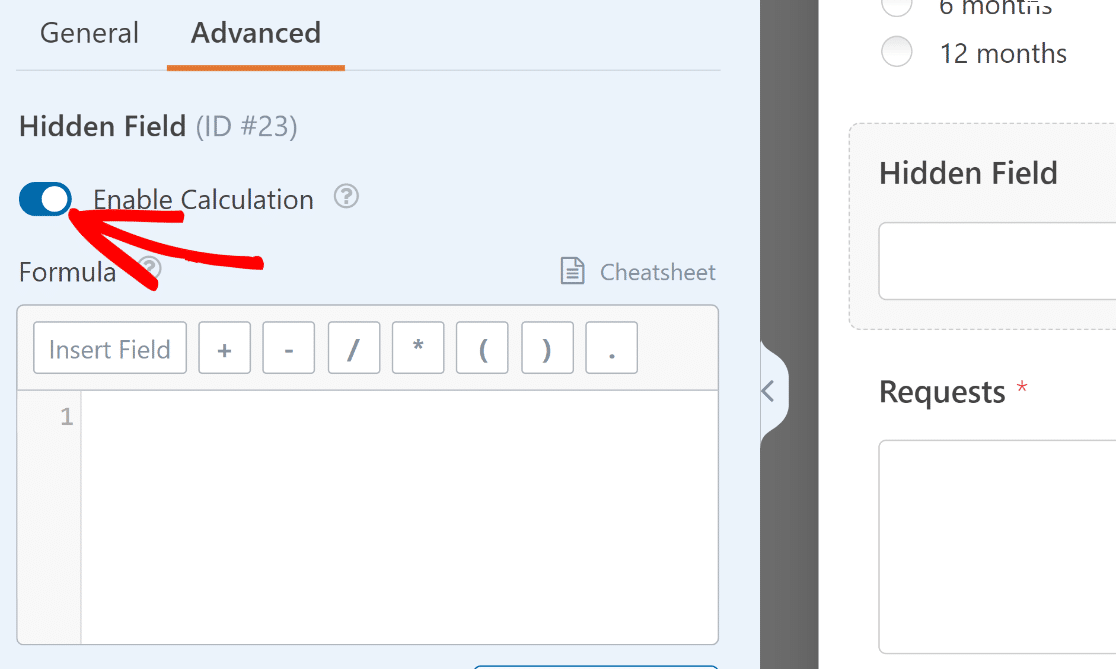
You’ll notice an editor appear in the left-hand pane. Here, you can use other form fields as variables and perform math operations on them by creating a formula.
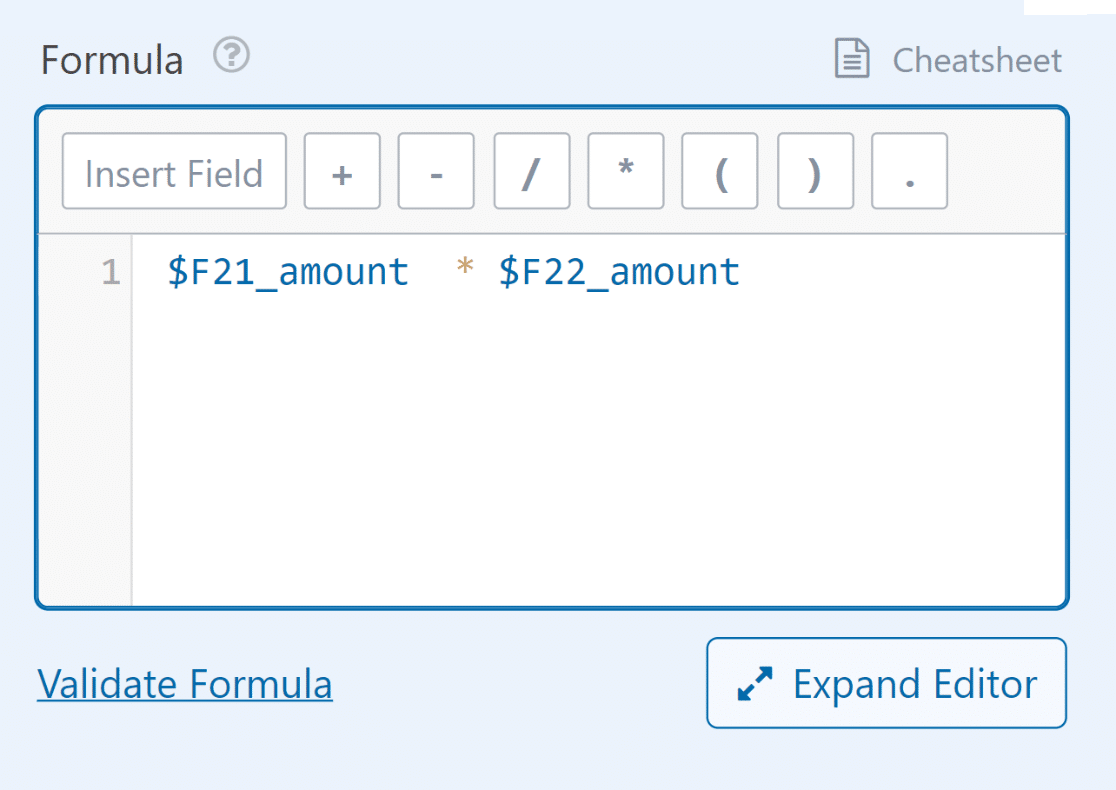
WPForms makes it incredibly easy to create formulas. In this example, we just need to multiply our Services Needed field by Service Duration to get the quote.
This can be done by clicking on the Insert Field button to open the list of available fields in this form that we can use as variables.
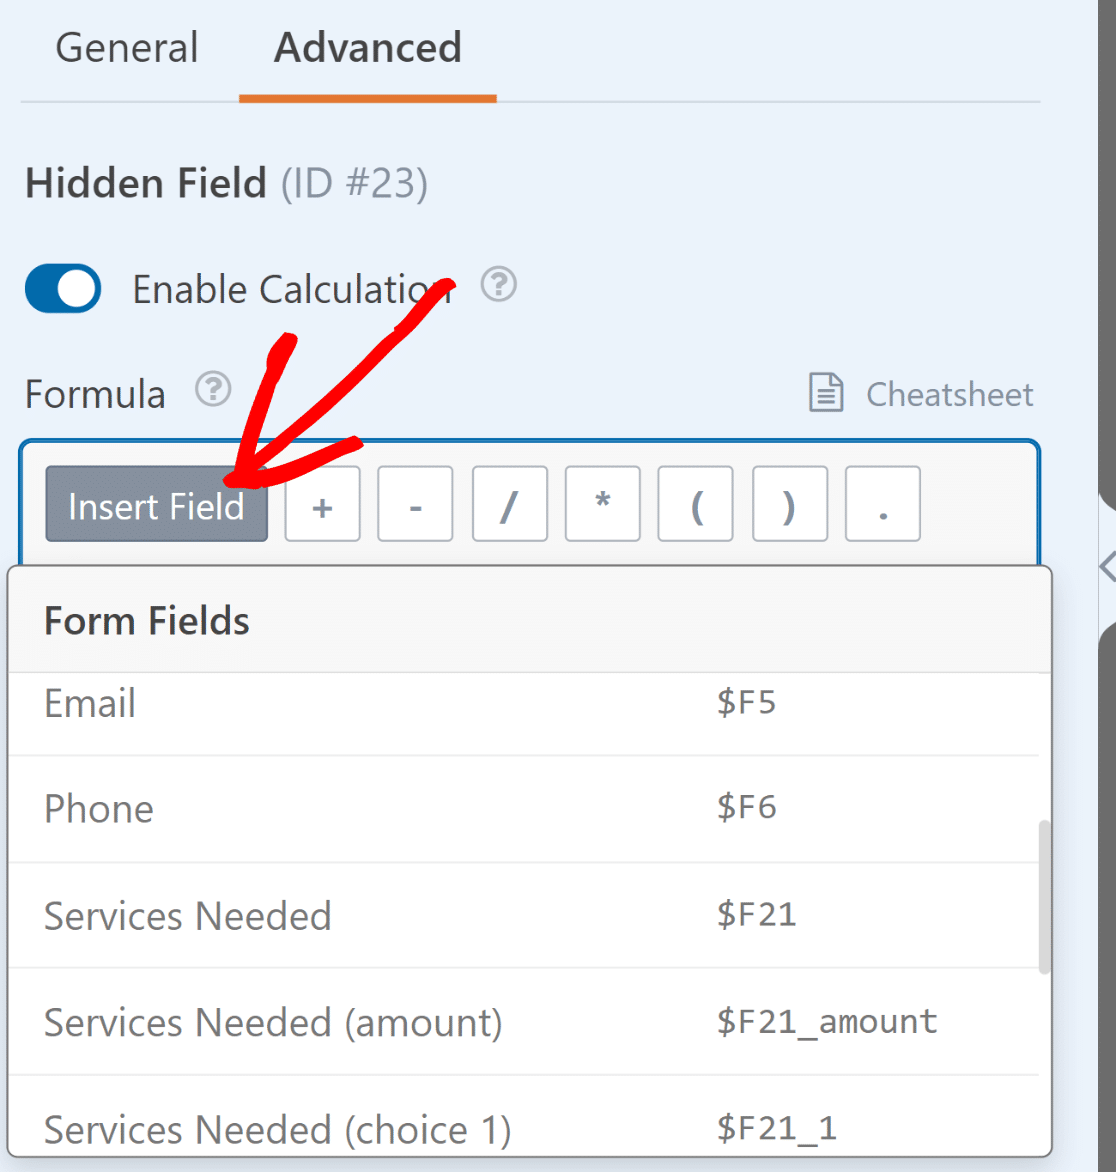
We’ll now select the Services Needed (amount) variable from the list.
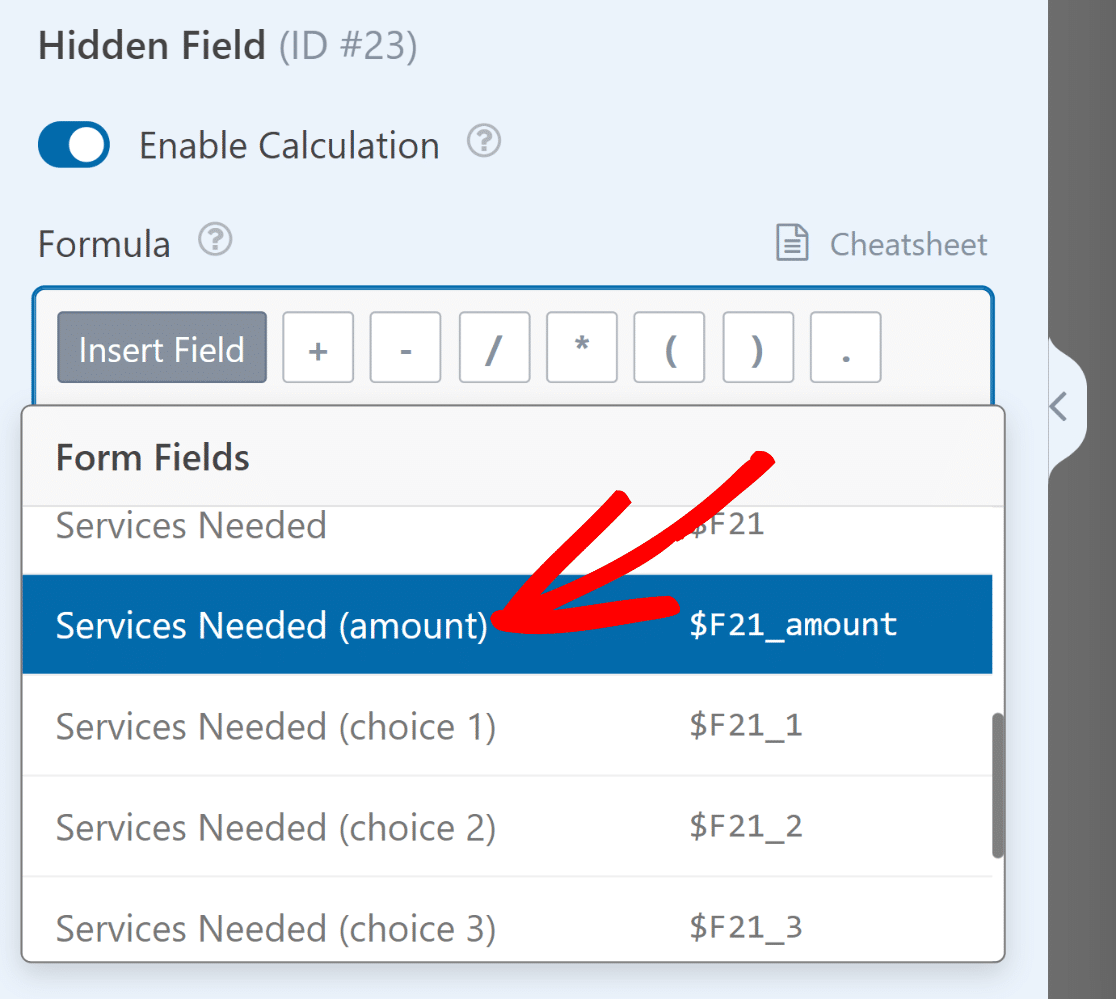
Then, we need to enter an asterisk (*), which is the multiplier function. In a similar fashion, we’ll then select the Service Duration (amount) variable.
And that completes our formula for this scenario:
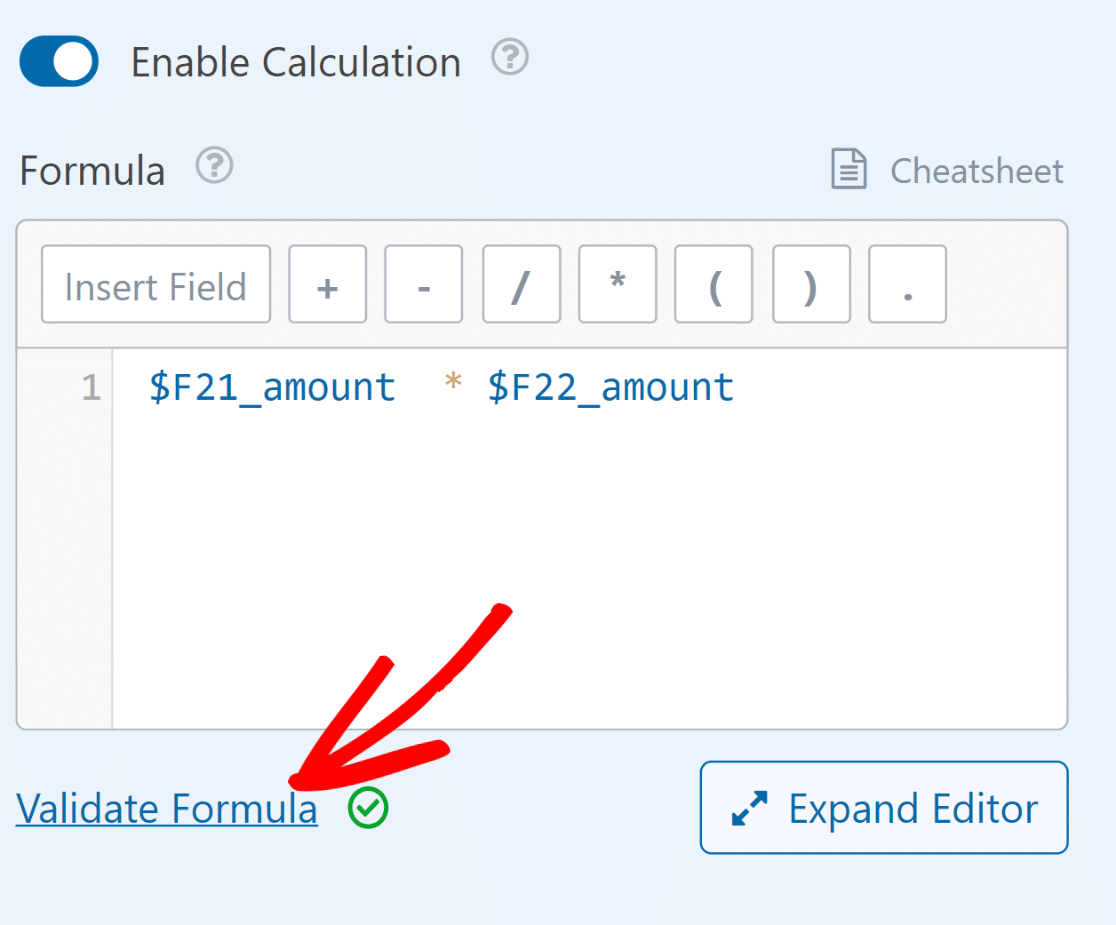
You can also validate your formula by clicking on the Validate Formula link at the bottom. If there are no errors in the formula, you’ll see a green check mark appear.
OK now that our form is ready to calculate a quote, we need to display the quote estimate in a proper way.
Display Quote Estimate in Form Confirmation
WPForms offers highly configurable confirmation messages. Once a user submits a form, you can display any message you want to assure your visitors that their form has been successfully submitted.
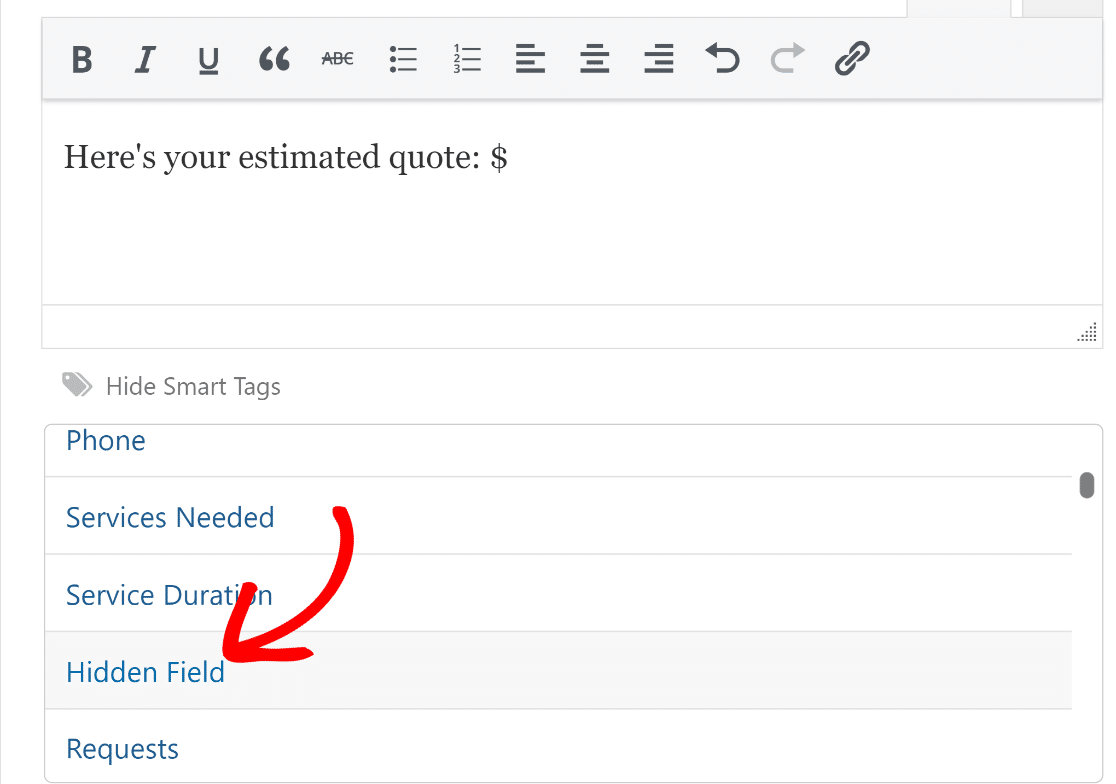
In this case, we can take advantage of the Hidden Field we set up in the previous step. All we need to do is use Smart Tags to pull the calculated value inside the Hidden Field and use it in the confirmation message.
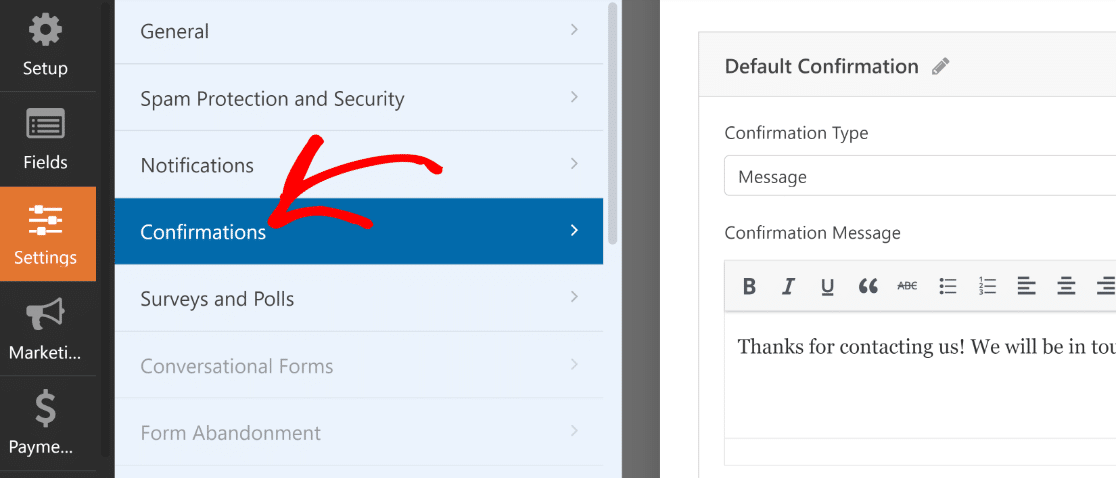
To do this, click on Settings » Confirmations.
Using the text editor, we can rephrase the confirmation message to draw attention to the quote estimate. Then, we’ll click on the Show Smart tags link just under the text editor.
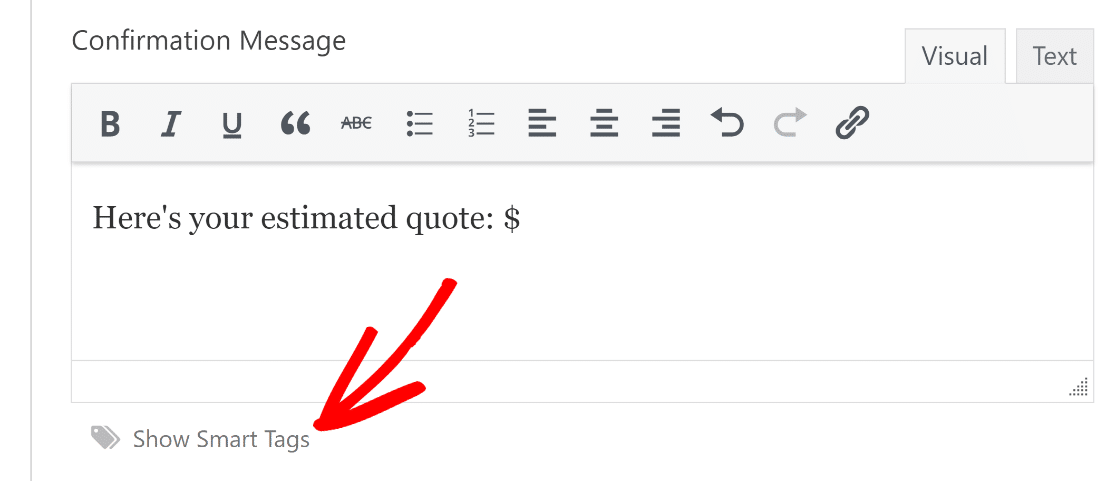
And select the Hidden Field from the list of available tags for fields.
Perfect. All we need to do now is Save and Publish this form following the same steps as shown earlier.
You can test this form out by filling out a dummy entry. If everything is set up correctly, you’ll see a quote appear in the confirmation message as soon as the form is submitted.

Pretty awesome, right? 🤩
And there you have! You can now create fully customized request a quote forms in WordPress without hiring a developer!
Next, Learn Adding a Disclaimer Checkbox
If you want to add an official terms of service or disclaimer to your request a quote form, check out our documentation on how to add a Terms of Service checkbox to your WordPress forms. This helps ensure your users know exactly what’s in store for them when they submit a request for a quote from you.
Also, would you like to track if your forms are converting? If so, see our guide on setting up form tracking in WordPress.
Create Request a Quote Form Now
So, what are you waiting for? Get started with the most powerful WordPress forms plugin today.
And don’t forget, if you like this article, then please follow us on Facebook and Twitter.
The post How to Create a Request a Quote Form in WordPress [Template] appeared first on WPForms.source https://wpforms.com/how-to-create-a-request-a-quote-form-in-wordpress/
