
Are you looking for an easy way to personalize your form’s email notifications using a WPForms custom email template?
Customizing email notifications in WPForms is a straightforward process that can significantly improve your communication with form respondents.
In this guide, we’ll walk you through the simple steps of customizing form email notifications in WPForms to create a unique and more professional look.
Why Customize Form Emails Notifications in WPForms?
Customizing form email notifications in WPForms isn’t just about changing the look and feel. Here’s a brief look into the significant benefits of personalizing these notifications.
- Enhanced Brand Identity: Customizing WordPress emails allows you to incorporate your brand’s logo, color scheme, and style. This consistency in advertising helps reinforce your brand identity with every email sent.
- Improved Clarity and Relevance: By tailoring the content of your emails, you can ensure the message is relevant to the recipient, such as addressing recipients by name or providing specific details about their form submissions.
- Better User Engagement: Personalized emails are more engaging. They show your recipients that you value their interaction, fostering a stronger connection and potentially increasing user engagement with your brand.
- Increased Efficiency: Automating and customizing your email responses saves time. Instead of creating individual replies, you can set up specific, relevant responses that are triggered automatically upon form submission.
- Tracking and Analytics: With WPForms, you can track the effectiveness of your email notifications. This insight allows you to refine your approach, ensuring your communications are as effective as possible.
With WPForms, you can create email notifications that resonate with your audience and streamline your communication efforts. As you proceed through this guide, you’ll discover just how easy and impactful this process can be.
How to Customize Form Email Notifications in WPForms
Follow the steps below to learn how you can customize form email notifications in WPForms with custom templates and more!
1. Install and Activate WPForms
WPForms simplifies the process of creating and managing forms on your WordPress site. It is a well-known WordPress plugin that allows you to create various forms, such as surveys, contact forms, and registration forms, without coding skills.
Customizing email notifications in WPForms is also pretty straightforward, offering a user-friendly experience and functionality. It combines extensive customization options with the power to create attractive, responsive forms.

To start your journey, first install the plugin on your WordPress website. After activation, you can follow the steps below to easily navigate through the process of customizing your form’s email notifications.
2. Create a Form or Use a Template
Create forms directly from your WordPress dashboard. To get started, navigate to WPForms and click on the Add New button.

Now, start by naming your form to reflect its specific purpose. At this point, you can opt for an existing template to speed up your form creation.

The intuitive Form Builder interface of WPForms welcomes you next. Here, you can tailor your form by adding, editing, or rearranging various fields.

Once your form is set, the next crucial step is modifying the Confirmation Message that appears post-submission.

Additionally, you can customize the basic form notification settings that can be received by both the site administrator and the user who completed the form.

Form notifications are a great way to keep track of submissions and interact with site viewers right away. We’ll talk more about how to customize them below.
3. Set Up a Basic Form Notification Email
WPForms starts you off with a basic notification setting, but you can easily add a new one. Just click Add New Notification.

Enter a name for your new notification in the pop-up. This is just for your reference and won’t be seen by form users. After naming it, click OK.

Now, you’ll fill in several details to complete your notification setup. Each option is straightforward but vital to get right to ensure your notifications reach you and users correctly.
Send To Email Address
This is where your form notifications will be sent. It defaults to your WordPress site’s admin email, but you can change it. To send to multiple emails, just separate them with commas.

Email Subject Line
Change the default “New Entry “subject line to anything you prefer. It should be clear and relevant to the recipient.

From Name
This is the sender name for the email. By default, it’s your website name, but feel free to change it to something more familiar to the recipient.

From Email
Crucial for email delivery, this should be a valid email address, preferably from your domain, to avoid spam filters. Avoid using the form submitters’ email as the sender.

Mismatched domain names can trigger spam filters. For best results, use WP Mail SMTP for emails not matching your domain.

Reply-To Email Address
Set this to where you want replies to go. It’s helpful to use a Smart Tag for form user emails or your own for user notifications.

Email Message
This is your email body. It defaults to showing all form fields but can be customized with additional text, Smart Tags, or even HTML/CSS.

Keep these settings accurate and clear to ensure seamless communication through your WPForms notifications.
Save your form settings before moving on to the next step so you don’t lose your progress. At the top of the screen, click the Save button.

4. Customize Email Template and Styling
Customizing Email Notifications in WPForms is straightforward. Start by heading to WPForms » Settings and selecting the Email tab.

In the Email tab, you have numerous options for personalizing email notifications. These settings apply universally across your site. Here’s how each of them work:
Choose an Email Template
WPForms provides many templates that you can use to customize the look and feel of your notification emails.
In the Template section, you’ll find all the available templates WPForms supports. Lite users can access three templates, while Pro users enjoy additional options:
- Classic
- Compact
- Modern (Pro)
- Elegant (Pro)
- Tech (Pro)
- Plain Text
The Classic template is the default choice. However, for a more personalized touch, you can select from the other templates, provided you have a valid WPForms Pro license for certain options.
Just hover your mouse over the style you want to use and click the Choose button. For this example, we’ll use the Modern style, but you can pick any other one you want.

You can click on the Preview button at any time to see how each of the templates would appear in your user’s inbox.

Set an Email Header Image
To add a personal touch, you can upload a header image or logo. Navigate to the Header Image section and click on the Upload Image button.

A pop-up overlay will appear, giving you the option to either upload a new file or choose an existing file from the WordPress Media Library.

When you have finished uploading a new image or selecting an existing image, simply click on the Use Image button.
Once you have uploaded your image, you will be able to select the desired size for the image to be used in your email notifications from a dropdown menu.

The sizes available are Small, Medium, and Large. The image resolution adjusts to the size you choose and also adjusts to the user’s screen.
This means, if you are seeing the notification email on a mobile device, it will change itself to fit the screen size of the device you are using.
Change the Color Scheme
WPForms Pro users can access a Color Scheme section to adjust the background, body, text, and link colors.
Lite users can only modify the background color. The color picker lets you align these colors with your brand.

Below, we’ve explained all the available color schemes:
Background
The color selected for the Background determines the outer appearance of the email template. Here is an example with a light blue background color.

Body
The Body color determines the visual appearance of the email template container. This is the location where the notification email is stored.
Here is an example image that features a Body container with a white color scheme for your convenience.

Text
This color will be used for all text in the notification email. The default color scheme features a dark Text color, as shown in the image below.

Links
The following color scheme applies to all Links in the notification email. The email address in the image below is displayed as a link, using the default orange color for links.

To update any of the colors, you have two options. You can either enter the HEX value into the color field, or you can click on it to open the color picker.

Typography
Typography determines the font family that will be utilized for notification emails sent from your website. WPForms currently supports both Sans Serif and Serif fonts.

To update the font family of your email template, simply click on the Typography dropdown and choose the desired font from the available options.

After you have finished customizing your email template, scroll down and click on the Save Settings button to save the changes you have made.

Preview Your Email Template
After you’ve saved your changes, you can preview them to see how they would appear in your user’s inbox.
To accomplish this, simply click on the Preview Email Template link located under the Typography dropdown menu.

A new tab will open in your browser where you can see a preview of your notification email template. Everything you changed in the settings will be reflected in the preview.

If the user’s device is set to dark mode, the notification email will automatically adapt to match the device’s appearance.

Change Notifications in Form Builder
You can also change the email design for your form in the form builder if you want to. To do this, open the form you want to change and go to Settings » Notifications.

Then, scroll down and click on Advanced to get to the more advanced choices. There should be a dropdown button under Email Template.

This choice is set to Default Template for all forms on your site by default. This means that your forms will use the general settings you set on the settings page.
To override the default template, simply click on the Email Template dropdown and choose the desired template.

5. Publish Your Customized Form
Once you’ve created your form, customized it, and configured the email notification settings, all that’s left to do is publish your form.
Create a new page or post, or update an existing one. Then, click on the Add Block button and then choose the WPForms icon.

Next, use the dropdown menu in the WPForms widget to choose your custom form and add it to your page or post.

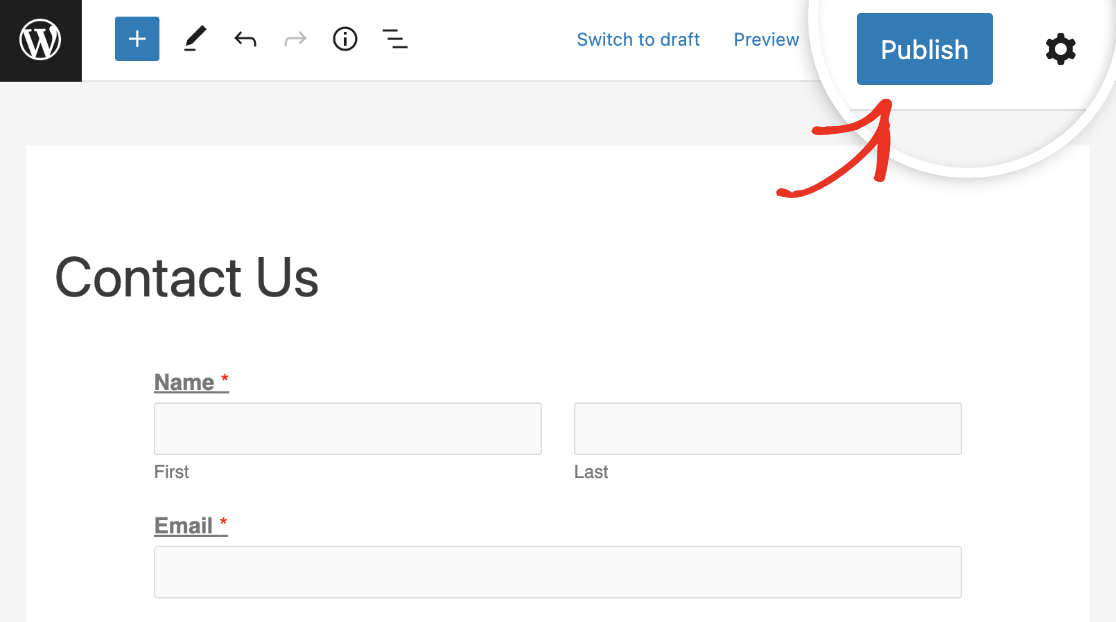
If you’re happy with how your form looks, all you have to do is hit the Update or Publish button to make it live.
More Questions about WPForms Custom Email Templates
Learning how to customize form notifications is a popular topic of interest among our readers. Here are answers to some common questions about it.
How do I create a custom email template?
To create a custom email template, navigate to WPForms » Settings and click the Email tab. Here, you can choose from various templates like Classic, Compact, or Modern. Customize the template by adding a header image, selecting your preferred color scheme, and choosing a typography style.
How do I customize my email template in WordPress?
Go to WPForms » Settings and select the Email tab. You can pick a template that suits your style and customize it by uploading a header image, adjusting the color scheme, and selecting a font in the Typography section. Use the Preview option to see how your template will look and ensure it aligns with your brand identity.
How do I change my email on WPForms?
To change your email in WPForms, access the form where you want to update the email. Click Edit on the specific form, navigate to Settings » Notifications in the form builder. Here, you can update the Send To Email Address field with your new email address.
Next, Learn How to Style Contact Forms in WordPress
Wondering how you can get your contact form design to match your WordPress site without any understanding of CSS? Check out this guide to learn how to style contact forms in WordPress using WPForms’ customization options.
Create Your WordPress Form Now
Ready to build your form? Get started today with the easiest WordPress form builder plugin. WPForms Pro includes lots of free templates and offers a 14-day money-back guarantee.
If this article helped you out, please follow us on Facebook and Twitter for more free WordPress tutorials and guides.
The post How to Customize Form Email Notifications in WPForms appeared first on WPForms.source https://wpforms.com/how-to-customize-form-email-notifications-in-wpforms/
