Want to use your Outlook account as your WordPress mailer and get reliable email deliverability for your WordPress site?
You can use the Outlook mailer for WP Mail SMTP to securely authenticate your WordPress website’s emails with Microsoft’s API. In this post, we’ll show step by step how to set up the Microsoft Outlook mailer in WP Mail SMTP.
Here are the complete steps in this tutorial:
- Get Started with WP Mail SMTP
- Configure a Microsoft Azure Account
- Save Settings and Authorize WP Mail SMTP
- Send a Test Email
Want your contact form plugin to be able to send reliable email notifications to people who fill them out? Follow these steps:
How to Set up WordPress Outlook Mailer in WP Mail SMTP
If you’re setting up your WP Mail SMTP with the Outlook mailer, here are the steps on exactly how to do it.
Step 1. Get Started with WP Mail SMTP
To get started setting up your WordPress Outlook mailer, the first step is to install and activate the WP Mail SMTP plugin. For help with this, check out the post how to install a WordPress plugin.
Once you’ve installed and activated the plugin, go to WP Mail SMTP » Settings.
Then at the top of the Settings page, you’ll see the From Email and From Name options. You can skip both of these settings, as these things will be overridden by the settings within your Outlook account (eventually, you’ll notice that both these fields end up disabled).
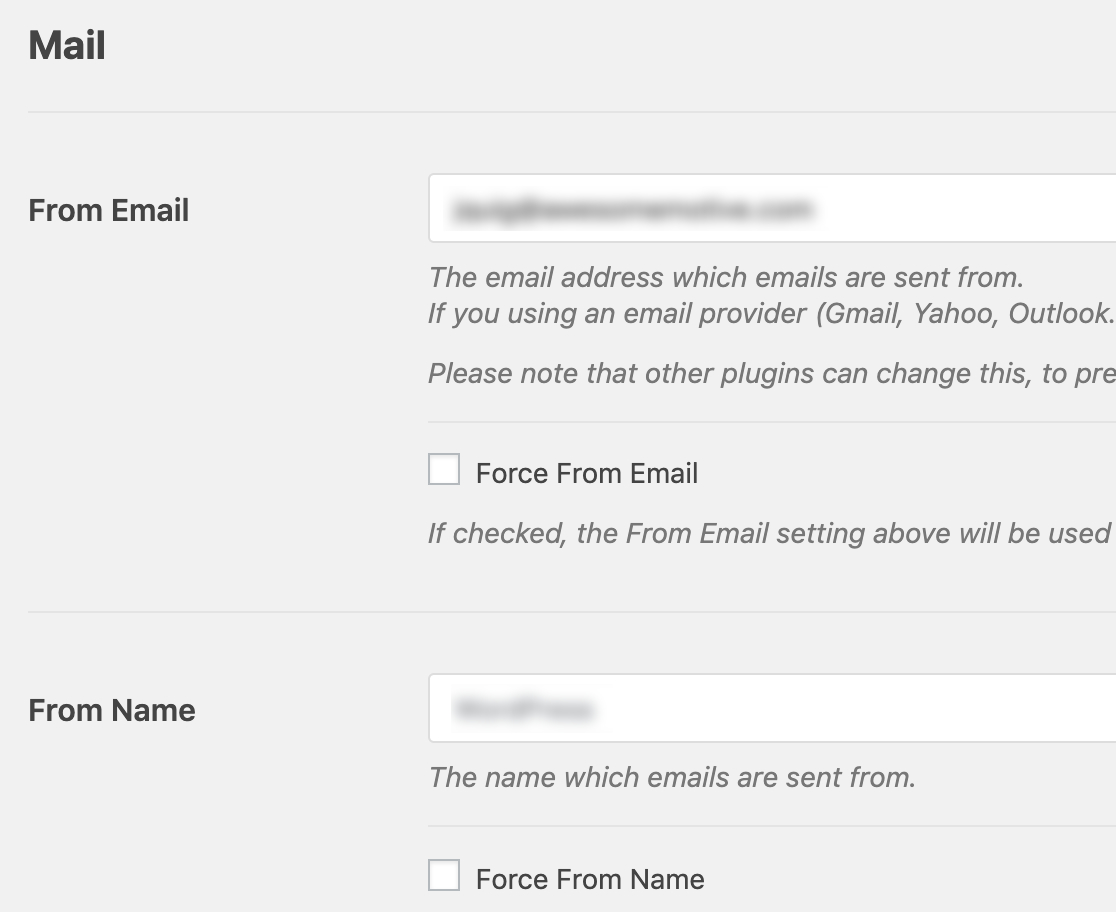
Next, we recommend checking the optional Return Path checkbox to Set the return-path to match the From Email. With this enabled, you’ll receive an email if any messages bounce as a result of issues with the recipient’s email.

Now, you’ll need to scroll down to the Mailer section and select the Outlook option.

And now that you’ve picked the Outlook mailer, you’ll see a new section appear titled Outlook.
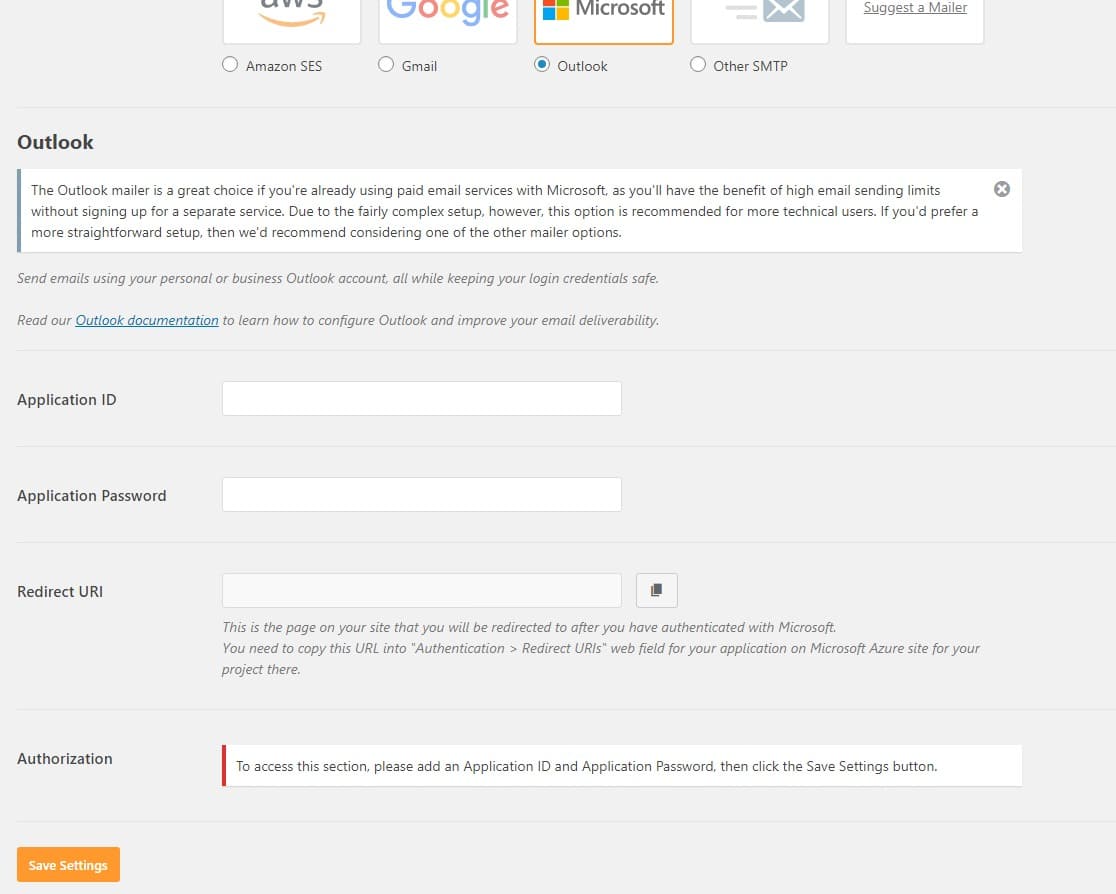
To get the info needed for this section, you’ll need to set up a web application within a Microsoft Azure account. We’ll show you exactly what to do next.
Be sure to keep these WP Mail SMTP settings open in a separate tab or window, because you’ll return to that page shortly to paste in all that info.
Want to track all the emails your website sends? Take a look at our post on logging WordPress emails.
Step 2. Configure a Microsoft Azure Account
In order to continue the setup process, you’ll need to have a Microsoft Azure account.
Since you most likely already have a Microsoft email account (through Hotmail, Live, Outlook, Office 365, etc), you can simply log into Microsoft Azure with your existing account credentials.
Just be sure that the email you use for your Microsoft Azure account is the same email address you want to use as the From Email on your website.
If you need to create a brand new account, you can click this link sign up for a free Microsoft Azure account. Also be sure to check that the account you use for signup includes email sending permissions.
Note: While your account is free and this mailer setup does not require use of any paid services, Microsoft will require that you enter a credit card to set up an account to reduce spam signups.
After you’ve decided on the email address, open the Azure Portal.
Create an Application ID
Now that the Azure Portal is open, navigate to the left sidebar and click on All services.
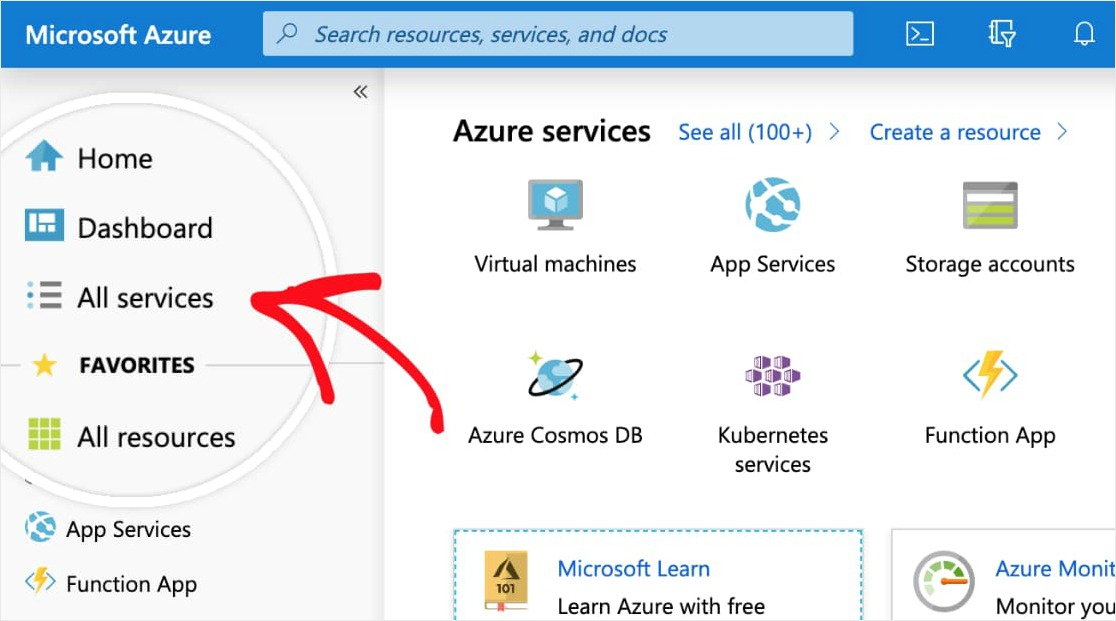
Next click on Identity in the left sidebar. Then an additional column appears, and you’ll want to click on App registrations on the right.

At the top of the App Registrations page, click on the +New Registration option.

In this app registration form, here are the details you’ll need to fill out:
- Name — This is only for you, so we recommend naming it something like “WP Mail SMTP: yourdomain.com”.
- Supported Account Types — Select Accounts in any organizational directory and personal Microsoft accounts.

- Redirect URI — For the first dropdown, leave this set to Web. Then for the 2nd field, you’ll need to copy this info from your WP Mail SMTP settings (see below).
In order to find the Redirect URI, go back to the tab or window where you left your site’s WP Mail SMTP settings open. Under the Outlook section, you’ll see a field named Redirect URI.
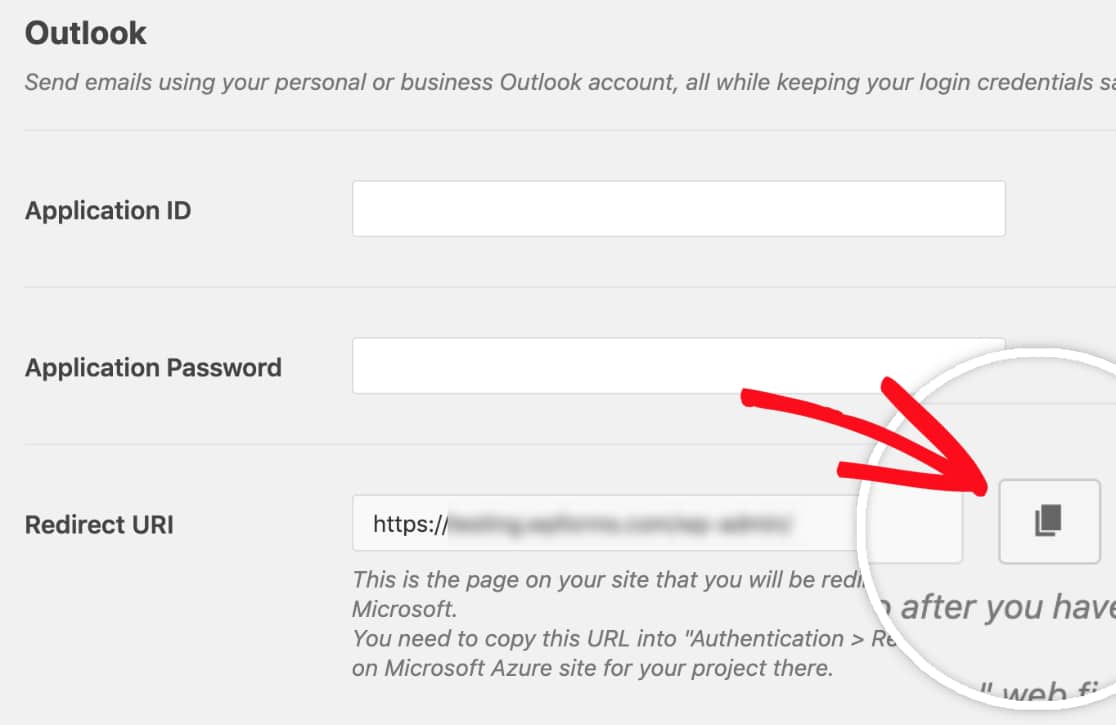
Copy this info and then paste it into your Microsoft Azure app registration form.
Keep both windows or tabs open in your browser, as we’ll continue to switch between both.
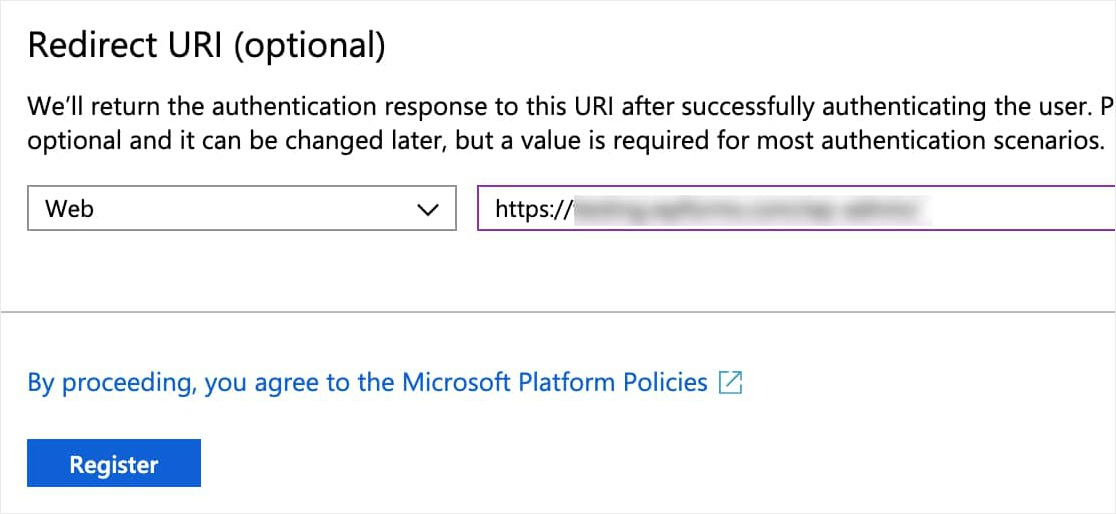
Now, click the Register button to continue.
As soon as this registration form is submitted, you should see a page that includes Application (client) ID.
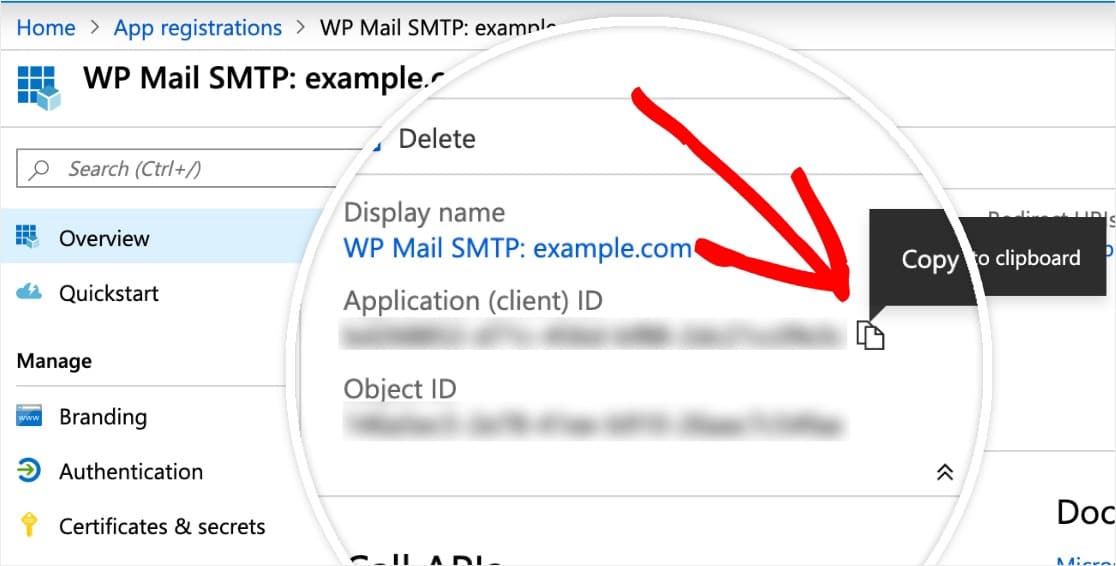
Here, copy this full ID and paste it into your WP Mail SMTP settings, in the field labeled Application ID.

Create an Application Password
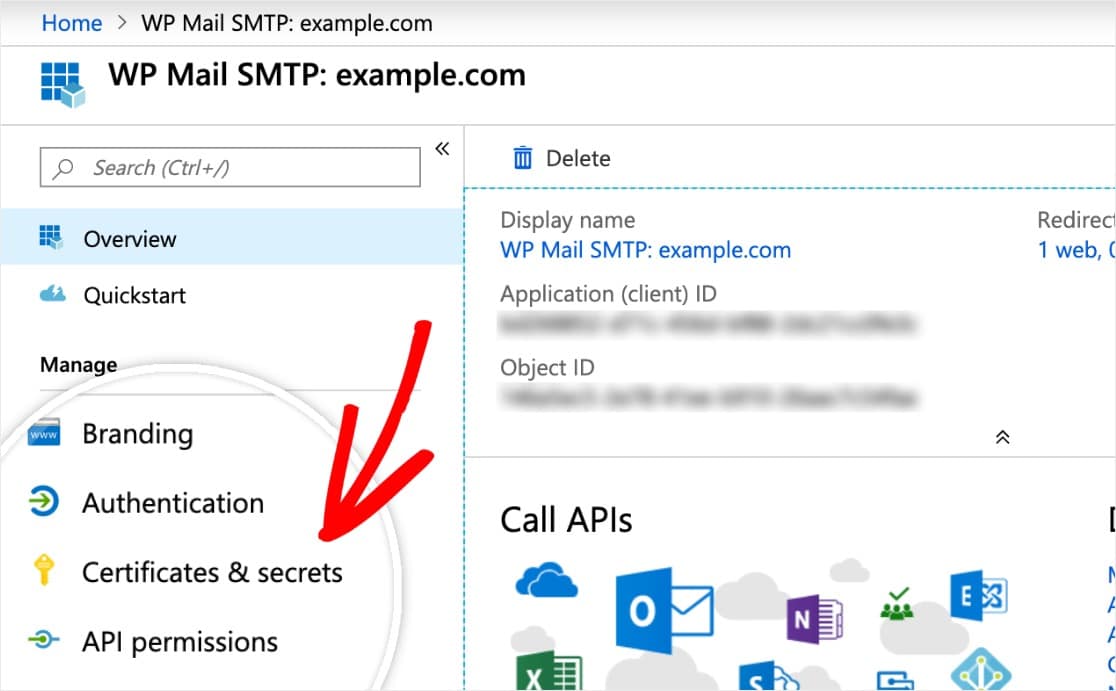
Next, you’ll need to generate a password for this app. To do that, click on Certificates & secrets in the left sidebar.
Now, scroll down to the Client Secrets section and select +New client secret.
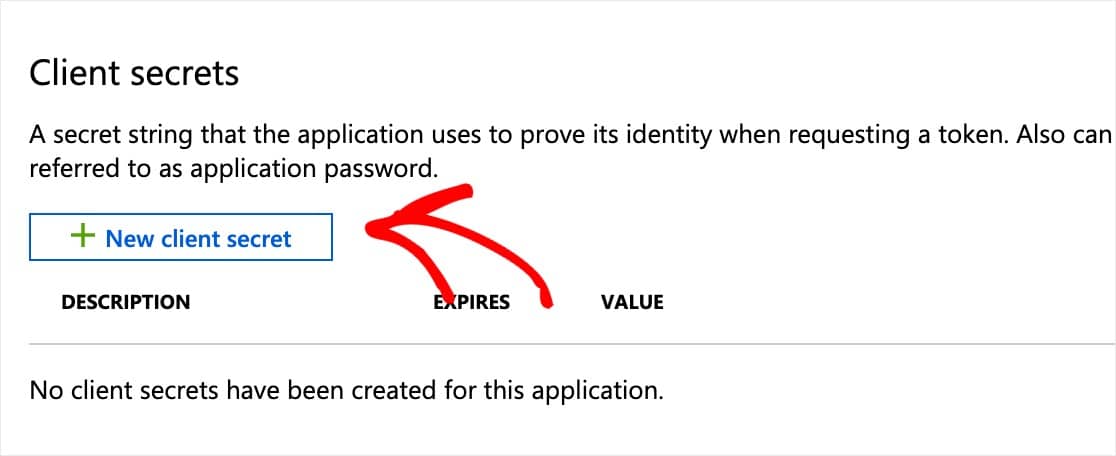
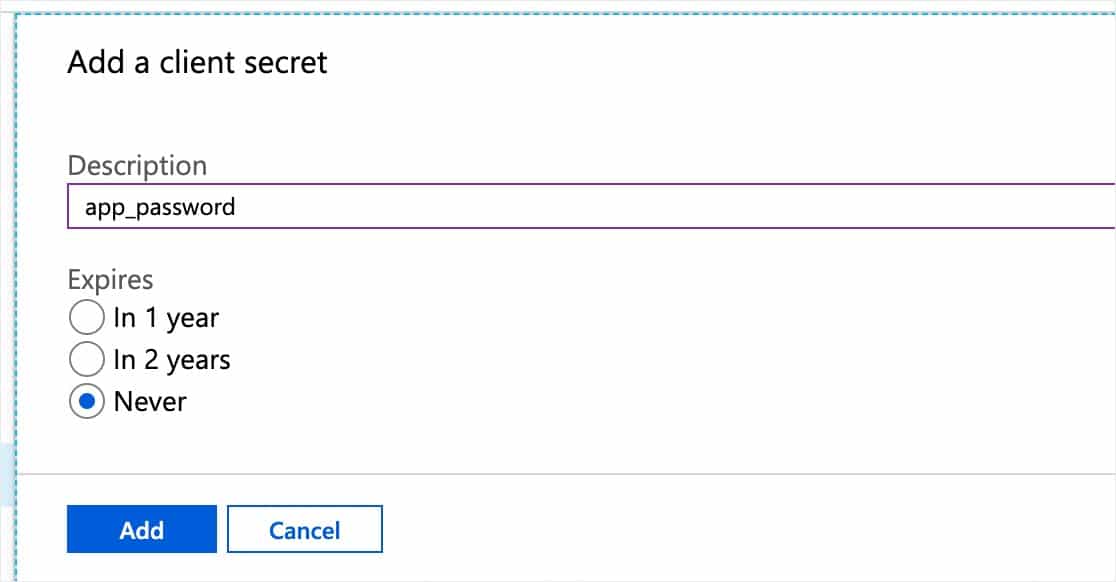
An overlay will now appear and you’ll need to fill out a form with these details:
- Description — This name is only for you, so we recommend a simple name like
app_password. - Expires — Never
Click on Add.
Now once you submit the client secret form, the Application Password will automatically be generated.

Next, copy this password and paste it into your WP Mail SMTP settings in the Application Password field on the WP Mail SMTP window or tab.

Set up API Permissions
Now that you’ve got both the Application ID and Application Password filled out in your WP Mail SMTP settings, the next step to continue setting up your WordPress Outlook mailer is to set up API permissions.
To do this, click on API permissions in the left sidebar. Then, click on the +Add a permission option.

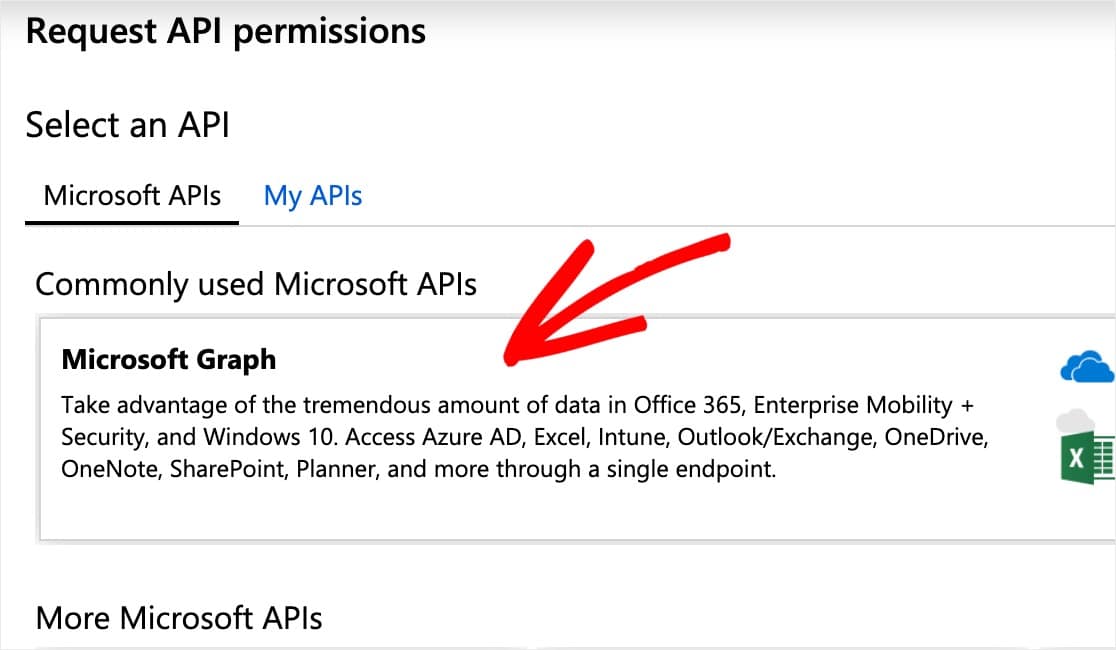
A page titled Request API Permissions will open. Click the option on the top named Microsoft Graph.
Next, fill out a couple pieces of info on this page to continue setting up your Microsoft Outlook mailer:
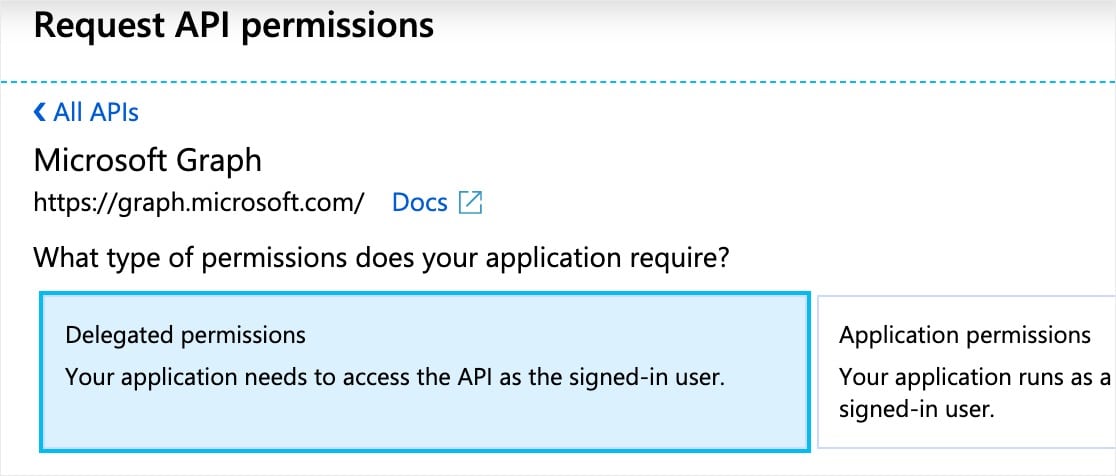
- What type of permissions does your API require — Choose the option named Delegated permissions
- Select permissions — Type in
send. Then, from the options that appear, check the box next to Mail.Send.Shared.
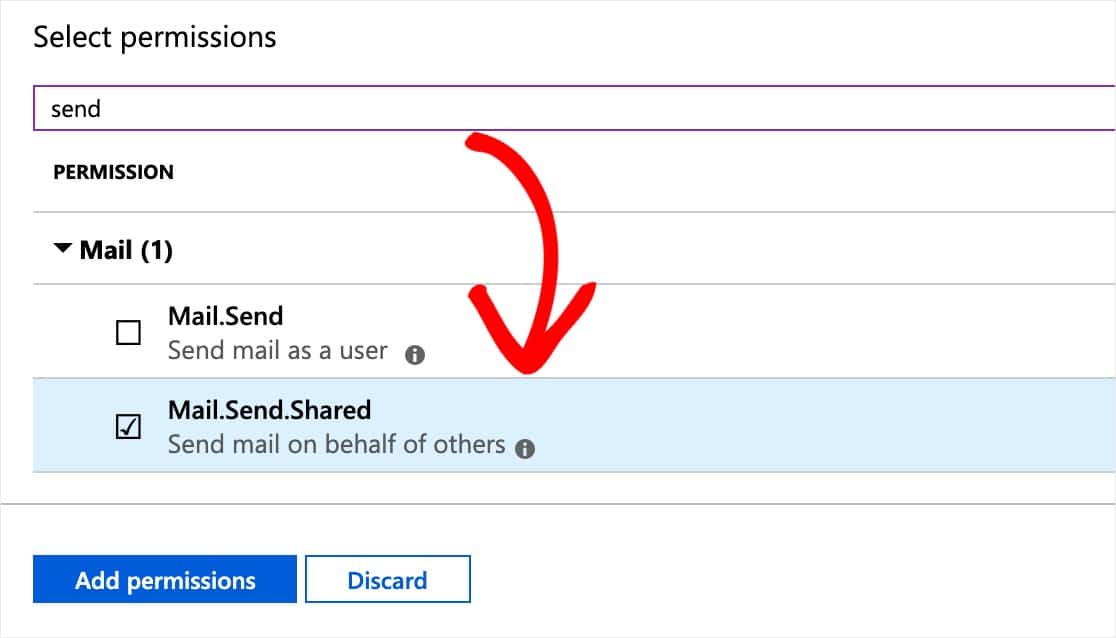
When you’re ready, click the Add permissions button to continue.
Now, you’ll need to go through this permissions process again but in a slightly different way. To do this, go ahead and once more click on + Add a permission, followed by the Microsoft Graph option.
Here are the new details you’ll need for this 2nd set of permissions:
-
- What type of permissions does your API require — Choose the option named Application permissions.

- Select permissions — Type in
send. Then, from the options that appear, check Mail.Send.
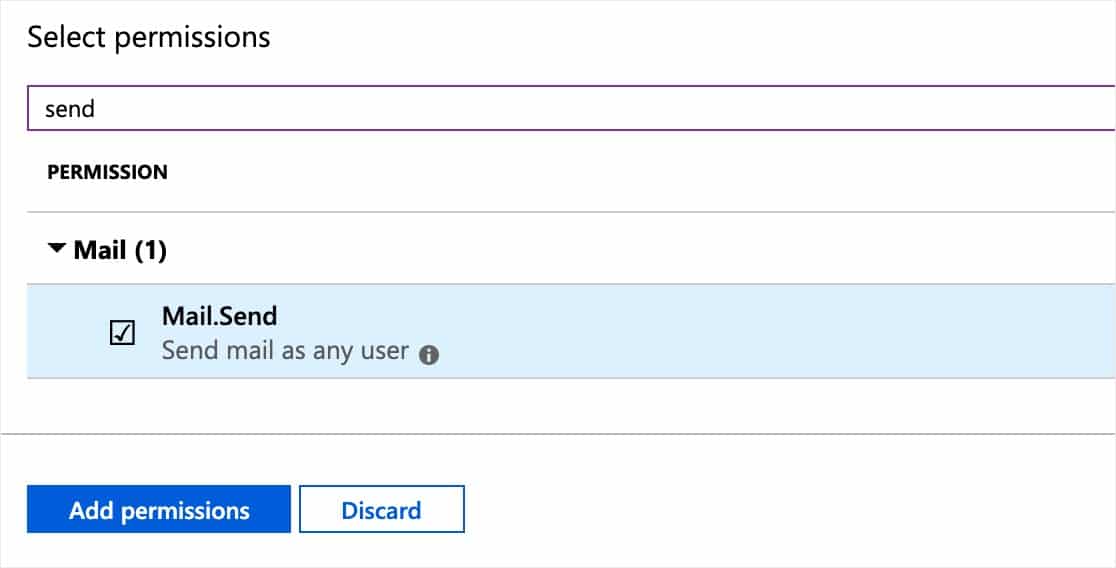
Now, click the Add permissions button when you’re ready to continue.
Great job! Your API permissions are all set up in Microsoft’s system, and you can now finish up the WordPress Outlook mailer configuration in WP Mail SMTP.
Need more leads from your website? Check out our post with tips to create a lead capture form that converts.
Step 3. Save Settings and Authorize WP Mail SMTP
Head back to your WP Mail SMTP settings. You should now have all fields filled out.
After confirming this, click Save Settings at the bottom of the page.
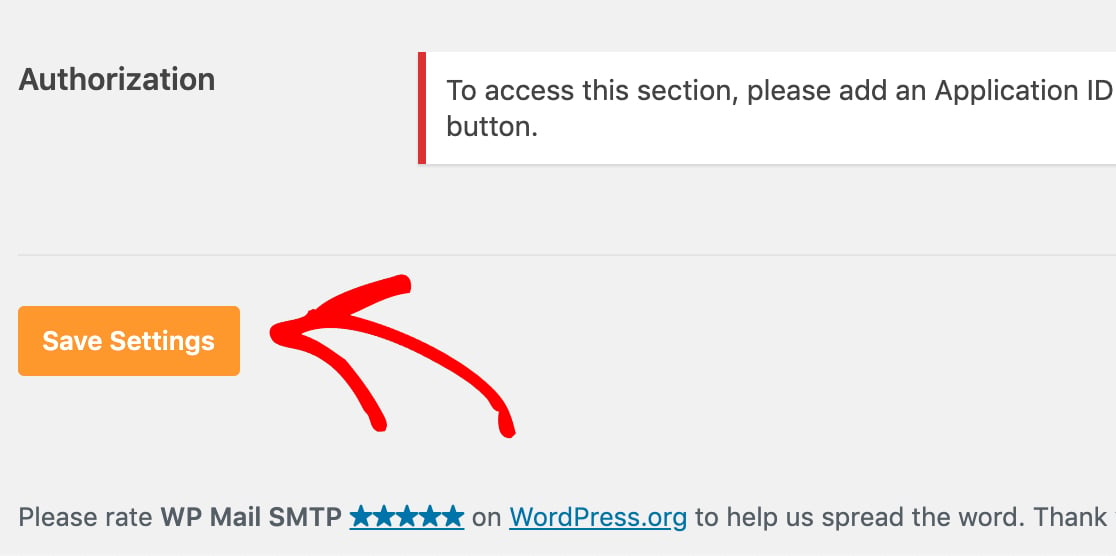
After you’ve saved the settings, scroll down to the Authorization setting. You should now see a button that says Allow plugin to send emails using your Microsoft account. Click this.

As soon as you click this button, you should be redirected to a Microsoft permissions form.
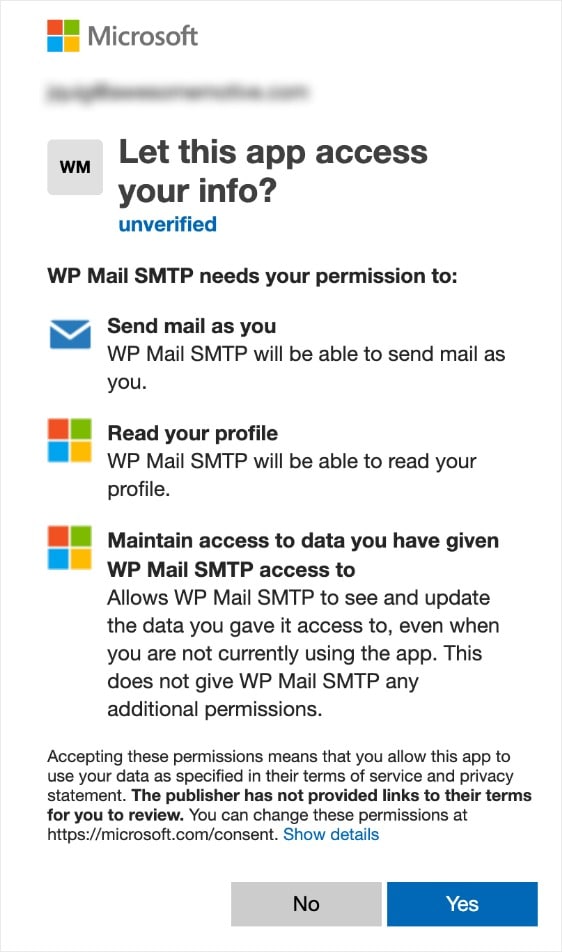
At the bottom of this form, click Yes.
Now you’ll be redirected back to your WP Mail SMTP settings to finish your WordPress Outlook mailer setup.
At the top of the page, you should see a confirmation letting you know that you’ve successfully connected your Microsoft account.

Step 4. Send a Test Email
Now that your Microsoft API is set up and connected, it’s important to send a test email to make sure that everything is working properly.
To do this, make sure you’re on the Settings » WP Mail SMTP page and then click on the tab that says Email Test.
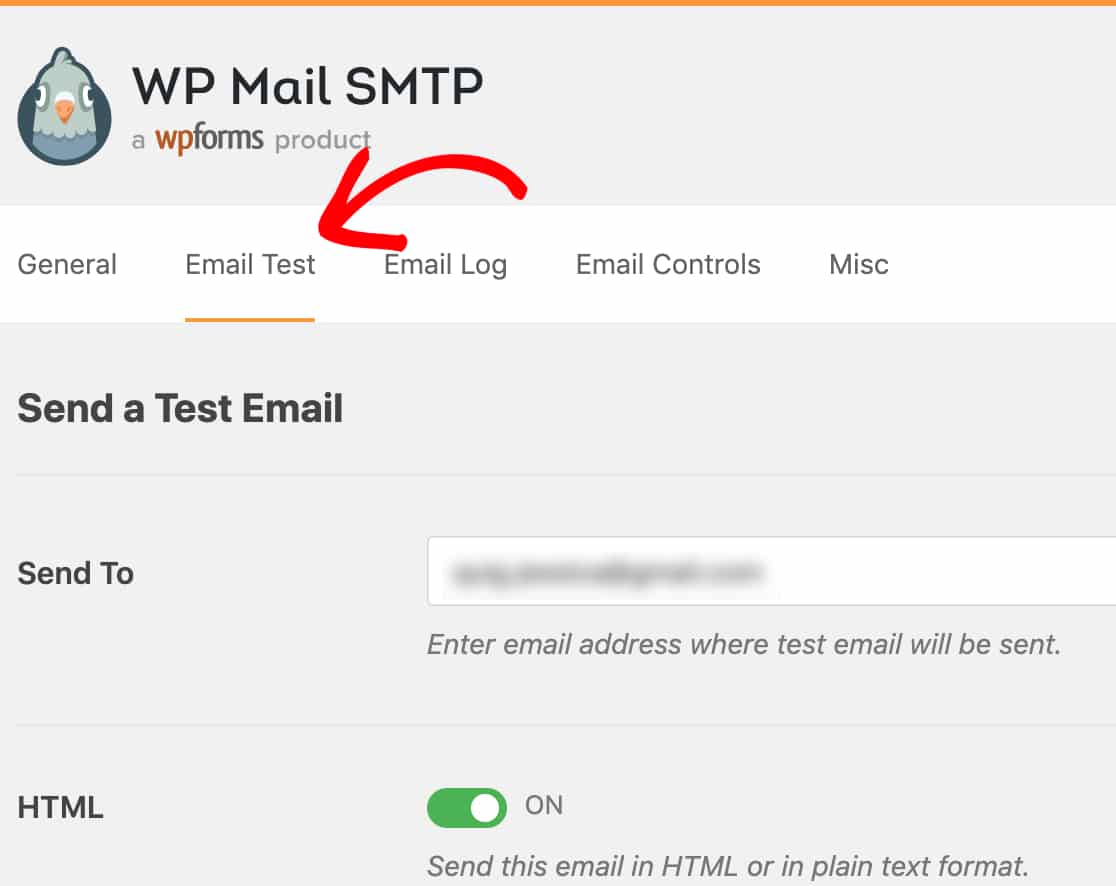
On this page, you can enter any email address that you have access to (the default will be the site’s admin email). Then, click on the Send Email button.
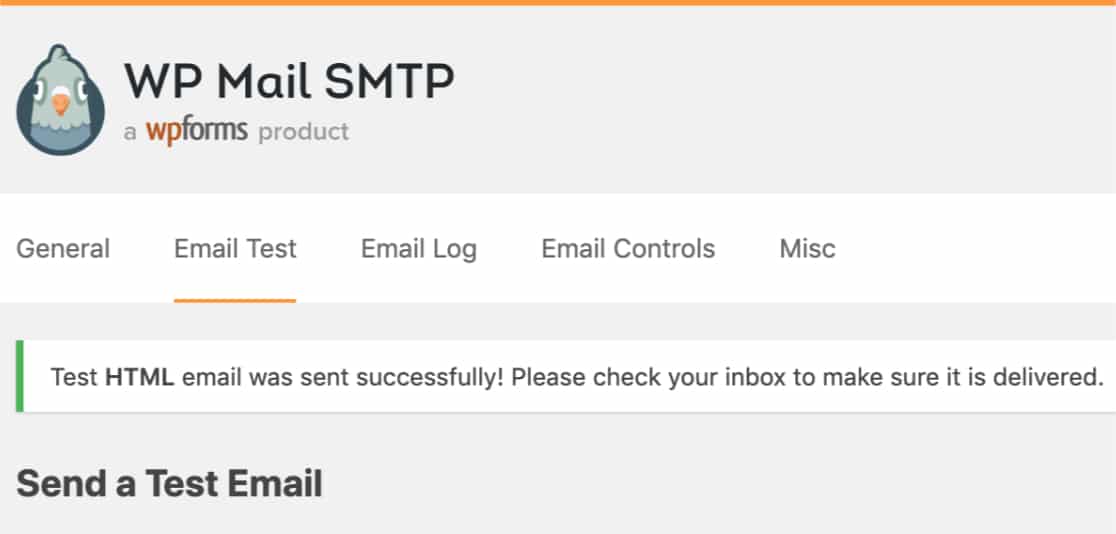
After sending the email, you’ll see a success message.
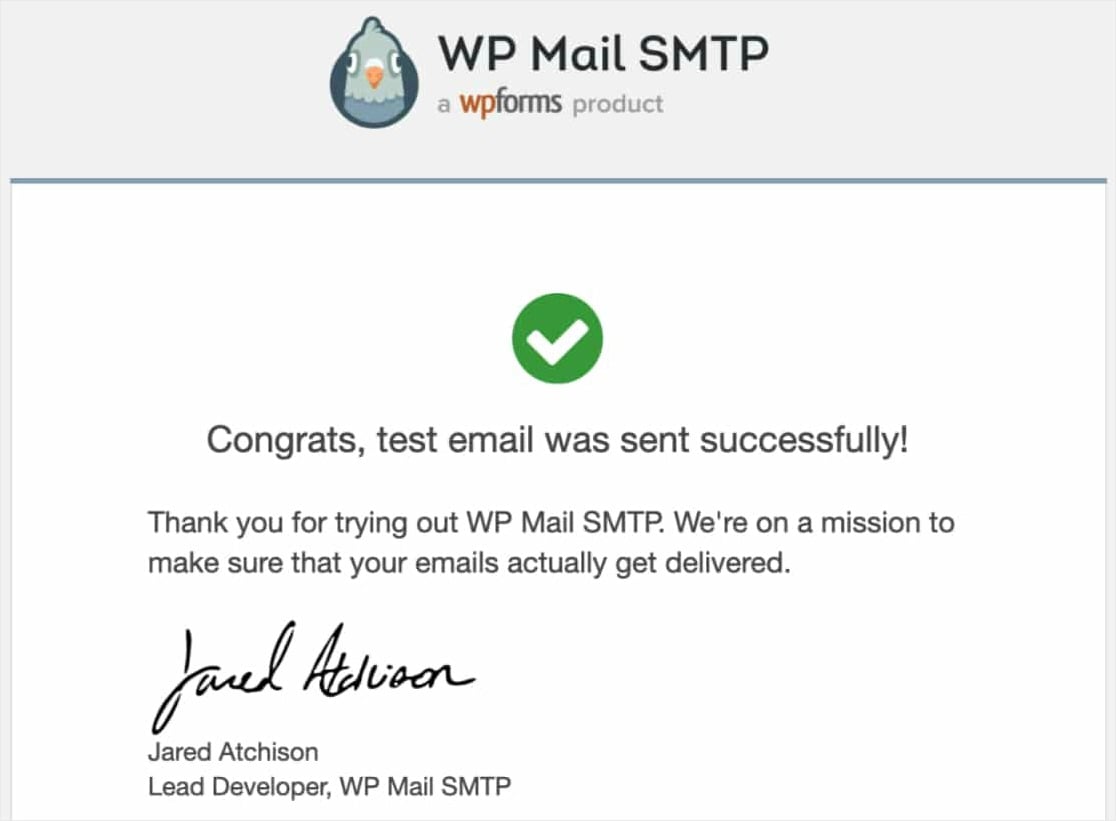
If you check the inbox for the email address you entered, you should receive the test email that says:
Final Thoughts
That’s it! You’ve successfully set up your site to send WordPress emails with the Outlook mailer in WP Mail SMTP.
You may also want to take a peek at our post on how to add Google Analytics to WordPress.
If you enjoyed this post, make sure to follow us on Facebook and Twitter for more free WordPress tutorials.
The post How to Set Up WordPress Outlook Mailer in WP Mail SMTP appeared first on WPForms.
source https://wpforms.com/how-to-set-up-wordpress-outlook-mailer-in-wp-mail-smtp/

