
Are you looking for a quick and easy way to let your tenants put in an online work order for their apartment or other rental? You can easily set up an online form with a maintenance request template that lets you accept online maintenance requests and even automatically email your maintenance person.
In this step-by-step guide, we’ll walk you through exactly how to create a maintenance request form in WordPress.
Click Here to Make Your Maintenance Request Form Now
How to Create a Maintenance Request Form in WordPress
Here’s a table of contents for easy navigation of this tutorial:
- Create a Maintenance Request Form in WordPress
- Customize Your Maintenance Request Form
- Enable Conditional Logic
- Configure Your Form Settings
- Customize Your Maintenance Request Form’s Notifications
- Configure Your Form’s Confirmations
- Add Your Maintenance Request Form to Your Website
Let’s take a look at exactly how to create a maintenance request form in WordPress with the WPForms plugin.
Here’s how it’s done:
Step 1: Create a Maintenance Request Form in WordPress
The first thing you’ll need to do if you’re wondering how to make a maintenance request form online is install and activate the WPForms plugin. For detailed instructions, see our step-by-step guide on how to install a WordPress plugin. Among its many powerful features, WPForms works great as a maintenance request WordPress plugin.
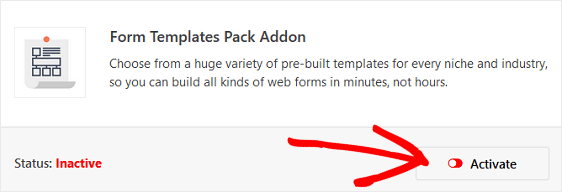
Next, you’ll need to install and activate the Form Templates Pack addon. With this addon, you’ll be able to access the pre-built maintenance request form template, as well as tons of other industry-specific templates for creating customized forms for your site.
This saves you a lot of time since you won’t have to start from scratch and manually add fields to a simple contact form.
Want to work on your website behind the scenes? Be sure to read our post on the best WordPress coming soon plugins and themes.
From the WPForms addon page, search for the Form Templates Pack.
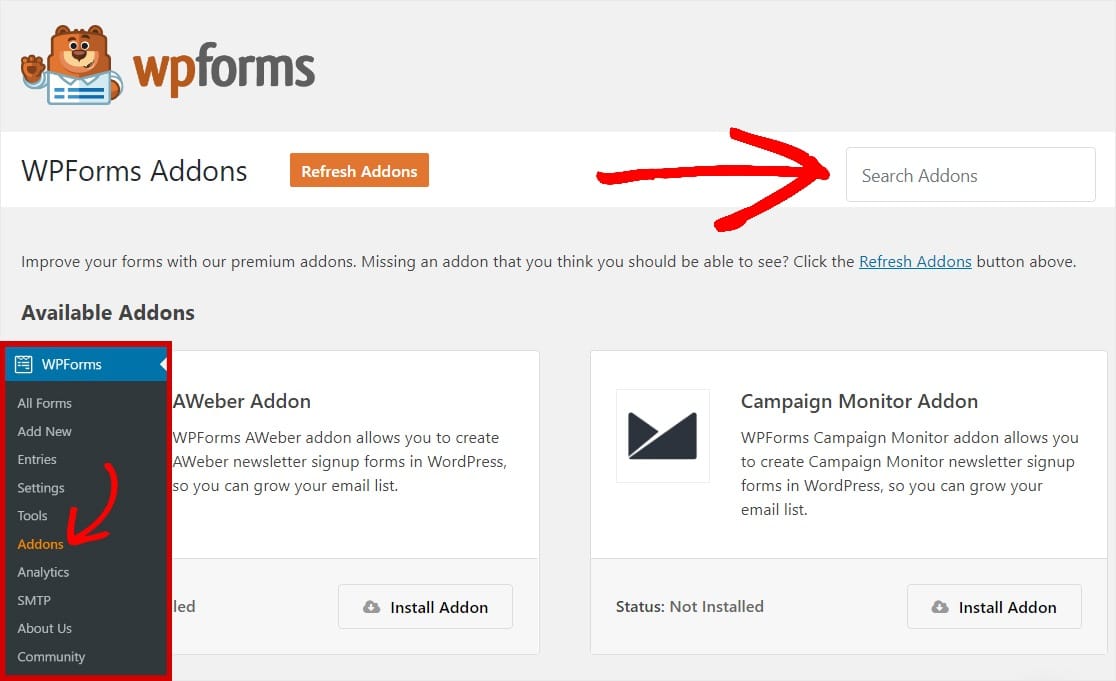
Click Install Addon and Activate.
Next, go to WPForms » Add New to create a new form.
On the setup screen, name your form and scroll down to the bottom of the templates screen where it says Additional Templates.
Type “Maintenance” into the search bar and the maintenance request form template will appear.
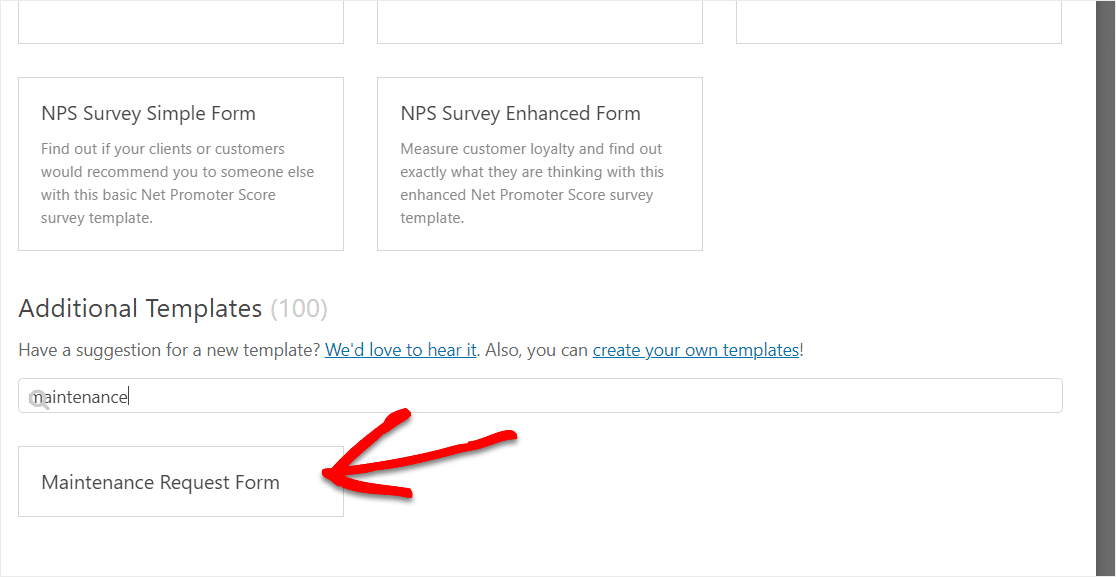
Click on the template and WPForms will automatically create a maintenance request form for you.
Step 2: Customize Your Maintenance Request Form
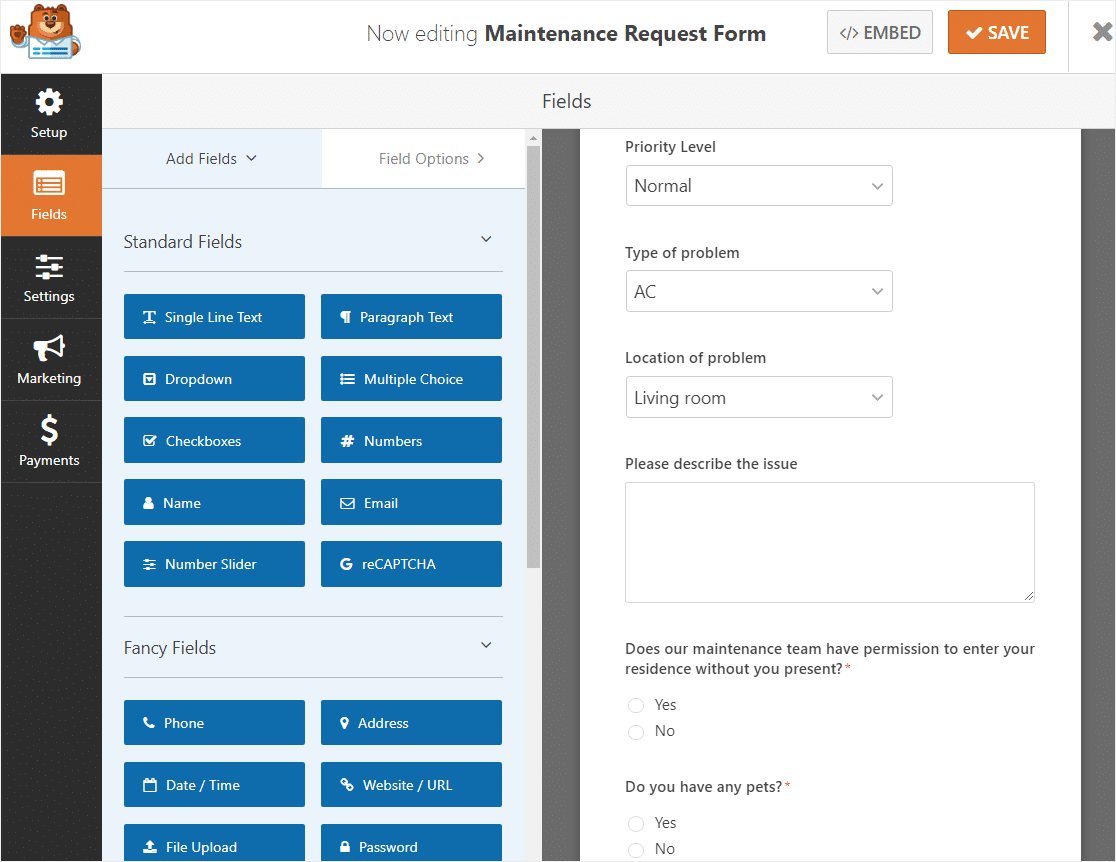
WPForms makes customizing forms easy to do.
In addition to the standard form fields Name, Email, Phone Number, and Property Address, you’ll notice the following form fields:
- Dropdowns (3)
- Paragraph Text
- Multiple Choice (2)
This template already includes basic questions like contact information, but you can ask for more info if you need it. You can add additional form fields to your apartment maintenance request form by simply dragging them from the left-hand panel to the right-hand panel.
Here are a few ideas of additional form fields you might want to add:
- Entry Instructions— Add a multiple choice, checkbox, or single line text field to have people provide more details on how to access their place.
- Issue Start Date — Add a single line text field and let people enter when the issue started. If you want, create an input mask so people can easily enter a date.
- Emergency — Add a multiple choice field asking people if the request is an emergency, and if they click yes, automatically display text with a number to call or other info using conditional logic (more on this in step #3)
Also, you have the option to create a multi-step form to make your form appear less cluttered as well!
Plus, you can also ask for things like pictures so your team knows exactly what is broken and where in the unit.
This can easily be done by adding a File Upload field to your form. Just drag it from the left-hand panel onto your form, in the spot that you’d like it to appear.
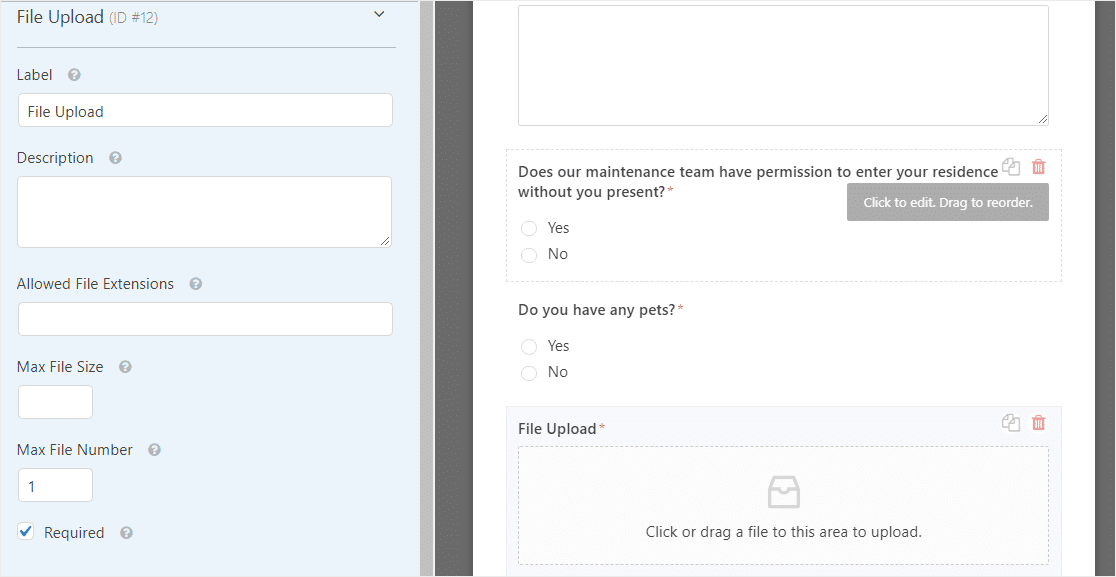
Once it’s on your form, click on the File Upload field to customize it and do the following:
- Change the label so people know what to upload
- Add a description with instructions if needed
- Specify the types of file extensions you’ll allow people to upload
- Enter a maximum file size if you want to restrict the size to be smaller than the default of 128MB
- Change the default maximum file number of file uploads from 1 if you want to allow for more files per field
- Click the Required checkbox if everyone must upload a file
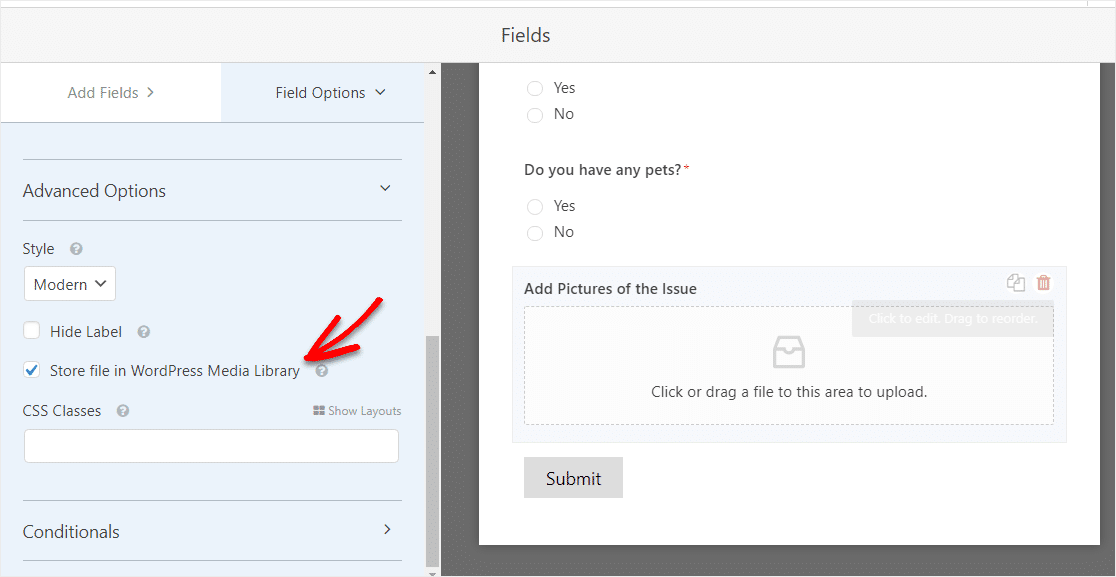
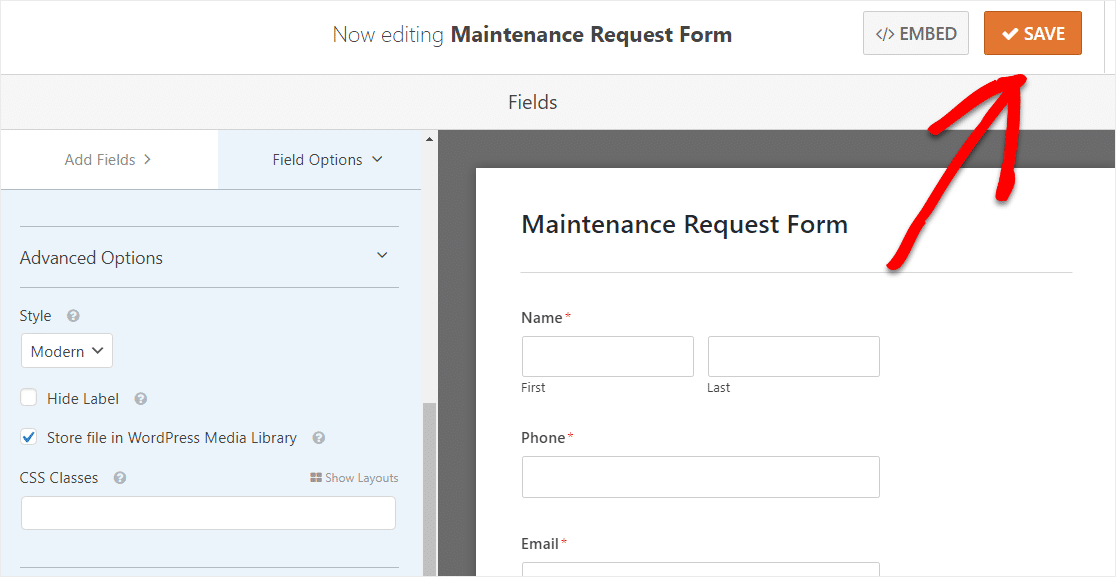
Under the Advanced Options section, click the checkbox labeled Store file in WordPress Media Library for easy access to the files your tenants upload to their forms.
Want to have an upload button instead of the Modern style file uploader?
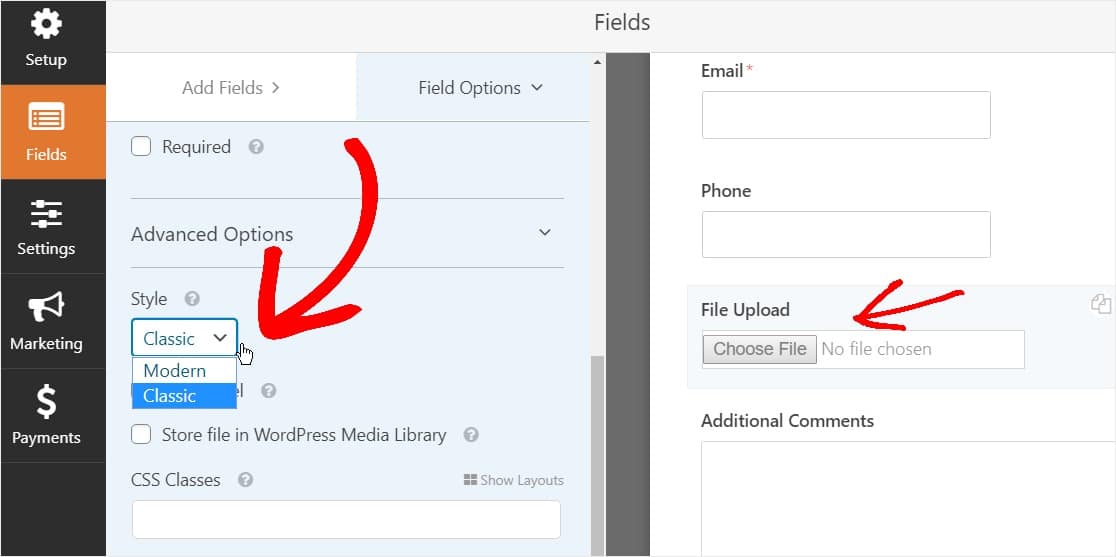
You can read Step #2 in this post on how to switch to the Classic style for your upload field.
When you’re done customizing your form, click Save.
Step 3: Enable Conditional Logic
Having a long maintenance request form is not ideal. To fight form fatigue, create clutter free forms, and still gather the information you need from people, you should enable smart conditional logic on your WordPress form.
And it’s super easy to do!
Looking for a great way to get more income from your small business website? Check out our post with great tips to create a lead capture form that converts.
In our example, we’ll ask people filling out the form if they have any pets. If they select yes, a box will appear asking for more details. Pretty cool, right?!
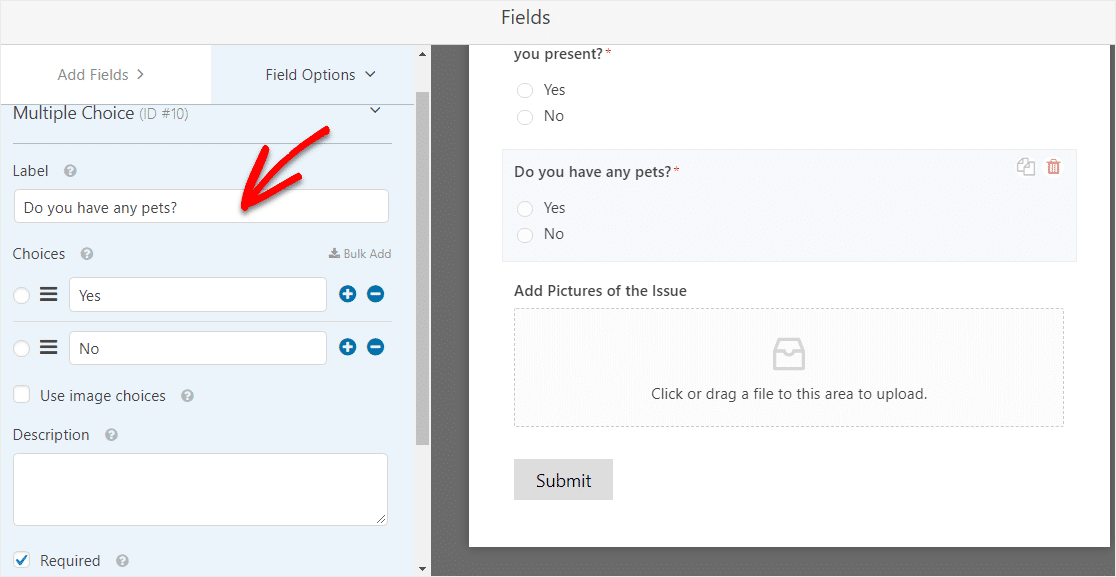
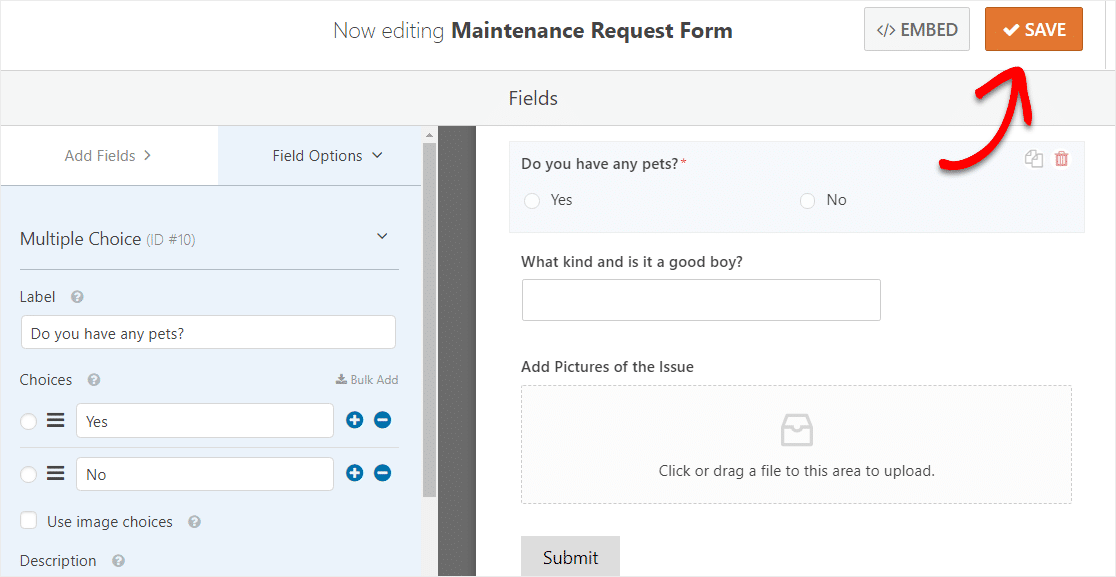
So to set this question up, head to the Multiple Choice form field that already asks about pets. Then, click on the field to make changes.
Here you can change the label and add the choices you want people to pick from, if you need.
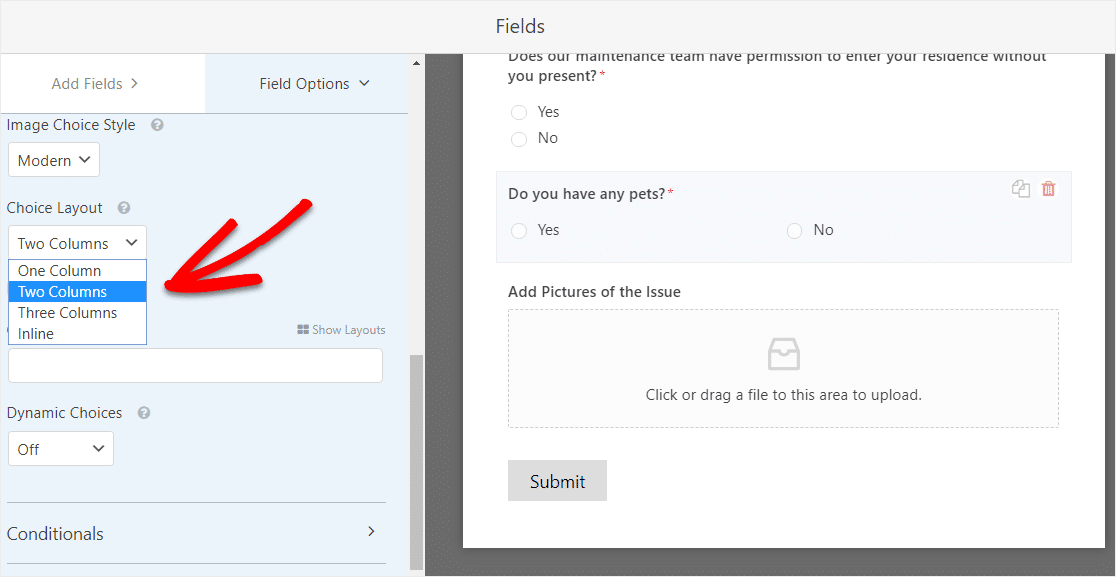
And under Advanced Options you can change the Choice Layout to two columns if you’d like.
Next, under Add Fields, drag a Single Line Text form field directly underneath the pet question on your form. Once you’ve done that, click on the field to make changes.
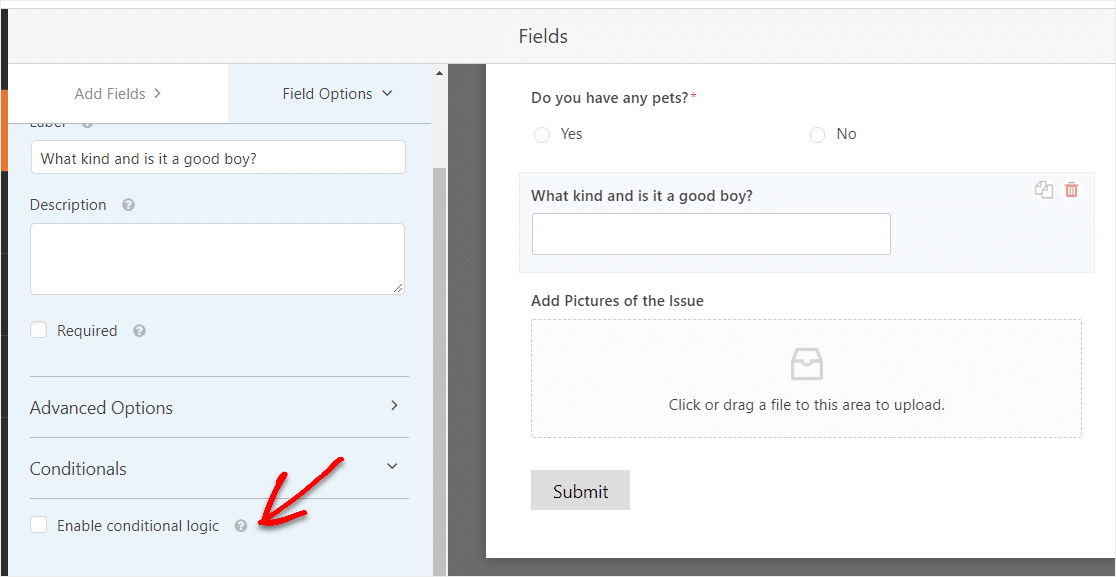
Start by changing the field label. In our example, we’ll ask the question “What kind and is it a good boy?”

Now here’s where the magic happens. To enable conditional logic, scroll down to the section labeled Conditionals in the left-hand panel. Then, click on the checkbox labeled Enable conditional logic.
After you click on the checkbox, customize the conditions. Select Show this field if Were you referred by an existing employee? is Yes.
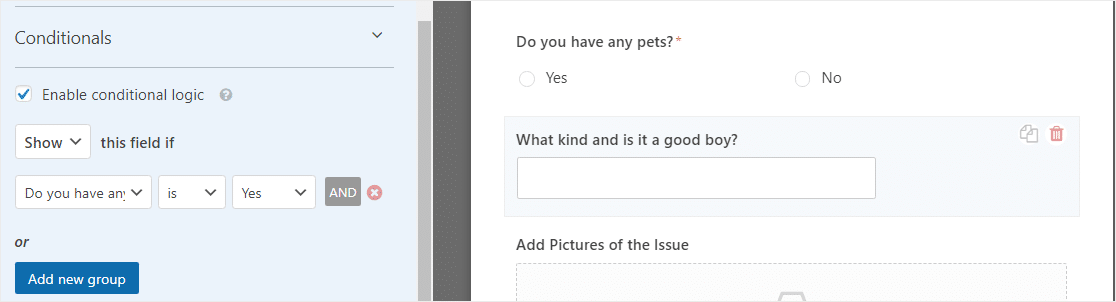
Now, whenever someone filling out your WordPress form selects the multiple choice option “Yes” when answering the question “Do you have any pets?” the single line text field will appear so they can enter more details about their little friend.
Check it out:
When you’re done, click Save.
Step 4: Configure Your Form Settings
To start, go to Settings » General.
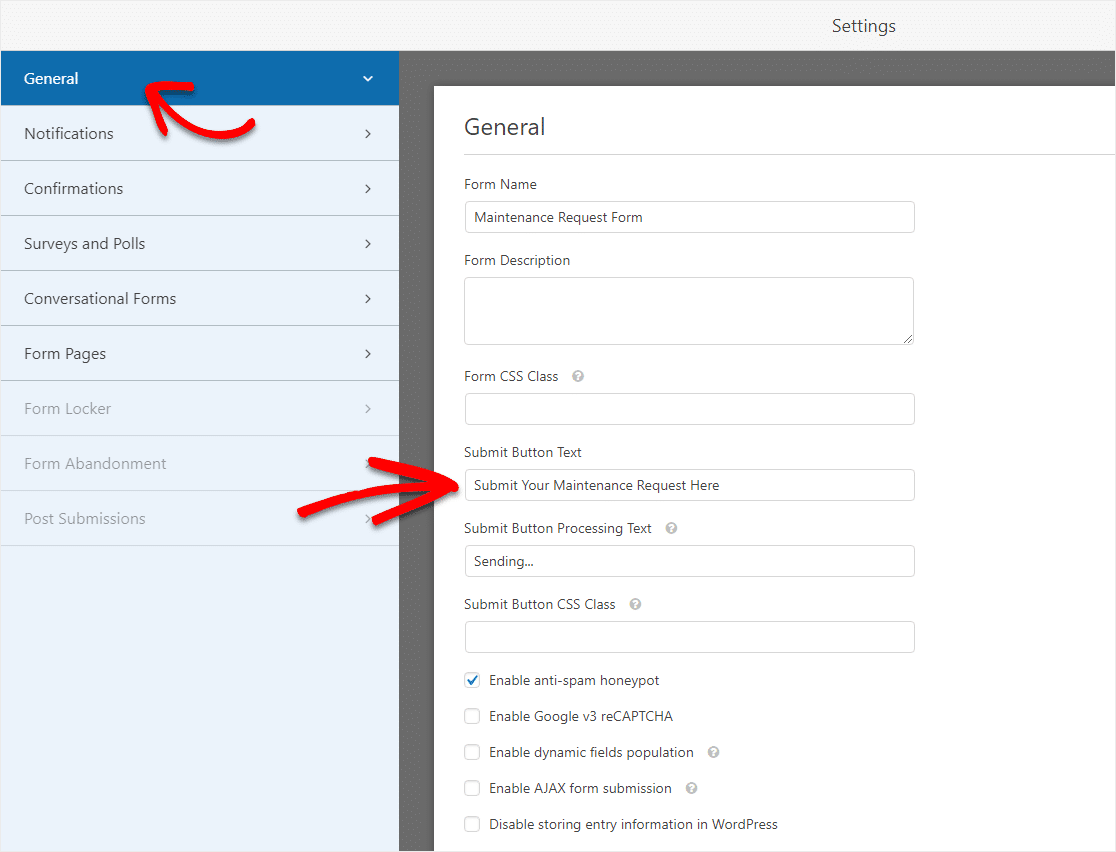
Here you can configure the following:
- Form Name — Rename your form here if you want to.
- Form Description — Give your form a description.
- Submit Button Text — Customize the copy on the submit button. In our example, we’ll change our submit button to say “Submit Your Maintenance Request Here”
- Spam Prevention — Enable the anti-spam honeypot feature to prevent spambot requests and keep your website secure. This feature is automatically enabled on all WordPress forms. If you decide to use another form of spam prevention, unclick this option. You can also enable Google reCAPTCHA here.
- AJAX Forms — Enable AJAX settings with no page reload.
- GDPR Enhancements — You can disable the storing of entry information and user details, such as IP addresses and user agents, in an effort to comply with GDPR requirements. In addition, check out our step-by-step instructions on how to add a GDPR agreement field to your simple contact form.
When you’re done, click Save.
Step 5: Customize Your Maintenance Request Form’s Notifications
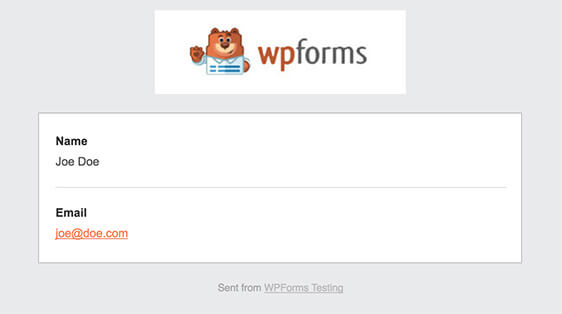
Notifications are a great way to send an email whenever a work order is submitted on your website.
In fact, unless you disable this feature, whenever someone submits a maintenance request form on your site, you’ll get a notification about it.
If you use smart tags, you can also send a notification to the user when they fill this out, letting them know you received their work order and someone will be in contact shortly. This assures people their request has gone through properly.
Are you keeping track of who is coming to your website and from where? Make sure to read our guide on how to add Google Analytics to WordPress.
For help with this step, check out our documentation on how to set up form notifications in WordPress.
And if you want to keep branding across your emails consistent, you can check out this guide on adding a custom header to your email template.
Note: Since file attachment can often hurt email deliverability, WPForms doesn’t attach files in emails. For example, if an email provider only allows a maximum of 10MB for the attachment but the user uploads a file size higher than 10MB, the email won’t be delivered. Instead, we send the file uploads via email as links.
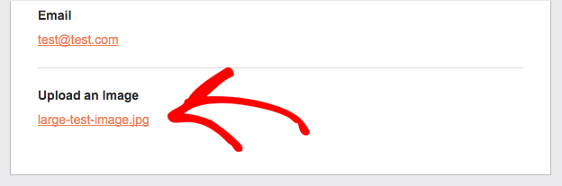
This is a great way to send work order requests to your maintenance team to make sure they jump on things quickly!
Step 6: Configure Your Form’s Confirmations
Form confirmations are messages that display to site visitors once they submit a work order request on your website. They let people know that their maintenance request has gone through and offer you the chance to let them know what the next steps are.
WPForms has 3 confirmation types to choose from:
- Message — This is the default confirmation type in WPForms. When a site visitor submits a work order request, a simple message confirmation will appear letting them know their request was processed. Check out some great success messages to help boost user happiness.
- Show Page — This confirmation type will take site visitors to a specific web page on your site thanking them for submitting. For help doing this, check out our tutorial on redirecting customers to a thank you page. In addition, be sure to read our article on creating effective Thank You pages.
- Go to URL (Redirect) — This option is for when you want to send site visitors to a different website.
Let’s see how to set up a simple form confirmation in WPForms so you can customize the message site visitors will see when they fill out your form.
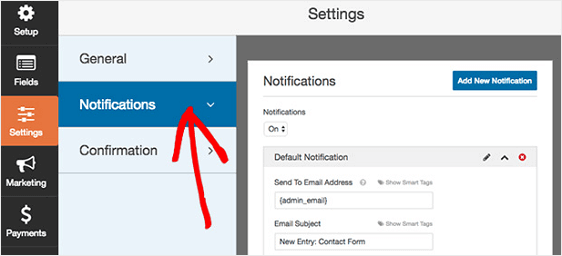
To start, click on the Confirmation tab in the Form Editor under Settings.
Next, select the type of confirmation you’d like to create. For this example, we’ll select Message.
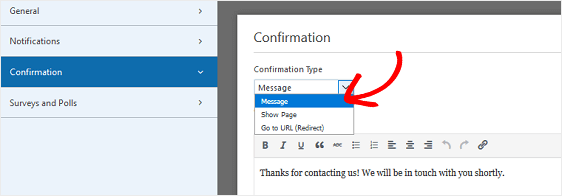
Then, customize the confirmation message to your liking and click Save.
For help with other confirmation types, see our documentation on setting up form confirmations.
Now you’re ready to add your maintenance request form to your website.
Step 7: Add Your Maintenance Request Form to Your Website
After you’ve created your maintenance request form, you need to add it to your WordPress website. WPForms allows you to add your forms to many locations on your website, including your blog posts, pages, and even sidebar widgets.
Let’s take a look at the most common placement option: page/post embedding.
To begin, create a new page or post in WordPress, or go to the update settings on an existing one.
After that, click inside the first block (the blank area below your page title) and click on the Add WPForms icon.
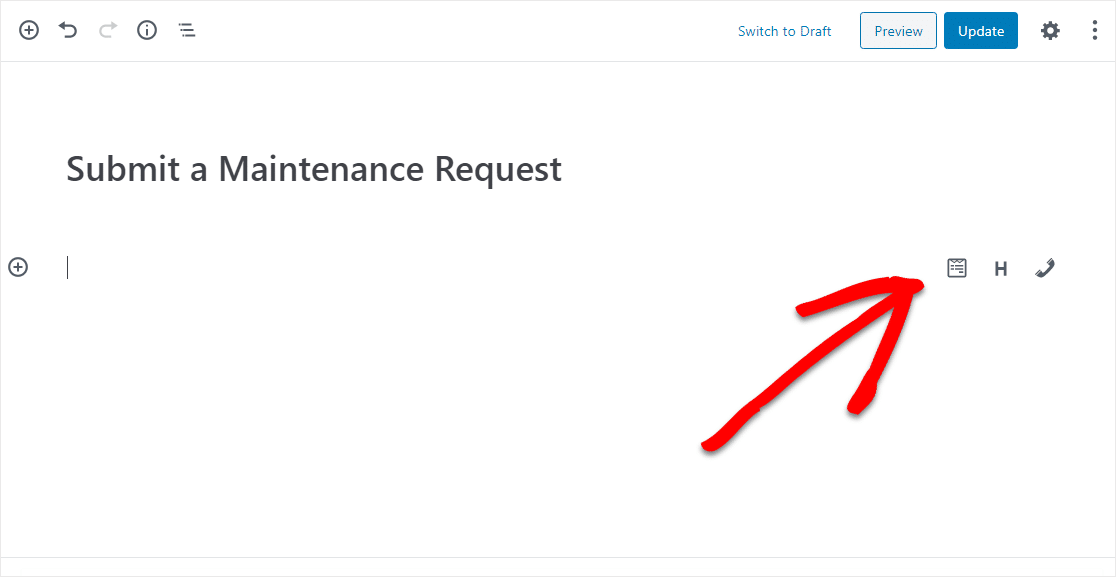
The handy WPForms widget will appear inside of your block. Click on the WPForms dropdown and pick which one of the forms you’ve already created that you want to insert into your page. Select your Maintenance Request Form.
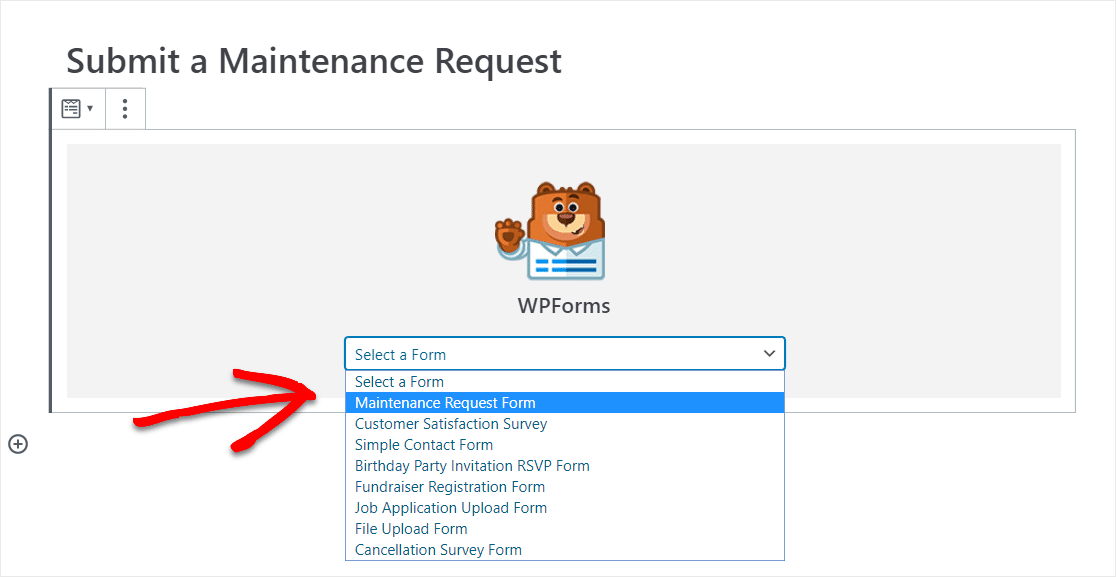
Then, publish or update your post or page so your maintenance request form will appear on your website.
To view form entries after they’ve been submitted, check out this complete guide to form entries. For example, you can view, search for, filter, print, and delete any maintenance request form entries, making the work order process that much easier. In addition, you can use our Zapier addon to automatically save file uploads to cloud services like Google Drive and Dropbox.
Click Here to Make Your Maintenance Request Form Now
In Conclusion
And there you have it! You now know how to create an online maintenance request form in WordPress using the WPForms plugin so you can easily get work orders from your tenants!
Looking to get your tenant’s attention while they’re on your maintenance request form page? Take a peek at our post on the best WordPress popup plugins.
So what are you waiting for? Get started with the most powerful WordPress forms plugin today.
And don’t forget, if you like this article, then please follow us on Facebook and Twitter.
The post [TEMPLATE] How to Create a Maintenance Request Form in WordPress appeared first on WPForms.
source https://wpforms.com/maintenance-request-form/
