
Do you want to add a country dropdown list to a form? Putting a list in your form will help your visitors to pick their country quickly when filling in your form.
In this article, we’ll show you how to add countries to a dropdown in WordPress. This is a really easy method that requires no coding, and you don’t have to find a list of countries to copy and paste.
Create Your WordPress Form Now
How to Get a Country List in WordPress
WPForms comes with a preset country list that you can add to any WordPress form.
You can use the preset to quickly add the entire list to your form with 1 click. From there, you can also customize the list so that the countries are formatted and spelled exactly how you want them.
We’ll walk you through all of this in the tutorial below.
The WPForms plugin is the best contact form plugin for WordPress. The country list is just one of the presets you can use.
It also has handy presets for:
- US states
- Country postal codes
- State postal codes
- Months of the year
- Days of the week
These will save you tons of time when you’re making forms.
Keep reading to find out how to quickly add a pre-populated list of countries to any form easily.
How to Add a Country Dropdown List to Your WordPress Forms
There are only 3 steps in this tutorial. We’re also going to show you an optional step if you want to customize the list.
Here are the steps we’re going to walk through:
- Install the WPForms Plugin
- Add a Country Dropdown List to Your Form
- Customize the Countries in Your Dropdown List (Optional)
- Publish Your Form on Your Website
Let’s start by setting up the WPForms plugin.
Step 1: Install the WPForms Plugin
To start, install and activate the WPForms plugin.
If you need a little help with this, read this easy guide on how to install a plugin in WordPress.
You’ll also need a form ready that you can edit as we step through the tutorial. You can create a simple contact form quickly now, or edit an existing form.
When you have your form ready, let’s continue.
Step 2: Add a Country Dropdown List to Your Form
Now we’re ready to add the list of countries to the form.
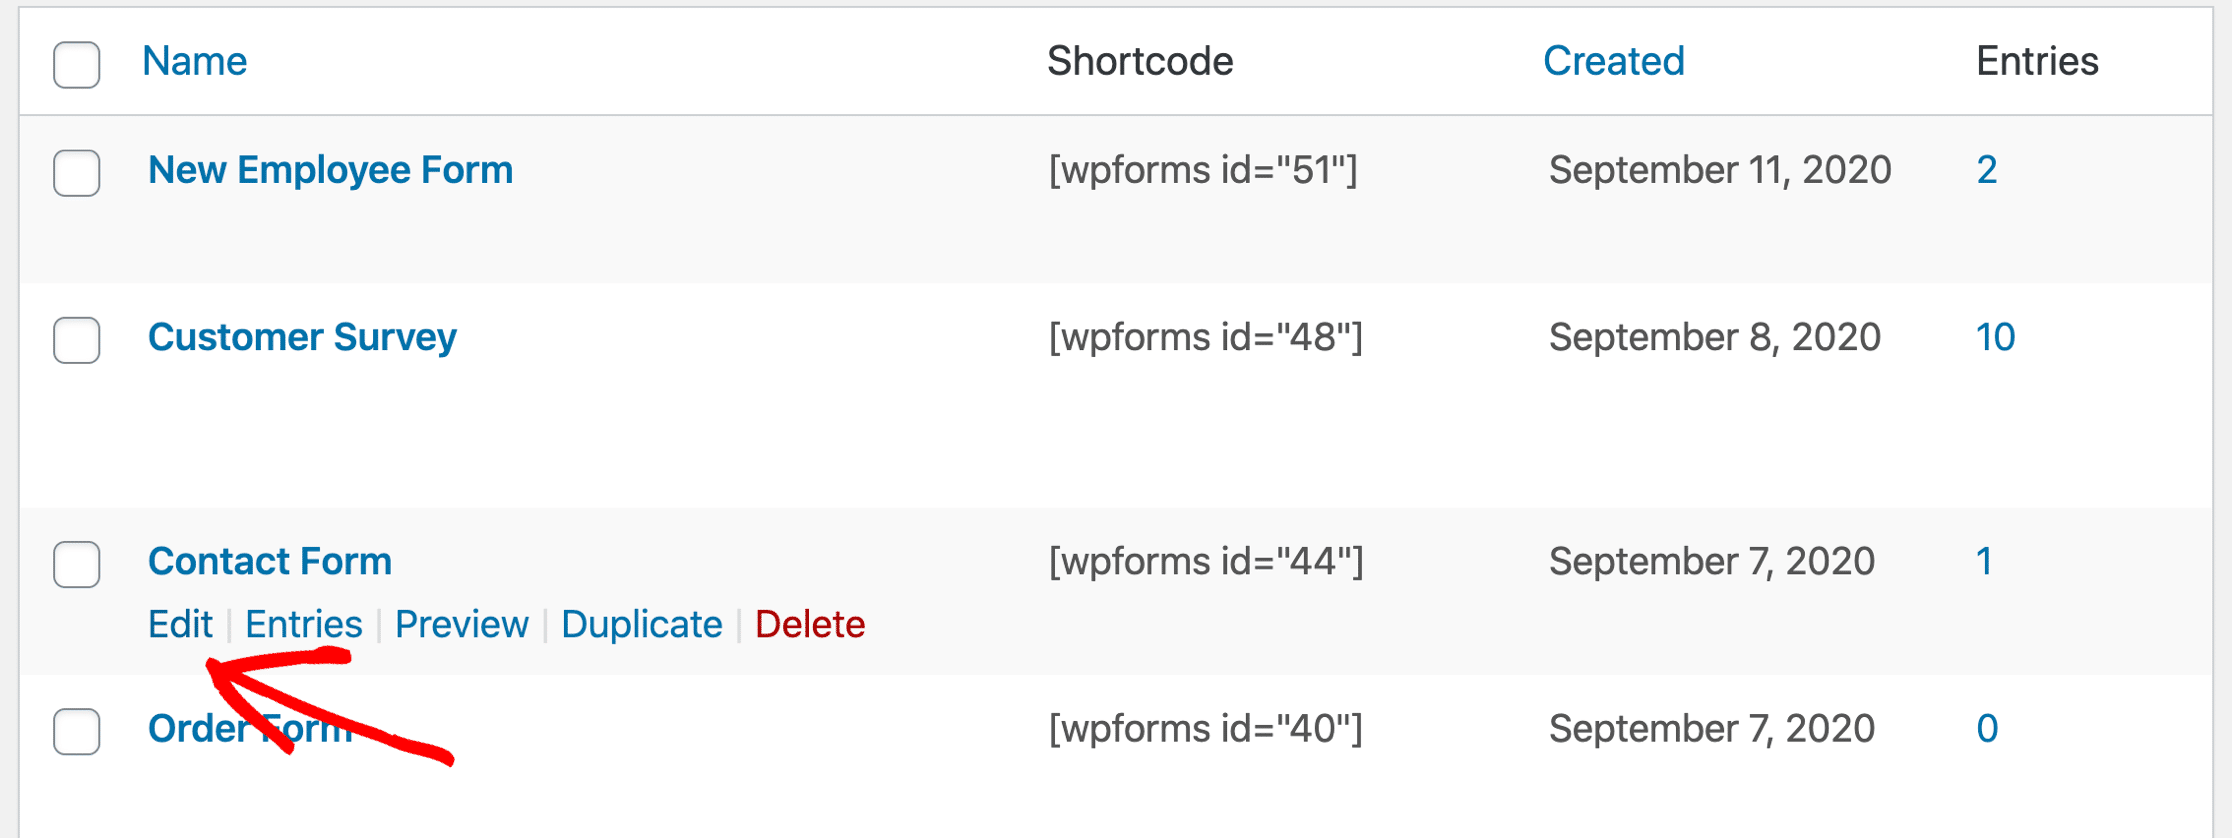
In the WordPress dashboard, click WPForms » All Forms. Hover your mouse over the form you want to add the dropdown to, then click Edit.
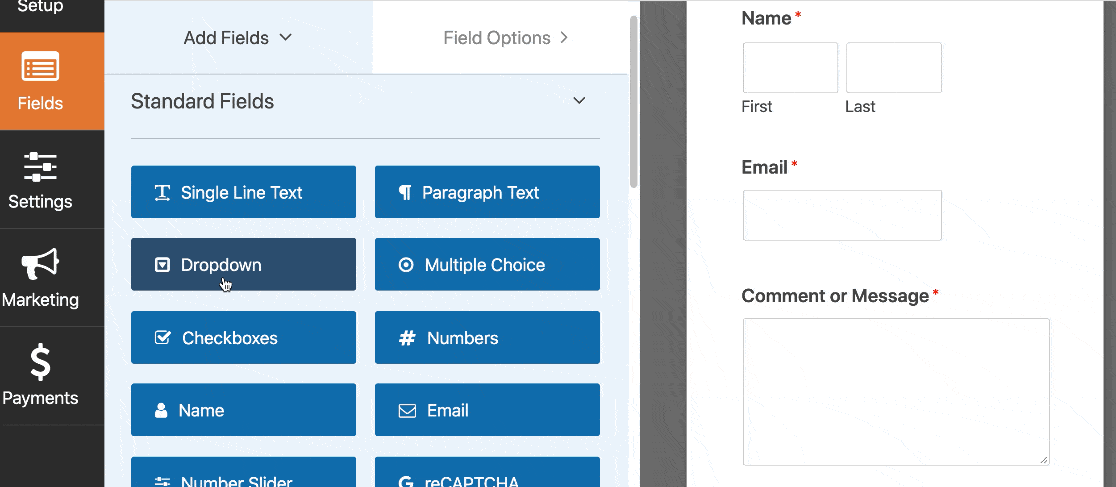
Now we’re in the form builder. Go ahead and drag a dropdown field from the left hand pane to the pane on the right.
Click once on the dropdown to open the settings. We’re going to add the countries using the Bulk Add tool here.
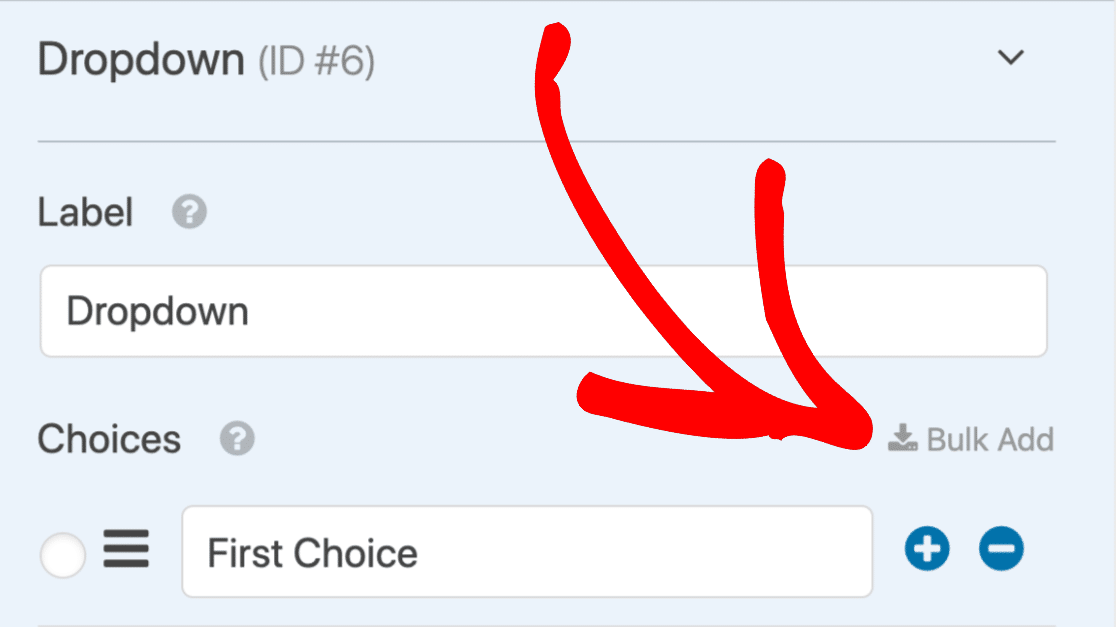
Let’s break it right down.
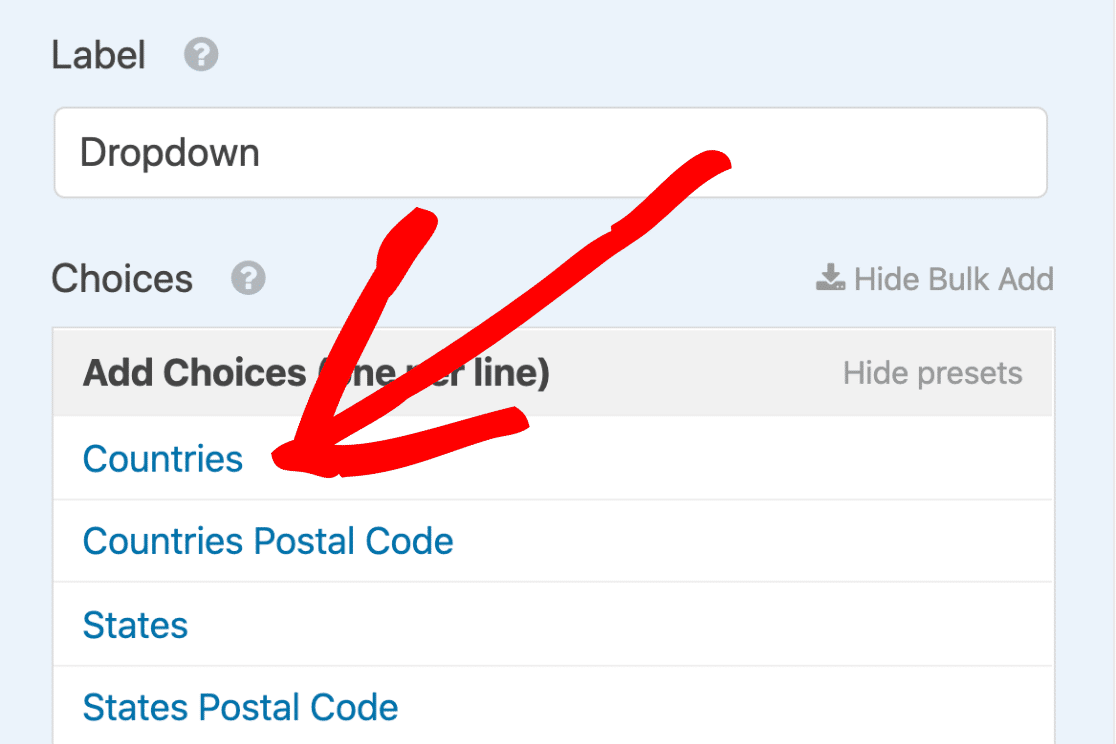
First, with the dropdown settings open, you’ll want to click the Bulk Add link.
Underneath, click Show Presets to open a list of all the presets in WPForms.
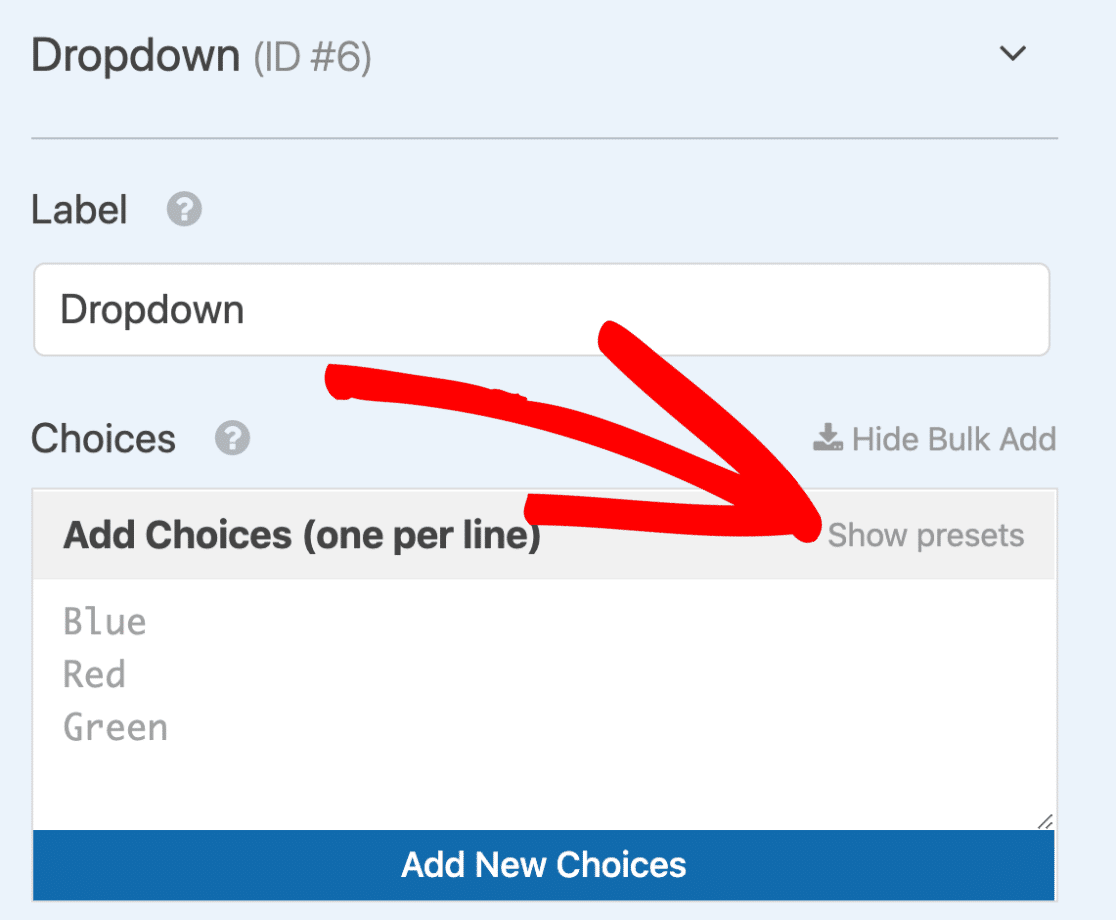
Go ahead and click Countries to load the full list of countries into the form builder.
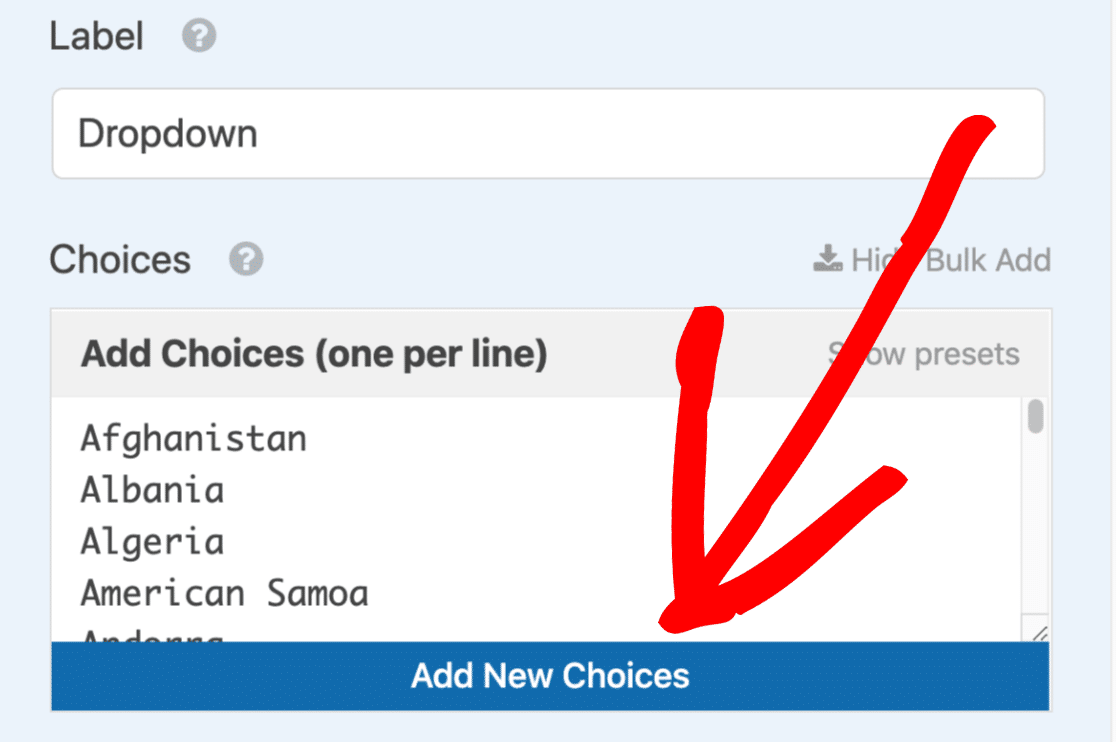
And finally, click Add New Choices to add all of the countries as new Choices in your dropdown list.
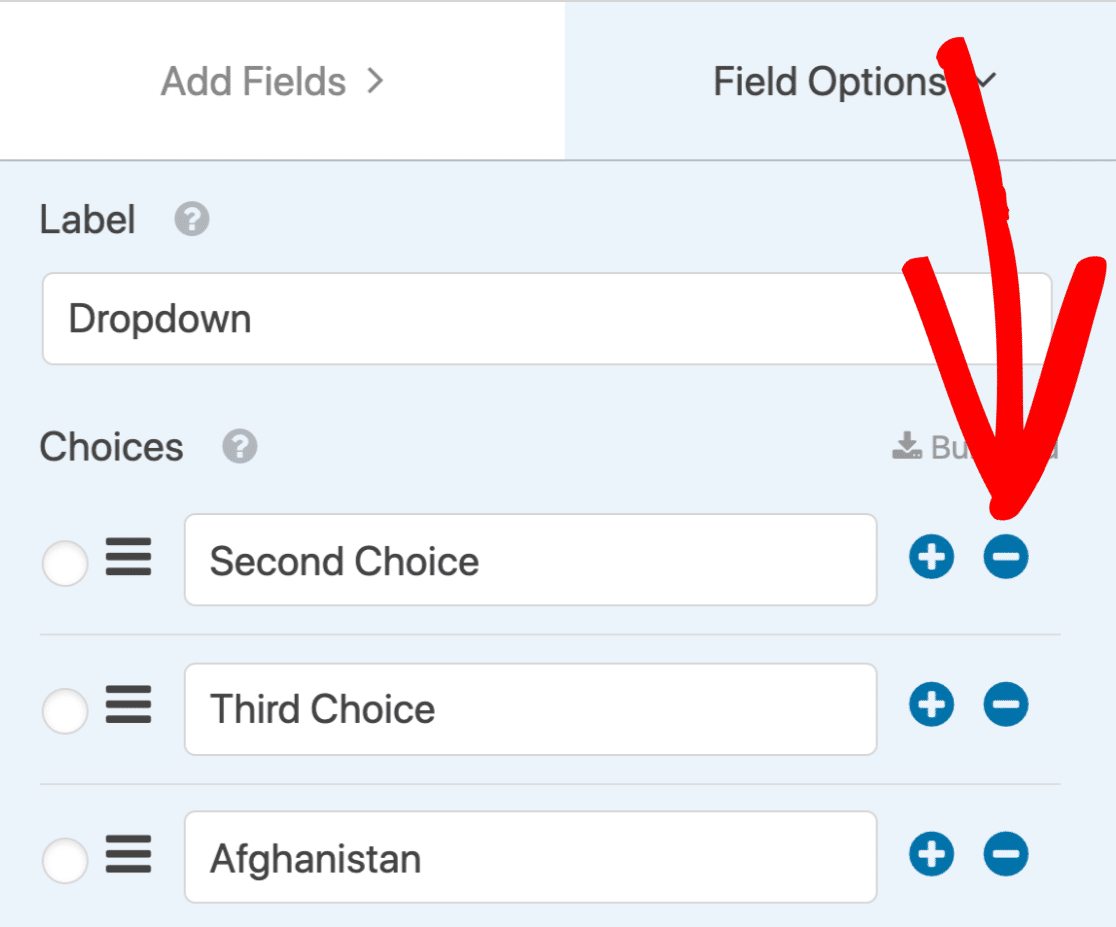
Great! We have a country dropdown list almost ready to go. There are 3 more small tweaks to do now.
First, let’s get rid of the 3 default choices called First Choice, Second Choice, and Third Choice. One by one, click the minus icon next to those items to delete them.
You can use the same method to remove countries from the list if you want to.
Now we should change the label on the field. Let’s delete Dropdown and change it to Please select your country.

Just one more thing. Scroll down again and click Advanced Options. Choose the Modern style instead of the Classic style here.
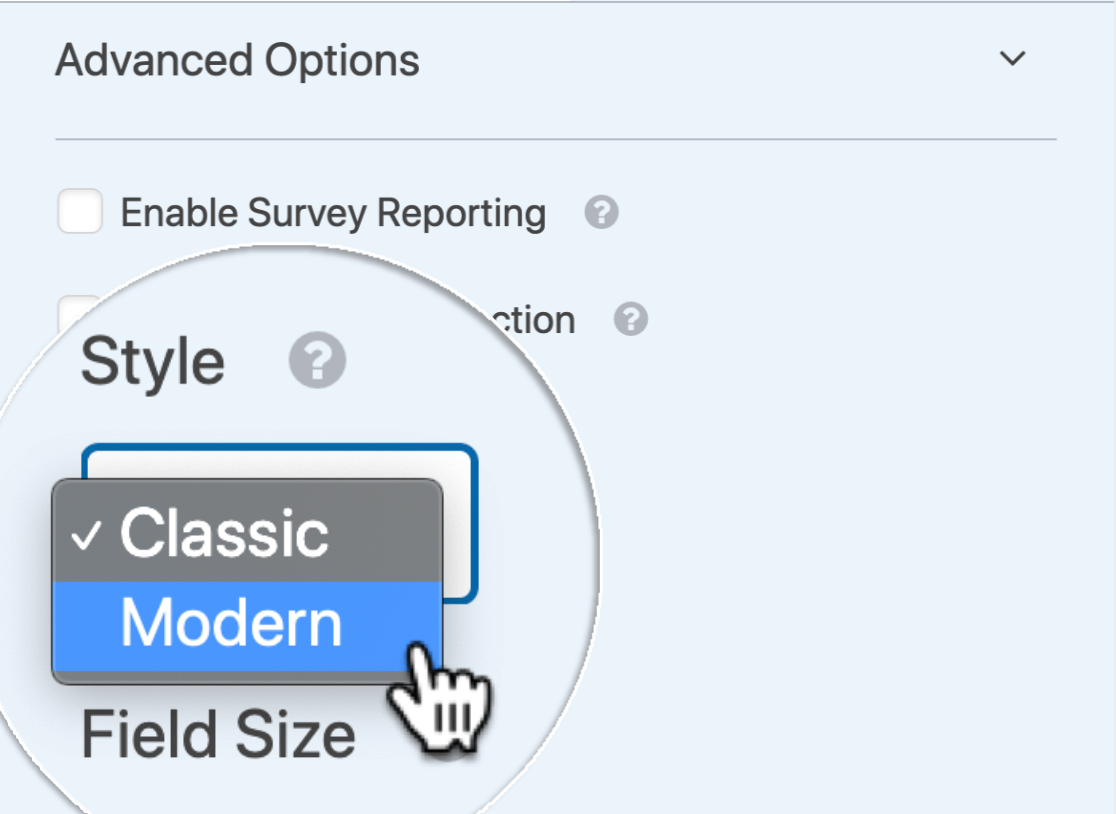
Why use the Modern style?
- It’s easy to search the list, which really helps when you have tons of choices.
- Visitors can change their selection easily by clicking the X. We’ll show you how this works at the end of the tutorial.
If that’s all you need, you’re ready to publish your form. You can skip ahead to step 4 to find out how to do that.
If you want to customize the list, keep reading.
Step 3: (Optional) Customize the Country Names in Your Dropdown
Now that you’ve added all of the countries to your dropdown, you might want to customize the way they’re set up.
There are 2 things you can do to tweak the list.
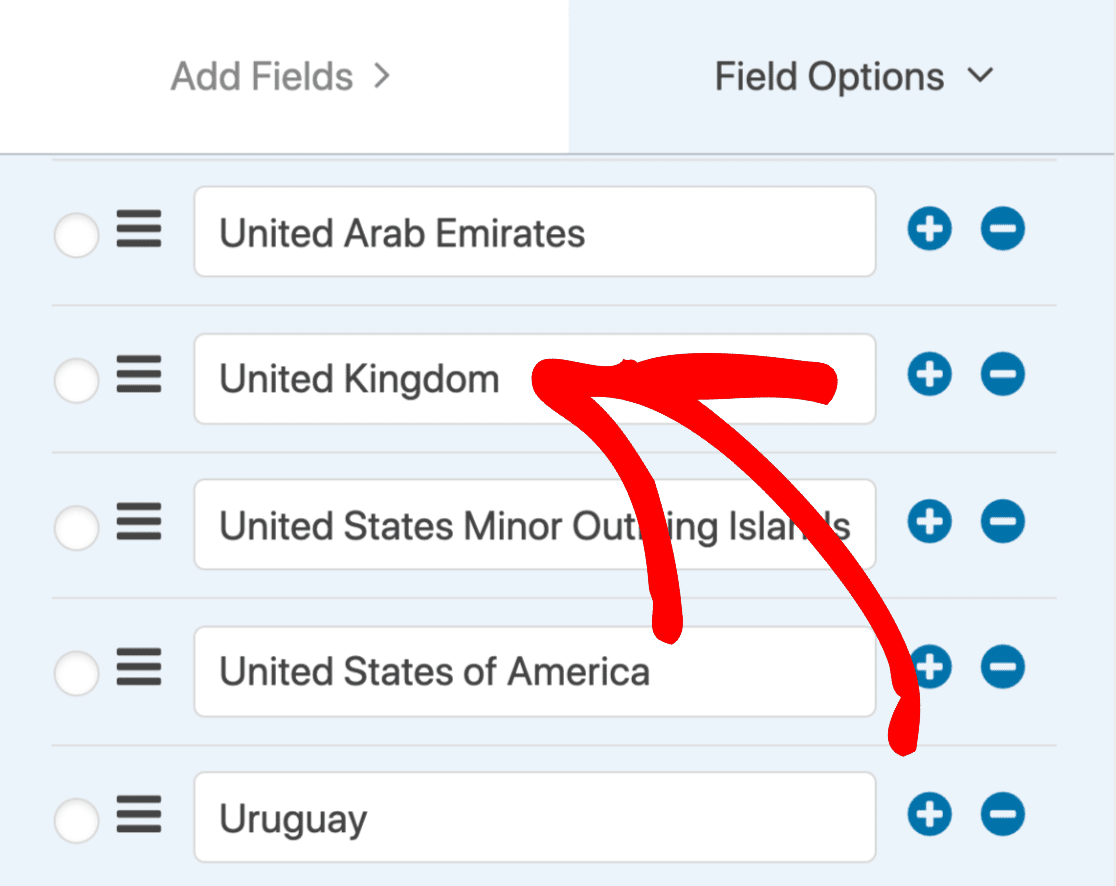
First, you can change the way a country name is formatted by editing the choice in the form builder.
For example, you might want to change ‘United Kingdom of Great Britain and Northern Ireland’ to ‘United Kingdom’.
Just edit the text to do that:
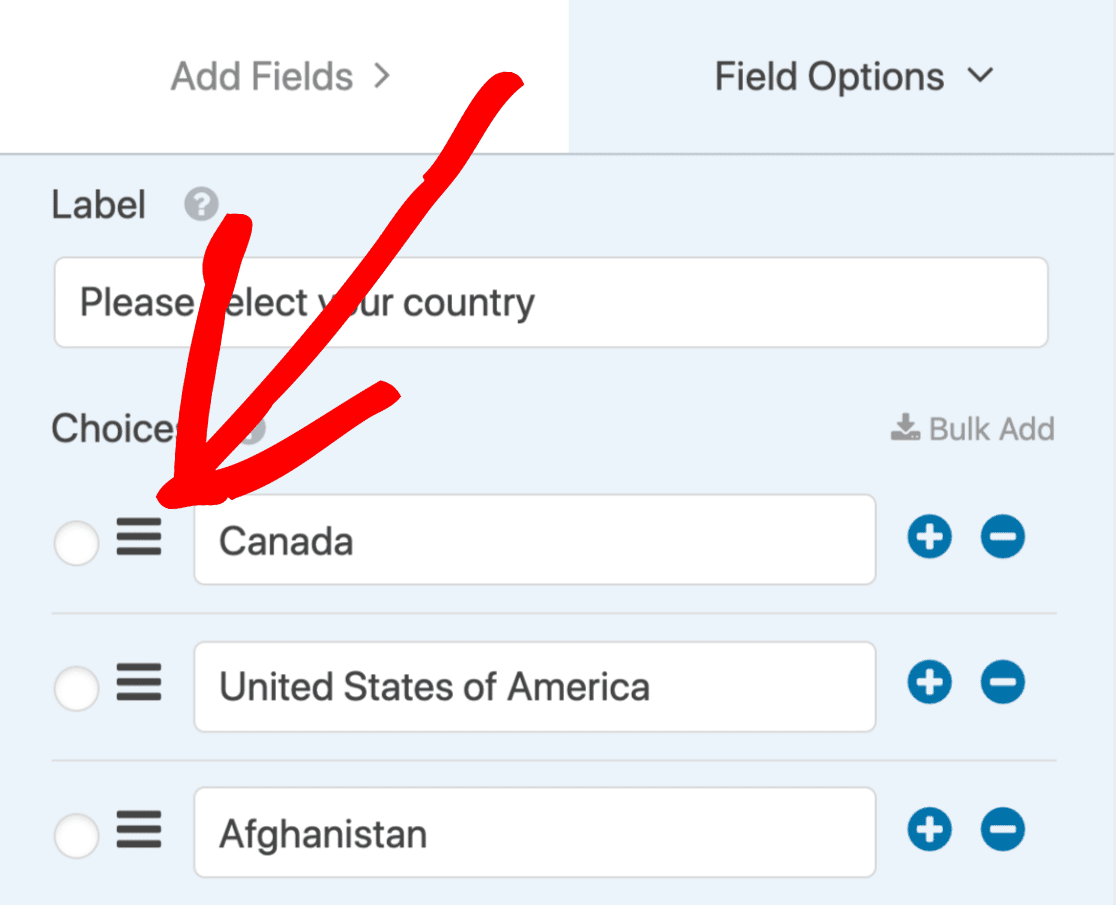
Second, don’t forget that you can drag the answer choices up and down. That means you can put the most common selections at the top of the list so that they’re easier to find.
To move any Choice in the list, just click and hold the icon with 3 lines and drag it. Here we’ve moved Canada and United States to the top:
Great! Now your country dropdown will look exactly as you want it to. All we need to do now is publish it.
Click Save before moving on.
Step 4: Publish Your Form
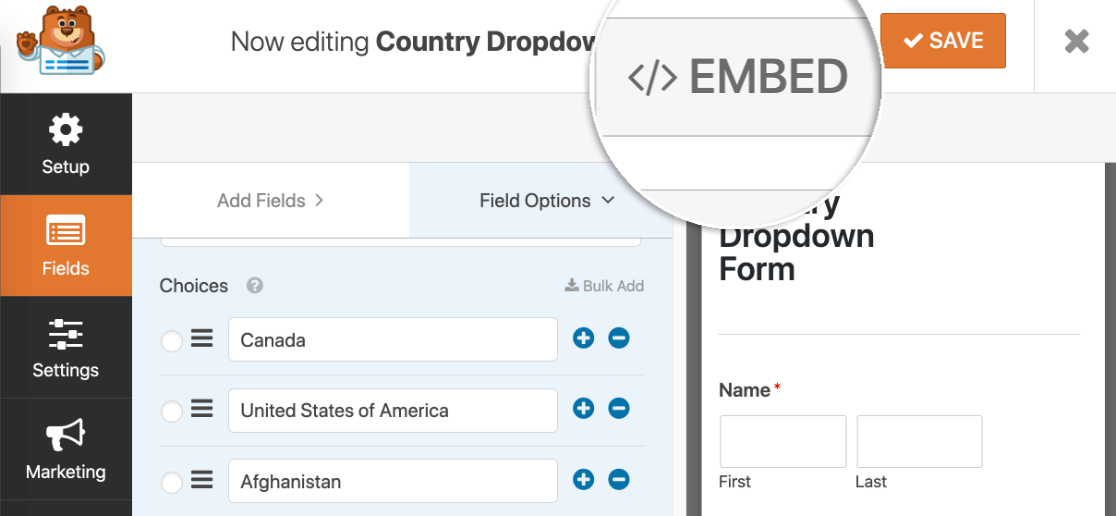
Now your dropdown is set up, it’s time to publish your form. It’s really easy to create a new page right from the form builder.
To use the embed wizard, first click Embed at the top of the form builder.
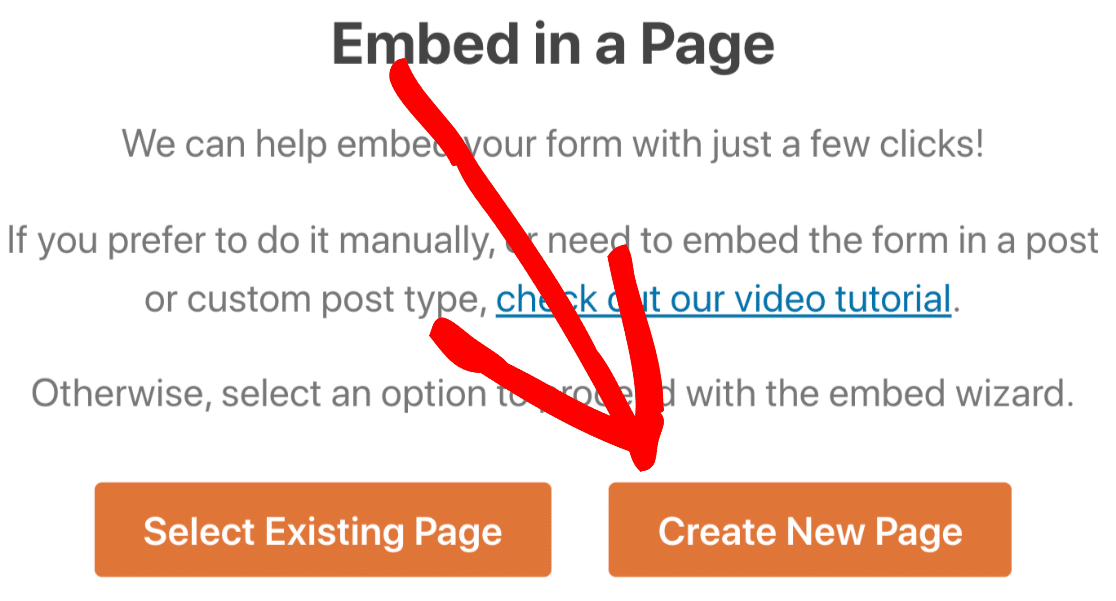
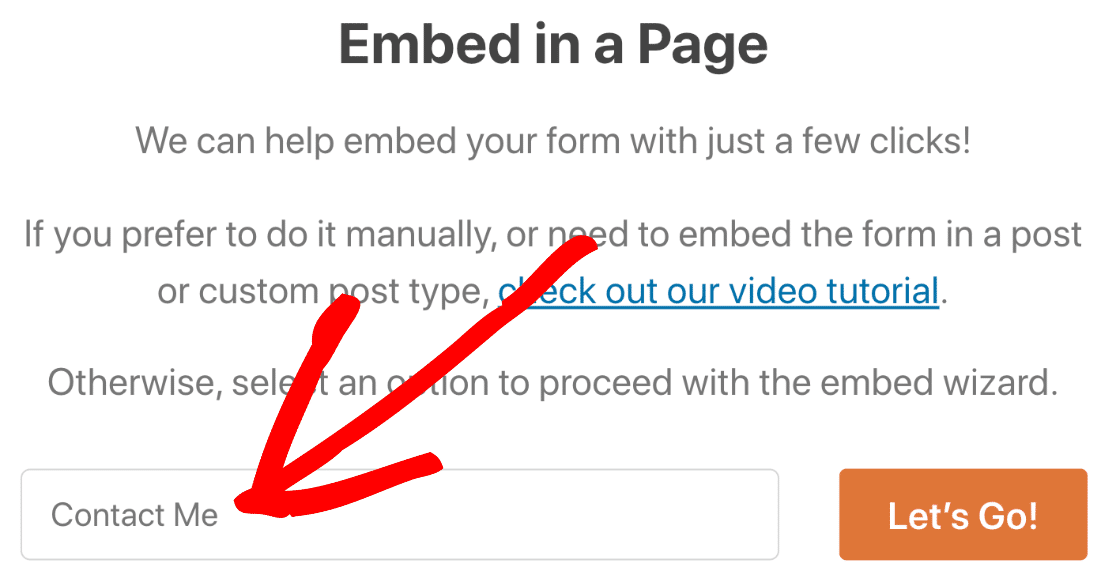
Let’s click Create New Page.
In the popup, type a name for the page and click Let’s Go.
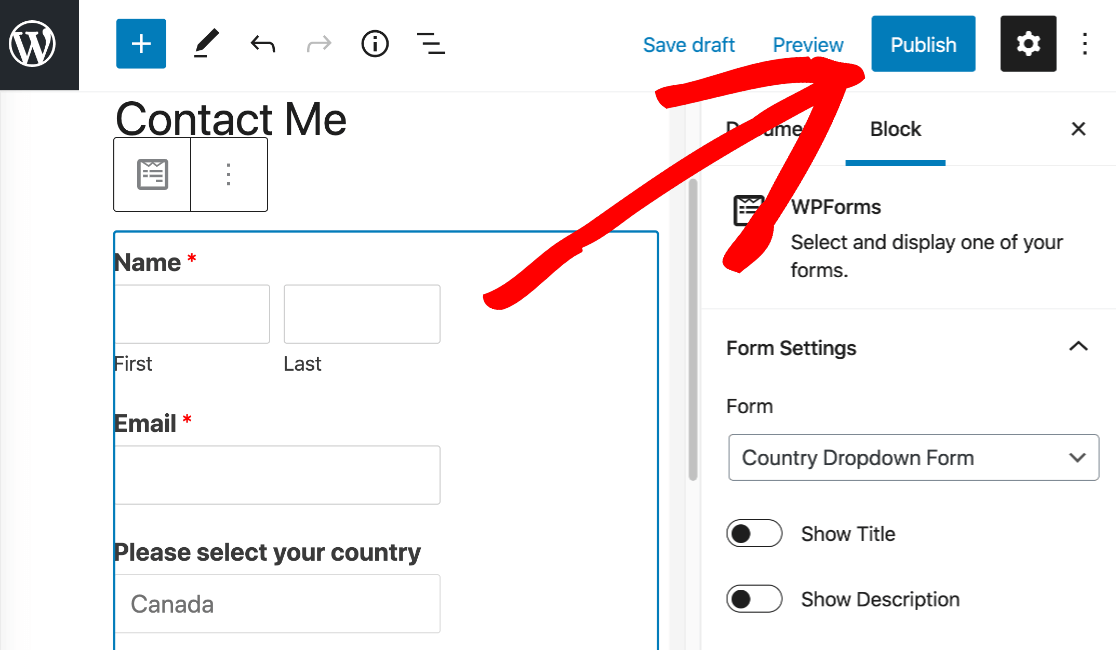
And now publish the page by clicking the blue Publish button at the top.
Now you can see your published dropdown list.
You can see that the countries we reordered are right here at the top:
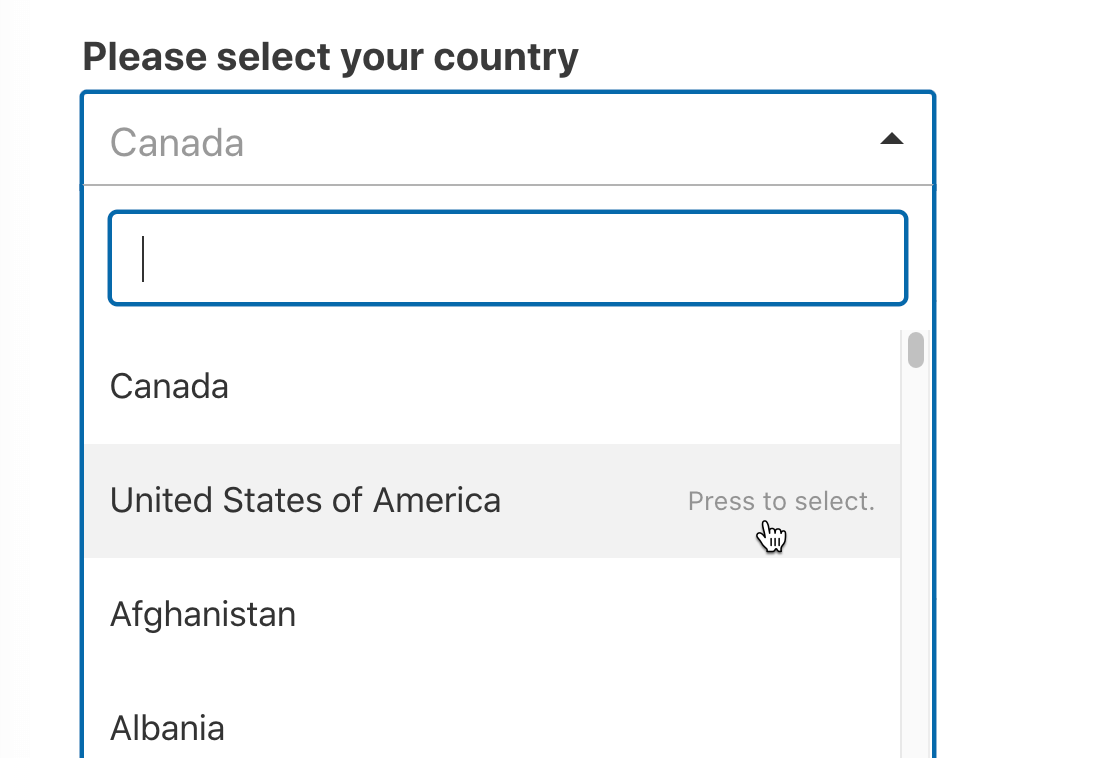
We can also search for a country to find it easily:
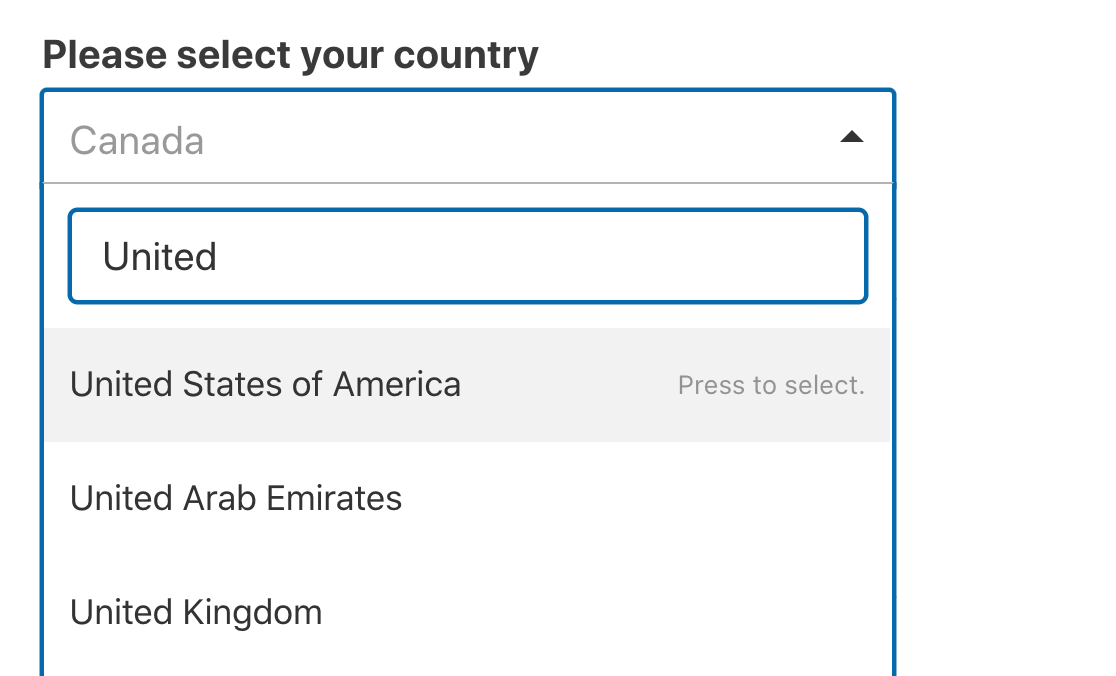
And if we click the wrong country, we can click the X to search again:

For really long lists like country dropdowns, these extra little features are really helpful and make your country dropdown a lot easier to use.
If you want to check out more ways to create useful dropdowns, check out this guide to adding dynamic field choices to your form.
And that’s it! Now you have a country dropdown on your WordPress form ready for your visitors to use.
Create Your WordPress Form Now
Next Tip: Get Your Visitor’s Location Automatically
Did you know that WPForms can automatically display your visitors’ location on a map?
You can activate geolocation on all of your forms with 1 click. Check out this guide on how to track user locations with WordPress form submissions to set this up.
Ready to build your form? Get started today with the easiest WordPress form builder plugin. WPForms Pro includes all Fancy Fields and offers a 14-day money-back guarantee.
If this article helped you out, please follow us on Facebook and Twitter for more free WordPress tutorials and guides.
The post How to Add a Country Dropdown List to Your WordPress Forms (The Easy Way) appeared first on WPForms.
source https://wpforms.com/how-to-country-dropdown-list/
