Want to make it easier for people to join your WordPress newsletter using Constant Contact?
Having a checkbox that asks people to join your newsletter on any form you have on your website is a quick and easy way to grow your email list.
So in this tutorial, we’ll walk you through how to add a Constant Contact signup checkbox to your WordPress form (easily).
Here’s a table of contents of the steps if you need to jump ahead:
- Install WPForms
- Create a Form
- Add a Checkbox
- Connect Your Form to Constant Contact
- Enable Conditional Logic
- Add Your Constant Contact Form to Your Website
How to Add a Constant Contact Signup Checkbox to a WordPress Form
Follow these steps to connect your Constant Contact account with WordPress so you can add a signup checkbox to your site’s forms.
Step 1: Install WPForms
The first thing you need to do is install and activate the WPForms plugin. Also, you can use this as your Constant Contact WordPress plugin. Here’s a step-by-step guide on how to install a WordPress plugin.
Since the Constant Contact integration is included with the core WPForms plugin, there’s no need to install anything else!
Now that your WPForms plugin is installed and active, let’s create your first form.
Step 2: Create a Form
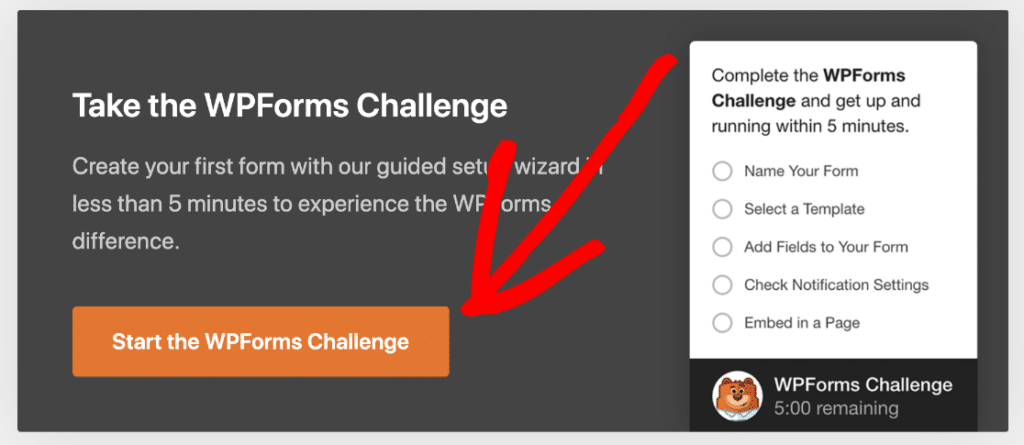
The next step is to make your first form. You can choose any form you’d like to add a Constant Contact checkbox on WordPress to, but for this example, we’ll build a simple contact form using the WPForms challenge.
Great. Now, let’s add a checkbox to your form asking people to join your newsletter.
Step 3: Add a Checkbox
First, head to the Fields tab in the form editor and drag the Checkboxes field onto your form above the submit button.
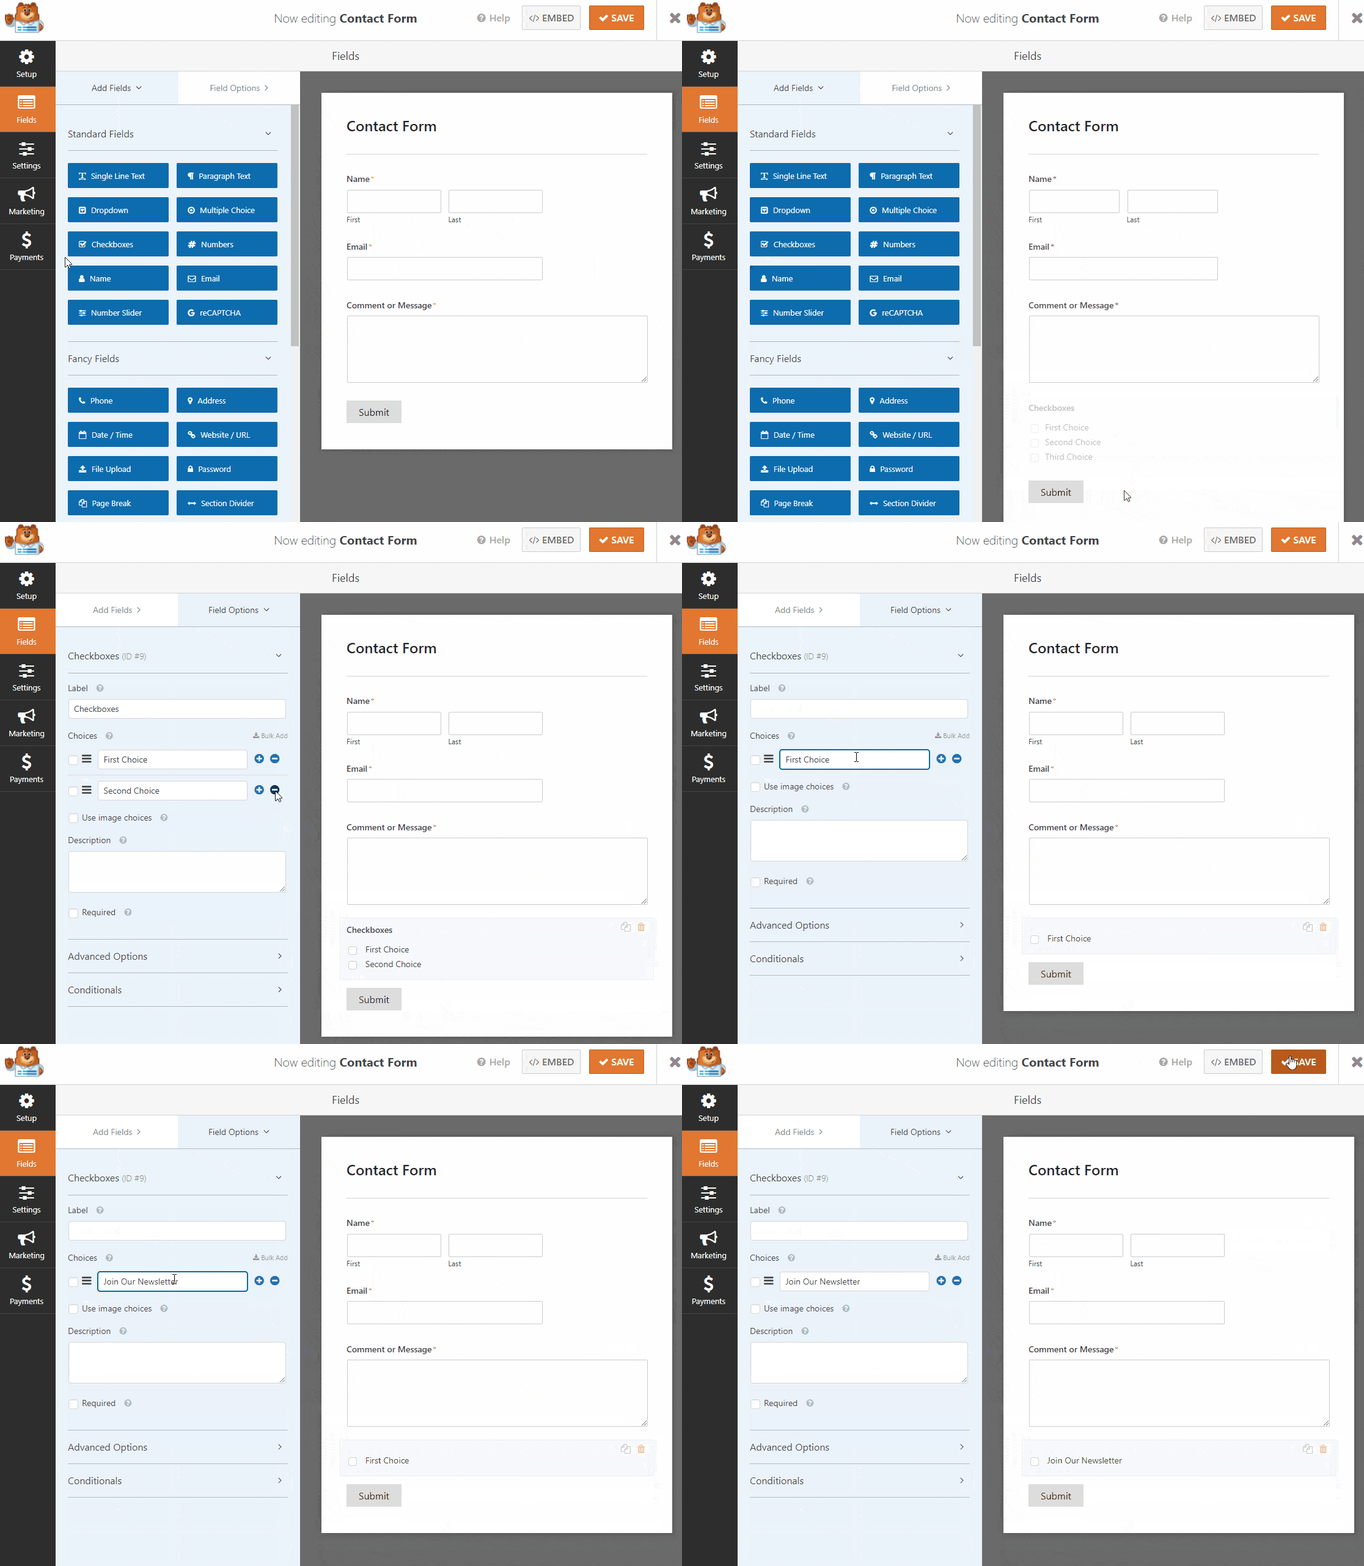
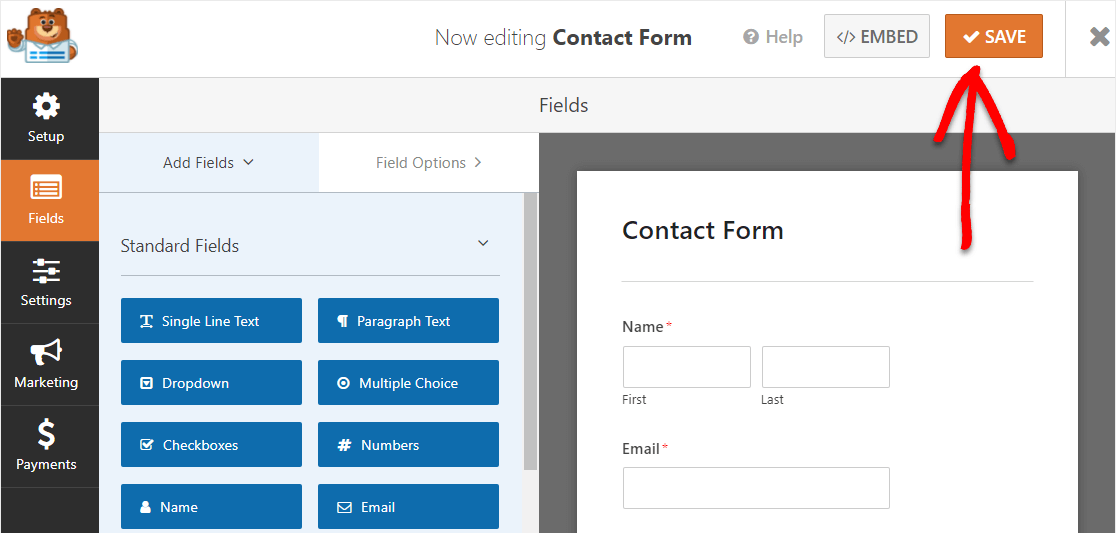
You’ll need to delete the Second Choice and Third Choice, and change the Label to something like ‘Join Our Newsletter’ as shown above. Then, click the Save button.
All set? Awesome work. Now that you’ve created your form, it’s time to connect it to your email marketing service.
Step 4: Connect Your Form to Constant Contact
We’re now going to connect your form to Constant Contact.
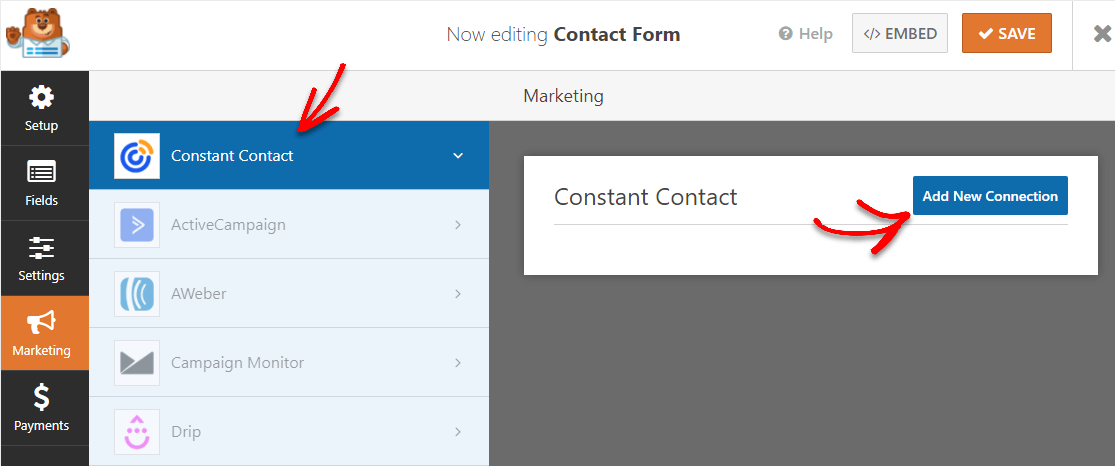
To do this, go to the form editor of the form you want to add a Constant Contact signup checkbox to. Click on Marketing » Constant Contact. On the right-hand sign, click on the Add New Connection button.
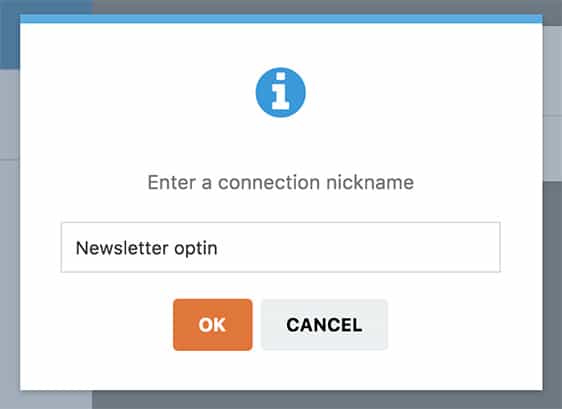
Now, this will cause a popup to appear. Enter a nickname for the connection you’re creating and click OK. This is for your internal use only and your form users won’t see this name.
From here, you’ll need to register WPForms with Constant Contact by clicking on Click here to register with Constant Contact.
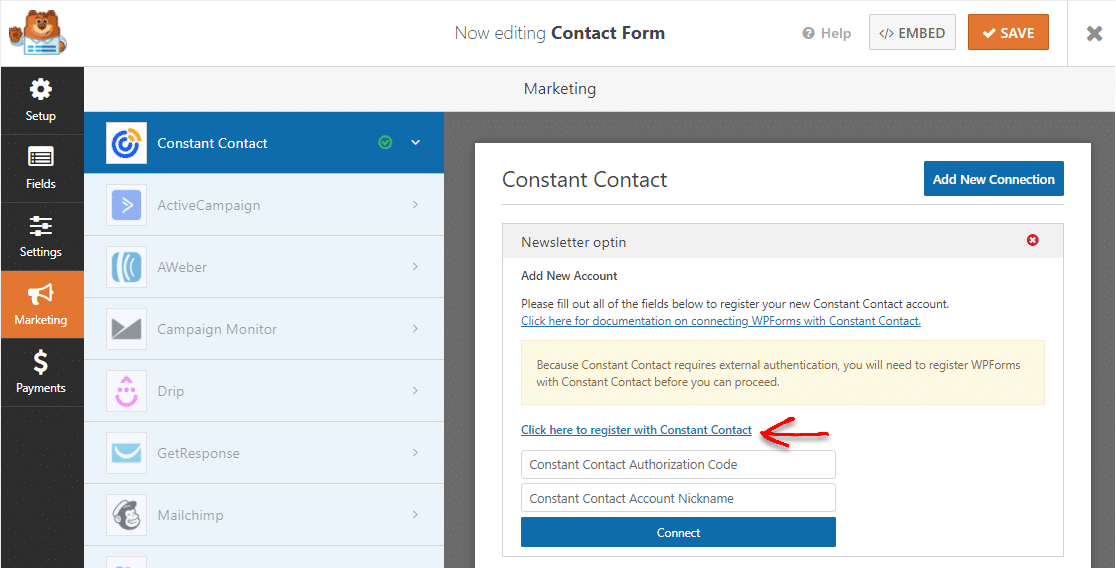
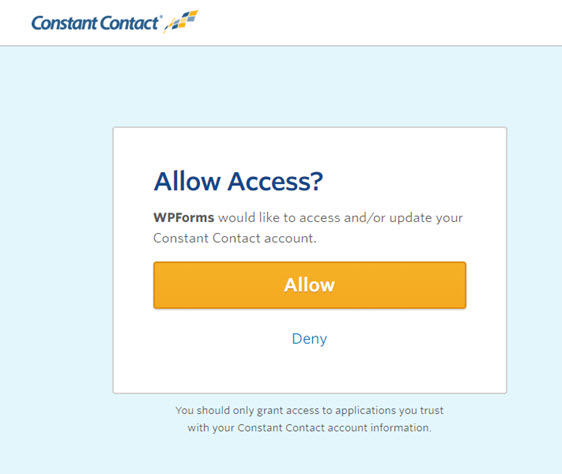
After clicking the link, you’ll see a prompt for you to log in to your Constant Contact account. Once you’re logged in, go ahead and click on the Allow button to grant access for WPForms.
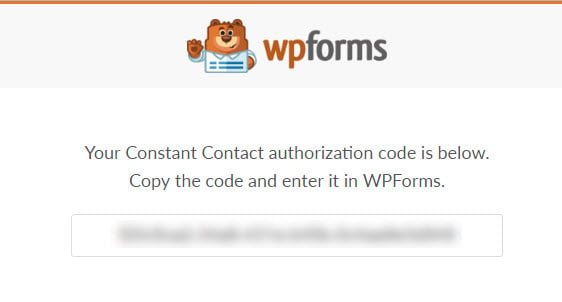
After that, you’ll see your Constant Contact authorization code. Copy the code and paste it into the Constant Contact Authorization Code field back in the WPForms Settings page.
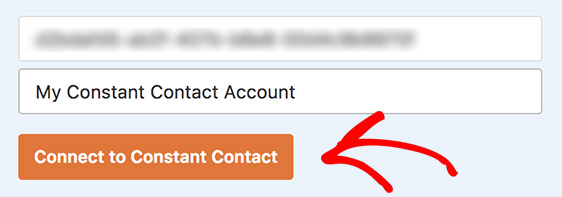
For the Constant Contact Account Nickname field, you can use any name since it’s just for your internal reference.
Once you’ve filled out both fields, click on the Connect to Constant Contact button to continue.
Once WPForms is done connecting your site to your Constant Contact account, a green box will show up that says Connected will be displayed.

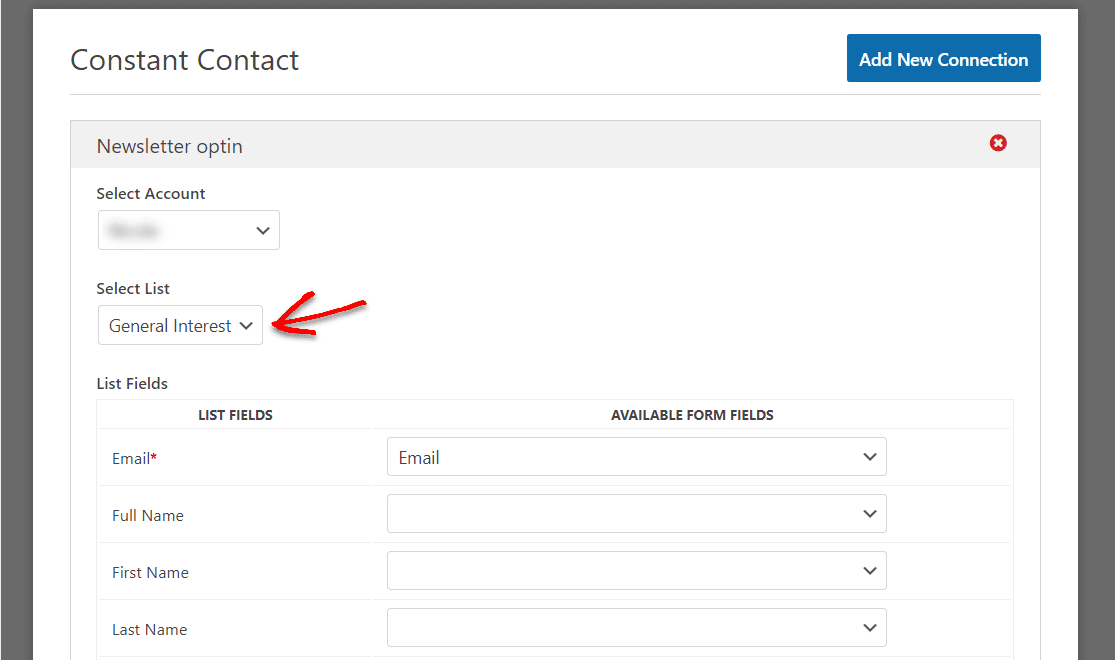
So now that your Constant Contact account is connected with WordPress and WPForms, you can select which Constant Contact account you need and list that you want to add new subscribers to in the preview panel on the right.
When you scroll down, you’ll see List Fields.
Here you’ll match the names and email address fields on your form to the corresponding fields in your Constant Contact list. The only required field is their email address, but you can also save the user’s name, phone number, address, and more.
Great job! Next, we’ll need to make sure that only users who select the checkbox on your form get added to your email list.
Step 5: Enable Conditional Logic
Scroll down on your form until you see the Enable conditional logic box.
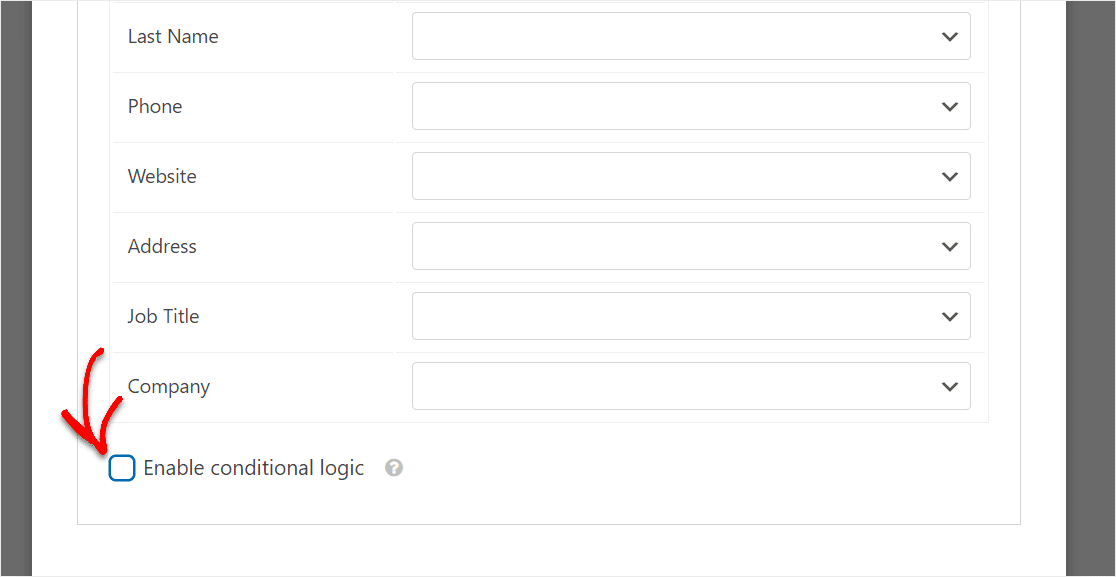
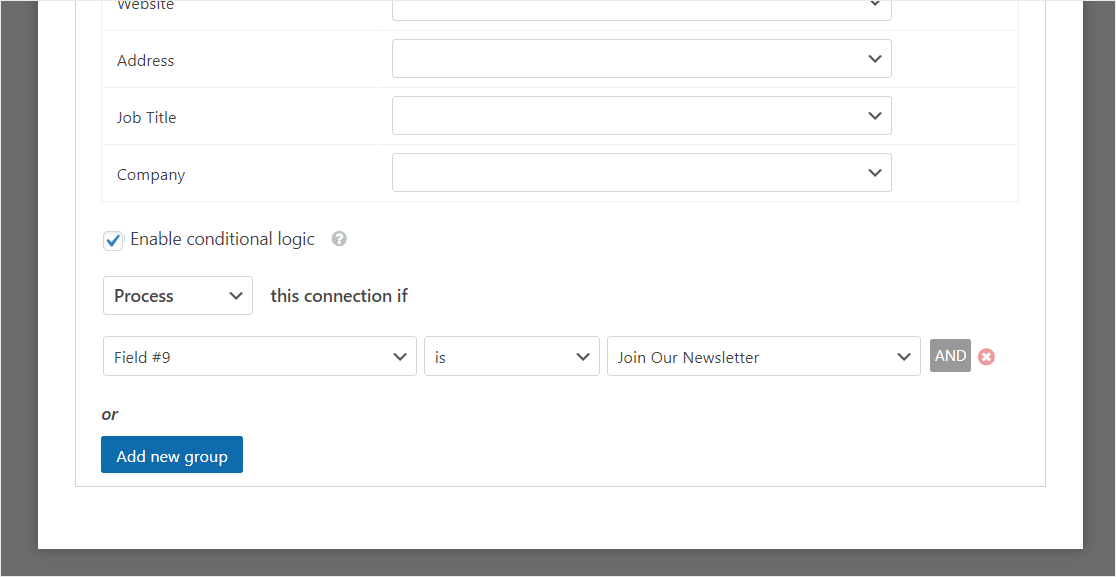
Once you click on that box, you’ll see the conditional logic options open up.
Now after “Process this connection if”…. select your Constant Contact signup checkbox field (ours is just called Field #9 because we chose to remove the Label completely).
Then after the is box select ‘Join Our Newsletter’.
And then, save all the changes you have made to your form. Your WordPress Constant Contact signup form’s now ready to be published on your website.
Step 6: Add Your Constant Contact Form to Your Website
So now that you’ve got your Constant Contact checkbox set up on your new WordPress form, let’s go ahead and publish it on your website.
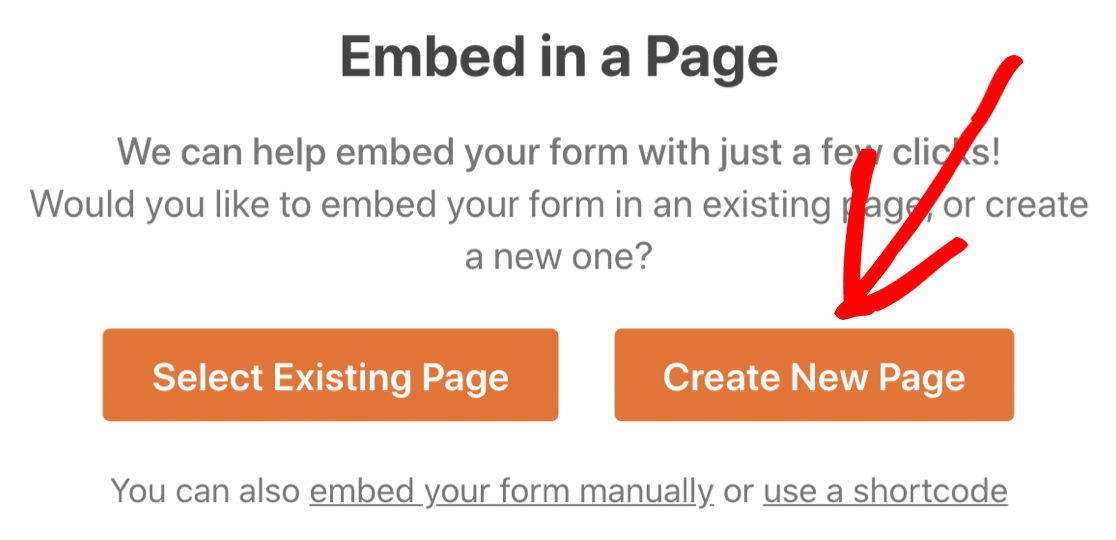
To start, click on the Embed button in the form builder.
Now when the Embed in a Page notification pops up, go ahead and click on the Create New Page button.
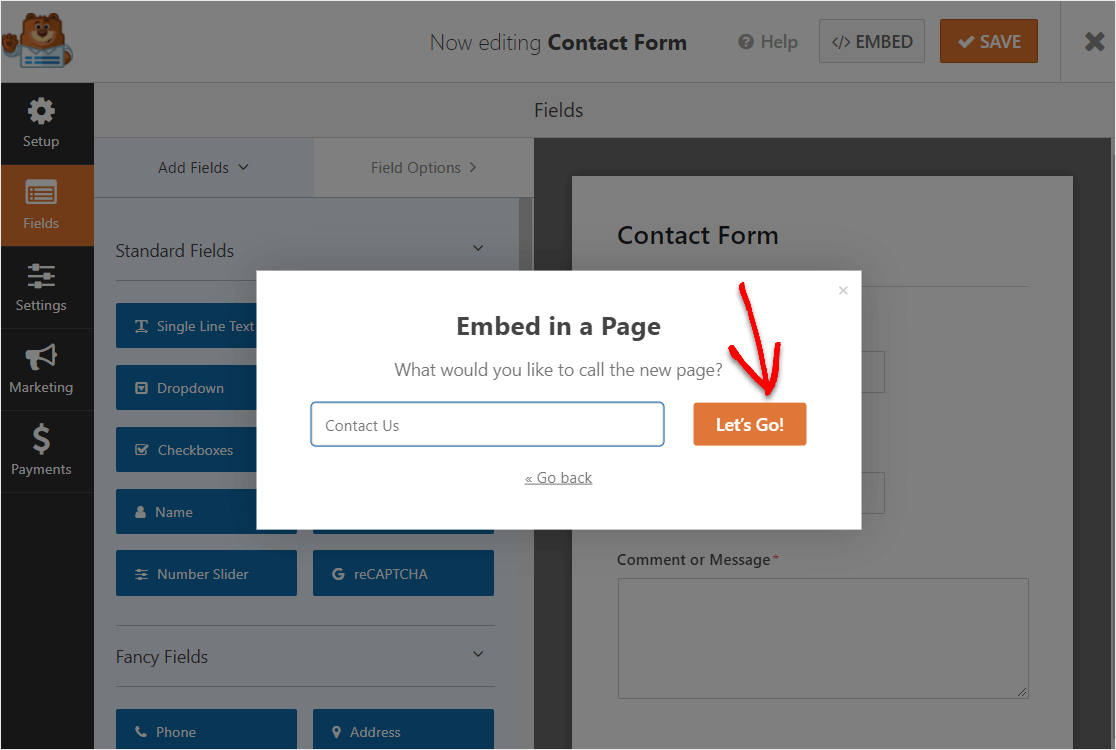
Next, WPForms will ask you to name your page. Type the title for the page you want into the box and click Let’s Go!
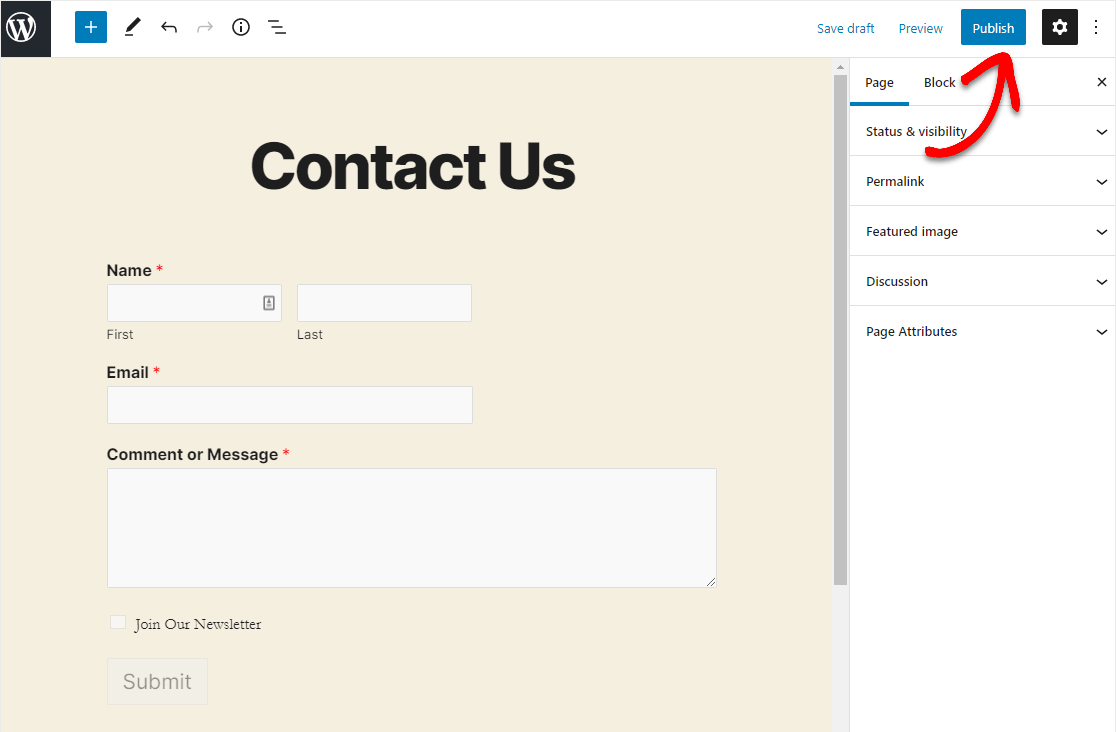
Now, you’ll see a new page all for your Constant Contact checkbox form on WordPress. Go ahead and click Publish on the top right corner of your page.
And check out your published Constant Contact WordPress form to see your awesome little checkbox in action. Get ready to see your email list really grow!
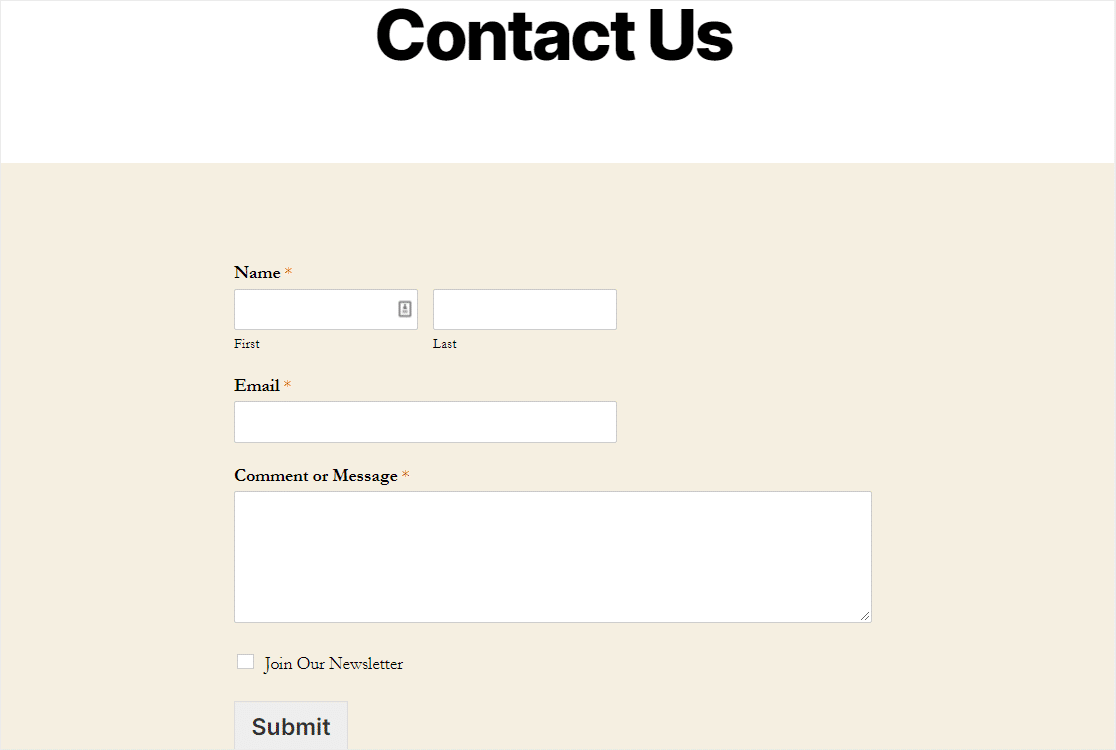
Great job on completing the tutorial on how to add a Constant Contact checkbox to a WordPress form!
Final Thoughts
That’s it! You’ve just added a Constant Contact signup checkbox to your WordPress form. And now you know how to add it to any other form you’d like.
And if you’re looking for other neat ways to get more email subscribers, check out our list of great ways to grow your email list.
Also, since you’re growing your email list, it’s probably time to build a simple order form and start selling on your site.
So what are you waiting for? Get started with the best WordPress forms plugin today.
And if you like this article, then please follow us on Facebook and Twitter for more free WordPress tutorials.
The post How to Add a Constant Contact Signup Checkbox to a WordPress Form appeared first on WPForms.
source https://wpforms.com/how-to-add-a-constant-contact-signup-checkbox-to-a-wordpress-form/

